一、Grunt简介
Grunt是一个基于命令的javascript工程命令行构建工具。
1. 官网:http://gruntjs.com/
2. 中文网:http://www.gruntjs.net/
在开发前端的时候,也就html、css、js三种,并不像其它编程语言需要管理很多模块、很多类,为什么要用构建工具?把代码放到服务器上的时候我们肯定是希望文件最小,加载的速度更快,我们自己写的css/js文件里面都有大量的空格,这些空格同样占据空间,如果把这些无用的空格省略掉,文件中只保留核心的代码,即使每个文件节省几Kb的大小,放大到上千万乃至更多的用户访问的时候,就可以给服务器减轻很多压力。同样如果一个项目中的css/js文件有很多,会节省更多的资源。官网上在首页给出了为什么要使用构建工具以及为什么要使用Grunt.
为什么要使用构建工具?
一句话:自动化。对于需要反复重复的任务,例如压缩(minification)、编译、单元测试、linting等,自动化工具可以减轻你的劳动,简化你的工作。当你在 Gruntfile 文件正确配置好了任务,任务运行器就会自动帮你或你的小组完成大部分无聊的工作。
为什么要使用Grunt?
Grunt生态系统非常庞大,并且一直在增长。由于拥有数量庞大的插件可供选择,因此,你可以利用Grunt自动完成任何事,并且花费最少的代价。如果找不到你所需要的插件,可以自己动手创造一个Grunt插件,然后将其发布到npm上。
二、安装
按照Grunt之前需要安装0.8版本以上的node.js和npm,node安装后,会附带npm工具。查看node和npm版本:
~ node -v
v6.0.0
~ npm -v
3.9.6
安装Grunt:
➜  ~ sudo npm install -g grunt-cli
Password:
/usr/local/bin/grunt -> /usr/local/lib/node_modules/grunt-cli/bin/grunt
/usr/local/lib
└── grunt-cli@1.2.0 这个时候如果在终端中执行grunt命令会出现错误:
➜  ~ grunt
A valid Gruntfile could not be found. Please see the getting started guide for
more information on how to configure grunt: http://gruntjs.com/getting-started
Fatal error: Unable to find Gruntfile.不要误以为安装失败,grunt -help输出grunt帮助命令说明已经安装成功。下面介绍如何使用grunt。
三、初始化项目
首先新建一个空文件夹:
mkdir grunttest
cd grunttest 然后npm init,一路回车设置为默认:
This utility will walk you through creating a package.json file.
It only covers the most common items, and tries to guess sensible defaults.

See `npm help json` for definitive documentation on these fields
and exactly what they do.

Use `npm install <pkg> --save` afterwards to install a package and
save it as a dependency in the package.json file.

Press ^C at any time to quit.
name: (grunttest)
version: (1.0.0)
description:
entry point: (index.js)
test command:
git repository:
keywords:
author:
license: (ISC)
About to write to /Users/yp/Desktop/grunttest/package.json:

{
  "name": "grunttest",
  "version": "1.0.0",
  "description": "",
  "main": "index.js",
  "scripts": {
    "test": "echo "Error: no test specified" && exit 1"
  },
  "author": "",
  "license": "ISC"
}


Is this ok? (yes)
现在在grunttest目录下生成了一个package.json文件,内容如下:
{
  "name": "grunttest",
  "version": "1.0.0",
  "description": "",
  "main": "index.js",
  "scripts": {
    "test": "echo "Error: no test specified" && exit 1"
  },
  "author": "",
  "license": "ISC"
}
要想使用grunt需要把grunt安装到该项目中,执行命令:
sudo npm install grunt --save-dev执行完毕后会在该目录下生成node_modules文件夹,文件夹里存放的事grunt依赖的包。
然后在新建一个空白的Grunt.js文件。现在工程目录结构如下:
|--grunttest
|--|--package.json
|--|--node_modules
|--|--Gruntfile.js现在初始化项目已经完成,执行grunt命令:
➜  grunttest grunt
Warning: Task "default" not found. Use --force to continue.

Aborted due to warnings.
提示默认task没有找到,grunt的任务都写在Gruntfile.js文件中,比如压缩文件是一个task,合并文件是一个task.
四、压缩、合并js
在工程目录下新建空文件夹js、css、build、dest,分别放入2个js文件和2个css文件做测试.现在的工程目录:
|--grunttest
|--|--build
|--|--dest
|--|--js
|--|--|--index.js
|--|--|--main.js
|--|--css
|--|--|--index.css
|--|--|--style.css
|--|--node_modules
|--|--Gruntfile.js
|--|--package.json
参考官网[grunt任务配置]文档(http://www.gruntjs.net/configuring-tasks).
压缩和合并js任务,在Gruntfile.js中新增:
module.exports = function(grunt) {
    pkg: grunt.file.readJSON('package.json'),
    grunt.initConfig({
        uglify: {
            // 这里是uglify任务的配置信息
            options: {
                banner: '/*!create by yaopan <%= grunt.template.today("yyyy-mm-dd")%>*/n'
            },
            static_mappings: {
                files: [{
                    src: 'js/index.js',
                    dest: 'build/index.min.js'
                }, {
                    src: 'js/main.js',
                    dest: 'build/main.min.js'
                }],
            }
        },
        concat: {
            bar: {
                src: ["build/*.js"],
                dest: 'dest/all.min.js',
            },
        },
    });


    grunt.loadNpmTasks('grunt-contrib-uglify');
    grunt.loadNpmTasks('grunt-contrib-concat');

    grunt.registerTask('default', ['uglify', 'concat']);
}
这时候执行grunt命令会提示安装要依赖的包:
安装grunt-contrib-uglify
sudo npm install grunt-contrib-uglify --save-dev 安装grunt-contrib-concat
sudo npm install grunt-contrib-concat --save-dev执行任务:
➜ grunttest grunt
Running "uglify:static_mappings" (uglify) task
File build/index.min.js created: 1.49 kB → 899 B
File build/main.min.js created: 767 B → 469 B
>> 2 files created.
Running "concat:bar" (concat) task
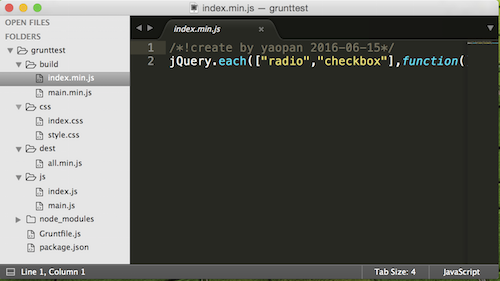
Done.打开build文件夹就可以看到压缩、合并的js文件
五、压缩、合并css
在Gruntfile.js中新增任务:
module.exports = function(grunt) {
    pkg: grunt.file.readJSON('package.json'),
    grunt.initConfig({
        uglify: {
            // 这里是uglify任务的配置信息
            options: {
                banner: '/*!create by yaopan <%= grunt.template.today("yyyy-mm-dd")%>*/n'
            },
            static_mappings: {
                files: [{
                    src: 'js/index.js',
                    dest: 'build/index.min.js'
                }, {
                    src: 'js/main.js',
                    dest: 'build/main.min.js'
                }],
            }
        },
        concat: {
            bar: {
                src: ["build/*.js"],
                dest: 'dest/all.min.js',
            },
            css: {
                src: ["build/*.min.css"],
                dest: 'dest/all.min.css'
            }
        },
         cssmin: {
            target: {
                files: [{
                    expand: true,
                    cwd: 'css/',
                    src: ['*.css', '!*.min.css'],
                    dest: 'build',
                    ext: '.min.css'
                }]
            }
        },

    });


    grunt.loadNpmTasks('grunt-contrib-uglify');
    grunt.loadNpmTasks('grunt-contrib-concat');
    grunt.loadNpmTasks('grunt-contrib-cssmin');
    grunt.registerTask('default', ['uglify', 'concat','cssmin']);

}
六、watch任务
watch可以实时监控文件的改动,css/js文件改动时让grunt自动压缩合并:
module.exports = function(grunt) {
    pkg: grunt.file.readJSON('package.json'),
    grunt.initConfig({
        uglify: {
            // 这里是uglify任务的配置信息
            options: {
                banner: '/*!create by yaopan <%= grunt.template.today("yyyy-mm-dd")%>*/n'
            },
            static_mappings: {
                files: [{
                    src: 'js/index.js',
                    dest: 'build/index.min.js'
                }, {
                    src: 'js/main.js',
                    dest: 'build/main.min.js'
                }],
            }
        },
        concat: {
            bar: {
                src: ["build/*.js"],
                dest: 'dest/all.min.js',
            },
            css: {
                src: ["build/*.min.css"],
                dest: 'dest/all.min.css'
            }
        },
        cssmin: {
            target: {
                files: [{
                    expand: true,
                    cwd: 'css/',
                    src: ['*.css', '!*.min.css'],
                    dest: 'build',
                    ext: '.min.css'
                }]
            }
        },
        watch: {
            files: ['js/*.js', 'css/*css'],
            tasks: ['uglify', 'concat', 'cssmin']
        }

    });

    grunt.loadNpmTasks('grunt-contrib-uglify');
    grunt.loadNpmTasks('grunt-contrib-concat');
    grunt.loadNpmTasks('grunt-contrib-cssmin');
    grunt.loadNpmTasks('grunt-contrib-watch');

    grunt.registerTask('default', ['uglify', 'concat', 'cssmin', 'watch']);


}
当有文件改动时会自动执行任务:
➜  grunttest grunt
Running "uglify:static_mappings" (uglify) task
File build/index.min.js created: 518 B → 310 B
File build/main.min.js created: 2.92 kB → 687 B
>> 2 files created.

Running "concat:bar" (concat) task

Running "concat:css" (concat) task

Running "cssmin:target" (cssmin) task
>> 2 files created. 1.12 kB → 815 B

Running "watch" task
Waiting...
>> File "css/style.css" changed.
Running "uglify:static_mappings" (uglify) task
File build/index.min.js created: 518 B → 310 B
File build/main.min.js created: 2.92 kB → 687 B
>> 2 files created.

Running "concat:bar" (concat) task

Running "concat:css" (concat) task

Running "cssmin:target" (cssmin) task
>> 2 files created. 1.13 kB → 836 B

Done.
Completed in 0.857s at Wed Jun 15 2016 08:24:37 GMT+0800 (CST) - Waiting...
七、源码
源码下载地址:http://download.csdn.net/detail/napoay/9549795
最后
以上就是个性白猫最近收集整理的关于Grunt压缩、合并js/css文件的全部内容,更多相关Grunt压缩、合并js/css文件内容请搜索靠谱客的其他文章。


发表评论 取消回复