#-*- codeing = utf-8 -*-
#@Time :2021/5/16 19:02
#@Author :Onion
#@File :MnistByHidden_Layers.py
#@Software :PyCharm

# 利用全连接网络将图片进行分类
import tensorflow as tf
from tensorflow.examples.tutorials.mnist import input_data
tf.compat.v1.disable_eager_execution()
# 获取MNIST数据
mnist = input_data.read_data_sets("/data/", one_hot=True)
tf.compat.v1.disable_v2_behavior()
tf.compat.v1.disable_eager_execution()
tf.compat.v1.reset_default_graph()
# 定义参数
learning_rate = 0.001
training_epochs = 200
batch_size = 100
display_step = 1
# 设置网络结构 784维输入-->256隐藏-->256隐藏-->10输出

n_hidden1 = 256
n_hidden2 = 256
n_input = 784
n_labels = 10

# 输入数据x和y,y是图片的标签数据
x = tf.compat.v1.placeholder("float", [None, n_input])
y = tf.compat.v1.placeholder("float", [None, n_labels])


# 定义构建网络的函数,返回结果为pred,输入参数:为了构建网络,要把输入值x,权重weight,偏置bias传进来,因为网络层数不止一层,这里的weight和bias都是字典类型的
def multilayer_perceptron(x, weight, bias):
    # Hidden layer with RELU activation
    layer_1 = tf.add(tf.matmul(x, weight['h1']), bias['b1'])
    layer_1 = tf.nn.relu(layer_1)
    # Hidden layer with RELU activation
    layer_2 = tf.add(tf.matmul(layer_1, weight['h2']), bias['b2'])
    layer_2 = tf.nn.relu(layer_2)
    # Output layer with linear activation
    out_layer = tf.matmul(layer_2, weight['out']) + bias['out']
    return out_layer

# 定义权重和偏置参数
weight = {
    'h1':tf.Variable(tf.compat.v1.random_normal([n_input, n_hidden1])),
    'h2':tf.Variable(tf.compat.v1.random_normal([n_hidden1, n_hidden2])),
    'out': tf.Variable(tf.compat.v1.random_normal([n_hidden2, n_labels]))
}
bias = {
    'b1': tf.Variable(tf.compat.v1.random_normal([n_hidden1])),
    'b2': tf.Variable(tf.compat.v1.random_normal([n_hidden2])),
    'out': tf.Variable(tf.compat.v1.random_normal([n_labels]))
}

# 定义前向传播(构建网络)
# 当层数比较多的时候,可以将构建网络的操作封装在一个函数中,该函数直接返回输出的pred
# 当pred给出之后,使用sotfmax将结果映射到0~1之间,以标准的one-hot格式输出,来间接表示概率
pred = multilayer_perceptron(x,weight,bias)

# 定义损失函数(因为输入的数据是分类标签类数据,使用交叉熵损失函数)
# 使用sotfmax进行映射,这里使用一个tf的Api(tf.nn.softmax_cross_entropy_with_logits),可以直接给输出层做softmax映射并自动计算损失函数
cost = tf.reduce_mean(tf.nn.softmax_cross_entropy_with_logits(logits=pred, labels=y))

# 定义优化器optimizer
train = tf.compat.v1.train.AdamOptimizer(learning_rate=learning_rate)
optimizer = train.minimize(cost)

# 初始化变量
with tf.compat.v1.Session() as sess:
    sess.run(tf.compat.v1.global_variables_initializer())
    for epoch in range(training_epochs):
        # 定义每一轮训练的平均损失(和每一个batch计算出来的损失是有区别的,需要注意,这个是把所有的batch里计算的一个再次取平均)
        avg_loss = 0.
        # 用训练集的总数据量除以每一个batch的数据量得到总共分成了多少各batch
        total_batch = int(mnist.train.num_examples / batch_size)
        for i in range(total_batch):
            # 这里next_batch(batch_size)直接把一个batch里的所有图片数据取出来训练
            batch_xs, batch_ys = mnist.train.next_batch(batch_size)
            # optimizer不会更新,因此返回的位置为空值,用一个,隔开,每一各batch都会计算出一个平均损失值,返回给变量c
            _, c = sess.run([optimizer, cost], feed_dict={x: batch_xs,y: batch_ys})
            avg_loss += c/total_batch
            # 显示训练中的详细信息
        if epoch % display_step == 0:
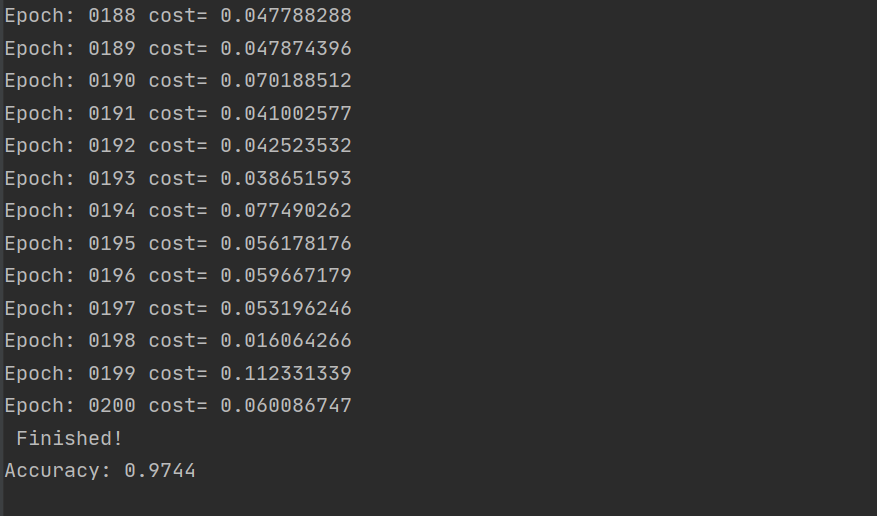
            print("Epoch:", '%04d' % (epoch + 1), "cost=",
                "{:.9f}".format(avg_loss))
    print(" Finished!")
    # 测试 model
    correct_prediction = tf.equal(tf.argmax(pred, 1), tf.argmax(y, 1))
    # 计算准确率
    accuracy = tf.reduce_mean(tf.cast(correct_prediction, "float"))
    print("Accuracy:", accuracy.eval({x: mnist.test.images, y: mnist.test.labels}))

这里顺便说一下过拟合的正则化,在Tensorflow中,L2正则化的函数为tf.nn.l2_loss(t,name=None),L1正则化没有现成的函数,使用tf.reduce_sum(tf.abs(w))来组合即可
例如
reg = 0.01 # λ(reg)是一个可以调节的参数,用来控制正则化对loss的影响
loss = tf.reduce_mean((y_pred-y)**2)+tf.nn.l2_loss(weights['h1'])*reg+tf.nn.l2_loss(weights['h2'])*reg
最后
以上就是知性咖啡豆最近收集整理的关于Tensorflow(1.15.0)利用全连接网络将图片进行分类的全部内容,更多相关Tensorflow(1内容请搜索靠谱客的其他文章。
本图文内容来源于网友提供,作为学习参考使用,或来自网络收集整理,版权属于原作者所有。


发表评论 取消回复