最近自己想设计一个网站,之前一直都是写前端,今天用到后端,有个简单的增删查减接口,记录一下。
首先通过脚手架生成了一个初始项目。结构如下:
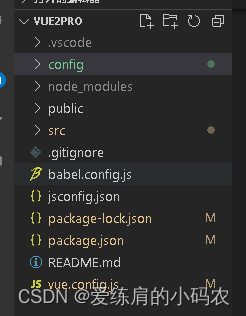
config这个文件是我自己建的。在这个文件夹下面建三个文件名分别为:
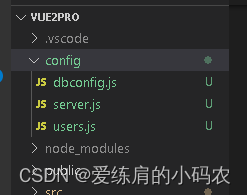
然后在文件下安装依赖
npm install corsnpm i expressnpm install mysql安装完之后在三个文件下贴上我的代码(里面有注释)
// server.js创建服务器并将请求的路由拦截传回数据
//server.js


/* // express使用cors跨域
// CORS是一个W3C标准,全称是"跨域资源共享"(Cross-origin resource sharing)。它允许浏览器向跨源服务器,发出XMLHttpRequest请求,从而克服了AJAX只能同源使用的限制。只要服务器实现了CORS接口,就可以跨源通信。
 */

//1.导入express包
const express = require("express");
const cors = require('cors');
const { findUser, findById, saveUser, deleteById } = require('./config/users')

//2.创建web服务器
const app = express();
//express内置的json转换方法,用来解析post请求的参数
app.use(express.urlencoded({ extended: false }));
app.use(express.json());
// 处理跨域
app.use(cors());
//3.使用服务器名.listen()方法启动服务器
app.listen(8800, () => {
  console.log("服务器启动于http://127.0.0.1");
})

// 拦截get请求,post请求同理
// 查询所有的用户
app.get('/user/findAll', (req, res) => {  // res 是成功后的回调函数
  findUser((result) => {
    // 将从数据库里面查询出来的数据返回给前端
    res.end(JSON.stringify(result))
  })

})

// 拦截get请求,post请求同理
// 根据id查询用户信息
app.get('/user/findById', (req, res) => {  // res 是成功后的回调函数
  findById(req.query.id,(result) => {
    // 将从数据库里面查询出来的数据返回给前端
    res.end(JSON.stringify(result))
  })
})

// 拦截get请求,post请求同理
// 根据id删除用户
app.get('/user/deleteById', (req, res) => {  // res 是成功后的回调函数
  deleteById(req.query.id,(result) => {
    // 将从数据库里面查询出来的数据返回给前端
    res.end(JSON.stringify(result))
  })
})
// 新增用户或修改用户
app.post('/user/saveOrUpdate', (req, res) => {  // res 是成功后的回调函数
    saveUser(req.body, (result) => {
      console.log('增加用户参数:',req.body);
      res.send(JSON.stringify(result))
    })
})
//dbconfig.js 配置连接数据库参数
var mysql = require('mysql');  //导入mysql包模块
    let db = mysql.createPool({
        host:'localhost',//主机ip
        port:'3306',//端口号
        user:'root',//数据库的用户名
        password:'root',//数据库的密码
        database: 'userlogin'//数据库的名字
    })
module.exports = {
    db
}
//users.js这个文件下写的是增删查改的四个接口
// 封装dao层
const { db } = require('./dbconfig');

// 查询所有的用户
let findUser = (callback) => {
    db.getConnection((err, connection) => {
        if (err) {
            console.log(err);
        } else {
            let sql = 'select * from user'
            connection.query(sql, (err, result) => {
                if (err) {
                    console.log(err)
                } else {
                    callback(result)
                    connection.release()
                    connection.destroy()
                }
            })
        }
    })
}

// 根据id查询用户信息
let findById = (id, callback) => {
    db.getConnection((err, connection) => {
        if (err) {
            console.log(err);
        } else {
            let sql = 'select * from user where id=?'
            connection.query(sql, [id], (err, result) => {
                if (err) {
                    console.log(err)
                } else {
                    callback(result)
                    connection.release()
                    connection.destroy()
                }
            })
        }
    })
}

// 新增用户或修改用户
let saveUser = (data, callback) => {
    db.getConnection((err, connection) => {
        if (err) {
            console.log(err);
        } else {
            if (data.id) {
                // 修改
                let sql = 'update user set username=?,password=?,email=? where id=?'
                connection.query(sql, [data.username, data.password, data.email, data.id], (err, result) => {
                    if (err) {
                        console.log(err)
                    } else {
                        result.code = 200
                        result.message = '编辑成功'
                        callback(result)
                        connection.release()
                        connection.destroy()
                    }
                })
            } else {
                // 保存
                let sql = 'insert into user(id,username,password,email) values(?,?,?,?)'
                connection.query(sql, [null, data.username, data.password, data.email], (err, result) => {
                    if (err) {
                        console.log(err)
                    } else {
                        result.code = 200
                        result.message = '添加成功'
                        callback(result)
                        connection.release()
                        connection.destroy()
                    }
                })
            }
        }
    })
}

// 根据id删除用户
let deleteById = (id, callback) => {
    db.getConnection((err, connection) => {
        if (err) {
            console.log(err);
        } else {
            let sql = 'delete from user where id = ?'
            connection.query(sql, [id], (err, result) => {
                if (err) {
                    console.log(err)
                } else {
                    callback(result)
                    connection.release()
                    connection.destroy()
                }
            })
        }
    })
}

module.exports = {
    findUser,
    findById,
    saveUser,
    deleteById
}
全部写完后执行server.js文件,服务器就开启了。
node server.js至此,服务后台全部布置好,前端需要调用接口怎么写呢示例:
//查询所有数据
//get后面第一个参数填入URL和我们定义好的接口就可以了
  this.$http.get('http://127.0.0.1:8800/user/findAll')
        .then(function (response) {
          // 处理成功情况,打印参数
          console.log(response.data);

        })
        .catch(function (error) {
          // 处理错误情况
          console.log(error);
        })
//根据id查询数据,示例中id:1就是查询数据库中id为1的数据
this.$http.get('http://localhost:8800/user/findById',{id:1})
        .then((res)=>{
            console.log(res.data);
        })
//新增数据
this.$http.post('http://127.0.0.1:8800/user/saveOrUpdate',{
					username: 'xiongj',
					password: "123456",
          email:'197877551@qq.com'
				})
//修改数据
this.$http.post('http://127.0.0.1:8800/user/saveOrUpdate',{
                          id: '2'
					username: 'xiongj',
					password: "123456",
          email:'197877551@qq.com'
				})
//删除数据
this.$http.get('http://localhost:8800/user/deleteById?id='+id)
           .then((res)=>{
            console.log('删除成功!');
        })
为啥用this.$http呢,那是因为用axios每个文件都要引入一遍,很麻烦,我直接在main.js中把axios挂载到Vue实例上了。
//main.js

import Vue from 'vue'
import App from './App.vue'


import ElementUI from 'element-ui';
import 'element-ui/lib/theme-chalk/index.css';


//全局引入axios挂载到Vue实例的属性上
import axios from 'axios';
Vue.prototype.$http = axios;

Vue.use(ElementUI);
Vue.config.productionTip = false

new Vue({
  render: h => h(App),
}).$mount('#app')
所以在这里
this.$http.get() 就等同于 axios.get()----------------------------------------------------------------------------------------------------------------------------
呼~终于写完了,这是第二次修改后的,之前文章有些细节上的问题,现在都改好了,希望能帮助到大家。????
最后
以上就是自由自行车最近收集整理的关于完整流程!用node.js和Vue.cli配合,布置服务器,并从数据库取数据传送到前端。的全部内容,更多相关完整流程!用node内容请搜索靠谱客的其他文章。
本图文内容来源于网友提供,作为学习参考使用,或来自网络收集整理,版权属于原作者所有。


发表评论 取消回复