笔者介绍:姜雪伟,IT公司技术合伙人,IT高级讲师,CSDN社区专家,特邀编辑,畅销书作者,已出版书籍:《手把手教你架构3D游戏引擎》电子工业出版社和《Unity3D实战核心技术详解》电子工业出版社等。
CSDN视频网址:http://edu.csdn.net/lecturer/144
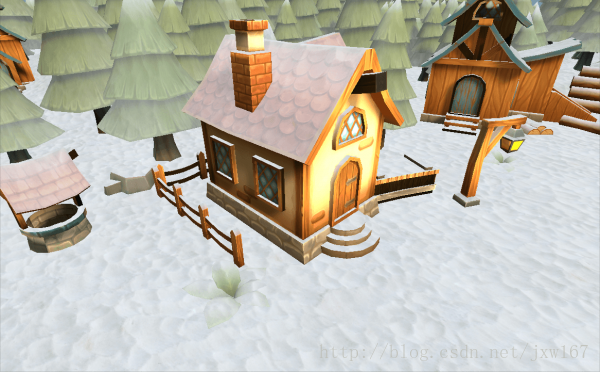
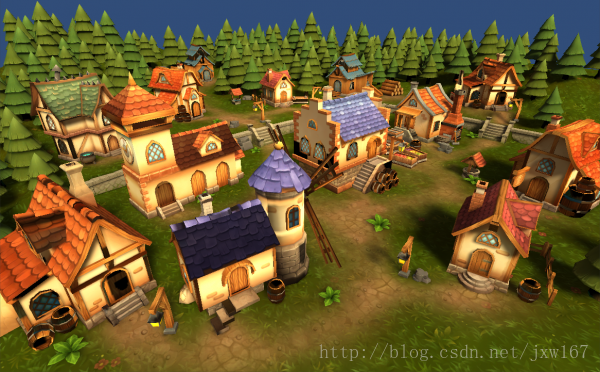
游戏中会出现各种各样的场景,比如雪场景,草地场景,城市场景等,这些场景通常的做法是通过美术利用Max工具建模实现的,在这里我们可以使用Shader去渲染,这样可以减少美术的工作量并且能优化效率。先给读者展示如下所示:
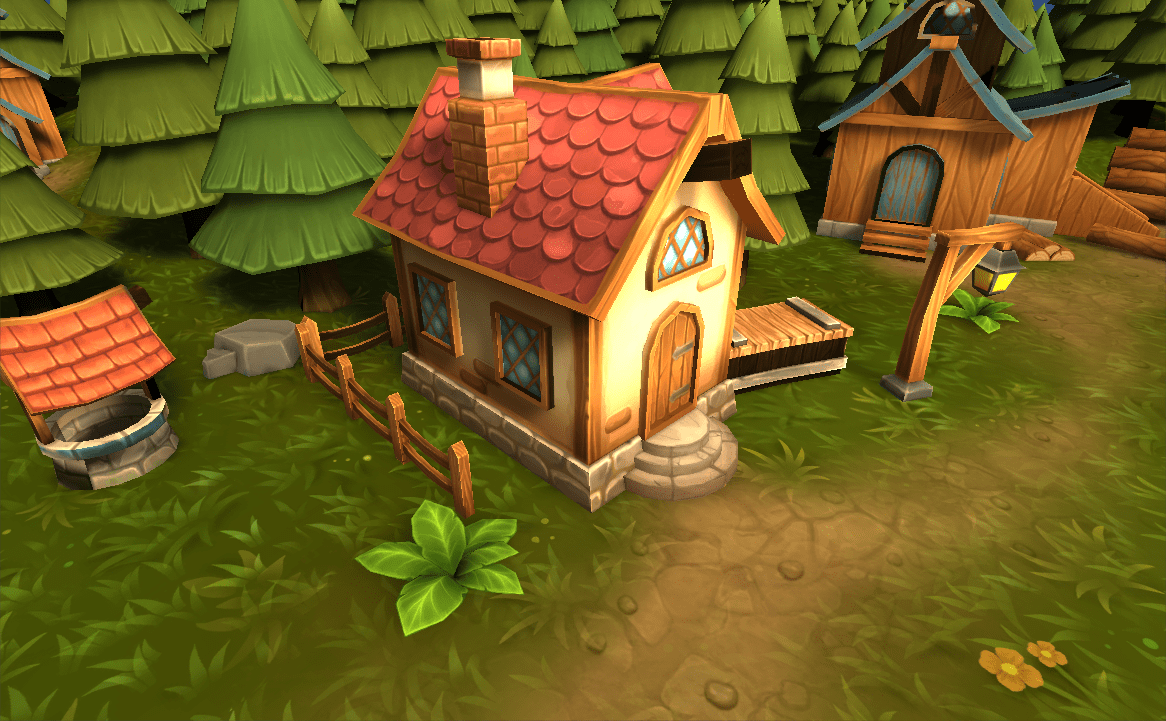
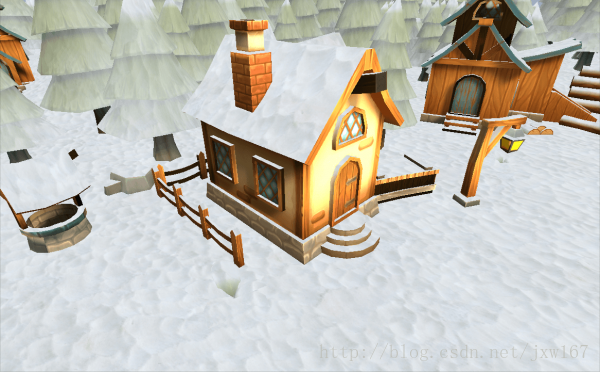
正常的场景效果,下面再给你看一副利用Shader的雪场景效果:
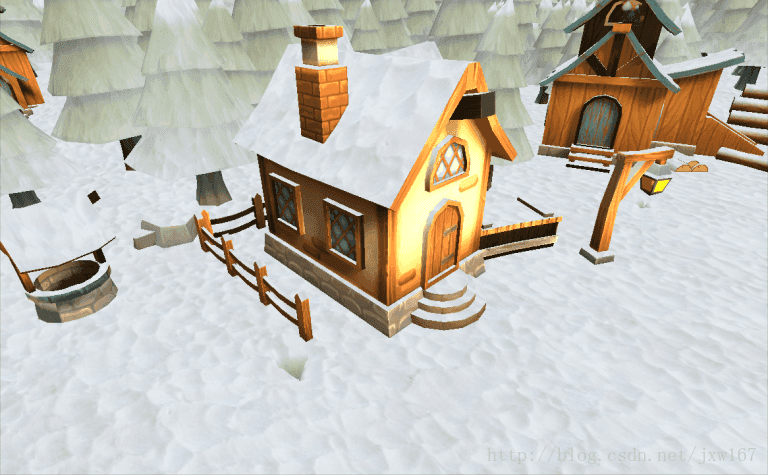
这两幅场景是相同的,唯一的区别是第二幅采用了雪效果场景,其他的纹理没有做任何改变,第二幅使用的就是屏幕空间的场景渲染,效果非常不错,下面给读者介绍一下它的实现原理:
理论很简单假设一旦渲染像素的正常面朝上(地面,屋顶等),则应该绘制雪。如果像素的正常面向任何其他方向,那么在雪纹理和原始纹理之间也应该有一个平缓的过渡 。
在实现该Shader之前需要做一些设置,首先将Rendering Path设置为Deferred (延迟渲染),如果将其设置成forward Rendering(前向渲染)在使用Shader时会出现问题。
在代码中将Camera.depthTextureMode设置成DepthNormals是为了将允许我们读取屏幕深度和法线。实现第二幅图效果只需要一个脚本和一个Shader文件就可以。下面实现屏幕渲染的脚本,代码如下所示:
using UnityEngine;
using System.Collections;

[ExecuteInEditMode]
public class ScreenSpaceSnow : MonoBehaviour
{

	public Texture2D SnowTexture;

	public Color SnowColor = Color.white;

	public float SnowTextureScale = 0.1f;

	[Range(0, 1)]
	public float BottomThreshold = 0f;
	[Range(0, 1)]
	public float TopThreshold = 1f;

	private Material _material;

	void OnEnable()
	{
		// dynamically create a material that will use our shader
		_material = new Material(Shader.Find("TKoU/ScreenSpaceSnow"));

		// tell the camera to render depth and normals
		GetComponent<Camera>().depthTextureMode |= DepthTextureMode.DepthNormals;
	}

	void OnRenderImage(RenderTexture src, RenderTexture dest)
	{
		// set shader properties
		_material.SetMatrix("_CamToWorld", GetComponent<Camera>().cameraToWorldMatrix);
		_material.SetColor("_SnowColor", SnowColor);
		_material.SetFloat("_BottomThreshold", BottomThreshold);
		_material.SetFloat("_TopThreshold", TopThreshold);
		_material.SetTexture("_SnowTex", SnowTexture);
		_material.SetFloat("_SnowTexScale", SnowTextureScale);

		// execute the shader on input texture (src) and write to output (dest)
		Graphics.Blit(src, dest, _material);
	}
}sampler2D _CameraDepthNormalsTexture;获取法线的代码函数:
half4 frag (v2f i) : SV_Target
{
    half3 normal;
    float depth;

    DecodeDepthNormal(tex2D(_CameraDepthNormalsTexture, i.uv), depth, normal);
    normal = mul( (float3x3)_CamToWorld, normal);

    return half4(normal, 1);
}这个方法检索的是相机空间的法线。也就是说,如果旋转屏幕相机,那么法线朝向也会改变。脚本中将法线乘以_CamToWorld 矩阵就是为了避免这种情况。它会将法线从相机空间转换为世界空间,这样就不再依赖于相机的透视。
为了让着色器正确编译就必须返回一些东西,所以上面的代码设置了返回语句。这样也便于预览结果以确认计算是否正确。
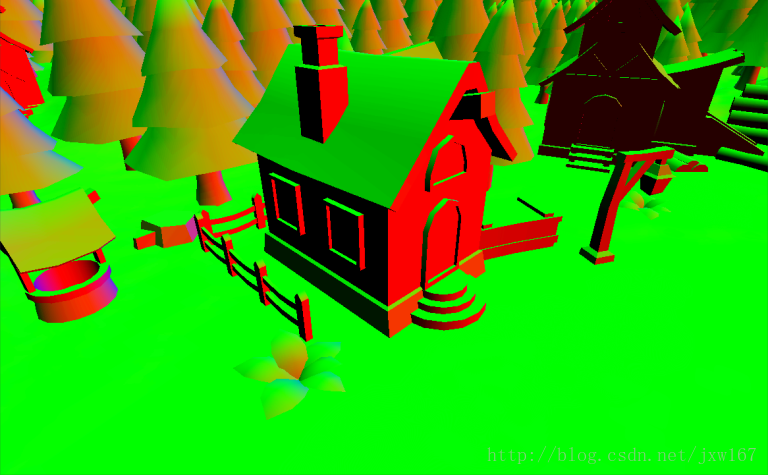
暂时渲染为RGB图像。在Unity中,Y轴是默认向上的。图中绿色部分表示Y坐标轴的值,现在将其转换为雪量的因子。
half4 frag (v2f i) : SV_Target
{
    half3 normal;
    float depth;

    DecodeDepthNormal(tex2D(_CameraDepthNormalsTexture, i.uv), depth, normal);
    normal = mul( (float3x3)_CamToWorld, normal);

    half snowAmount = normal.g;
    half scale = (_BottomThreshold + 1 - _TopThreshold) / 1 + 1;
    snowAmount = saturate( (snowAmount - _BottomThreshold) * scale);

    return half4(snowAmount, snowAmount, snowAmount, 1);
}
接下来介绍纹理,如果没有纹理,雪看起来会不真实。最难的部分就是将2D纹理(屏幕空间)应用到3D物体上。一种方法是获取像素的世界坐标,然后将世界坐标的X和Z值作为纹理坐标。
half4 frag (v2f i) : SV_Target
{
    half3 normal;
    float depth;

    DecodeDepthNormal(tex2D(_CameraDepthNormalsTexture, i.uv), depth, normal);
    normal = mul( (float3x3)_CamToWorld, normal);

    // find out snow amount
    half snowAmount = normal.g;
    half scale = (_BottomThreshold + 1 - _TopThreshold) / 1 + 1;
    snowAmount = saturate( (snowAmount - _BottomThreshold) * scale);

    // find out snow color
    float2 p11_22 = float2(unity_CameraProjection._11, unity_CameraProjection._22);
    float3 vpos = float3( (i.uv * 2 - 1) / p11_22, -1) * depth;
    float4 wpos = mul(_CamToWorld, float4(vpos, 1));
    wpos += float4(_WorldSpaceCameraPos, 0) / _ProjectionParams.z;

    half3 snowColor = tex2D(_SnowTex, wpos.xz * _SnowTexScale * _ProjectionParams.z) * _SnowColor;

    return half4(snowColor, 1);
}
下面将积雪与场景进行合并:
half4 frag (v2f i) : SV_Target
{
    half3 normal;
    float depth;

    DecodeDepthNormal(tex2D(_CameraDepthNormalsTexture, i.uv), depth, normal);
    normal = mul( (float3x3)_CamToWorld, normal);

    // find out snow amount
    half snowAmount = normal.g;
    half scale = (_BottomThreshold + 1 - _TopThreshold) / 1 + 1;
    snowAmount = saturate( (snowAmount - _BottomThreshold) * scale);

    // find out snow color
    float2 p11_22 = float2(unity_CameraProjection._11, unity_CameraProjection._22);
    float3 vpos = float3( (i.uv * 2 - 1) / p11_22, -1) * depth;
    float4 wpos = mul(_CamToWorld, float4(vpos, 1));
    wpos += float4(_WorldSpaceCameraPos, 0) / _ProjectionParams.z;

    wpos *= _SnowTexScale * _ProjectionParams.z;
    half3 snowColor = tex2D(_SnowTex, wpos.xz) * _SnowColor;

    // get color and lerp to snow texture
    half4 col = tex2D(_MainTex, i.uv);
    return lerp(col, half4 (snowColor,1.0f), snowAmount);
}
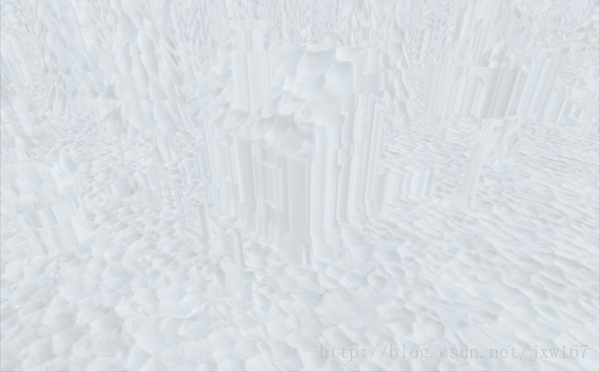
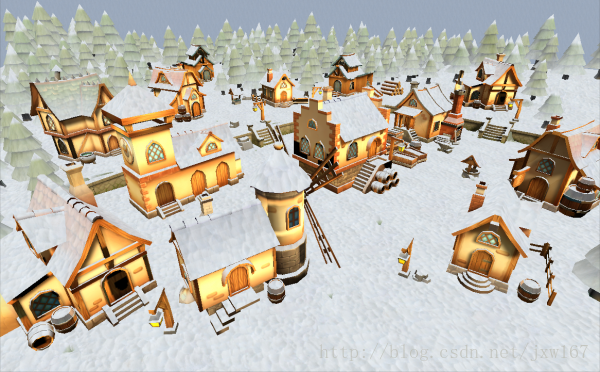
最后一步:将_TopThreshold设为0.6:
全屏效果见下图:
完整的代码下载地址:链接:http://pan.baidu.com/s/1qYTs0cG 密码:uw1k
最后
以上就是幸福指甲油最近收集整理的关于Unity3D 屏幕空间雪场景Shader渲染的全部内容,更多相关Unity3D内容请搜索靠谱客的其他文章。


发表评论 取消回复