新手小白Android热爱者,记录开发中的点点滴滴。
推荐文章:MPAndroidChart文档
MPAndroidChart地址:官方地址
还有一个翻译官方Wiki:翻译Wiki(主要是这个全是文字和代码)
一、使用MPAndroidChart前需要添加相关依赖
repositories {
	google()
	jcenter()
	maven {url"http://jitpack.io"}//必须添加这个
}
implementation 'com.github.PhilJay:MPAndroidChart:v3.1.0'
二、需要自行定义一个MarkView继承MarkView 名字自己取,里面的内容可以自行编辑
MyMarkerView 代码
public class MyMarkerView extends MarkerView {

    TextView tvYContent;
    TextView tvXContent;

    //这个为主要模块
    public MyMarkerView(Context context, int layoutResource) {
        super(context, layoutResource);

        tvYContent = findViewById(R.id.tvYContent);//获取对应的控件id

        tvXContent = findViewById(R.id.tvXContent);
    }

    // runs every time the MarkerView is redrawn, can be used to update the
    // content (user-interface)
    @Override
    public void refreshContent(Entry e, Highlight highlight) {

        if (e instanceof CandleEntry) {
            CandleEntry ce = (CandleEntry) e;
            tvYContent.setText(Utils.formatNumber(ce.getHigh(), 0, true));
            tvXContent.setText(Utils.formatNumber(ce.getHigh(), 0, true));
        } else {

        }

        super.refreshContent(e, highlight);
    }

    @Override
    public MPPointF getOffset() {
        return new MPPointF(-(getWidth() / 2), -getHeight());
    }
}
相关界面代码:(界面代码也是可以自己进行自定义的,反正你怎么喜欢怎么写)
custom_marker_view代码:
<?xml version="1.0" encoding="utf-8"?>
<LinearLayout xmlns:android="http://schemas.android.com/apk/res/android"
    xmlns:tools="http://schemas.android.com/tools"
    android:layout_width="wrap_content"
    android:layout_height="wrap_content"
    android:padding="5dp"
    android:background="@drawable/marker2"//这个是对应的对话框图片,可以自己在网上找一个
    android:orientation="vertical"
    tools:ignore="Overdraw">

    <TextView
        android:id="@+id/tvYContent"
        android:layout_width="wrap_content"
        android:layout_height="wrap_content"
        android:layout_centerHorizontal="true"
        android:layout_gravity="center"
        android:text=""
        android:textSize="10sp"
        android:textColor="@android:color/white"
        android:ellipsize="end"
        android:singleLine="true"
        android:textAppearance="?android:attr/textAppearanceSmall" />

    <TextView
        android:id="@+id/tvXContent"
        android:layout_width="wrap_content"
        android:layout_height="wrap_content"
        android:layout_centerHorizontal="true"
        android:layout_gravity="center"
        android:layout_marginTop="2.5dp"
        android:layout_marginBottom="15dp"
        android:text=""
        android:textSize="10sp"
        android:textColor="@android:color/white"
        android:ellipsize="end"
        android:singleLine="true"
        android:textAppearance="?android:attr/textAppearanceSmall" />

</LinearLayout>
三、在曲线activity中的调用(大部分代码省略,只展示关键代码)
1、调用接口:
implements OnChartValueSelectedListener接口里面有对应的onValueSelected函数;
2、定义MyMarkView:
private MyMarkerView mv;
mv = new MyMarkerView(getActivity(), R.layout.custom_marker_view);
2、对曲线图进行点击监听事件:
chart.setOnChartValueSelectedListener(对应的activity名称.this);3、在生成的onValueSelected函数中进行获取相关的横纵坐标值:
@Override
public void onValueSelected(Entry e, Highlight h){
    int i = (int) e.getX();

    mv.tvXContent.setText("时间:" + time1.get(i));
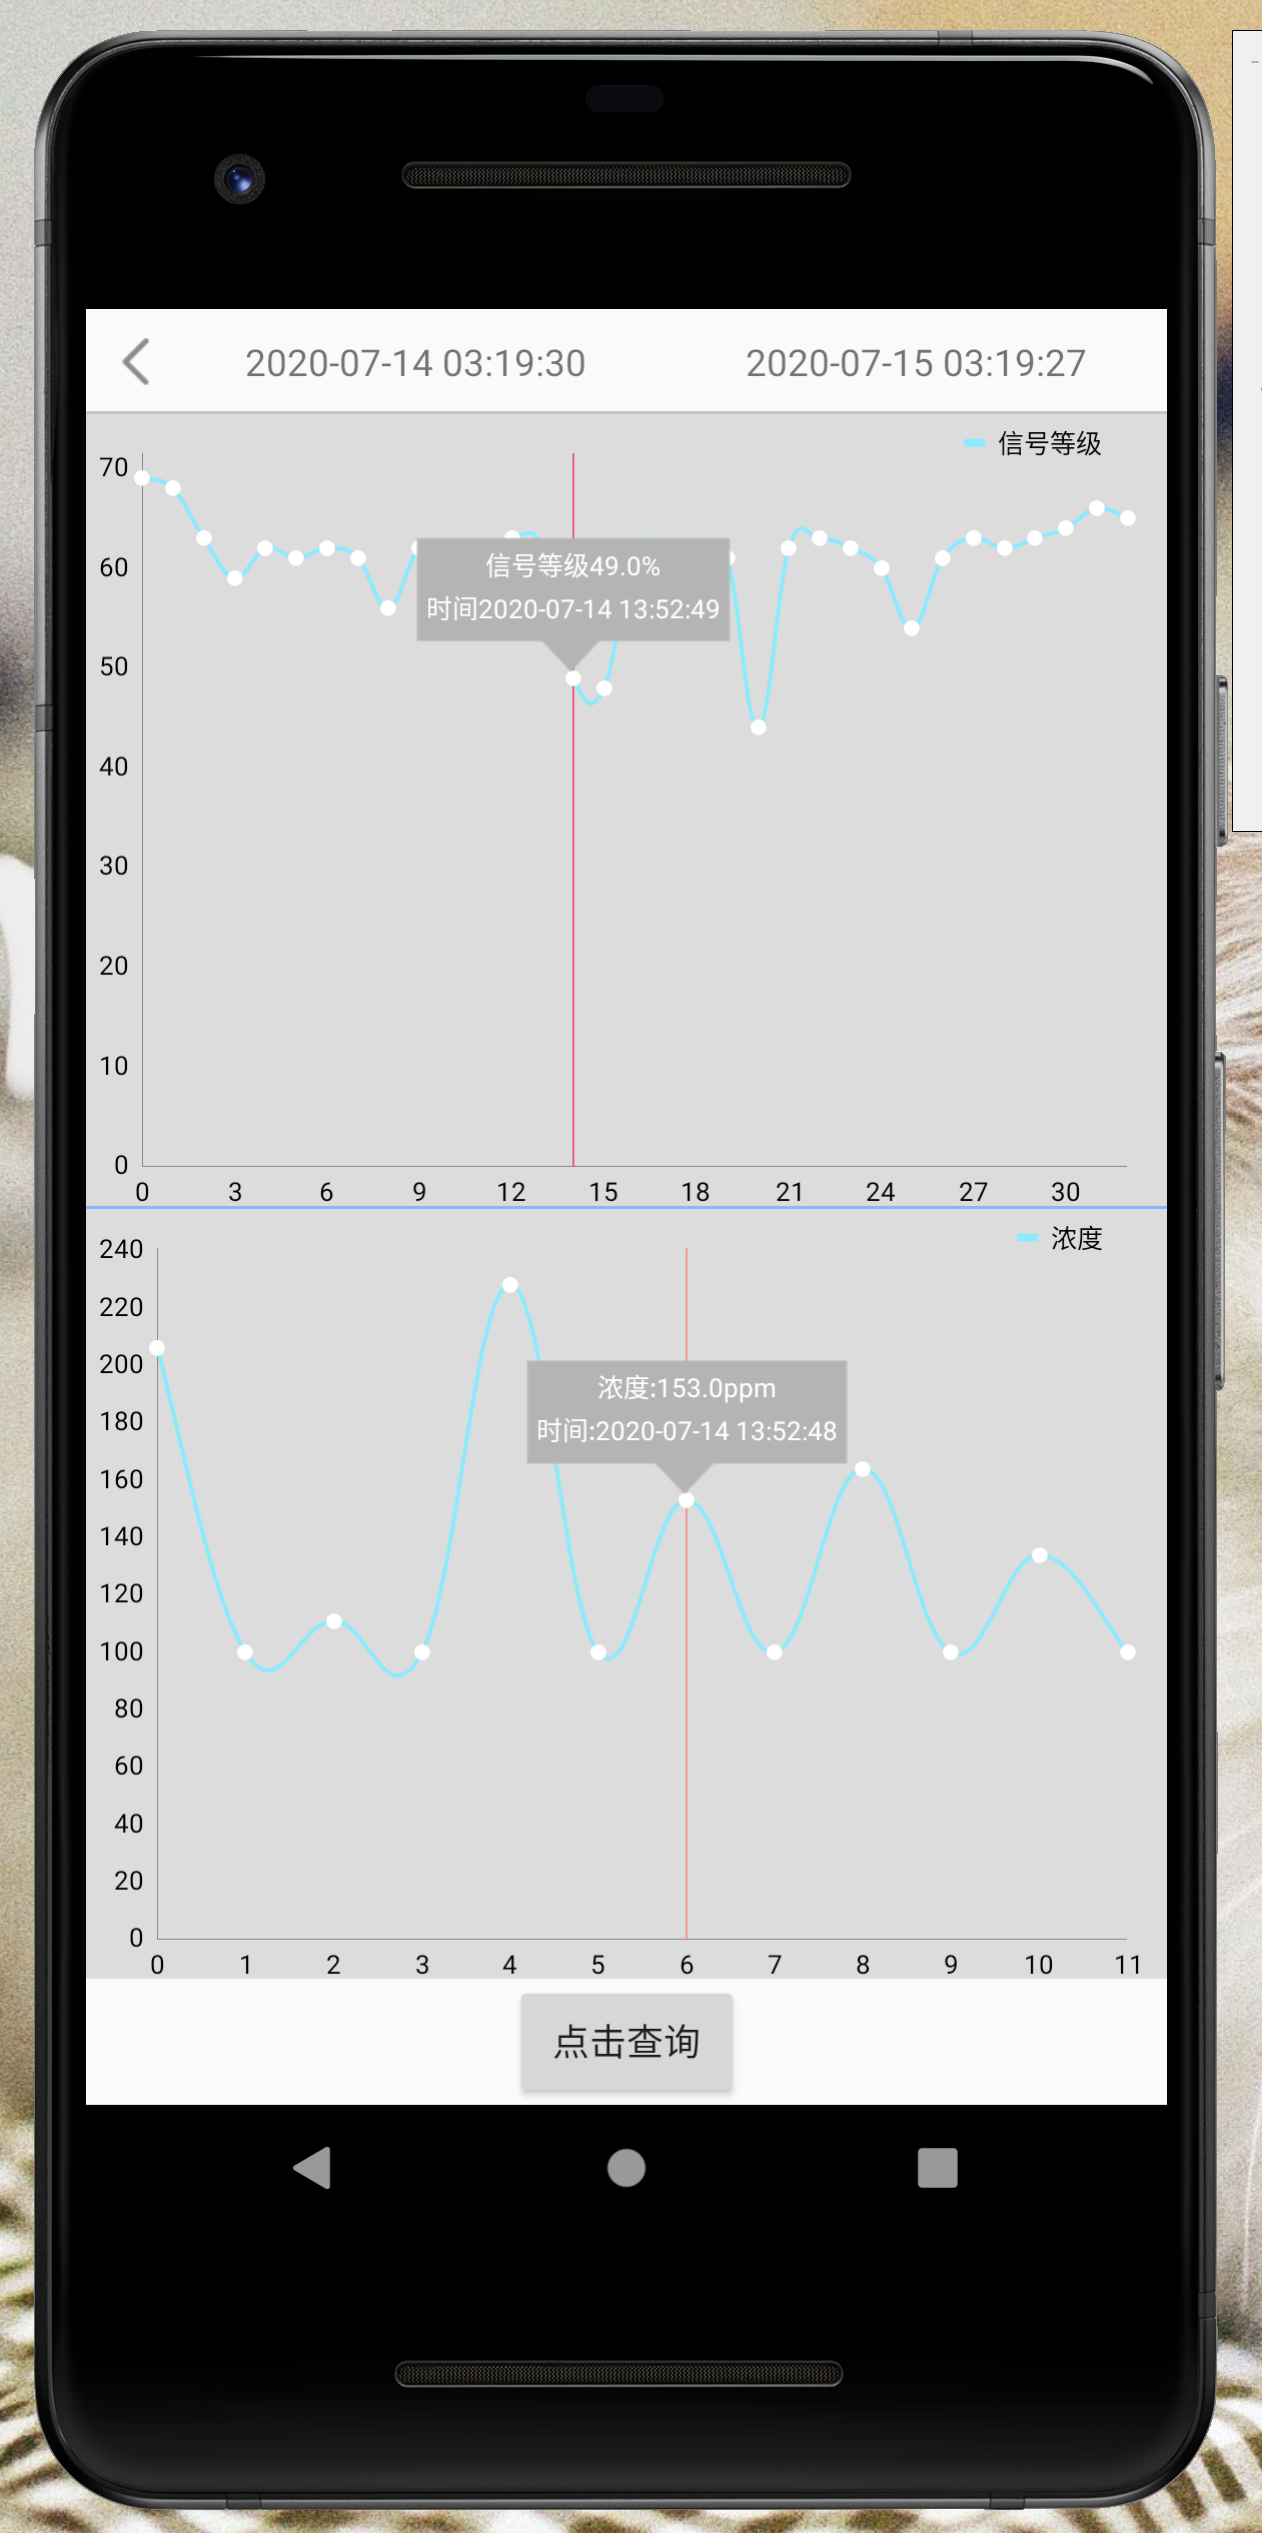
    mv.tvYContent.setText("浓度:" + firstList2.get(i).getValue()  + "ppm");

}
time1是我自己从后台获取的时间列表;firstList2是从后台获取的数据列表,i是对应的在曲线上点击的第几个点。
其实我这样获取xy轴值有些时候会闪退,因为数组越界问题,但是我还不知道怎么解决。
附上效果图:

如果有什么问题可以留言,我基本都在,可以一起讨论,毕竟我也只是一个小小白,哈哈哈
最后
以上就是妩媚芹菜最近收集整理的关于MPAndroidChart 显示x轴数值的全部内容,更多相关MPAndroidChart内容请搜索靠谱客的其他文章。
本图文内容来源于网友提供,作为学习参考使用,或来自网络收集整理,版权属于原作者所有。


发表评论 取消回复