<template>
  <div>
    <div id="editor">
    </div>
  </div>
</template>

<script>
//1.https://www.kancloud.cn/wangfupeng/wangeditor2
//npm install wangeditor
import   './dist/js/lib/jquery-1.10.2.min.js'
import   './dist/js/wangEditor.js'
import   "./dist/css/wangEditor.min.css";


export default {
  name: 'wangEditor',
  data(){
    return {
      editor: null
    }
  },
  props: {
    editorDefault: {
      type: String,
      default: '<p><br/></p>'
    },
  },
  mounted() {
    this.editor = new wangEditor('editor');
    this.editor.config = {
      ...this.editor.config,     //
      pasteFilter: false,        //关闭样式过滤
      uploadImgUrl: '/rest/picture/multiUpload',    //上传图片地址
      uploadHeaders : {      //数据流名称
        'name' : 'file'
      },
    }

    this.editor.config.uploadImgFns.onload =  (resultText, xhr) =>{
        // resultText 服务器端返回的text
        // xhr 是 xmlHttpRequest 对象,IE8、9中不支持

        // 上传图片时,已经将图片的名字存在 editor.uploadImgOriginalName
        // var originalName = this.editor.uploadImgOriginalName || '';

        // 如果 resultText 是图片的url地址,可以这样插入图片:

        const url = JSON.parse(resultText).data[0]
        // this.editor.command(null, 'insertHtml', '<img src="' + url + '" style="max-width:100%;"/>');
        // 如果不想要 img 的 max-width 样式,也可以这样插入:
        this.editor.command(null, 'InsertImage', url);
    };

    // 自定义timeout事件
    this.editor.config.uploadImgFns.ontimeout = function (xhr) {
        // xhr 是 xmlHttpRequest 对象,IE8、9中不支持
        alert('上传超时');
    };

    // 自定义error事件
    this.editor.config.uploadImgFns.onerror = function (xhr) {
        // xhr 是 xmlHttpRequest 对象,IE8、9中不支持
        alert('上传错误'+xhr);
    };


    this.editor.create()
    this.$emit('ready')
    this.editor.$txt.html(this.editorDefault)
  },
  created(){
  },
  methods: {
    setContent(val) {    //设置内容
      this.editor.$txt.html(val)
    },
    clearContent() {    //清空内容
      // this.editor.txt.clear()
      this.editor.$txt.html(this.editorDefault)
    },
    getContent() {      //获取内容
      var content = this.editor.$txt.html()
      if (content.replace("<p><br></p>","").trim() !="" ) {
        return this.editor.$txt.html()
      }else{
        return ""
      }
    }
  }

}
</script>

<style lang="less" >
  .wangEditor-txt {    //防止外部样式覆盖默认样式
    height: 400px ;
      h1 {font-size: 2em; margin: .67em 0 }

      h2 {font-size: 1.5em; margin: .75em 0 }

      h3 {font-size: 1.17em; margin: .83em 0 }

      h4, p,blockquote, ul, fieldset, form, ol, dl, dir, menu { margin: 1.12em 0 }

      h5 {font-size: .83em; margin: 1.5em 0 }

      h6 {font-size: .75em; margin: 1.67em 0 }

      h1, h2,h3, h4, h5, h6, b,strong { font-weight: bolder }
      b {
        font-weight: 700;
      }
      i, cite,em,var, address { font-style: italic }
  }


</style>
<style lang="less" scoped>

</style>
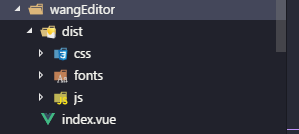
以上为组件index.vue文件
组件目录

使用


清除

设置

获取

转载于:https://www.cnblogs.com/wendyAndJken/p/9293692.html
最后
以上就是耍酷芒果最近收集整理的关于wangEditor 2.0版本简单封装为vue组件的全部内容,更多相关wangEditor内容请搜索靠谱客的其他文章。
本图文内容来源于网友提供,作为学习参考使用,或来自网络收集整理,版权属于原作者所有。


发表评论 取消回复