- 安装
npm install wangeditor
- 新建 editor.vue 文件
写入如下内容
<template>
	<div class="editor">
		<!--动态绑定id, 否则不能在一个页面上使用多个-->
		<div :id="uniqueId"></div>
	</div>
</template>

<script>
import E from "wangeditor"

export default {
	name: 'editor',
	data() {
		return {
			content: "",
			editor: null,
			info_: null
		}
	},
	model: {
		prop: 'desc',
		event: 'change'
	},
	watch: {
		isClear(val) {
			if (val) {
				this.editor.txt.clear()
			}
		},
		desc(value) {
			if (value != this.editor.txt.html()) {
				this.editor.txt.html(this.desc)
			}
		}
	},
	props: {
		desc: {
			type: String,
			default: ""
		},
		//业务中我们经常会有添加操作和编辑操作,添加操作时,我们需清除上一操作留下的缓存
		isClear: {
			type: Boolean,
			default: false
		},
		uploadUrl: {
			type: String,
			default: ""
		},
		uniqueId: {
			type: String,
			default: "e"
		}
	},
	mounted() {
		this.initE();
	},
	methods: {
		initE() {
			this.editor = new E('#' + this.uniqueId)
			this.editor.config.onchangeTimeout = 1000 // 单位 ms
			this.editor.config.uploadFileName = 'file'
			// this.editor.config.uploadImgServer = this.uploadUrl  // 你的服务器地址
			this.editor.config.uploadImgServer = '/api/editor-upload'  // 你的服务器地址
			this.editor.config.uploadImgHooks = {
				before: function (xhr, editor, files) {
					// 图片上传之前触发
					// xhr 是 XMLHttpRequst 对象,editor 是编辑器对象,files 是选择的图片文件

					// 如果返回的结果是 {prevent: true, msg: 'xxxx'} 则表示用户放弃上传
					// return {
					//     prevent: true,
					//     msg: '放弃上传'
					// }
				},
				success: function (xhr, editor, result) {
					// 图片上传并返回结果,图片插入成功之后触发
					// xhr 是 XMLHttpRequst 对象,editor 是编辑器对象,result 是服务器端返回的结果
				},
				fail: function (xhr, editor, result) {
					// 图片上传并返回结果,但图片插入错误时触发
					// xhr 是 XMLHttpRequst 对象,editor 是编辑器对象,result 是服务器端返回的结果
				},
				error: function (xhr, editor) {
					// 图片上传出错时触发
					// xhr 是 XMLHttpRequst 对象,editor 是编辑器对象
				},
				timeout: function (xhr, editor) {
					// 图片上传超时时触发
					// xhr 是 XMLHttpRequst 对象,editor 是编辑器对象
				},

				// 如果服务器端返回的不是 {errno:0, data: [...]} 这种格式,可使用该配置
				// (但是,服务器端返回的必须是一个 JSON 格式字符串!!!否则会报错)
				customInsert: function (insertImg, result, editor) {
					// 图片上传并返回结果,自定义插入图片的事件(而不是编辑器自动插入图片!!!)
					// insertImg 是插入图片的函数,editor 是编辑器对象,result 是服务器端返回的结果

					// 举例:假如上传图片成功后,服务器端返回的是 {url:'....'} 这种格式,即可这样插入图片:
					console.log(result.url)
					var url = result.url
					insertImg(url)

					// result 必须是一个 JSON 格式字符串!!!否则报错
				}
			}
			this.editor.config.onchange = (html) => {
				this.info_ = html // 绑定当前逐渐地值
				this.$emit('change', this.info_) // 将内容同步到父组件中
			}
			this.editor.config.menus = [
				'head',  // 标题
				'bold',  // 粗体
				'fontSize',  // 字号
				'fontName',  // 字体
				'italic',  // 斜体
				'underline',  // 下划线
				'strikeThrough',  // 删除线
				'foreColor',  // 文字颜色
				'backColor',  // 背景颜色
				'link',  // 插入链接
				'list',  // 列表
				'justify',  // 对齐方式
				'quote',  // 引用
				'emoticon',  // 表情
				'image',  // 插入图片
				'table',  // 表格
				'code',  // 插入代码
				'undo',  // 撤销
				'redo'  // 重复
			]
			this.editor.create()
		}
	},
}
</script>

<style scoped>

</style>
- 在父组件中调用
<editor v-model="ruleForm.reply" :uniqueId="'reply'" :isClear="isClear"></editor>

<script>
import editor from '../../tools/editor'

export default {
	components: {
		editor
	},
}
</script>
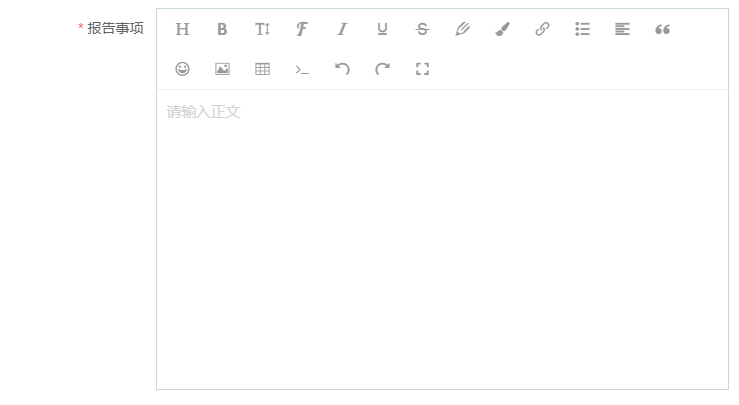
- 效果

最后
以上就是单纯含羞草最近收集整理的关于vue 富文本编辑器 wangEditor 组件封装的全部内容,更多相关vue内容请搜索靠谱客的其他文章。
本图文内容来源于网友提供,作为学习参考使用,或来自网络收集整理,版权属于原作者所有。


发表评论 取消回复