数据分析汇总学习
https://blog.csdn.net/weixin_39778570/article/details/81157884
import numpy as np
import pandas as pd
import matplotlib.pyplot as plt
from pandas import Series, DataFrame
%matplotlib inline
import seaborn as sns
# 使用matplotlib
s1 = Series(np.random.randn(1000))
plt.hist(s1)
(array([ 6., 33., 98., 154., 230., 218., 163., 61., 29., 8.]),
array([-2.96113056, -2.35197999, -1.74282942, -1.13367884, -0.52452827,
0.08462231, 0.69377288, 1.30292346, 1.91207403, 2.52122461,
3.13037518]),
<a list of 10 Patch objects>)
s1.plot(kind='kde')
<matplotlib.axes._subplots.AxesSubplot at 0x277853b9a20>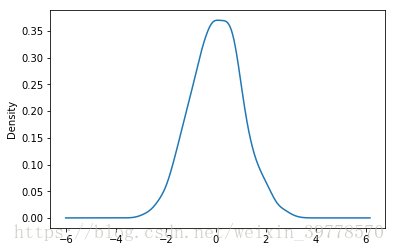
Seaborn
# 同时绘制密度图和直方图
sns.distplot(s1, hist=True, kde=True)
<matplotlib.axes._subplots.AxesSubplot at 0x277853b9a20>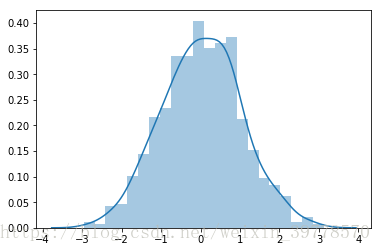
sns.distplot(s1, hist=True, kde=False, rug=True)
<matplotlib.axes._subplots.AxesSubplot at 0x277859199e8>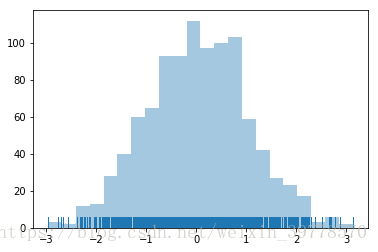
sns.distplot(s1, bins=20, hist=True, kde=False, rug=True, color='k')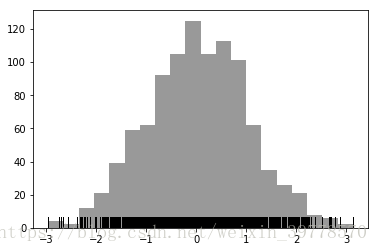
# 绘制密度图的另一种方法,shada阴影填充
sns.kdeplot(s1, shade=True, color='r')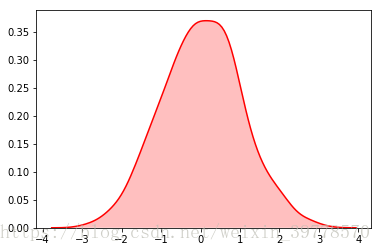
最后
以上就是甜美外套最近收集整理的关于Seaborn简单画图(二) -- 直方图和密度图的全部内容,更多相关Seaborn简单画图(二)内容请搜索靠谱客的其他文章。
本图文内容来源于网友提供,作为学习参考使用,或来自网络收集整理,版权属于原作者所有。


发表评论 取消回复