目录
1 前言
2. 安装
From source files
3. IMU原始数据测试
3.1 文件系统
注:遇到串口权限问题,请安装此步骤解决
3.2 运行imu_read_node
运行节点launch文件
查看节点和话题信息
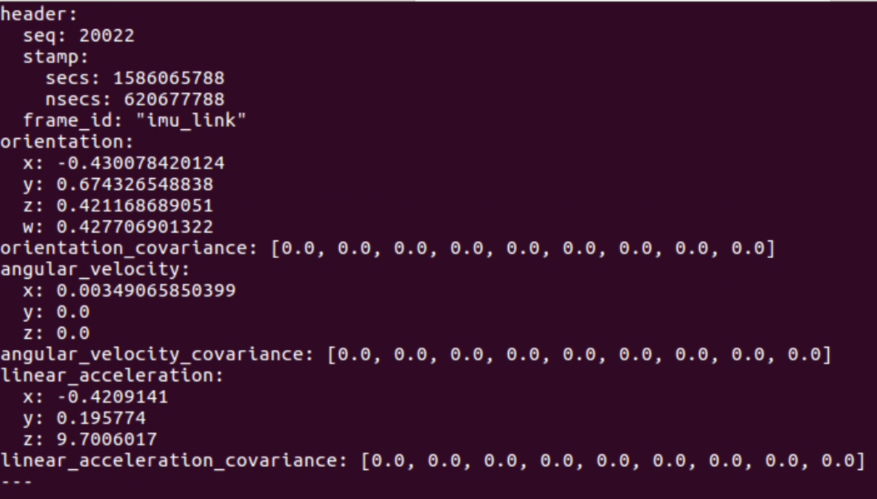
查看原始数据:
3.3 打开rviz查看原始的imu数据
修改Fixed Frame选项:
添加IMU数据:
4. imu_tools滤波及可视化
4.1 修改imu_tools文件
重新编译:catkin_make, 然后 source ~/.bashrc
4.2 测试
1 前言
imu_filter_madgwick:一种滤波器,可将来自常规IMU设备的角速度,加速度和磁力计读数(可选)融合到一个方向中。基于工作:http://www.x-io.co.uk/open-source-imu-and-ahrs-algorithms/
imu_complementary_filter:一种滤波器,它使用一种基于互补融合的新颖方法,将来自通用IMU设备的角速度,加速度和磁力计读数(可选)融合到方向四元数中。基于文献:http://www.mdpi.com/1424-8220/15/8/19302
rviz_imu_plugin:rviz插件,可显示sensor_msgs::Imu消息。
ROS org imu_tools官方介绍地址:http://wiki.ros.org/imu_tools
github源代码地址:https://github.com/ccny-ros-pkg/imu_tools
2. 安装
From source files
Create a catkin workspace (e.g., ~/ros-hydro-ws/) and source the devel/setup.bash file.
创建一个 catkin 工作区(例如 ~ / ros-hydro-ws /) ,并为 devel / setup. bash 文件提供源代码。
Make sure you have git installed:
确保你已经安装了 git:
sudo apt-get install git-core
Download the stack from our repository into your catkin workspace (e.g., ros-hydro-ws/src; use the proper branch for your distro, e.g., groovy, hydro...):
从我们的存储库中下载堆栈到您的 catkin 工作区(例如,ros-hydro-ws / src; 对您的发行版本使用适当的分支,例如,groovy,hydro...) :
git clone -b <distro> https://github.com/ccny-ros-pkg/imu_tools.git
Install any dependencies using rosdep.
使用 rosdep 安装任何依赖项。
rosdep install imu_tools
Compile the stack:
编译堆栈:
cd ~/ros-hydro-ws
 catkin_make
查看电脑链接的串口信息(名称):
dmesg | grep ttyS*
3. IMU原始数据测试
3.1 文件系统
./src/imu_read.cpp
/*
HI219出厂默认输出协议接收:
输出 sum = 41
0x5A+0xA5+LEN_LOW+LEN_HIGH+CRC_LOW+CRC_HIGH+ 0x90+ID(1字节) + 0xA0+Acc(加速度6字节) + 0xB0+Gyo(角速度6字节) + 0xC0+Mag(地磁6字节) + 0xD0 +AtdE(欧拉角6字节) + 0xF0+Pressure(压力4字节)
*/
#include "ros/ros.h"
#include "sensor_msgs/Imu.h"
#include "tf/transform_broadcaster.h"

#include <iostream>
#include <boost/asio.hpp>
#include <boost/bind.hpp>
#include <string>

using namespace std;
using namespace boost::asio;


#define MAX_PACKET_LEN          (41)// length of the data

typedef enum
{
    kItemID =                   0x90,   /* user programed ID    size: 1 */
    kItemIPAdress =             0x92,   /* ip address           size: 4 */
    kItemAccRaw =               0xA0,   /* raw acc              size: 3x2 */
    kItemAccRawFiltered =       0xA1,
    kItemAccDynamic =           0xA2,
    kItemGyoRaw =               0xB0,   /* raw gyro             size: 3x2 */
    kItemGyoRawFiltered =       0xB1,
    kItemMagRaw =               0xC0,   /* raw mag              size: 3x2 */
    kItemMagRawFiltered =       0xC1,
    kItemAtdE =                 0xD0,   /* eular angle          size:3x2 */
    kItemAtdQ =                 0xD1,   /* att q,               size:4x4 */
    kItemTemp =                 0xE0,
    kItemPressure =             0xF0,   /* pressure             size:1x4 */
    kItemEnd =                  0xFF,
}ItemID_t;

uint8_t ID;
int16_t AccRaw[3];
int16_t GyoRaw[3];
int16_t MagRaw[3];
float Eular[3];
int32_t Pressure;

int main(int argc, char **argv)
{
    ros::init(argc, argv, "imu_read_node");
    ros::NodeHandle n;
    //发布主题, 消息格式使用sensor_msg::Imu标准格式(topic名称,队列长度)
    ros::Publisher imu_pub = n.advertise<sensor_msgs::Imu>("imu_raw", 1000);

    //parameters
    string com_port = "/dev/ttyUSB0";
    string imu_frame_id = "imu_link";
    ros::param::get("~com_port",com_port);
    ros::param::get("~imu_frame_id",imu_frame_id);

    io_service iosev;
    serial_port sp(iosev, com_port);
    sp.set_option(serial_port::baud_rate(115200));
    sp.set_option(serial_port::flow_control(serial_port::flow_control::none));
    sp.set_option(serial_port::parity(serial_port::parity::none));
    sp.set_option(serial_port::stop_bits(serial_port::stop_bits::one));
    sp.set_option(serial_port::character_size(8));

    int count = 0;
    ros::Rate loop_rate(100);
    while (ros::ok())
    {
        // 向串口写数据
        // write(sp, buffer("Hello world", 12));

        // 向串口读数据
        uint8_t buf_tmp[1];
        uint8_t buf[MAX_PACKET_LEN-1];
        read(sp, buffer(buf_tmp));
        if(buf_tmp[0] == 0x5A )
        {
            read(sp, buffer(buf));

            sensor_msgs::Imu imu_msg;
            imu_msg.header.stamp = ros::Time::now();
            imu_msg.header.seq = count;
            imu_msg.header.frame_id =  imu_frame_id;

            /*
            按出厂默认输出协议接收:
            0x5A+0xA5+LEN_LOW+LEN_HIGH+CRC_LOW+CRC_HIGH+ 0x90+ID(1字节) + 0xA0+Acc(加速度6字节) + 0xB0+Gyo(角速度6字节) + 0xC0+Mag(地磁6字节) + 0xD0 +AtdE(欧拉角6字节) + 0xF0+Pressure(压力4字节)
            */
            int i=0;
            if(buf[i] == 0xA5) /* user ID */
            {

                i+=5;//moving right 5bit to 0x90

                //user ID
                if(buf[i+0] == kItemID)
                {
                    ID = buf[i+1];
                }
                //Acc value
                if(buf[i+2] == kItemAccRaw)
                {
                    memcpy(AccRaw, &buf[i+3], 6);
                    imu_msg.linear_acceleration.x =AccRaw[0]* 9.7887/1000.0;
                    imu_msg.linear_acceleration.y =AccRaw[1]* 9.7887/1000.0;
                    imu_msg.linear_acceleration.z =AccRaw[2]* 9.7887/1000.0;
                }
                //Gyro value
                if(buf[i+9] == kItemGyoRaw)
                {
                    memcpy(GyoRaw, &buf[i+10], 6);
                    imu_msg.angular_velocity.x = GyoRaw[0]*M_PI/10.0/180.0;
                    imu_msg.angular_velocity.y = GyoRaw[1]*M_PI/10.0/180.0;
                    imu_msg.angular_velocity.z = GyoRaw[2]*M_PI/10.0/180.0;
                }
                //Mag value
                if(buf[i+16] == kItemMagRaw)
                {
                    memcpy(MagRaw, &buf[i+17], 6);
                }
                //atd E
                if(buf[i+23] == kItemAtdE)
                {
                    Eular[0] = ((float)(int16_t)(buf[i+24] + (buf[i+25]<<8)))/100;
                    Eular[1] = ((float)(int16_t)(buf[i+26] + (buf[i+27]<<8)))/100;
                    Eular[2] = ((float)(int16_t)(buf[i+28] + (buf[i+29]<<8)))/10;
                    geometry_msgs::Quaternion quat = tf::createQuaternionMsgFromRollPitchYaw(Eular[0], Eular[1], Eular[2]);
                    imu_msg.orientation = quat;
                    //imu_msg.linear_acceleration_covariance=boost::array<double, 9>
                }
                //Pressure value
                if(buf[i+30] == kItemPressure)
                {
                    memcpy(&Pressure, &buf[i+31], 4);
                }

                //debug
                /*
                printf("ID: %d rn", ID);
                printf("AccRaw: %d %d %drn", AccRaw[0], AccRaw[1], AccRaw[2]);
                printf("GyoRaw: %f %f %frn", GyoRaw[0], GyoRaw[1], GyoRaw[2]);
                printf("MagRaw: %d %d %drn", MagRaw[0], MagRaw[1], MagRaw[2]);
                printf("Eular: %0.2f %0.2f %0.2frn", Eular[1], Eular[0], Eular[2]);
                printf("Pressure: %d Parnn", Pressure);
                */

                imu_pub.publish(imu_msg);

                //ros::spinOnce();
                //loop_rate.sleep();

                count++;
            }
        }
    }//while end

    iosev.run();
    return 0;
}
./launch/imu.launch文件
<launch>
  <node name="imu_read_node" pkg="miiboo_imu"  type="imu_read" output="screen">
    <param name="com_port"     value="/dev/ttyUSB0"/>
    <param name="imu_frame_id" value="imu_link"/>
  </node>
</launch>
注:遇到串口权限问题,请安装此步骤解决
一般情况下会出现打不开串口的情况,在确认驱动安装正常的情况下,可能是操作权限不够导致的,赋予权限就好了
sudo chmod a+rw /dev/ttyUSB0
但是这种方式只是临时的,每次启动都需输入一次,永久性解决办法:
可以通过增加udev规则来实现:
/etc/udev/rules.d/70-ttyusb.rules
创建文件
sudo gedit /etc/udev/rules.d/70-ttyusb.rules
文件内容为:
KERNEL=="ttyUSB[0-9]*", MODE="0666
增加访问权限:
sudo chmod a+rw /dev/ttyUSB0
————————————————
3.2 运行imu_read_node
运行节点launch文件
roslaunch miiboo_imu imu.launch
查看节点和话题信息
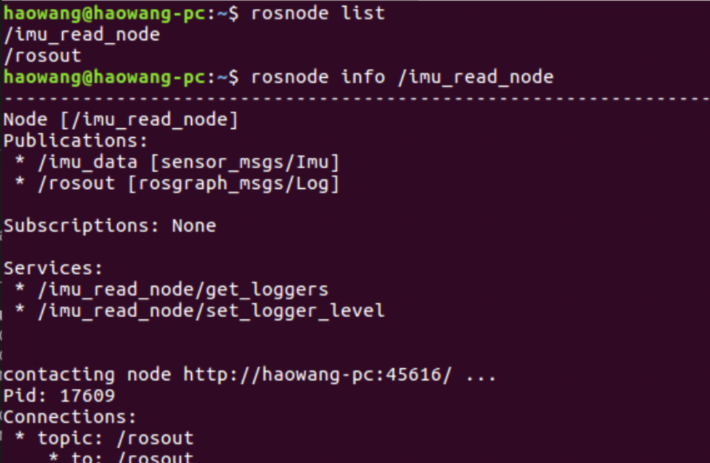
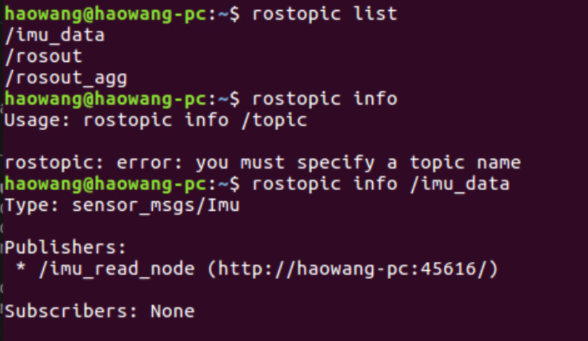
查看原始数据:
rostopic echo /imu_data
3.3 打开rviz查看原始的imu数据
修改Fixed Frame选项:

(注意,坐标系应该与你定义的imu节点中的link一致。)
添加IMU数据:
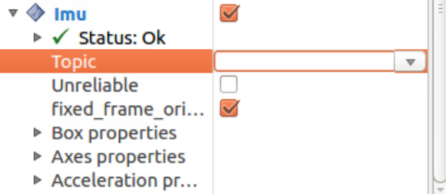
2. 点击左下方的Add按钮,往下翻找到rviz_imu_plugin插件中的imu选项
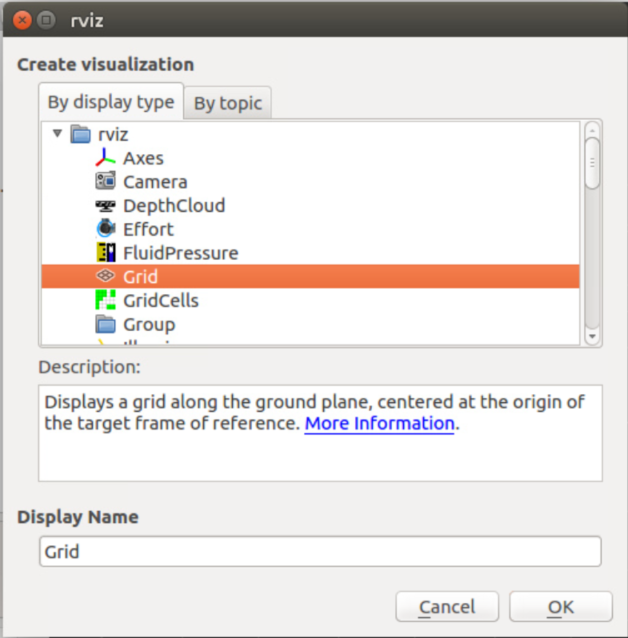
3. 修改imu订阅的话题:根据你定义的imu发布的sensor msg topic名称,选择对应的话题即可
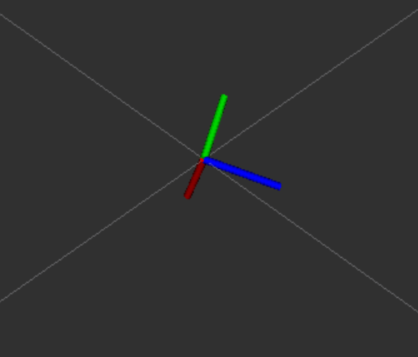
4. 可视化,在实际动画中可以明显的观察到imu的飘逸和晃动,切位姿不准确。
4. imu_tools滤波及可视化
4.1 修改imu_tools文件
打开文件:~/imu_tools_ws/src/imu_tools/imu_complementary_filter/src/complementary_filter_ros.cpp,有如下代码:
// Register IMU raw data subscriber.
imu_subscriber_.reset(new ImuSubscriber(nh_, ros::names::resolve("imu") + "/data_raw", queue_size));可以看出,imu_tools订阅的topic为imu/data_raw,而IMU发布的topic为/imu_data,因此需要修改代码,使topic一致:
将imu订阅的话题改为自定义的话题名称即可:
// Register IMU raw data subscriber.
imu_subscriber_.reset(new ImuSubscriber(nh_, "/imu_data", queue_size));
然后,修改launch文件
打开launch文件:~/imu_tools_ws/src/imu_tools/imu_complementary_filter/launch/complementary_filter.launch,进行一些修改:
前半部分已省略

重点修改以下部分的内容

<!-- ComplementaryFilter launch file -->
<launch>
  #### Complementary filter
  <node pkg="imu_complementary_filter" type="complementary_filter_node"
      name="complementary_filter_gain_node" output="screen">
    <param name="do_bias_estimation" value="true"/>
    <param name="do_adaptive_gain" value="true"/>
    <param name="use_mag" value="false"/>
    <param name="gain_acc" value="0.01"/>
    <param name="gain_mag" value="0.01"/>
    <param name="publish_debug_topics" value="false"/>
    <param name="publish_tf" value="true"/>
  </node>
</launch>
重新编译:catkin_make, 然后 source ~/.bashrc
4.2 测试
1. 先开一个终端,打开imu读取节点,具体命令根据不同package节点的命名自行修改,
roslaunch miiboo_imu imu.launch
2. 再开一个终端运行imu_tools中的launch文件,若正常运行不报错则已经开始了滤波操作
roslaunch imu_complementary_filter complementary_filter.launch
3. 再开一个终端打开rviz,并把imu接收到topic改为imu_tools滤波后发布的消息
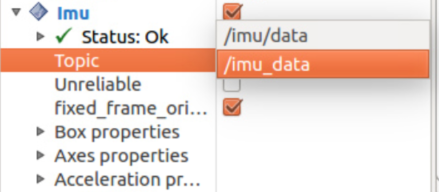

再观察右边可视化窗口
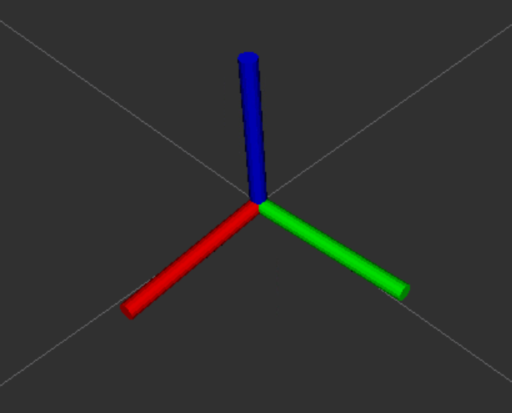
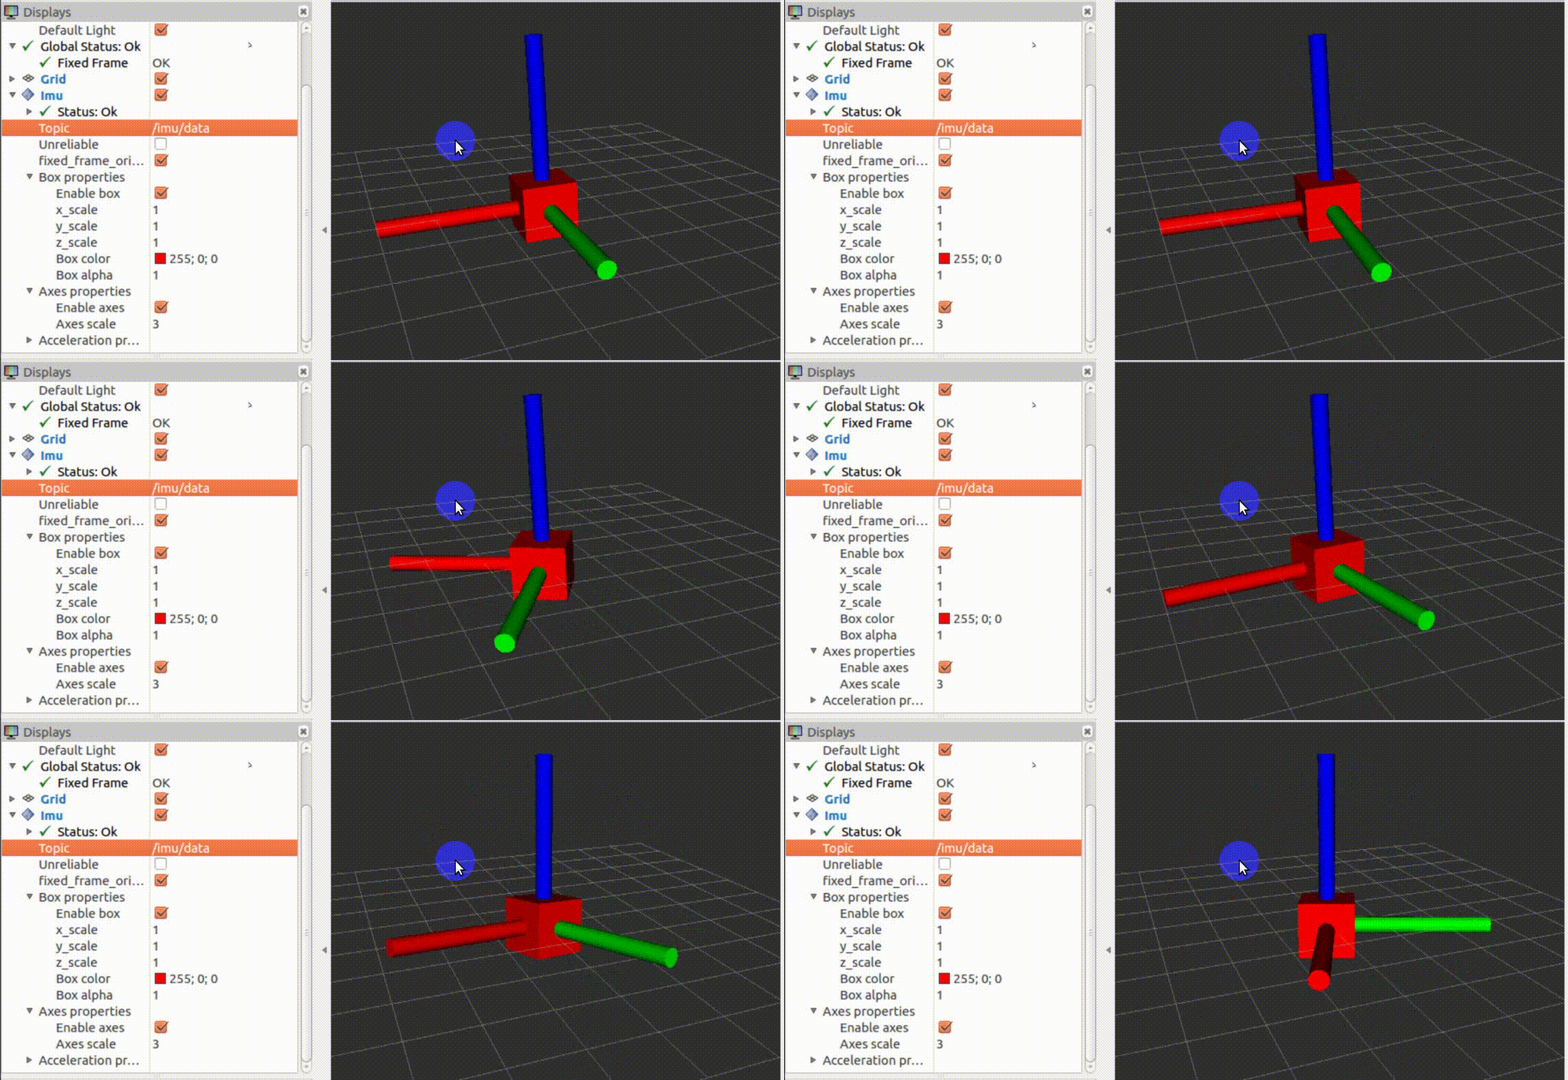
对比滤波前的imu姿态数据,为了形成对照,imu设备的姿态在此过程中均未发生移动,左图为原始位姿,右图为滤波之后位姿。较为准确的对imu的姿态滤波和估计。


动画演示:中间突然报错退出了rviz,不知怎么回事。
参考:https://github.com/ccny-ros-pkg/imu_tools
https://www.cnblogs.com/21207-iHome/p/7832355.html
最后
以上就是魔幻砖头最近收集整理的关于ROS学习笔记 使用imu_tools对imu_raw数据进行滤波和可视化目录1 前言2. 安装3. IMU原始数据测试注:遇到串口权限问题,请安装此步骤解决4. imu_tools滤波及可视化4.2 测试的全部内容,更多相关ROS学习笔记内容请搜索靠谱客的其他文章。


发表评论 取消回复