透视投影
三维计算机图形学中另外一种重要的变换是透视投影。与平行投影沿着平行线将物体投影到图像平面上不同,透视投影按照从投影中心这一点发出的直线将物体投影到图像平面。这就意味着距离投影中心越远投影越小,距离越近投影越大。
最简单的透视投影将投影中心作为坐标原点,z = 1 作为图像平面,这样投影变换为  ;
;  ,用齐次坐标表示为:
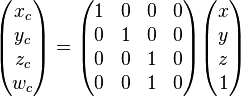
(这个乘法的计算结果是  =
=  。)
。)
在进行乘法计算之后,通常齐次元素 wc 并不为 1,所以为了映射回真实平面需要进行齐次除法,即每个元素都除以 wc:

更加复杂的透视投影可以是与旋转、缩放、平移、切变等组合在一起对图像进行变换。
在python中调用opencv,用下面函数完成透视投影
transform_matrix=cv2.getPerspectiveTransform(src,dst)
print transform_matrix
#透射变换完成变形
newimg=cv2.warpPerspective(img,transform_matrix,(w,h))
cv2.imshow('preview',newimg)
cv2.waitKey()
cv2.destroyAllWindows()
本博客所有内容是原创,如果转载请注明来源
http://blog.csdn.net/myhaspl/
WarpPerspective
对图像进行透视变换
void cvWarpPerspective( const CvArr* src, CvArr* dst, const CvMat* map_matrix,
int flags=CV_INTER_LINEAR+CV_WARP_FILL_OUTLIERS,
CvScalar fillval=cvScalarAll(0) );
-
src
- 输入图像. dst
- 输出图像. map_matrix
- 3×3 变换矩阵 flags
-
插值方法和以下开关选项的组合:
- CV_WARP_FILL_OUTLIERS - 填充所有缩小图像的象素。如果部分象素落在输入图像的边界外,那么它们的值设定为 fillval.
- CV_WARP_INVERSE_MAP - 指定 matrix 是输出图像到输入图像的反变换,因此可以直接用来做象素插值。否则, 函数从 map_matrix 得到反变换。
-
fillval
- 用来填充边界外面的值
-
-
-
Python:
cv2.
warpPerspective
(src, M, dsize
[, dst
[, flags
[, borderMode
[, borderValue
]
]
]
]
) → dst
-
C:
void
cvWarpPerspective
(const CvArr*
src, CvArr*
dst, const CvMat*
map_matrix, int
flags=CV_INTER_LINEAR+CV_WARP_FILL_OUTLIERS, CvScalar
fillval=cvScalarAll(0)
)
-
Parameters: - src – input image.
- dst – output image that has the size dsize and the same type assrc .
- M –
 transformation matrix.
 - dsize – size of the output image.
- flags – combination of interpolation methods (INTER_LINEAR orINTER_NEAREST) and the optional flag WARP_INVERSE_MAP, that setsM as the inverse transformation (
 ).
). - borderMode – pixel extrapolation method (BORDER_CONSTANT orBORDER_REPLICATE).
- borderValue – value used in case of a constant border; by default, it equals 0.
The function warpPerspective transforms the source image using the specified matrix:

-
GetPerspectiveTransform
由四边形的4个点计算透射变换
CvMat* cvGetPerspectiveTransform( const CvPoint2D32f* src, const CvPoint2D32f* dst,
CvMat* map_matrix );
#define cvWarpPerspectiveQMatrix cvGetPerspectiveTransform
-
src
- 输入图像的四边形顶点坐标。 dst
- 输出图像的相应的四边形顶点坐标。 map_matrix
- 指向3×3输出矩阵的指针。
函数cvGetPerspectiveTransform计算满足以下关系的透射变换矩阵:

这里,dst(i) = (x'i,y'i),src(i) = (xi,yi),i = 0..3.

最后
以上就是优秀大门最近收集整理的关于数学之路-python计算实战(10)-机器视觉-透视投影的全部内容,更多相关数学之路-python计算实战(10)-机器视觉-透视投影内容请搜索靠谱客的其他文章。
本图文内容来源于网友提供,作为学习参考使用,或来自网络收集整理,版权属于原作者所有。


发表评论 取消回复