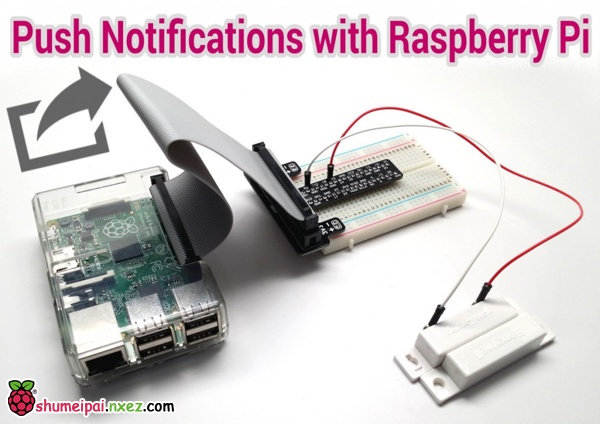
本项目说明了如何从树莓派发送推送通知给iOS和Android设备,只需要用到一个免费的推送app即可。这里的主要思想就是利用一个电磁感应门来触发推送信息的事件。当电磁门打开时,树莓派就发送消息。在这个项目中,电磁感应门可以很容易替换成其他类型的告警设备,比如PIR运动传感器,红外引信等。
作者声明:我不是个Python专家,也不是树莓派的专家。虽然我有过很多软件开发的经验,而且也曾是个全职的开发者,但这是我的第一个树莓派项目和Python应用。因此,我写的Python代码很可能不是最简洁的,而且也可能会有其他更好的方式来配置树莓派。我个人很乐意接受建设性的批评和建议。如果有任何改进的建议,请在评论栏中告诉我。
配置树莓派发送推送消息
下面各项就是我们需要完成的:
- 在Instapush上建立推送服务,并安装移动app
- 将电磁感应门连接到树莓派上
- 安装pycurl库
- 加载python代码
- 运行python应用
- 测试,获取推送通知
在Instapush上建立推送服务,并安装移动app
要处理推送通知,我使用了一个名为Instapush的免费推送服务。Instapush在iOS和Android上有免费的app,而且这个平台上也有一个易于使用的REST API供软件开发者使用。
- 首先,在https://instapush.im/注册并登陆。
- 下载移动app(iOS版,Android版)
- 登陆到app上,使用你在网站上注册的账户即可
- 在app上登陆后,你会发现控制面板中已经显示你的设备已连接到Instapush的账户上了。去这里查看https://instapush.im/dashboard.
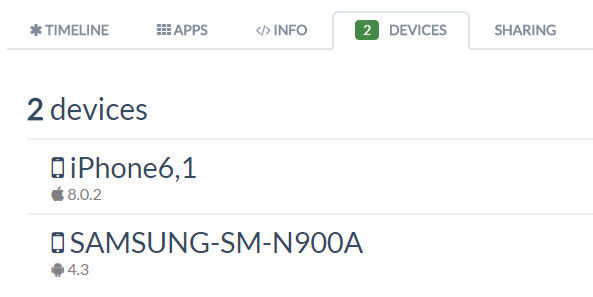
- 然后点击设备标签。我有两台设备都连接到了Instapush的账户上,见下图。
- 接下来,点击app标签。然后选择添加应用。
- 为你的应用选择一个名称,然后点击Add。我把应用命名为“Door Push”
- 添加了你的应用之后,你会进入事件界面。点击添加事件
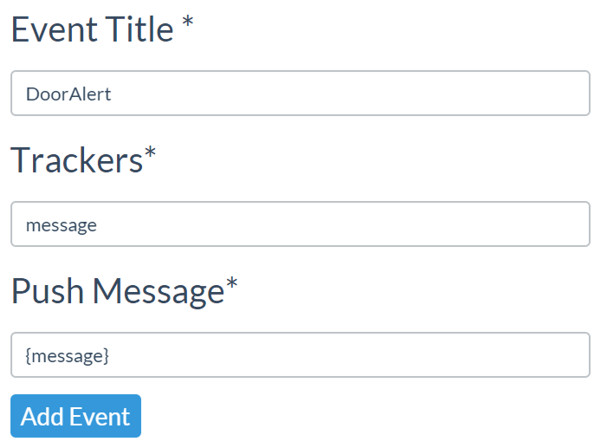
- 为你的时间选择一个标题。我建议在事件名中不要加入任何空格。我用的是“DoorAlert”
- 你需要添加至少一个tracker。这基本上就是一个用在推送通知中的变量。我给它命名为“message”
- 最后,输入你想要推送的消息内容。我的Python代码将变量{message}传给Instapush服务,因此我建议你只把{message}添加到Message字段即可。
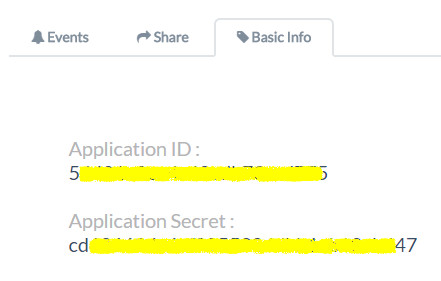
点击添加事件 - 点击Basic Info标签,记下Application ID和Application Secret fields这两个字段的内容。在编写Python代码时需要用到这些。可以参考下图中的示例。当然,我把我的ID做了些处理。
将电磁感应门连接到树莓派上
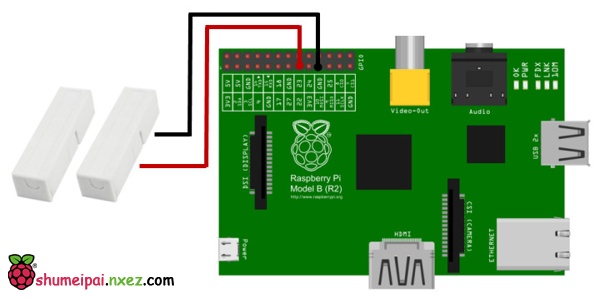
我使用了一个面包板套件来让这个过程变得简单些。我使用GPIO的第23号管脚以及接地管脚来连接电磁感应门。哪条线接GPIO,哪条线接地无关紧要。下面是示意图:
安装pycurl库
我们的Python程序需要使用一个称为pycurl的库来发送API请求给InstaPush服务。在树莓派上运行下面的命令来安装这个Python库。
|
1
|
sudo
apt-get
install
python-pycurl
|
Python代码
下面就是我编写的Python代码了。代码中的注释应该能很好的解释我在做什么。将程序命名为doorSensor.py。你可以在这里下载源代码。
|
1
2
3
4
5
6
7
8
9
10
11
12
13
14
15
16
17
18
19
20
21
22
23
24
25
26
27
28
29
30
31
32
33
34
35
36
37
38
39
40
41
42
43
44
45
46
47
48
49
50
51
52
53
54
55
56
57
58
59
60
61
62
63
64
65
66
67
68
69
70
71
72
73
74
75
76
77
78
79
80
81
82
83
84
85
86
87
88
89
90
|
# ------------- Begin doorSensor.py ------------------ #
import
pycurl, json
from
StringIO
import
StringIO
import
RPi.GPIO as GPIO
#setup GPIO using Broadcom SOC channel numbering
GPIO.setmode(GPIO.BCM)
# set to pull-up (normally closed position)
GPIO.setup(
23
, GPIO.IN, pull_up_down
=
GPIO.PUD_UP)
#setup InstaPush variables
# set this to Application ID from Instapush
appID
=
""
# set this to the Application Secret from Instapush
appSecret
=
""
# leave this set to DoorAlert unless you named your event something different in Instapush
pushEvent
=
"DoorAlert"
# set this to what you want the push message to say
pushMessage
=
"Door Opened!"
# use StringIO to capture the response from our push API call
buffer
=
StringIO()
# use Curl to post to the Instapush API
c
=
pycurl.Curl()
# set Instapush API URL
c.setopt(c.URL,
'https://api.instapush.im/v1/post'
)
# setup custom headers for authentication variables and content type
c.setopt(c.HTTPHEADER, [
'x-instapush-appid: '
+
appID,
'x-instapush-appsecret: '
+
appSecret,
'Content-Type: application/json'
])
# create a dictionary structure for the JSON data to post to Instapush
json_fields
=
{}
# setup JSON values
json_fields[
'event'
]
=
pushEvent
json_fields[
'trackers'
]
=
{}
json_fields[
'trackers'
][
'message'
]
=
pushMessage
postfields
=
json.dumps(json_fields)
# make sure to send the JSON with post
c.setopt(c.POSTFIELDS, postfields)
# set this so we can capture the resposne in our buffer
c.setopt(c.WRITEFUNCTION,
buffer
.write)
# uncomment to see the post that is sent
#c.setopt(c.VERBOSE, True)
# setup an indefinite loop that looks for the door to be opened / closed
while
True
:
# door open detected
GPIO.wait_for_edge(
23
, GPIO.RISING)
print
(
"Door Opened!n"
)
# in the door is opened, send the push request
c.perform()
# capture the response from the server
body
=
buffer
.getvalue()
# print the response
print
(body)
# reset the buffer
buffer
.truncate(
0
)
buffer
.seek(
0
)
# door closed detected
GPIO.wait_for_edge(
23
, GPIO.FALLING)
print
(
"Door Closed!n"
)
# cleanup
c.close()
GPIO.cleanup()
# -------------------- End doorSensor.py -------------------- #
Save the Python script on your Raspberry Pi.
|
将Python脚本保存到你的树莓派上。
运行Python应用
要测试是否能从树莓派上发送推送通知,先运行doorSensor.py应用。程序跑起来之后,将电磁感应门的传感器分开。你会看到树莓派的屏幕上会打印出一些内容。第一行就是运行程序的命令,而第二行就是当我们打开门的时候所打印的。紧跟着会打印出从InstaPush的API服务接收到的响应。
|
1
2
3
4
5
6
7
|
pi@raspberrypi ~ $
sudo
python doorSensor.py
Door Opened!
{“msg”:”Notification Sent Successfully”,”error”:
false
,”status”:200}
Door Closed!
|
获取推送通知
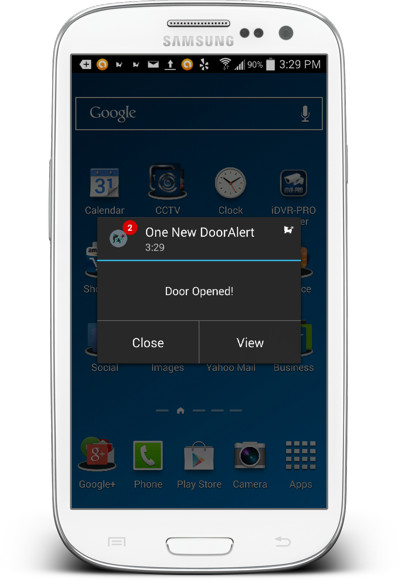
在你打开电磁门的1到2秒后,你应该在iOS或者Android设备上接收到推送通知。下图就是在我的三星Galaxy上所接收到的推送消息。iPhone上也工作的一样好。
最后
以上就是大意口红最近收集整理的关于树梅派应用47:用树莓派给智能手机发送推送通知配置树莓派发送推送消息的全部内容,更多相关树梅派应用47内容请搜索靠谱客的其他文章。


发表评论 取消回复