转自:https://blog.csdn.net/lj779323436/article/details/79911322
我在此基础上时间并进行了些许修正。
先在树莓派上创建热点:
https://blog.csdn.net/fm0517/article/details/80939113
在树莓派上编写脚本代码:tcpserver.py
#!/usr/bin/python
#coding=utf-8
import socket
import time
import sys

HOST_IP = "192.168.12.1"    #我的树莓派作为AP热点的ip地址
HOST_PORT = 7654            #端口号

print("Starting socket: TCP...")
socket_tcp = socket.socket(socket.AF_INET, socket.SOCK_STREAM)    #创建socket

print("TCP server listen @ %s:%d!" %(HOST_IP, HOST_PORT) )
host_addr = (HOST_IP, HOST_PORT)
socket_tcp.bind(host_addr)    #绑定我的树莓派的ip地址和端口号
socket_tcp.listen(1)    #listen函数的参数是监听客户端的个数,这里只监听一个,即只允许与一个客户端创建连接

while True:
        print ('waiting for connection...')
        socket_con, (client_ip, client_port) = socket_tcp.accept()    #接收客户端的请求
        print("Connection accepted from %s." %client_ip)

        socket_con.send("Welcome to RPi TCP server!")    #发送数据

        while True:
                data=socket_con.recv(1024)    #接收数据

                if data:    #如果数据不为空,则打印数据,并将数据转发给客户端
                        print(data)
                        socket_con.send(data)

socket_tcp.close()
用AndroidStudio创建安卓工程MyApplication:
1.activity_main.xml
<?xml version="1.0" encoding="utf-8"?>
<LinearLayout xmlns:android="http://schemas.android.com/apk/res/android"
    xmlns:app="http://schemas.android.com/apk/res-auto"
    xmlns:tools="http://schemas.android.com/tools"
    android:layout_width="match_parent"
    android:layout_height="match_parent"
    android:orientation="vertical"
    tools:context="lh.wifidemo.ui.activity.Device_Control_Activity">

    <TextView
        android:layout_width="match_parent"
        android:layout_height="wrap_content"
        android:text="设备控制"/>

    <EditText
        android:layout_width="match_parent"
        android:layout_height="wrap_content"
        android:id="@+id/et_send"/>
    <Button
        android:layout_width="match_parent"
        android:layout_height="wrap_content"
        android:text="发送"
        android:id="@+id/bt_send"/>

    <TextView
        android:layout_width="match_parent"
        android:layout_height="wrap_content"
        android:text="接收到的信息:"/>

    <TextView
        android:layout_width="match_parent"
        android:layout_height="wrap_content"
        android:id="@+id/tv_recv"/>
</LinearLayout>
2.MainActivity.java
package com.example.chenth.myapplication;

import android.os.Handler;
import android.support.v7.app.AppCompatActivity;
import android.os.Bundle;
import android.view.View;
import android.widget.Button;
import android.widget.EditText;
import android.widget.TextView;

import java.io.BufferedReader;
import java.io.BufferedWriter;
import java.io.IOException;
import java.io.InputStream;
import java.io.InputStreamReader;
import java.io.OutputStream;
import java.io.OutputStreamWriter;
import java.io.PrintWriter;
import java.net.Socket;

/*import com.example.chenth.myapplication.R;*/

public class MainActivity extends AppCompatActivity {

    private EditText et_send;
    private Button bt_send;
    private TextView tv_recv;

    private String send_buff=null;
    private String recv_buff=null;

    private Handler handler = null;

    Socket socket = null;

    @Override
    protected void onCreate(Bundle savedInstanceState) {
        super.onCreate(savedInstanceState);
        setContentView(R.layout.activity_main);

        initView();

        handler = new Handler();

        //单开一个线程来进行socket通信
        new Thread(new Runnable() {
            @Override
            public void run() {
                try {
                    socket = new Socket("192.168.12.1" , 7654);
                    if (socket!=null) {
                        System.out.println("###################");
                        while (true) {      //循环进行收发
                            recv();
                            send();
                            Thread.sleep(50);
                        }
                    }
                    else
                        System.out.println("socket is null");
                } catch (Exception e) {
                    e.printStackTrace();
                }
            }
        }).start();
        send();
    }


    private void recv() {

        //单开一个线程循环接收来自服务器端的消息
        InputStream inputStream = null;
        try {
            inputStream = socket.getInputStream();
        } catch (IOException e) {
            e.printStackTrace();
        }

        if (inputStream!=null){
            try {
                byte[] buffer = new byte[1024];
                int count = inputStream.read(buffer);//count是传输的字节数
                recv_buff = new String(buffer);//socket通信传输的是byte类型,需要转为String类型
                System.out.println(recv_buff);

            } catch (IOException e) {
                e.printStackTrace();
            }
        }
        //将受到的数据显示在TextView上
        if (recv_buff!=null){
            handler.post(runnableUi);

        }
    }

    //不能在子线程中刷新UI,应为textView是主线程建立的
    Runnable runnableUi = new Runnable() {
        @Override
        public void run() {
            tv_recv.append("n"+recv_buff);
        }
    };

    private void send() {
        bt_send.setOnClickListener(new View.OnClickListener() {
            @Override
            public void onClick(View v) {
                new Thread(new Runnable() {
                    @Override
                    public void run() {
                        send_buff = et_send.getText().toString();
                        //向服务器端发送消息
                        System.out.println("------------------------");
                        OutputStream outputStream=null;
                        try {
                            outputStream = socket.getOutputStream();
                        } catch (IOException e) {
                            e.printStackTrace();
                        }

                        if(outputStream!=null){
                            try {
                                outputStream.write(send_buff.getBytes());
                                System.out.println("1111111111111111111111");
                                outputStream.flush();
                            } catch (IOException e) {
                                e.printStackTrace();
                            }
                        }

                    }
                }).start();

            }
        });
    }

    private void initView() {
        et_send = (EditText) findViewById(R.id.et_send);
        bt_send = (Button) findViewById(R.id.bt_send);
        tv_recv = (TextView) findViewById(R.id.tv_recv);
    }
}
3. AndroidManifest.xml
主要是增加了网络访问权限:
<uses-permission android:name="android.permission.INTERNET"/><?xml version="1.0" encoding="utf-8"?>
<manifest xmlns:android="http://schemas.android.com/apk/res/android"
package="com.example.chenth.myapplication">
<uses-permission android:name="android.permission.INTERNET"/>
<application
android:allowBackup="true"
android:icon="@mipmap/ic_launcher"
android:label="@string/app_name"
android:roundIcon="@mipmap/ic_launcher_round"
android:supportsRtl="true"
android:theme="@style/AppTheme">
<activity
android:name=".MainActivity"
android:label="@string/app_name">
<intent-filter>
<action android:name="android.intent.action.MAIN" />
<category android:name="android.intent.category.LAUNCHER" />
</intent-filter>
</activity>
</application>
</manifest>这里有几个地方需要特别注意:
1、创建socket时需要开一个子线程,而不能直接在主线程中完成,否则会报错
2、当接收来自树莓派服务器的消息时,需要刷新TextView,而刷新TextView的操作不能直接在子线程中完成,需要用Handler来实现,否则会报错,提示view只能由源线程来更改
整个项目需要先启动树莓派,然后手机连上树莓派的WIFI热点,如果想要查看树莓派的输出信息,则可以利用window的远程桌面连接树莓派,也可以用putty这个软件进行命令行控制,当然,有条件的完全可以用HDMI接口给你的树莓派连一个显示器
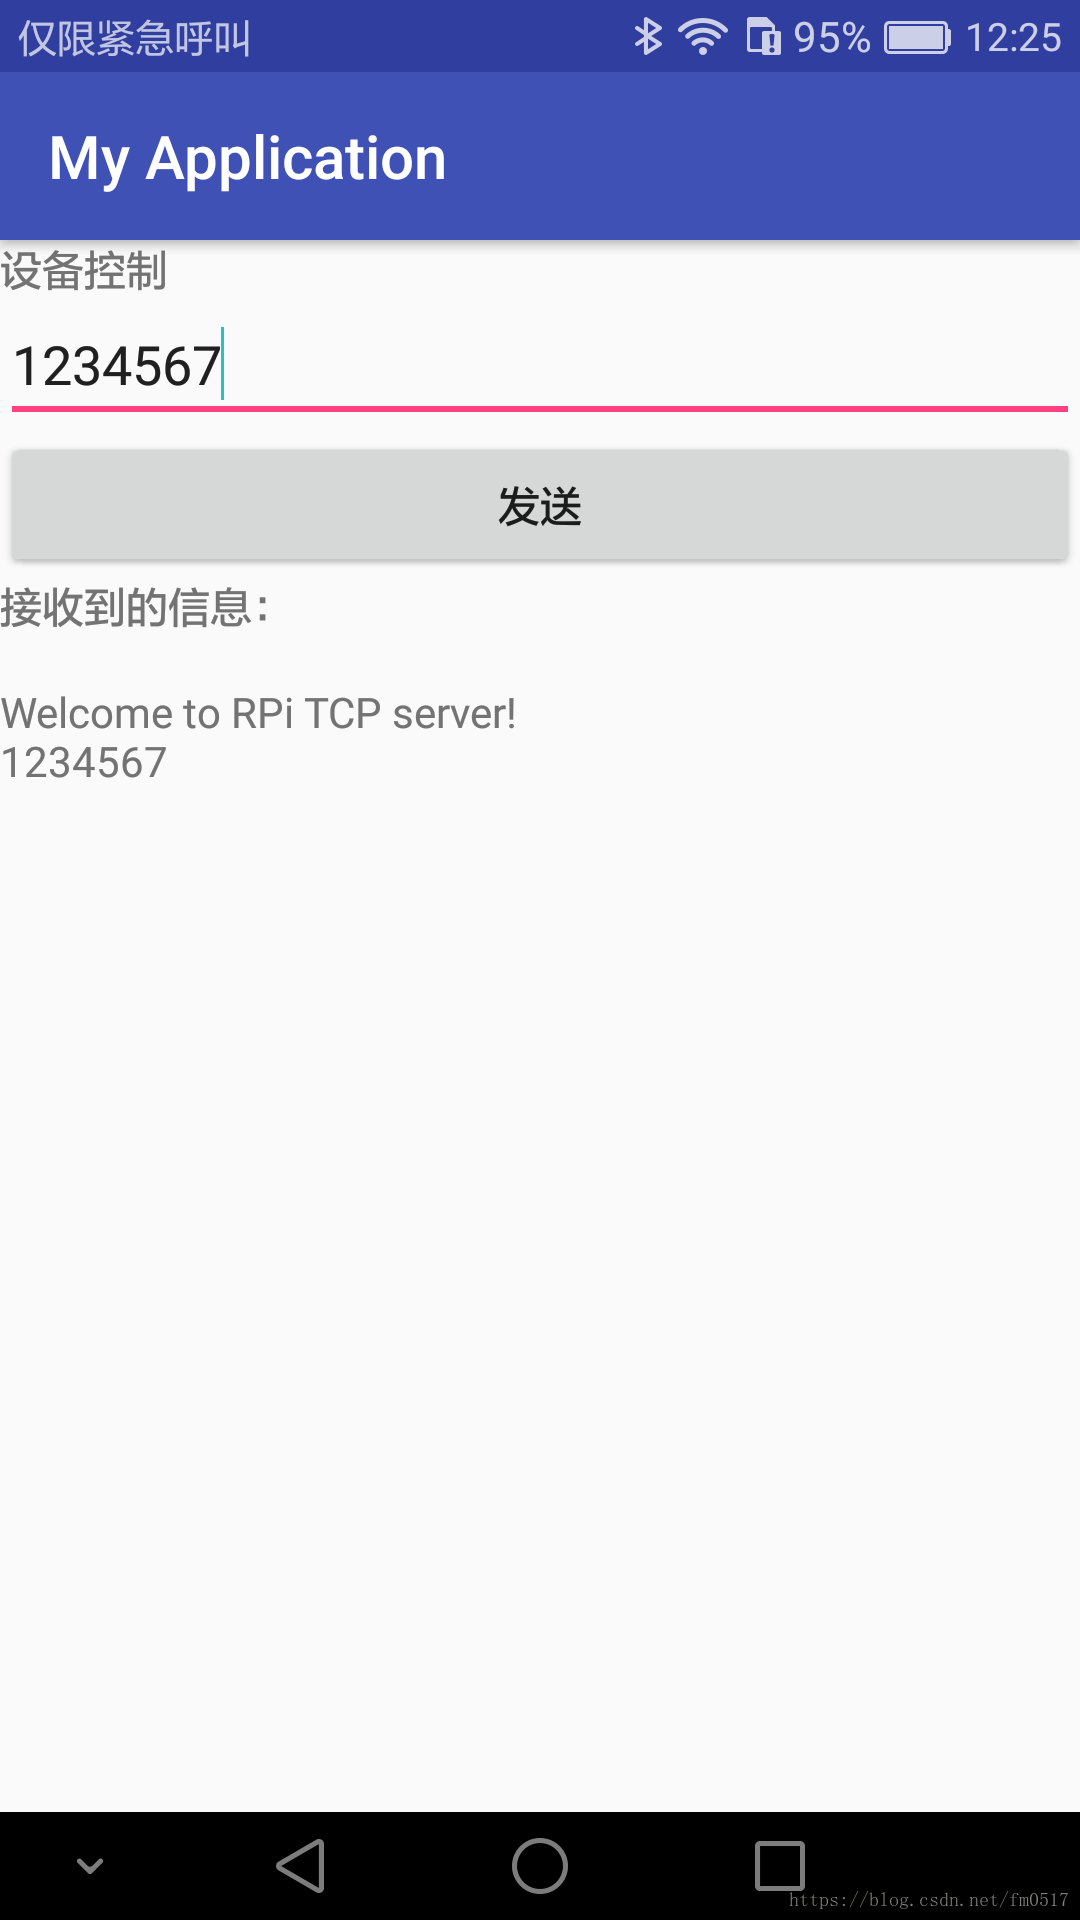
最后上图:
图1.树莓派上的程序运行:

图2.手机上的程序运行:

最后
以上就是沉默母鸡最近收集整理的关于树莓派与Android客户端进行socket通信的全部内容,更多相关树莓派与Android客户端进行socket通信内容请搜索靠谱客的其他文章。
本图文内容来源于网友提供,作为学习参考使用,或来自网络收集整理,版权属于原作者所有。


发表评论 取消回复