我是靠谱客的博主 温婉超短裙,这篇文章主要介绍新版本onenet如何创建应用(温湿度折线图为例)1.由于新版本onenet不能使用新增应用功能,只能使用数据可视化view。2.新建项目3.编辑view4.添加图表5.数据选择6.创建数据源7.查看数据处理结果8.进行样式设置(设置好就可以看到大概效果)9.湿度也是同样设置(设置好并保存)10.发布作品11.通过发布作品的链接访问view12.效果展示13.图表的属性(颜色、大小等可以在样式中自行设置),现在分享给大家,希望可以做个参考。
1.由于新版本onenet不能使用新增应用功能,只能使用数据可视化view。

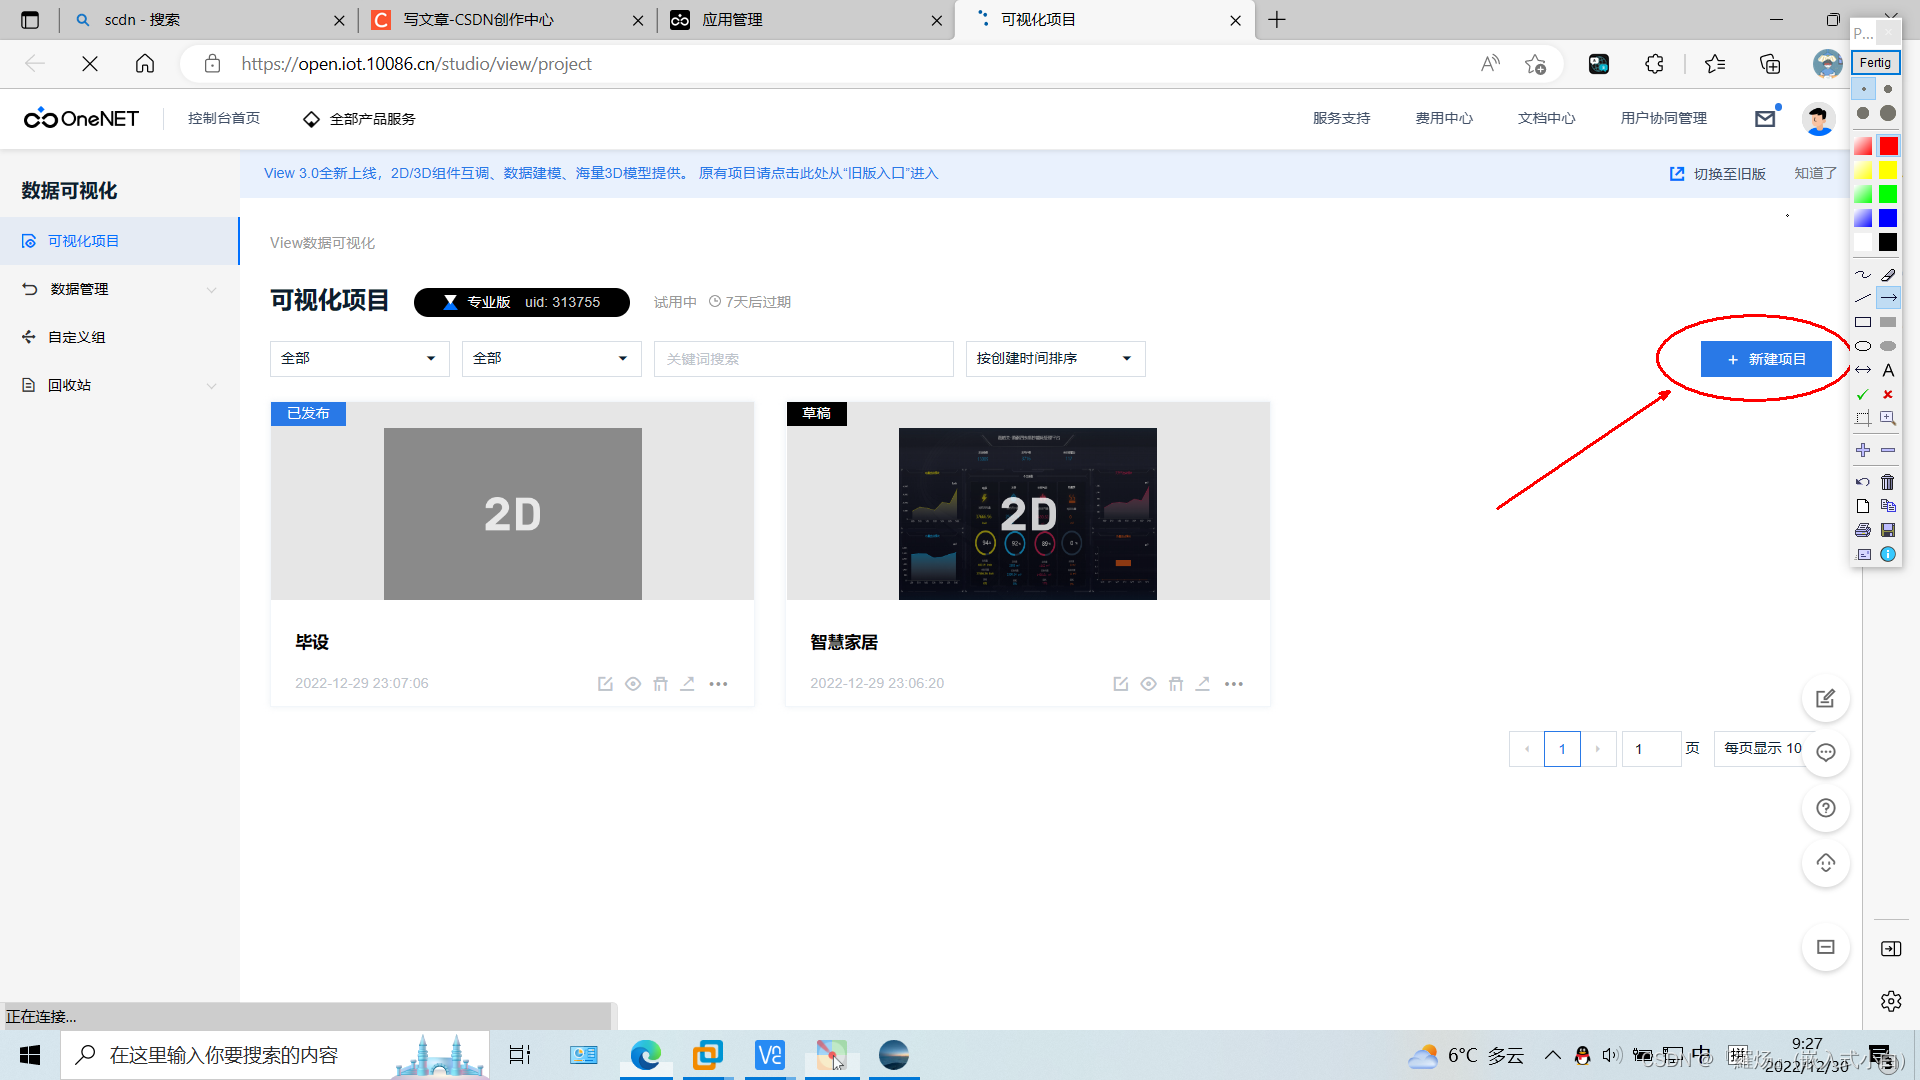
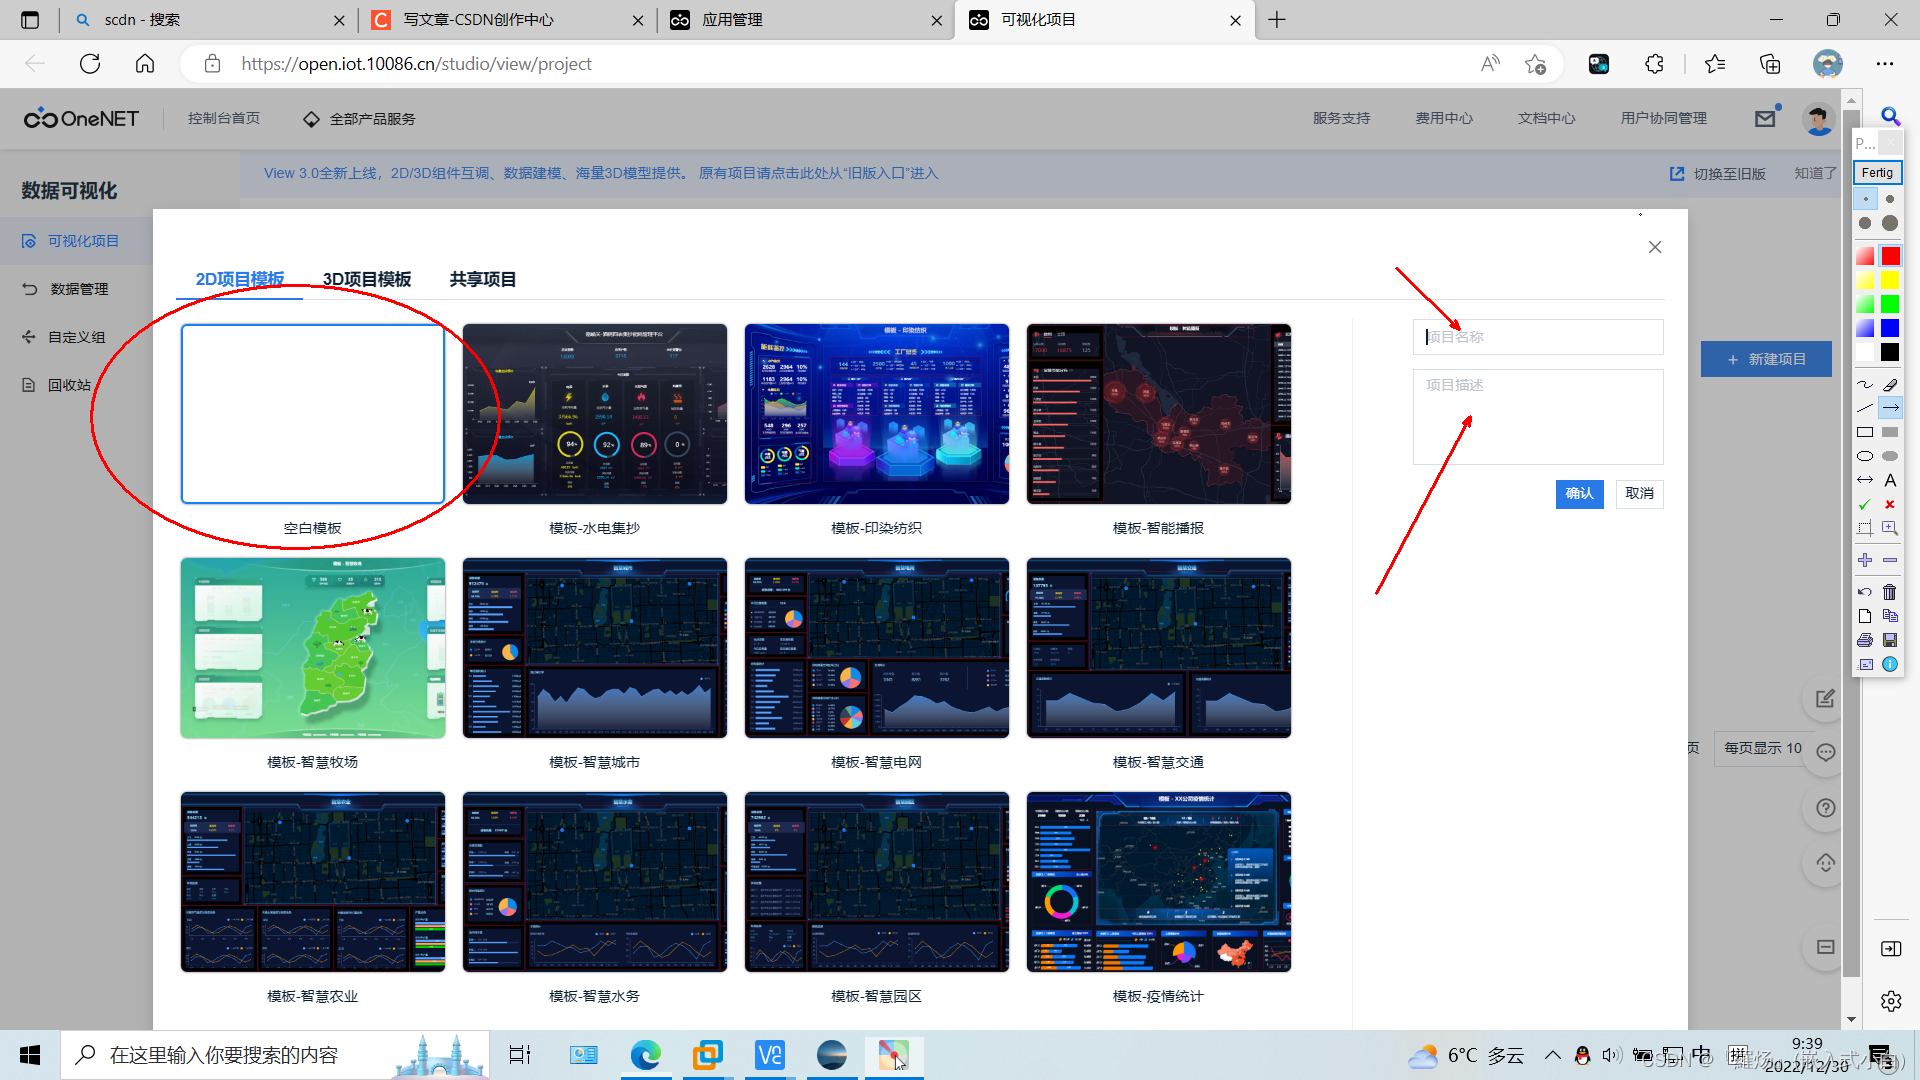
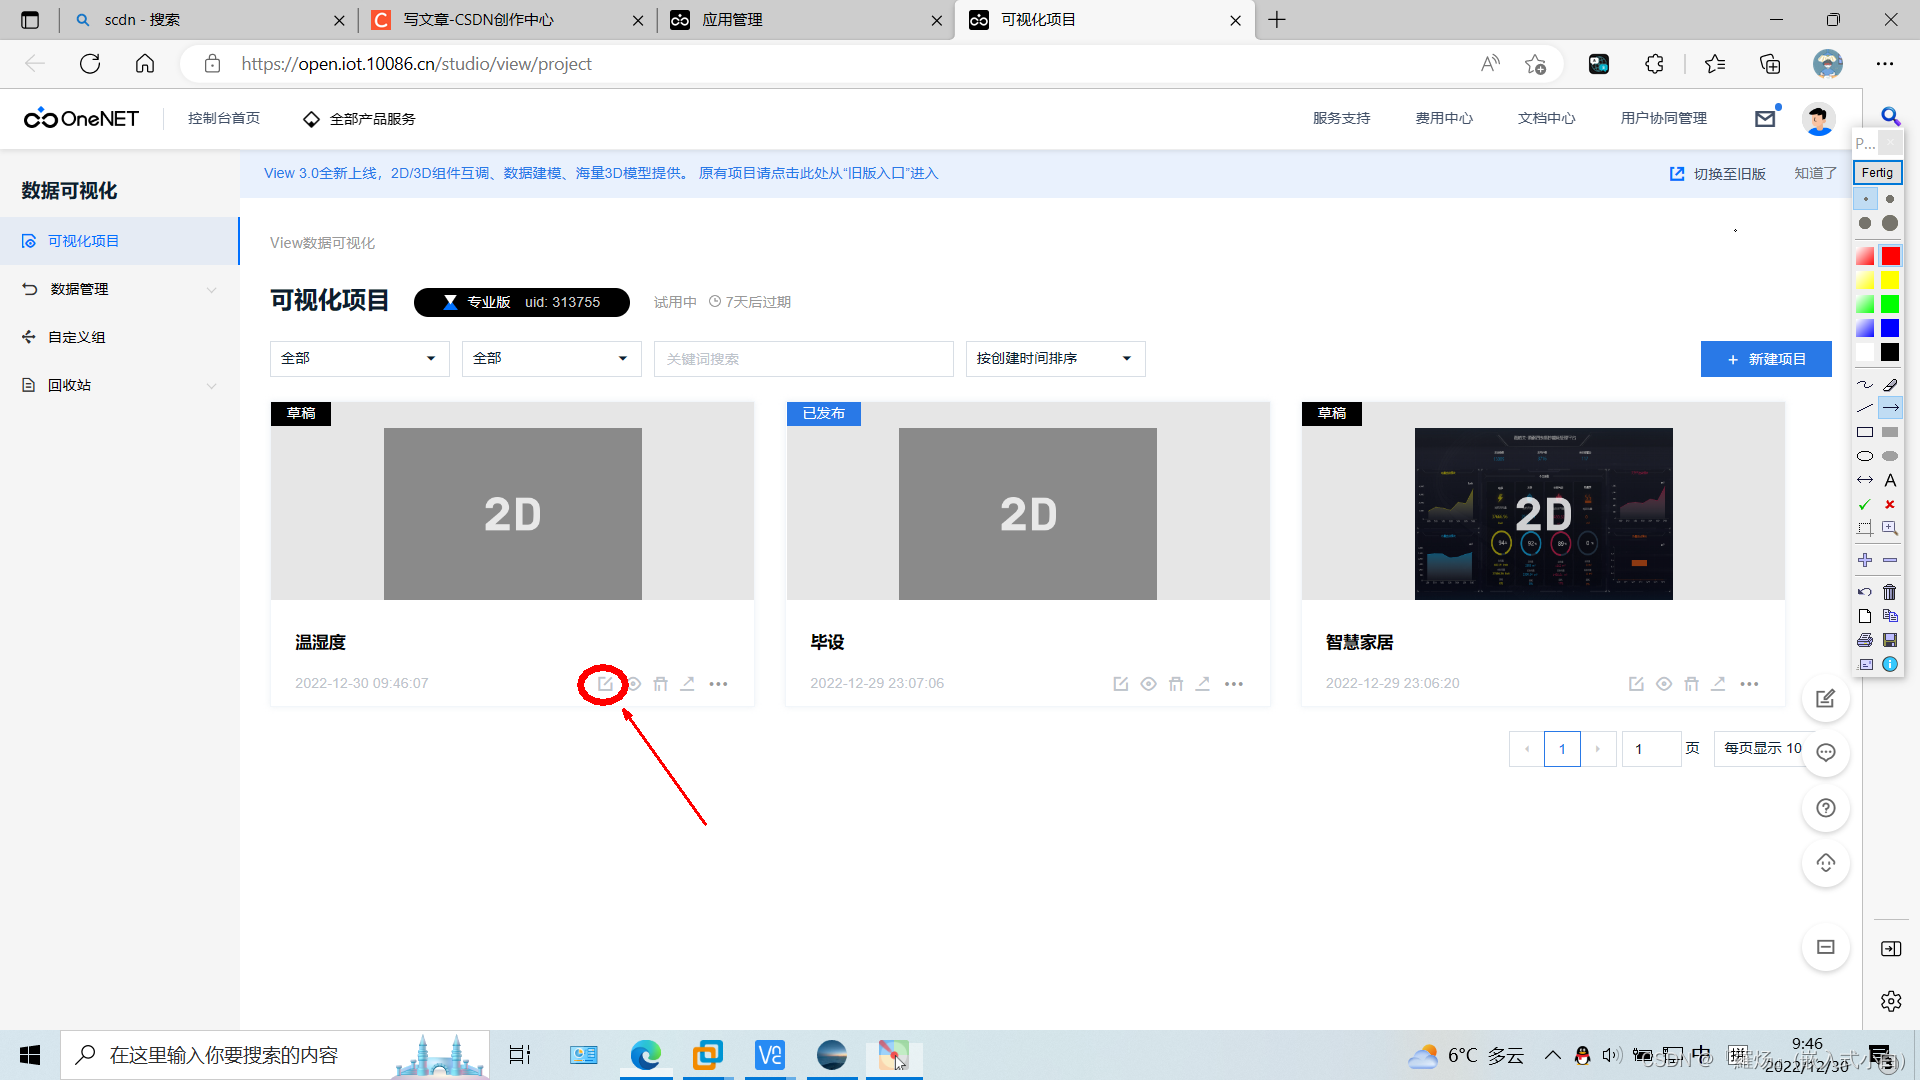
2.新建项目
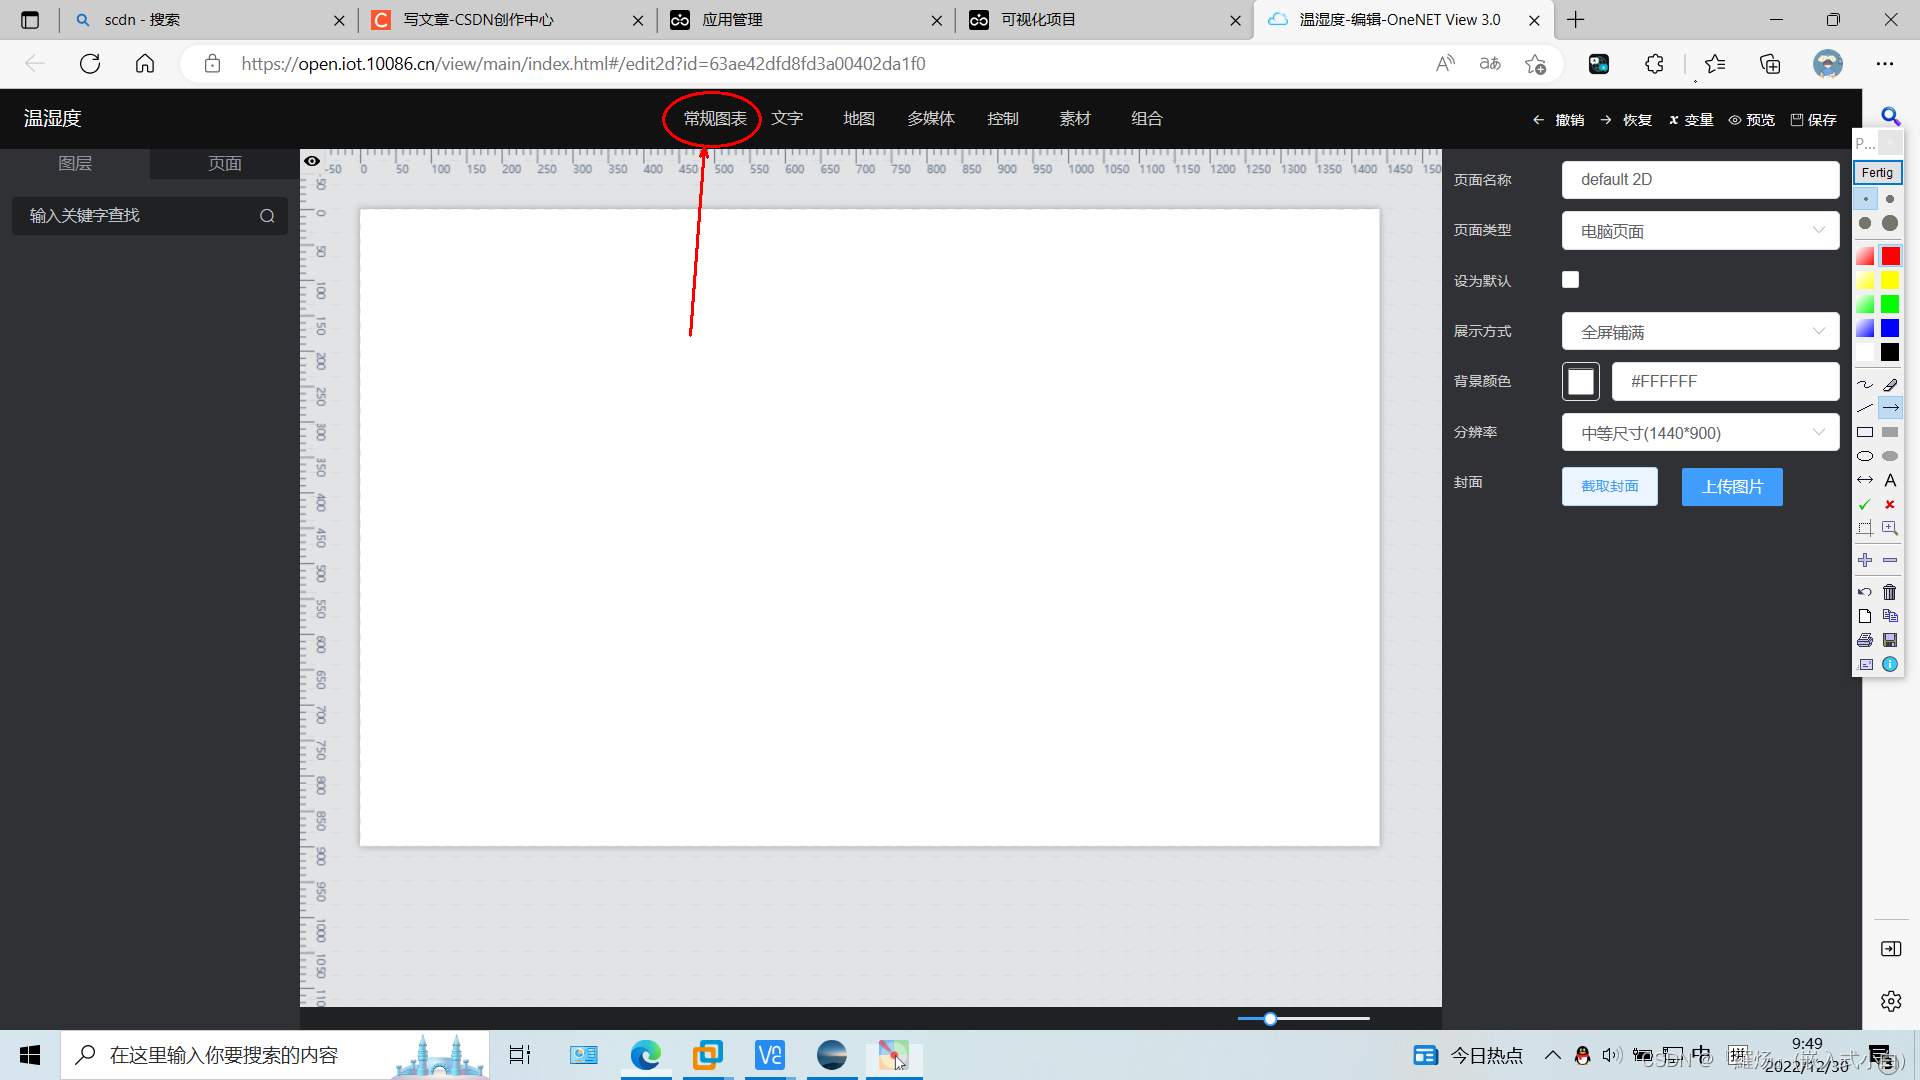
3.编辑view
4.添加图表
5.数据选择
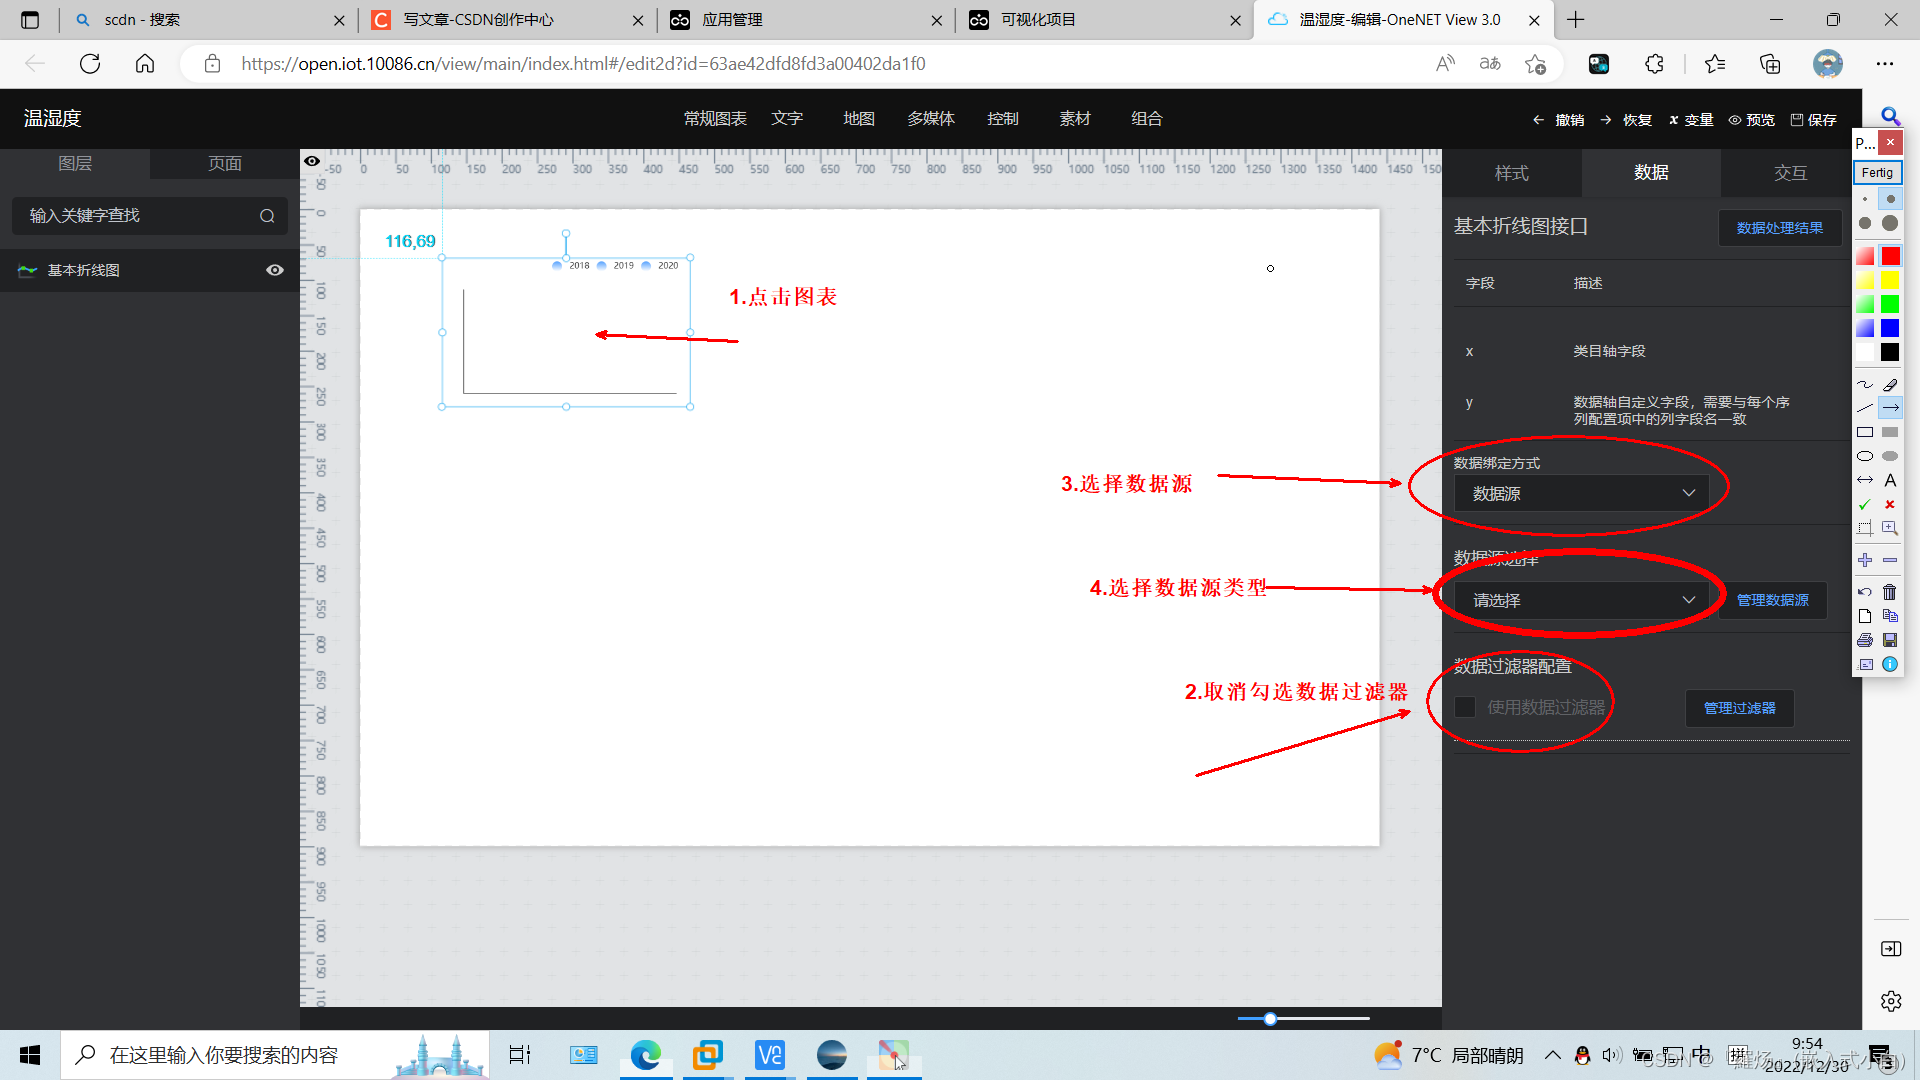
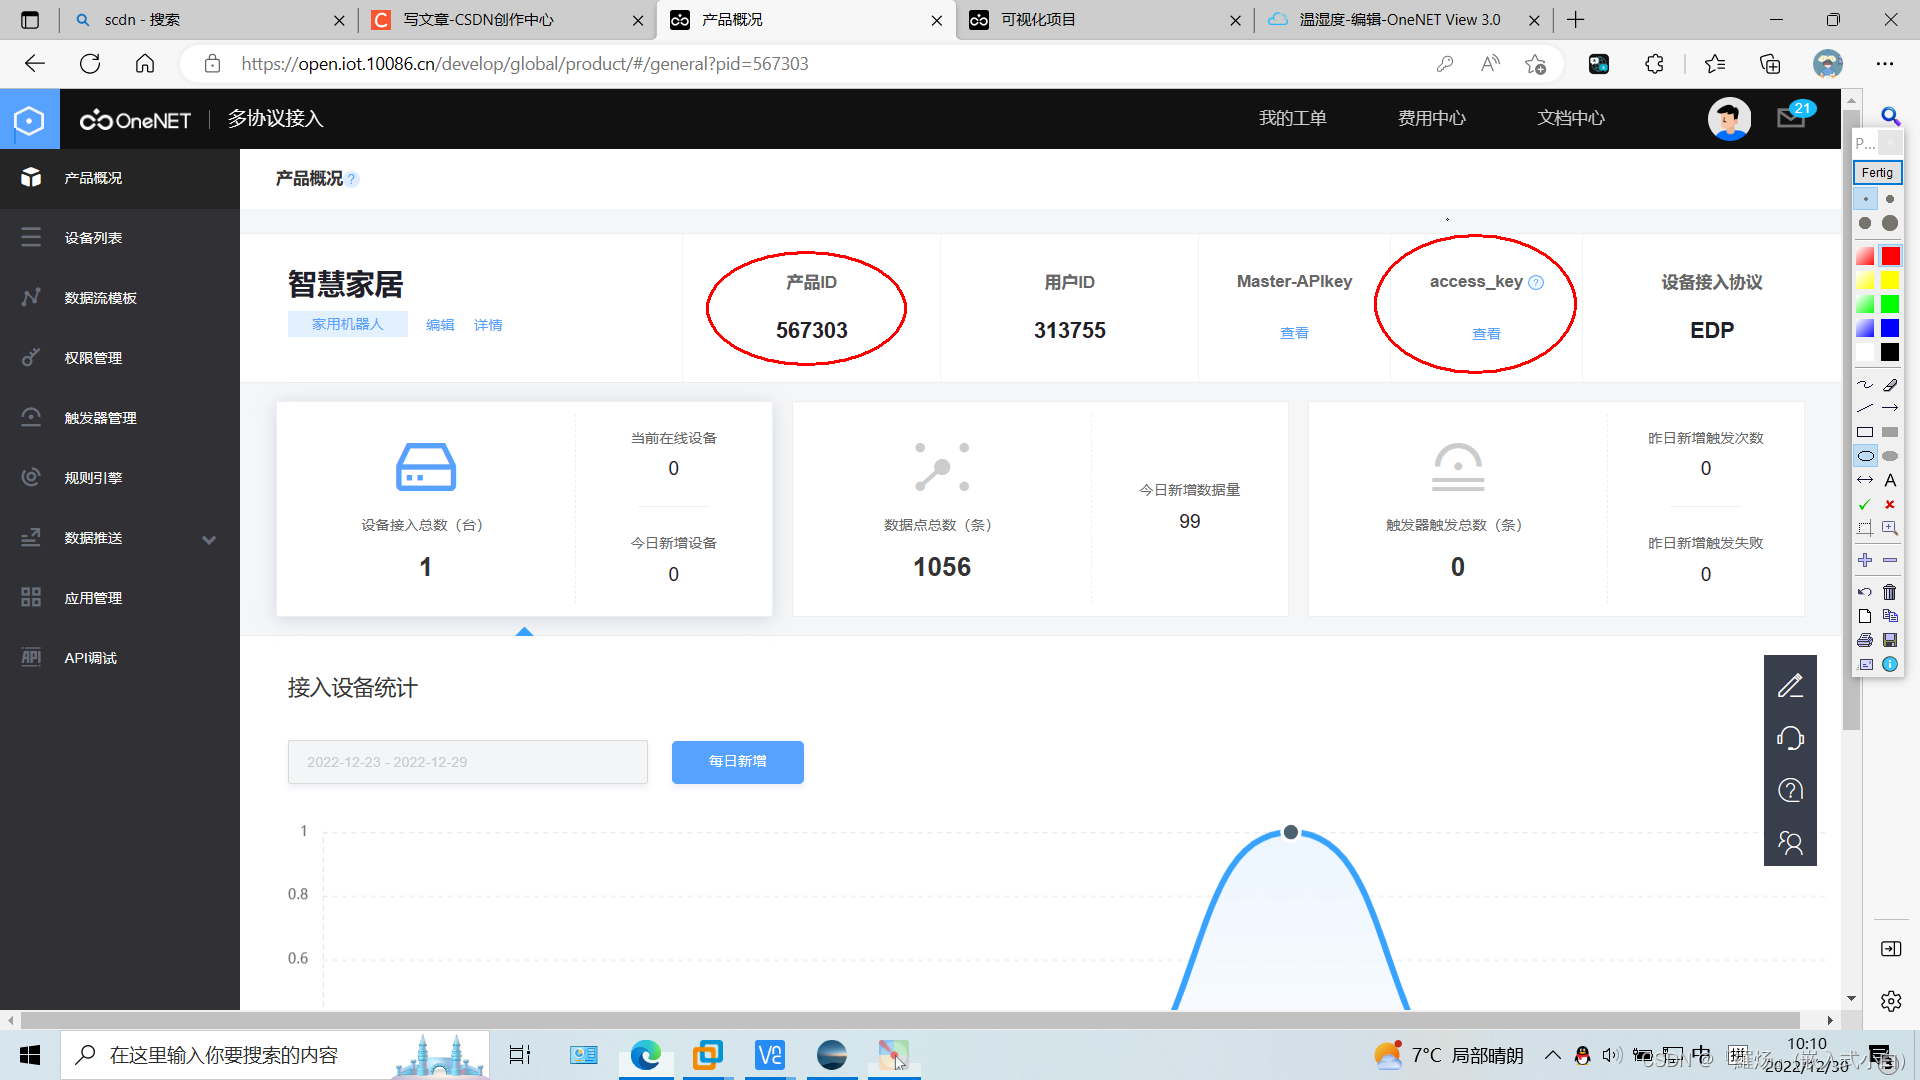
6.创建数据源

产品id以及key对应值
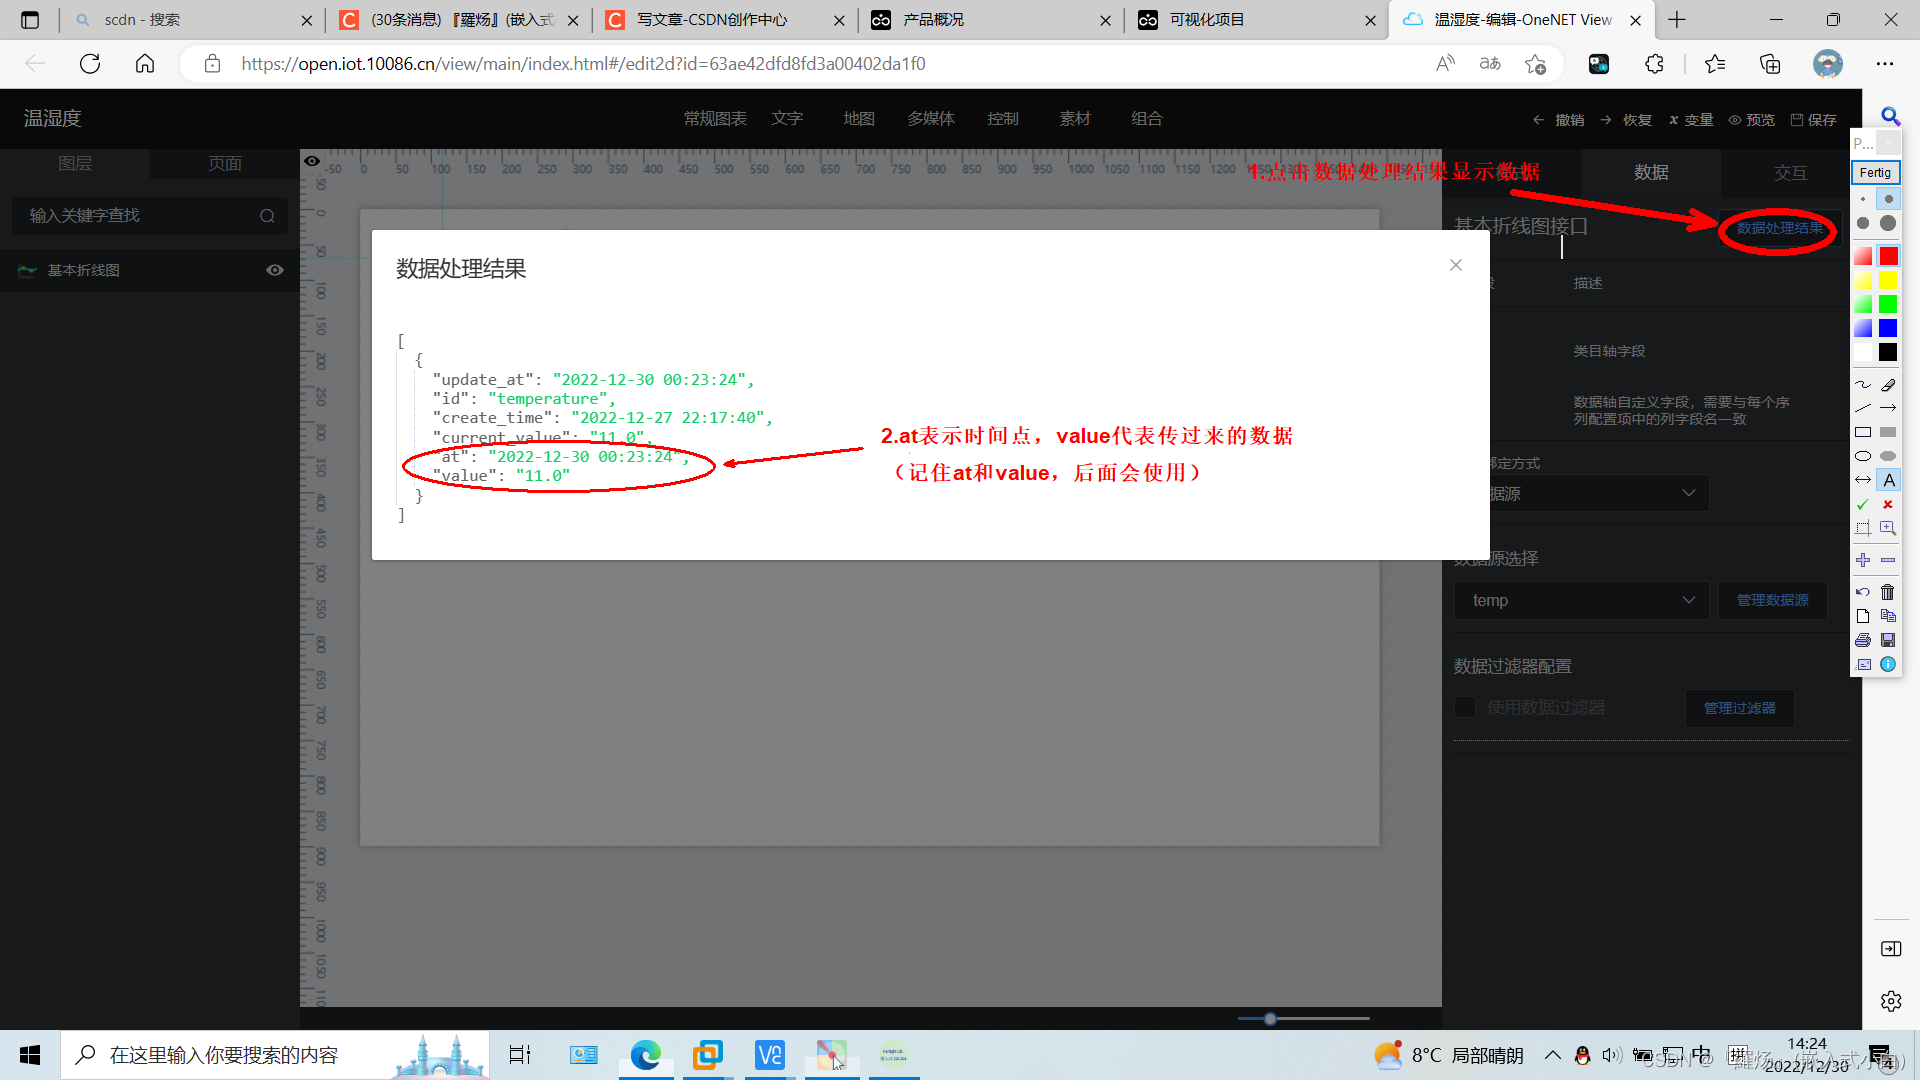
7.查看数据处理结果
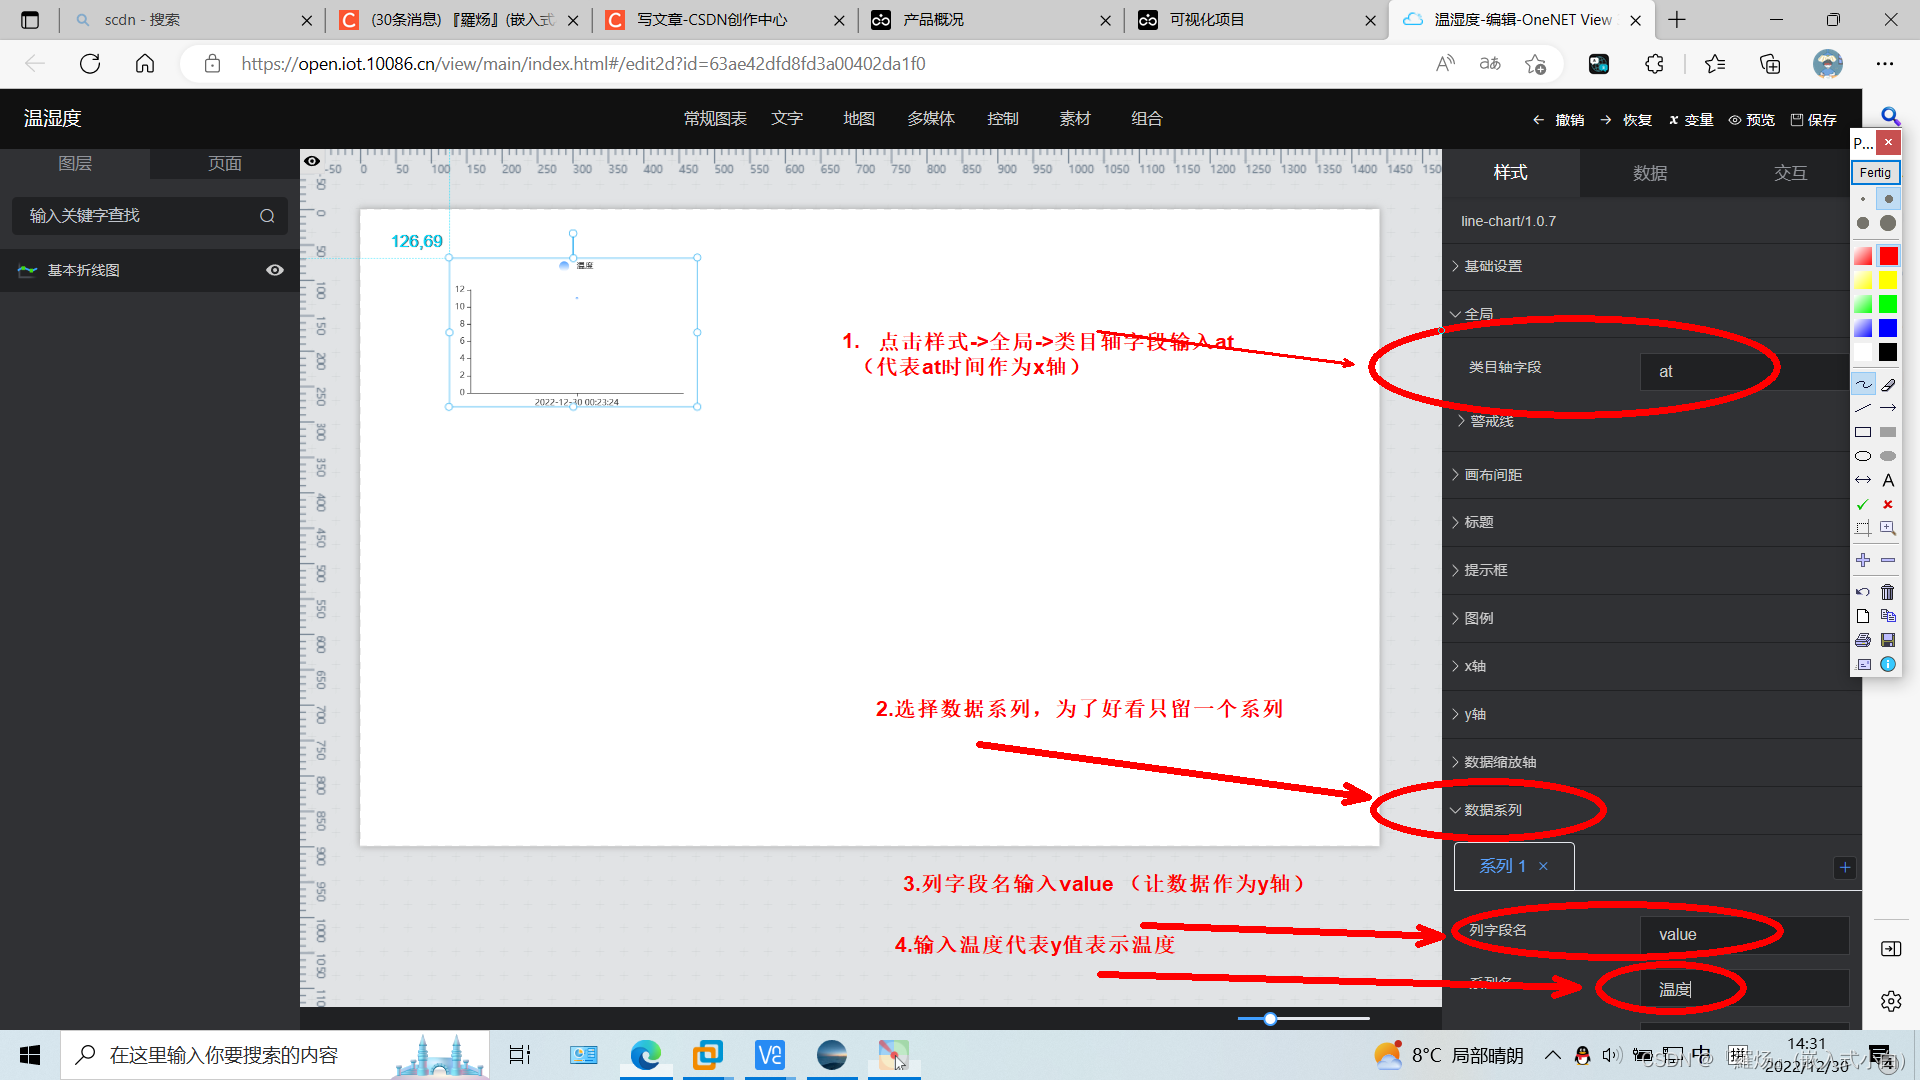
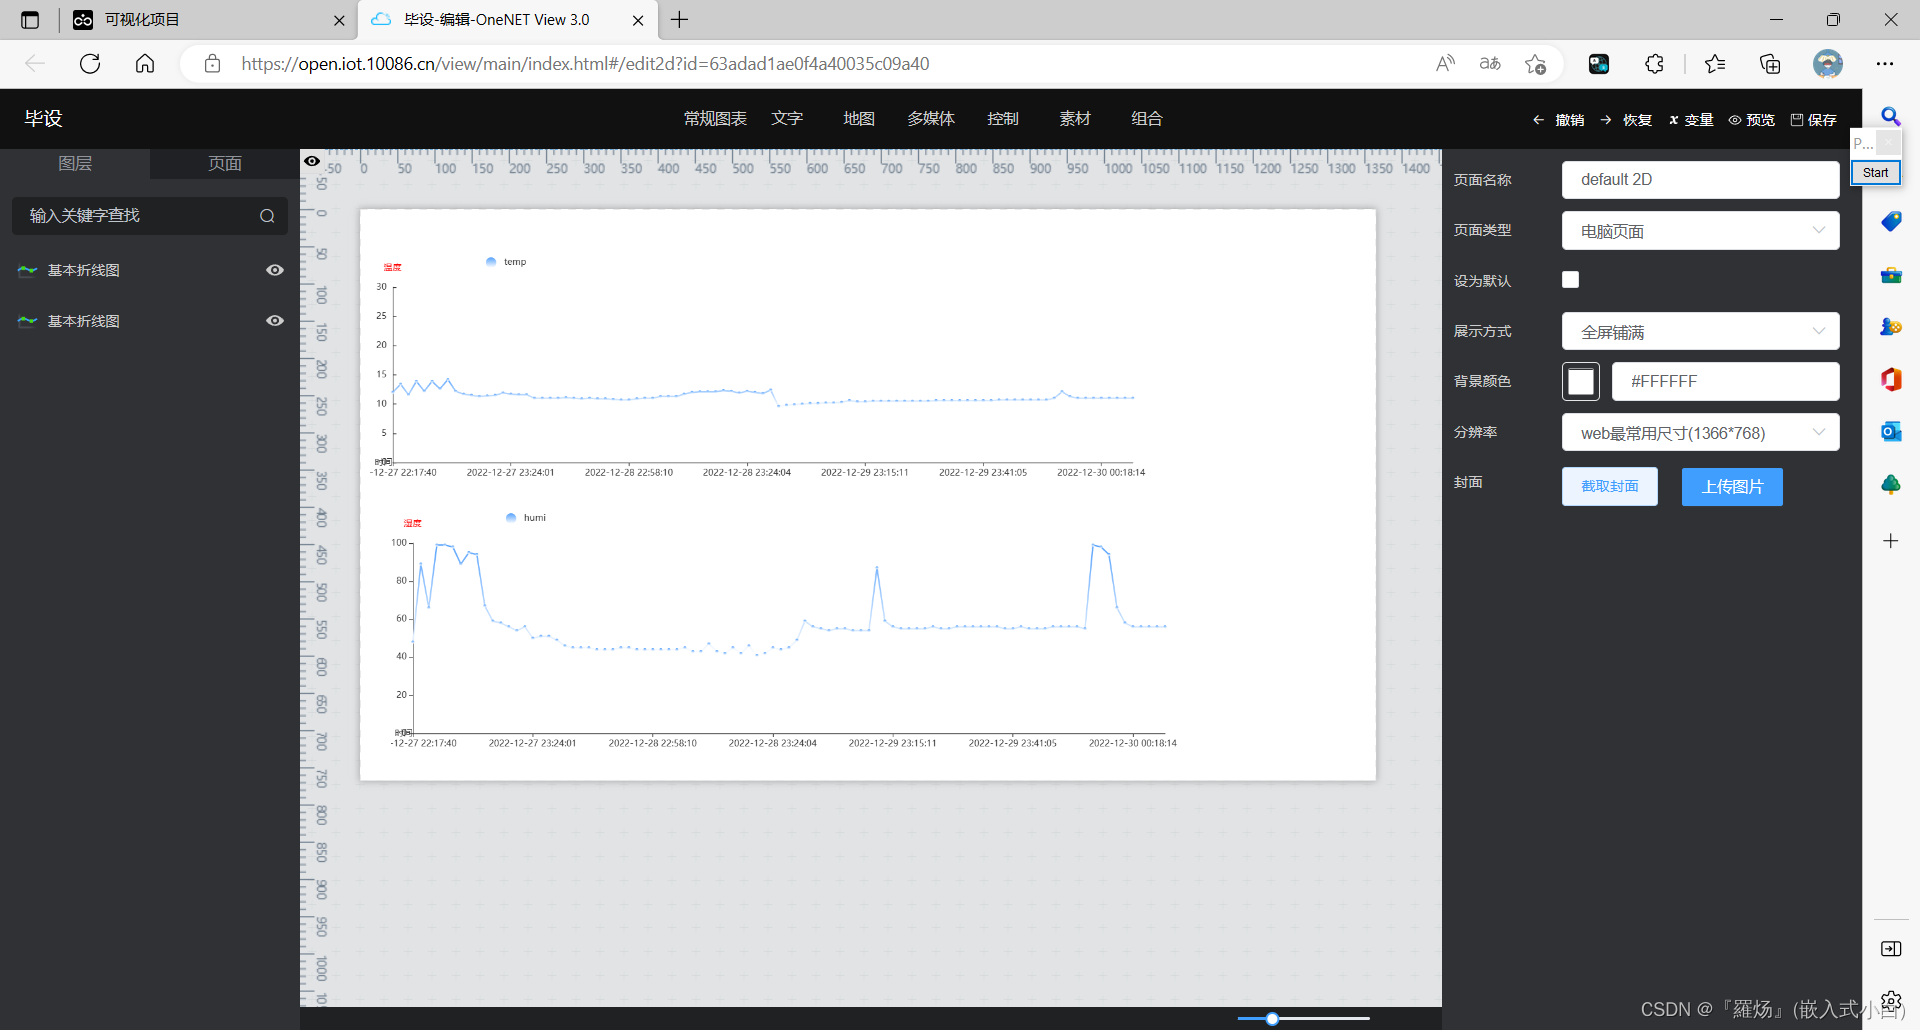
8.进行样式设置(设置好就可以看到大概效果)
9.湿度也是同样设置(设置好并保存)
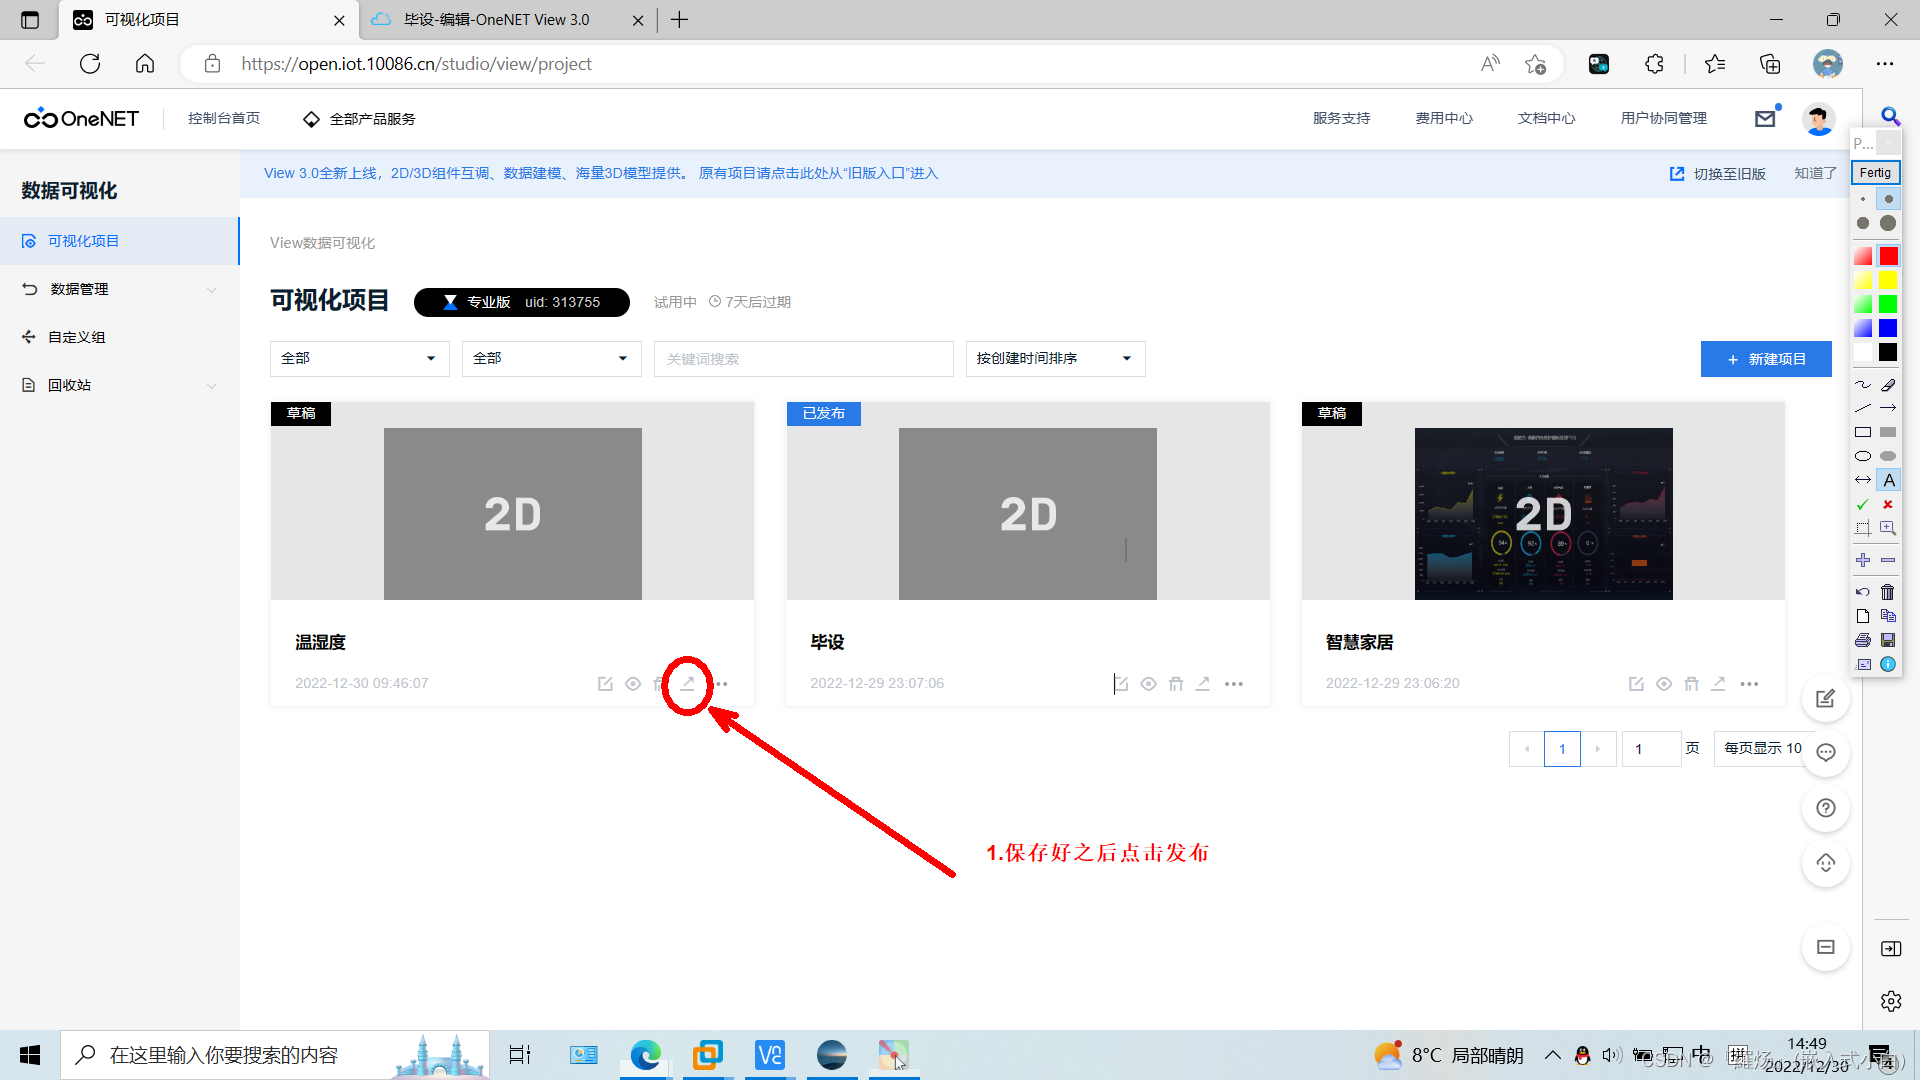
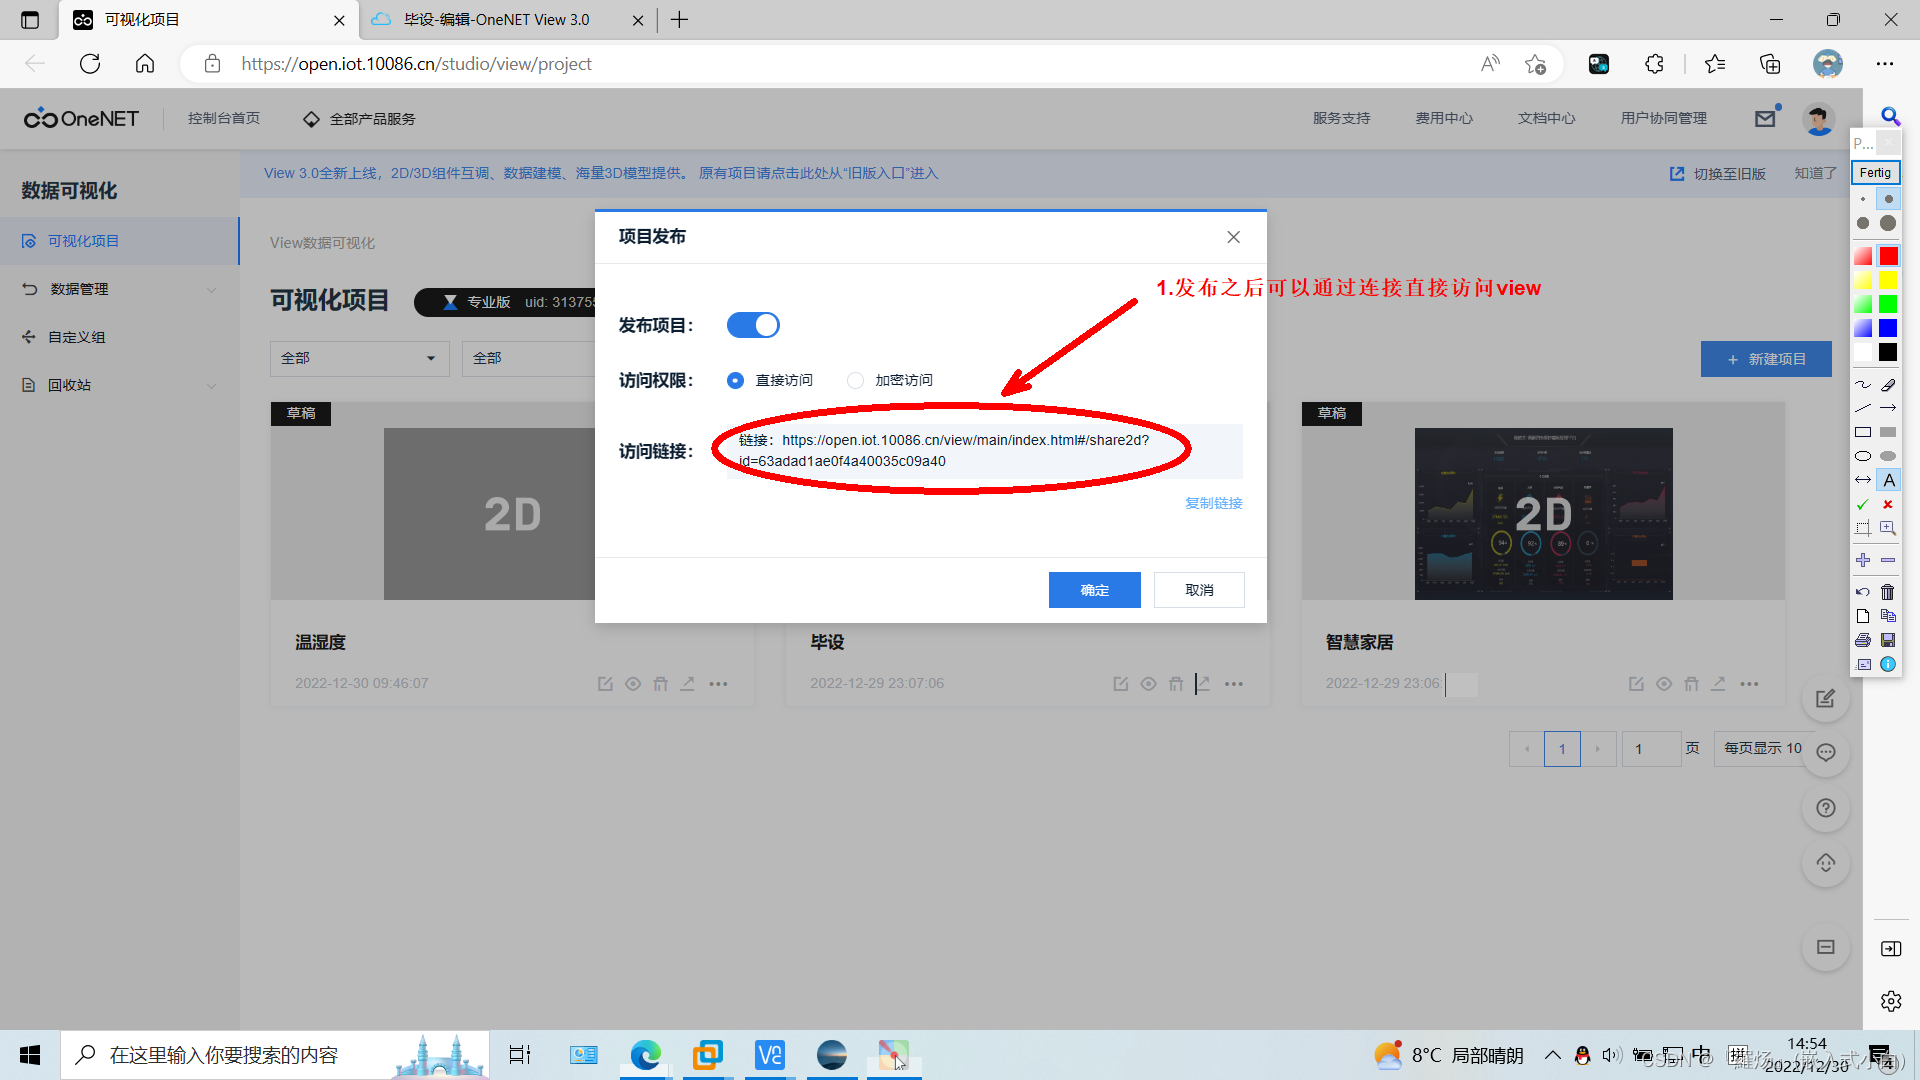
10.发布作品
11.通过发布作品的链接访问view
12.效果展示
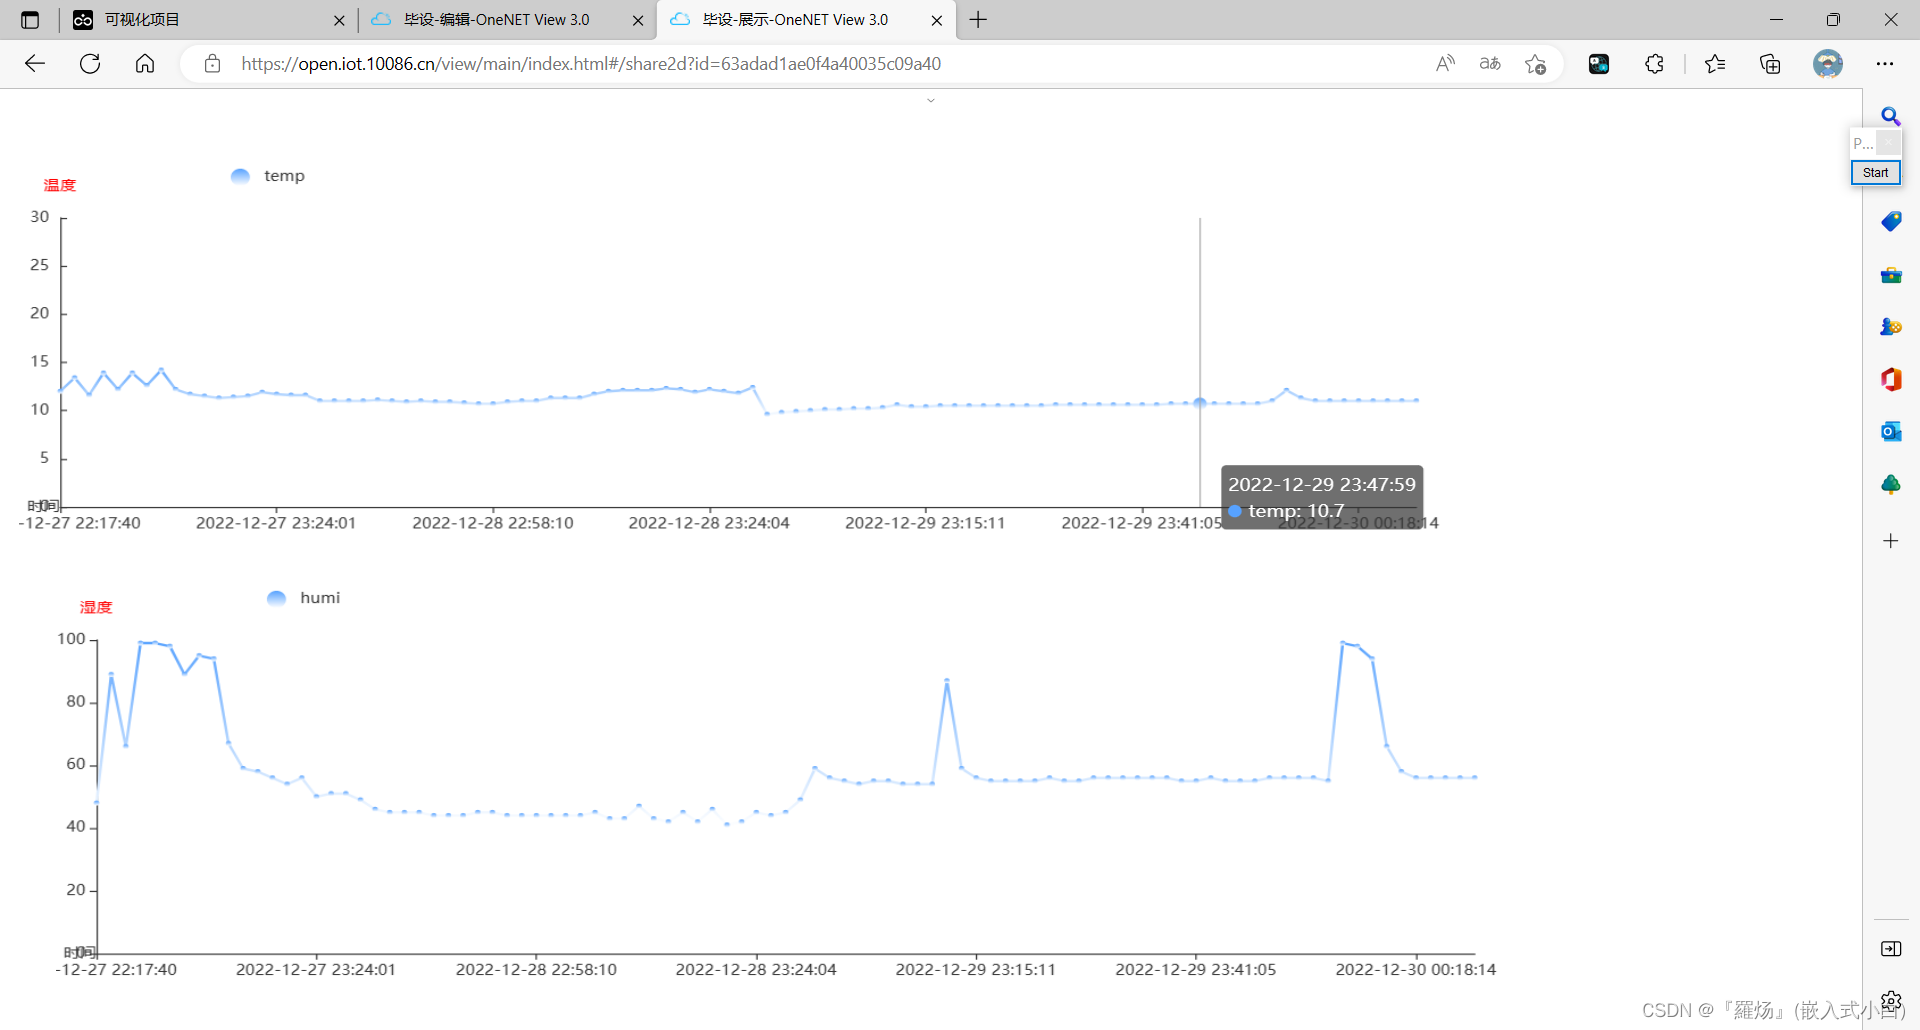
13.图表的属性(颜色、大小等可以在样式中自行设置)
最后
以上就是温婉超短裙最近收集整理的关于新版本onenet如何创建应用(温湿度折线图为例)1.由于新版本onenet不能使用新增应用功能,只能使用数据可视化view。2.新建项目3.编辑view4.添加图表5.数据选择6.创建数据源7.查看数据处理结果8.进行样式设置(设置好就可以看到大概效果)9.湿度也是同样设置(设置好并保存)10.发布作品11.通过发布作品的链接访问view12.效果展示13.图表的属性(颜色、大小等可以在样式中自行设置)的全部内容,更多相关新版本onenet如何创建应用(温湿度折线图为例)1.由于新版本onenet不能使用新增应用功能,只能使用数据可视化view。2.新建项目3.编辑view4.添加图表5.数据选择6.创建数据源7.查看数据处理结果8.进行样式设置(设置好就可以看到大概效果)9.湿度也是同样设置(设置好并保存)10.发布作品11.通过发布作品内容请搜索靠谱客的其他文章。
本图文内容来源于网友提供,作为学习参考使用,或来自网络收集整理,版权属于原作者所有。


发表评论 取消回复