
最终效果:

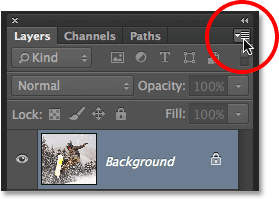
1、 将原素材图片转换为智能对象:


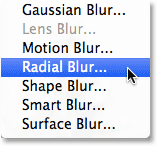
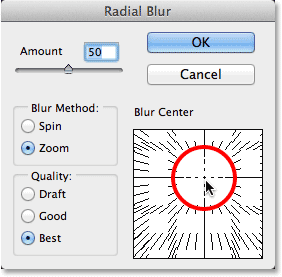
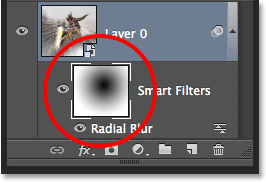
滤镜→模糊→径向模糊,设置如下红色圆圈内数据:


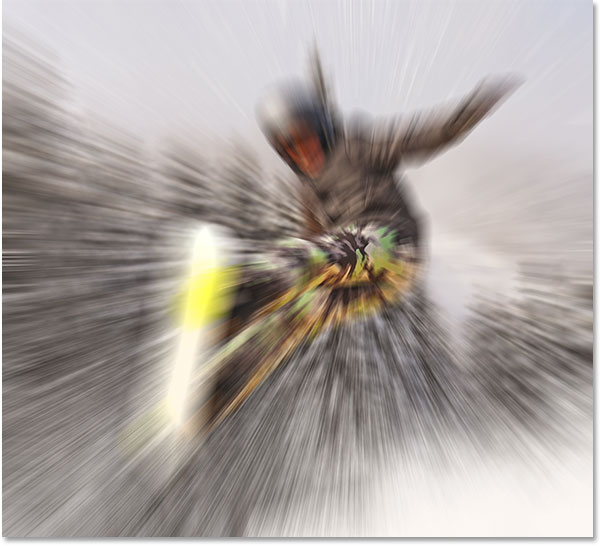
上面的模糊似乎还不是很完美,打开面板把中心点往上调一点:
 1/2 1 2 下一页 尾页赞


双击所示图标,不透明度数值设置为55%


最后
以上就是爱听歌曲奇最近收集整理的关于PS简单几步为滑雪者创造冲击力震撼的动感效果的全部内容,更多相关PS简单几步为滑雪者创造冲击力震撼内容请搜索靠谱客的其他文章。
本图文内容来源于网友提供,作为学习参考使用,或来自网络收集整理,版权属于原作者所有。
最终效果:
1/2 1 2 下一页 尾页赞
以上就是爱听歌曲奇最近收集整理的关于PS简单几步为滑雪者创造冲击力震撼的动感效果的全部内容,更多相关PS简单几步为滑雪者创造冲击力震撼内容请搜索靠谱客的其他文章。


发表评论 取消回复