- idea新建项目
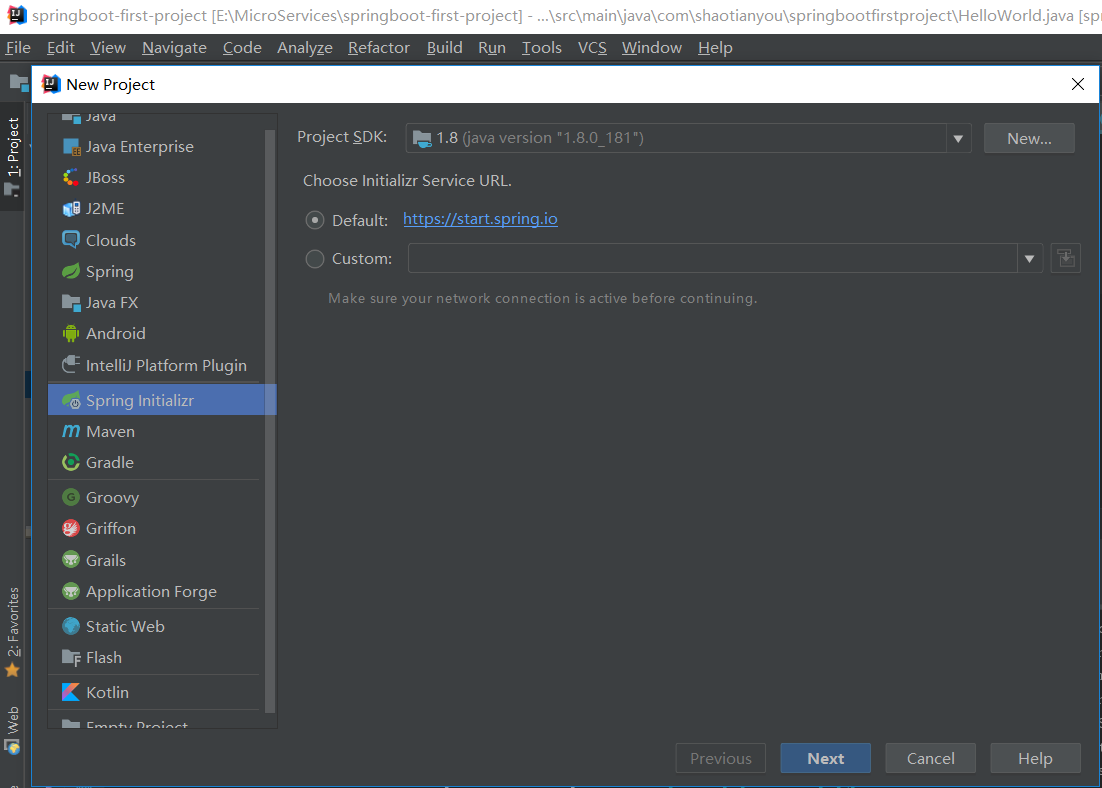
- 点击next
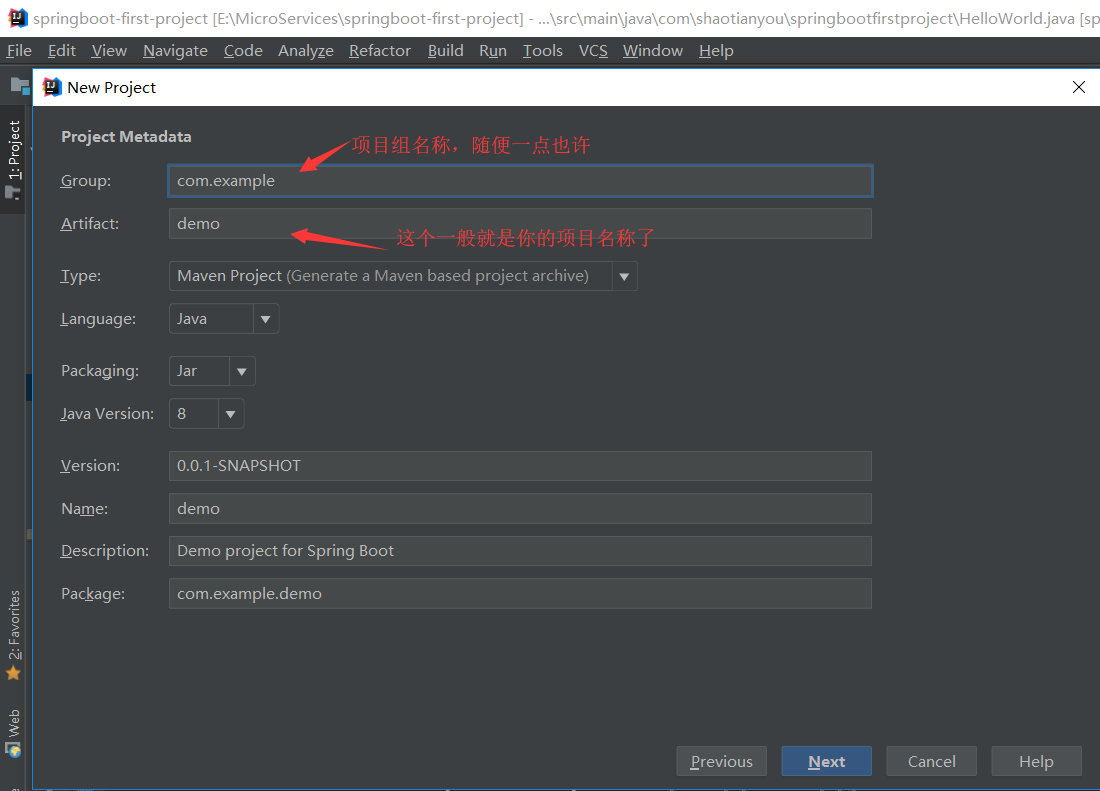
- 点击next
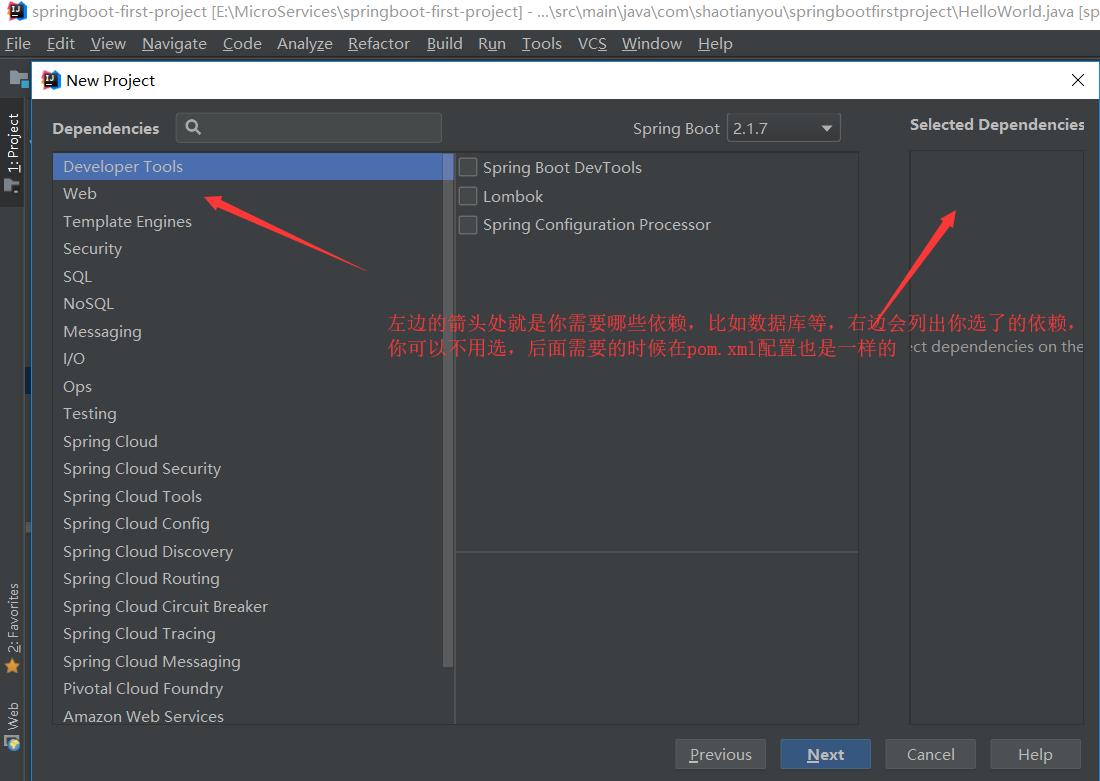
- 点击next
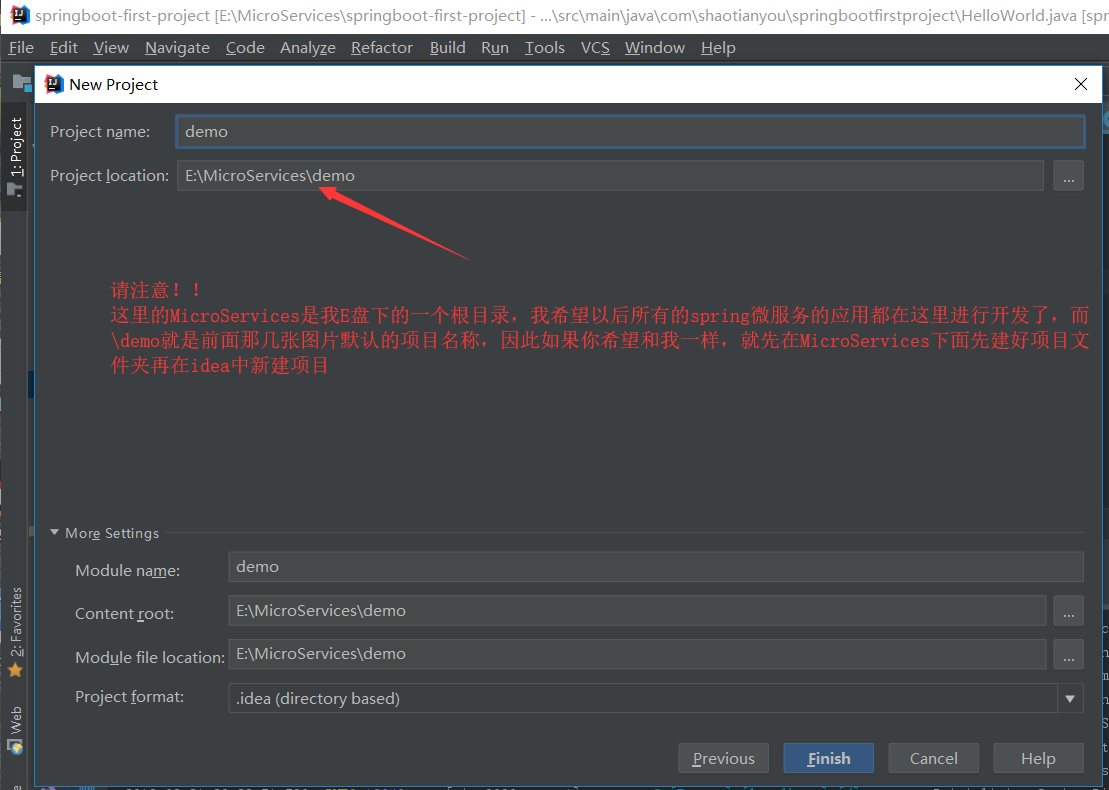
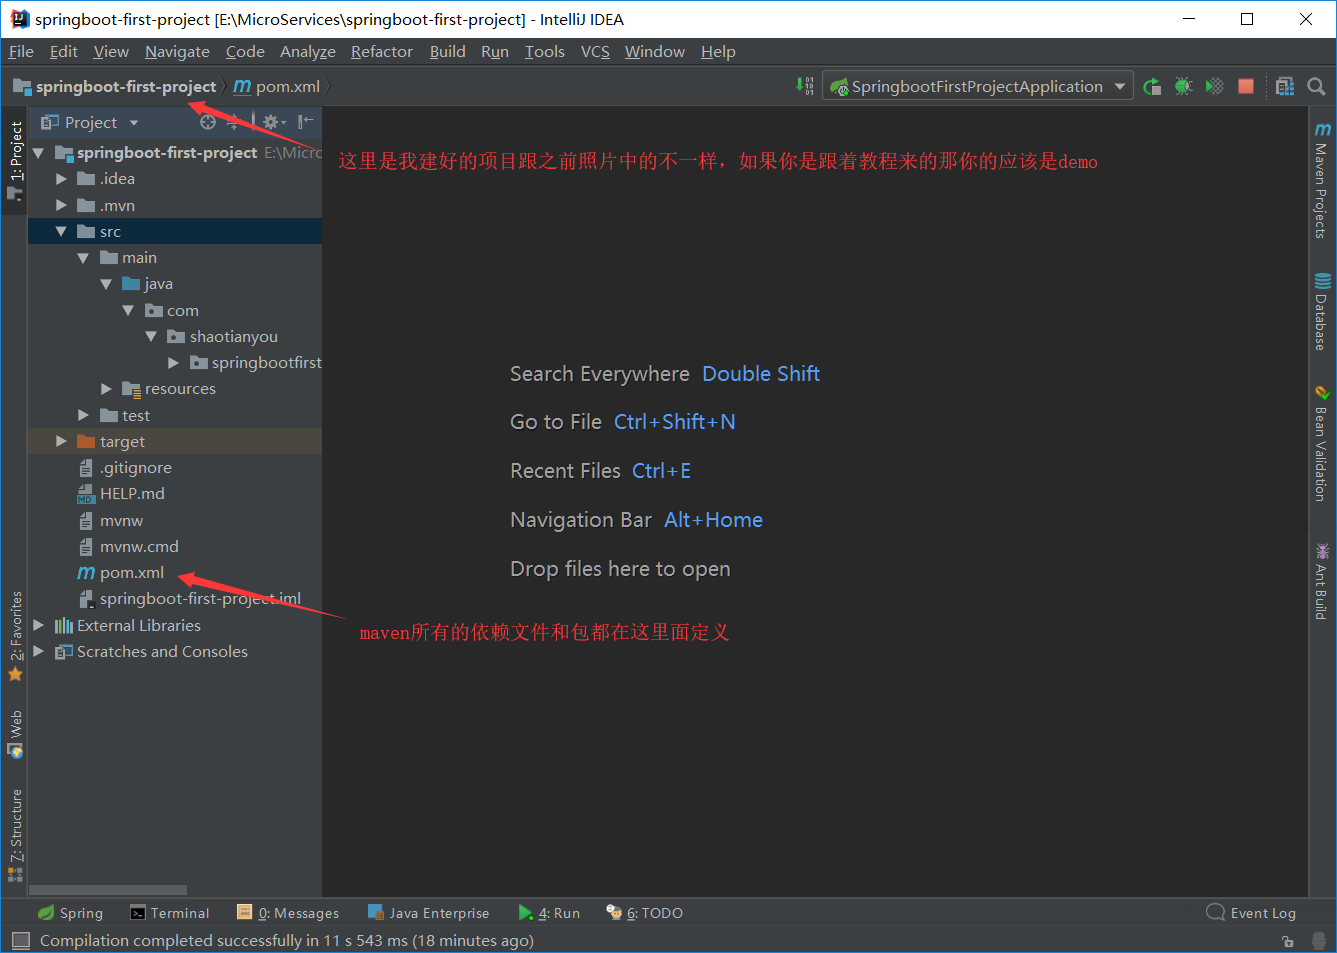
- 点击finish,看是否和我生成的一样
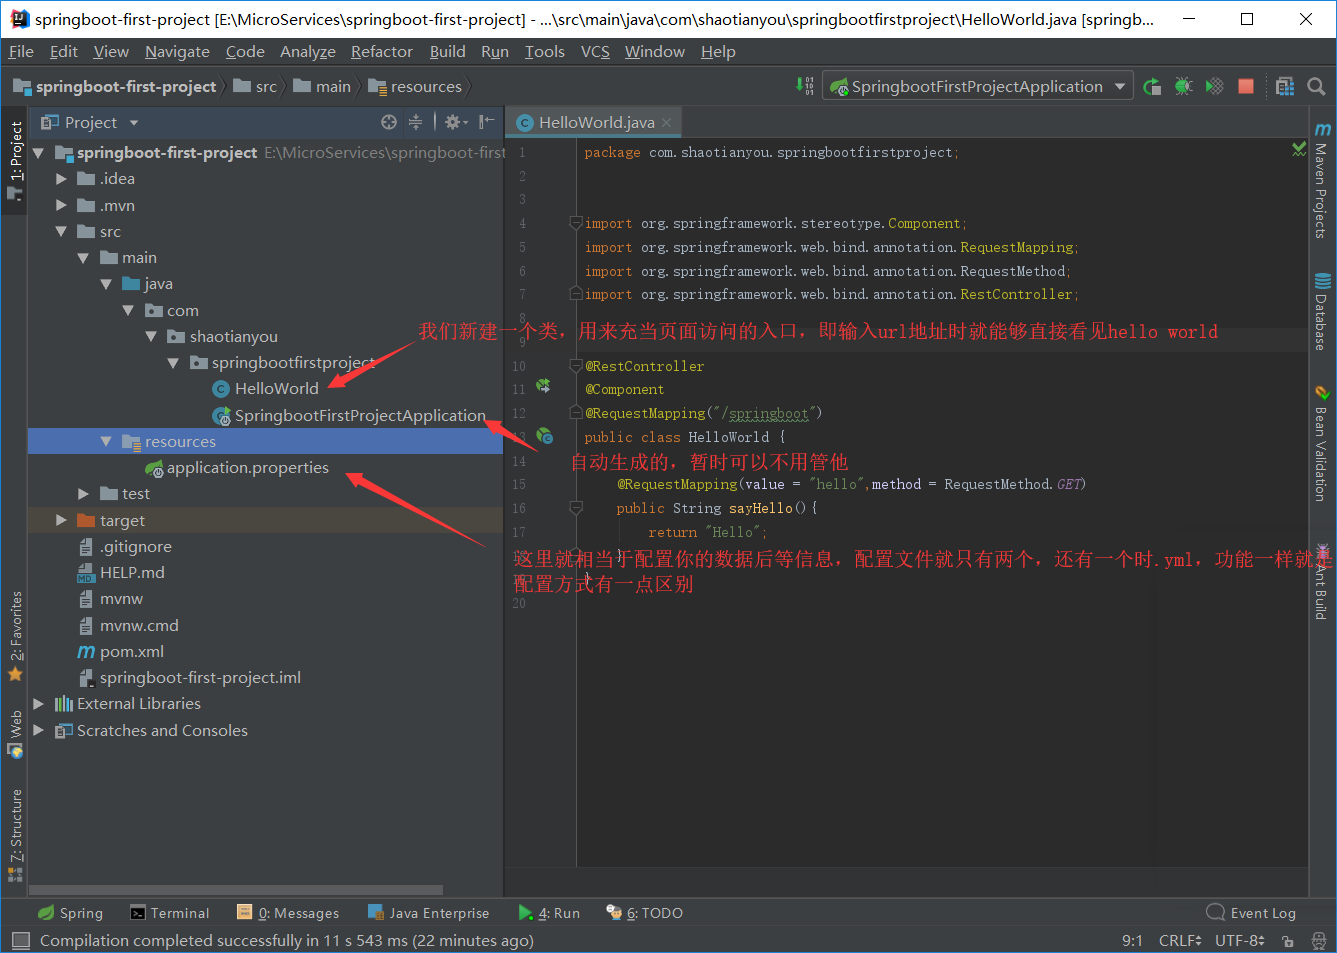
- 新建web入口类
- 配置pom.xml,所有的依赖文件都在里面配置,比如数据库驱动
`
<?xml version="1.0" encoding="UTF-8"?>
<project xmlns="http://maven.apache.org/POM/4.0.0" xmlns:xsi="http://www.w3.org/2001/XMLSchema-instance"
         xsi:schemaLocation="http://maven.apache.org/POM/4.0.0 https://maven.apache.org/xsd/maven-4.0.0.xsd">
    <modelVersion>4.0.0</modelVersion>
    <parent>
        <groupId>org.springframework.boot</groupId>
        <artifactId>spring-boot-starter-parent</artifactId>
        <version>2.1.7.RELEASE</version>
        <relativePath/> <!-- lookup parent from repository -->
    </parent>
    <groupId>com.shaotianyou</groupId>
    <artifactId>springboot-first-project</artifactId>
    <version>0.0.1-SNAPSHOT</version>
    <name>springboot-first-project</name>
    <description>Demo project for Spring Boot</description>

    <properties>
        <java.version>1.8</java.version>
    </properties>

    <dependencies>
        <dependency>
            <groupId>org.mybatis.spring.boot</groupId>
            <artifactId>mybatis-spring-boot-starter</artifactId>
            <version>2.1.0</version>
        </dependency>

        <dependency>
            <groupId>org.springframework.boot</groupId>
            <artifactId>spring-boot-starter-web</artifactId>
        </dependency>

        <dependency>
            <groupId>org.springframework.boot</groupId>
            <artifactId>spring-boot-starter-test</artifactId>
            <scope>test</scope>
        </dependency>

        <dependency>
            <groupId>mysql</groupId>
            <artifactId>mysql-connector-java</artifactId>
            <version>5.1.25</version>
        </dependency>

        <dependency>
            <groupId>org.springframework.boot</groupId>
            <artifactId>spring-boot-configuration-processor</artifactId>
            <optional>true</optional>
        </dependency>
    </dependencies>

    <build>
        <plugins>
            <plugin>
                <groupId>org.springframework.boot</groupId>
                <artifactId>spring-boot-maven-plugin</artifactId>
            </plugin>
        </plugins>
    </build>

</project>
- 配置aplication.properties文件
spring.datasource.url=jdbc:mysql://localhost:3306/schooltao?useUnicode=true&zeroDateTimeBehavior=convertToNull&autoReconnect=true
spring.datasource.username=xxx
spring.datasource.password=xxx
spring.datasource.driver-class-name=com.mysql.jdbc.Driver
- HelloWorld.java
package com.shaotianyou.springbootfirstproject;


import org.springframework.stereotype.Component;
import org.springframework.web.bind.annotation.RequestMapping;
import org.springframework.web.bind.annotation.RequestMethod;
import org.springframework.web.bind.annotation.RestController;


@RestController
@Component
@RequestMapping("/springboot")
public class HelloWorld {

    @RequestMapping(value = "hello",method = RequestMethod.GET)
    public String sayHello(){
        return "Hello";
    }
}
启动项目
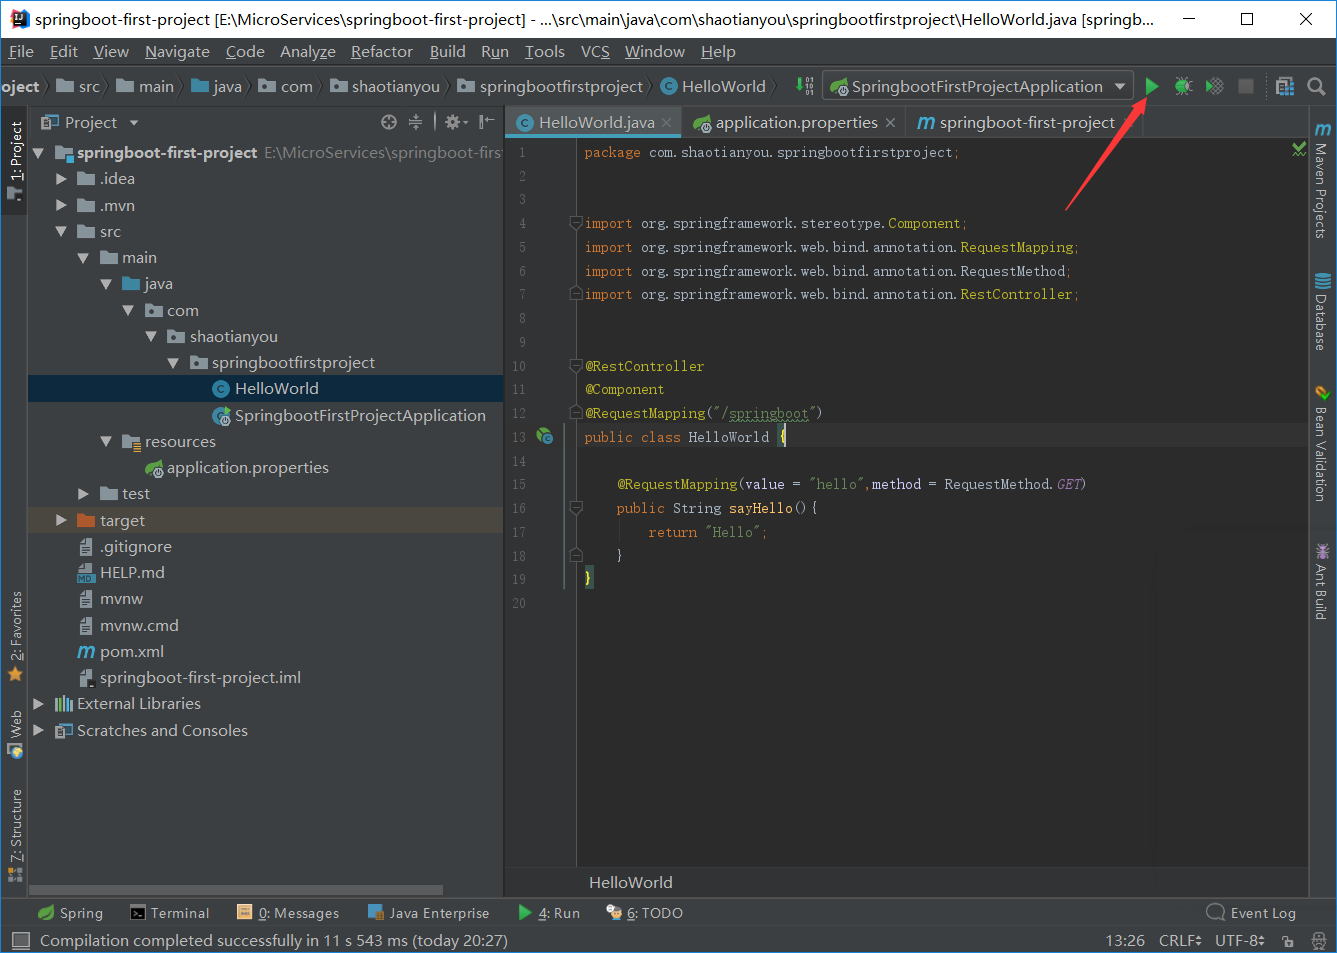 最后在地址栏上输入localhost:8080/springboot/hello就能够看到方法中返回的字符串
最后
以上就是幸福香烟最近收集整理的关于IDEA创建SpringBoot项目输出hello world——新手教程(1)的全部内容,更多相关IDEA创建SpringBoot项目输出hello内容请搜索靠谱客的其他文章。
本图文内容来源于网友提供,作为学习参考使用,或来自网络收集整理,版权属于原作者所有。


发表评论 取消回复