微信小程序各种权限处理授权逻辑,看这篇就够了
前言:
先看下效果:
微信小程序授权弹框操作
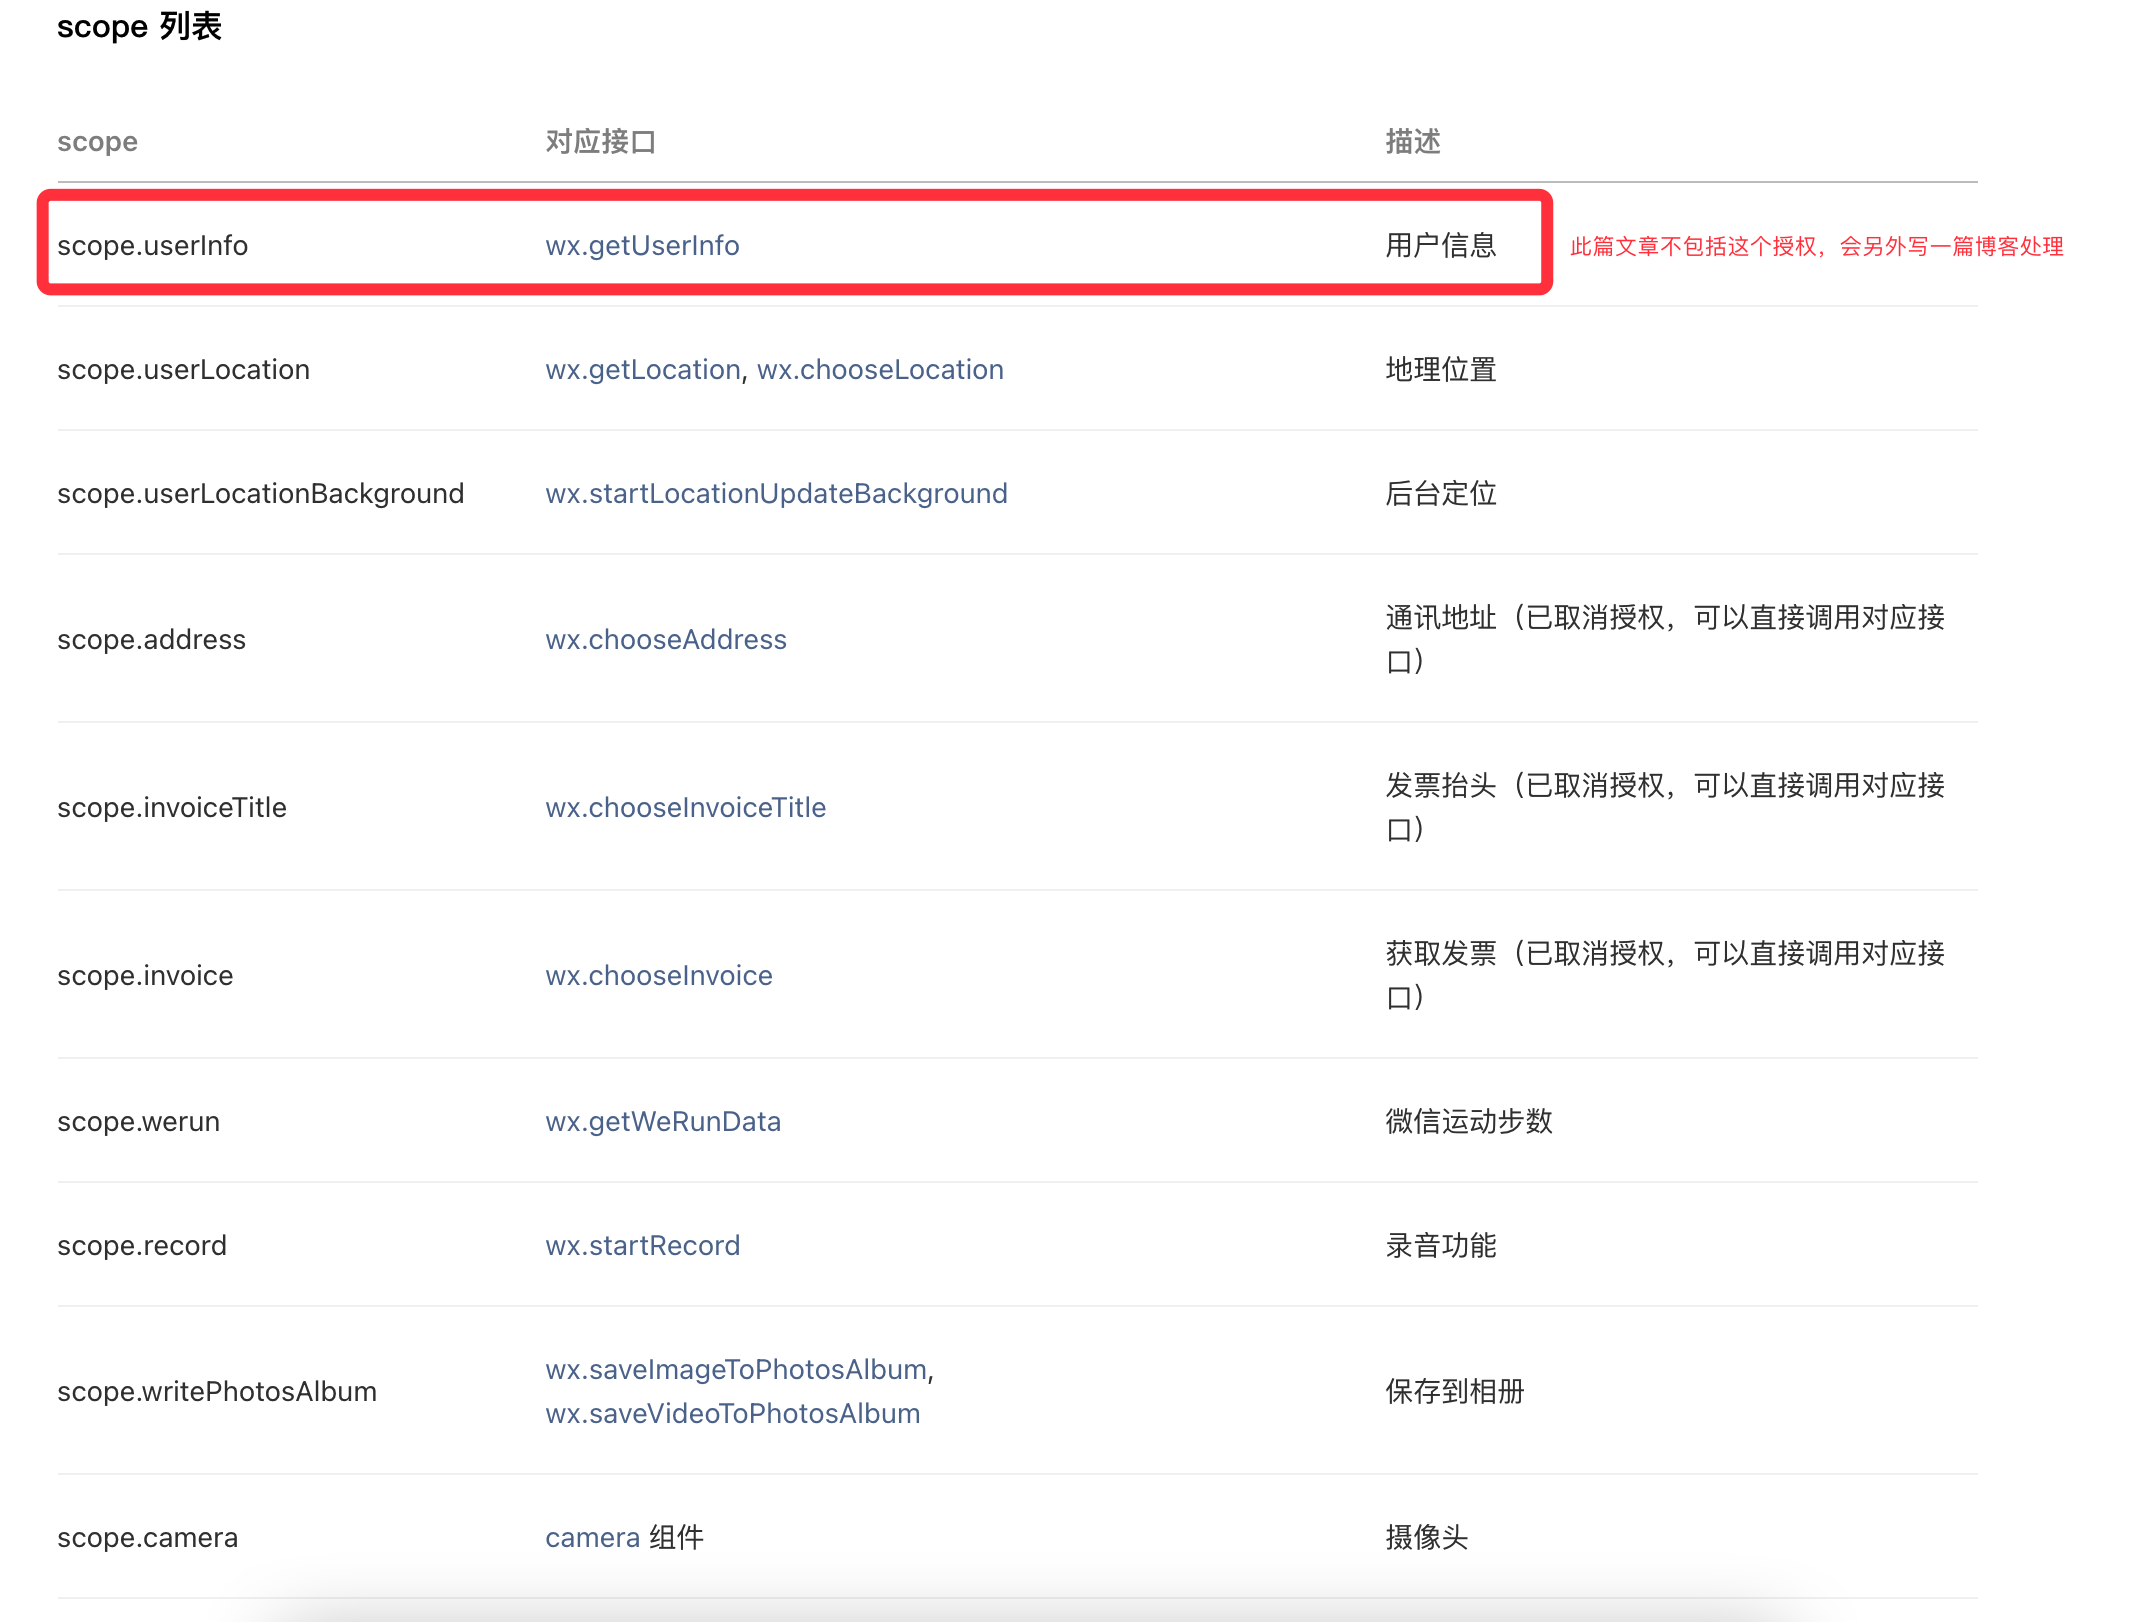
这篇博客不讲wx.getUserInfo的授权允许和拒绝的逻辑,只讲其他权限

从使用功能开始,详细的授权和拒绝授权以及在设置中再次授权的逻辑处理如下:
一、先贴一下通过wx.getSetting 获取各种权限的信息打印:
(以位置权限为例,其他权限相同)
1、若从未请求过权限(以位置权限为例)
	//wx.getSetting()结果:
	{
  "errMsg": "getSetting:ok",
  "authSetting": {
    "scope.address": true,
    "scope.invoice": true,
    "scope.invoiceTitle": true,
    "scope.userInfo": true
  }
}
如打印结果所示,第一次请求时authSetting中只有4个字段,若对除这4个字段之外的其他权限取值(如位置权限:scope.userLocation),结果是undefined。这里可以做是否为第一次获取权限的判断
2、请求过权限但未允许(以位置权限为例)
//wx.getSetting()结果:
{
  "errMsg": "getSetting:ok",
  "authSetting": {
    "scope.userLocation": false,
    "scope.address": true,
    "scope.invoice": true,
    "scope.invoiceTitle": true,
    "scope.userInfo": true
  }
}
此时对scope.userLocation取值为false ,这个时候要通过判断提示用户是否要去设置中心设置。
3、跳转设置中心设置权限(以位置权限为例)
通过wx.open跳转到设置中心去设置权限,代码如下:
wx.openSetting({
	success: res => {
		if (res.authSetting['scope.userLocation']) {
			// 授权成功
		}
	}
});
//wx.openSetting() 允许授权,返回结果:
{
  "errMsg": "openSetting:ok",
  "authSetting": {
    "scope.userLocation": true
  }
}
//wx.openSetting() 拒绝授权,返回结果:
{
  "errMsg": "openSetting:ok",
  "authSetting": {
    "scope.userLocation": false
  }
}
日常情况就是上面那几种,测试的时候将按钮都点一遍就可以覆盖到上面那几种情况,下面写具体判断流程,处理了对一种权限申请的允许和拒绝等逻辑
二:具体使用
1、单一权限
设有需求:要具有位置的使用权限,才能使用B功能。处理情况如下:
 // 功能B使用前判断位置使用权限
  getLocationAuthorize: function (e) {
    var self = this
    wx.getSetting({
      success: res => {
        //console.log(`设置位置权限信息:${JSON.stringify(res)}`)
        var userLocationStr = res.authSetting['scope.userLocation']
        if (userLocationStr) {//已允许授权 userLocationStr==true
          self.getLocation()
          return;
        }
        if (userLocationStr == undefined) { //第一次,从未请求过权限
          wx.authorize({
            scope: 'scope.userLocation',
            success(res) {
              if (res.errMsg == 'authorize:ok') { //授权位置弹框中点击 允许
                self.getLocation()
              }
            }
          })
          return
        }
        if (userLocationStr != 'undefined') { // 第一次授权弹框点拒绝的情况 未允许授权
          wx.showModal({
            title: '提示',
            content: '暂无权限,请开启「位置」使用权限,帮助您获取附近的位置信息',
            success: res => {
              if (res.confirm) { // 跳转设置页面
                wx.openSetting({
                  success: res => {
                    if (res.authSetting['scope.userLocation']) { // 授权成功 scope.userLocation == true
                      self.getLocation()
                    } else { // 未授权
                    }
                  }
                });
              }
            },
          });
        }
      }
    });
  },

  // 功能B实现
  getLocation: function (e) {
  	//此处已获取到位置权限
    wx.showToast({
      title: '功能B',
    })
  }
如上代码,已涵盖了所有的判断情况,在需要的地方直接复制过去就好,例子是使用的位置权限,其他权限使用时相同(除scope.userInfo外)。
2、多种权限同时满足
设有需求:要同时具有麦克风和摄像头的使用权限,才能使用功能A。
// 功能A 判断摄像头和麦克风权限
  getCameraAndRecordAuthorize: function (e) {
    var self = this
    wx.getSetting({
      success: res => {
        var cameraStr = res.authSetting['scope.camera']
        var recordStr = res.authSetting['scope.record']
        var status = 1; // ==1时 符合权限,不需弹框
        if (cameraStr == undefined || recordStr == undefined) { //从未请求过权限
          wx.authorize({
            scope: 'scope.camera',
            success(res) {
              if (res.errMsg == 'authorize:ok') {
                wx.authorize({
                  scope: 'scope.record',
                  success(res) {
                    if (res.errMsg == 'authorize:ok') {
                      wx.getSetting({
                        success: res => {
                          var cameraStr = res.authSetting['scope.camera']
                          var recordStr = res.authSetting['scope.record']
                          if (cameraStr == true || recordStr == true) {
                            self.dosomethingA()
                          }
                        }
                      })
                    }
                  },
                  fail(error) {
                    self.showAlertToast('麦克风');
                  }
                })
              }
            },
            fail(error) {
              wx.authorize({
                scope: 'scope.record',
                success(res) {
                  if (res.errMsg == 'authorize:ok') {
                    wx.getSetting({
                      success: res => {
                        var cameraSstr = res.authSetting['scope.camera']
                        var recordSstr = res.authSetting['scope.record']
                        if (cameraStr == true || recordStr == true) {
                          self.dosomethingA()
                        } else {
                          self.showAlertToast('摄像头或者麦克风');
                        }
                      }
                    })
                  }
                },
                fail(error) {
                  self.showAlertToast('麦克风');
                }
              })
            }
          })
          return;
        }

        //已经弹过授权框
        if (cameraStr != 'undefined' && recordStr != 'undefined') {
          if (cameraStr == false || recordStr == false) {
            status = 0;
          }
        }

        if (status == 1) {
          console.log('从未请求过或已开启权限' + JSON.stringify(res))
          self.dosomethingA()
        } else {
          // 未开启授权
          wx.showModal({
            title: '提示',
            content: '暂无权限,请开启「摄像头」和「麦克风」使用权限',
            success: res => {
              if (res.confirm) {
                // 跳转设置页面
                wx.openSetting({
                  success: res => {
                    if (res.authSetting['scope.camera'] && res.authSetting['scope.record']) { // 授权成功
                      self.dosomethingA()
                    } else {
                      self.showAlertToast('摄像头或者麦克风');
                    }
                  }
                });
              } else if (res.cancel) {
                self.setData({
                  requestLinking: false,
                })
              }
            }

          });
        }
      },
      fail: function (error) {
        console.log('获取用户设置信息失败:' + JSON.stringify(error))
      }
    })
  },

  // 拒绝授权提示
  showAlertToast: function (str) {
    wx.showToast({
      icon: 'none',
      title: '您拒绝了使用' + str + '权限,无法使用功能A'
    });
  },

  // 功能A
  dosomethingA: function (e) {
    wx.showToast({
      title: '功能A',
    })
  },
如上代码,多种权限的判断略复杂,但是已经有了一中 的各种情况的打印,处理起来还是比较方便的,相比于1种权限,多种权限加了个提示方法,用于处理不同权限被拒时的情况,使用时只需要在dosomethingA方法中写具体实现。
三、关于wx.getUserInfo
这个接口变了又变,已经改过好多次了,我另起一篇文章分享关于这个权限的处理,有需要的可以看下,wx.getUserInfo权限处理
最后
以上就是高高短靴最近收集整理的关于微信小程序端的各种授权逻辑处理,拒绝后再请求时的处理流程汇总的全部内容,更多相关微信小程序端内容请搜索靠谱客的其他文章。


发表评论 取消回复