Unity版本:Unity 2018.2.14f1
原视频链接:https://unity3d.com/cn/learn/tutorials/s/space-shooter-tutorial
教程目录:
Unity游戏开发官方入门教程:飞机大战(一)——创建新项目、导入资源、设置场景
Unity游戏开发官方入门教程:飞机大战(二)——创建飞船对象
Unity游戏开发官方入门教程:飞机大战(三)——设置相机和光照
Unity游戏开发官方入门教程:飞机大战(四)——使用Quad加入背景
Unity游戏开发官方入门教程:飞机大战(五)——实现飞船控制脚本
Unity游戏开发官方入门教程:飞机大战(六)——创建子弹
Unity游戏开发官方入门教程:飞机大战(七)——发射子弹
Unity游戏开发官方入门教程:飞机大战(八)——创建销毁边界
Unity游戏开发官方入门教程:飞机大战(九)——创建和销毁敌人
Unity游戏开发官方入门教程:飞机大战(十)——敌人的爆炸和移动
Unity游戏开发官方入门教程:飞机大战(十一)——游戏控制
新建脚本控制飞船移动
- 在Assets中新建文件夹Script,用于存放脚本文件
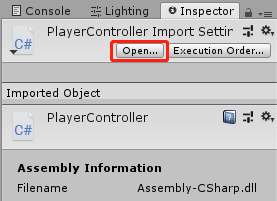
- Player->Add component->New Script->命名为PlayerController
- 将PlayerController拖拽进Script

- 点击"Open"编辑该脚本
- 脚本内容如下:
using System.Collections;
using System.Collections.Generic;
using UnityEngine;

public class PlayerController : MonoBehaviour
{
    private Rigidbody rb;

    void Start()
    {
        rb = GetComponent<Rigidbody>();
    }

    void FixedUpdate()
    {
        float moveHorizontal = Input.GetAxis("Horizontal");
        float moveVertical = Input.GetAxis("Vertical");

        Vector3 movement = new Vector3(moveHorizontal, 0.0f, moveVertical);
        rb.velocity = movement;
    }
}
- 保存脚本,运行游戏,现在可以用方向键或ASWD键控制飞船移动了。

加入速度控制
飞船的速度变量尚未设置,因此移动速度较为缓慢,现加入速度控制。
- 在脚本中增加一个public变量speed,作为velocity的系数,修改后的脚本如下:
using System.Collections;
using System.Collections.Generic;
using UnityEngine;

public class PlayerController : MonoBehaviour
{
    public float speed;
    private Rigidbody rb;

    void Start()
    {
        rb = GetComponent<Rigidbody>();
    }

    void FixedUpdate()
    {
        float moveHorizontal = Input.GetAxis("Horizontal");
        float moveVertical = Input.GetAxis("Vertical");

        Vector3 movement = new Vector3(moveHorizontal, 0.0f, moveVertical);
        rb.velocity = movement * speed;
    }
}
- 在Inspector中可见public变量speed,将speed修改为10

- 保存并运行,可见速度变为原来的10倍:

加入边界控制
为了防止飞船飞出游戏边界,现加入边界控制。
- 增加一个边界类Boundary
- 在边界类中增加4个public变量xMin, xMax, zMin, zMax,用于控制边界的4个顶点
- 在开头加上[System.Serializable],使得新增的Boundary类能够显示在Inspector中。
修改后的脚本如下:
using System.Collections;
using System.Collections.Generic;
using UnityEngine;

[System.Serializable]
public class Boundary
{
    public float xMin, xMax, zMin, zMax;
}

public class PlayerController : MonoBehaviour
{
    public float speed;
    public Boundary boundary;
    private Rigidbody rb;

    void Start()
    {
        rb = GetComponent<Rigidbody>();
    }

    void FixedUpdate()
    {
        float moveHorizontal = Input.GetAxis("Horizontal");
        float moveVertical = Input.GetAxis("Vertical");

        Vector3 movement = new Vector3(moveHorizontal, 0.0f, moveVertical);
        rb.velocity = movement * speed;

        rb.position = new Vector3
        (
        Mathf.Clamp(rb.position.x, boundary.xMin, boundary.xMax),
        0.0f,
        Mathf.Clamp(rb.position.z, boundary.zMin, boundary.zMax)
        );
    }
}
- 拖拽飞船的position的x,可知x的范围大概是(-6,6)

- 同理可知,z的范围大概是(-4,8)
- 在Inspector中修改xMin, xMax, zMin, zMax:

- 运行游戏,成功实现边界控制:

加入飞船倾斜效果
左右移动飞船的效果太生硬,现加入倾斜效果。
- 新增public变量tilt,用于设置旋转幅度
- 使用Unity中的四元数类的欧拉角函数
Quaternion.Euler(),让飞船绕着z轴旋转一定角度。
修改后的脚本如下:
using System.Collections;
using System.Collections.Generic;
using UnityEngine;

[System.Serializable]
public class Boundary
{
    public float xMin, xMax, zMin, zMax;
}

public class PlayerController : MonoBehaviour
{
    public float speed;
    public float tilt;
    public Boundary boundary;
    private Rigidbody rb;

    void Start()
    {
        rb = GetComponent<Rigidbody>();
    }

    void FixedUpdate()
    {
        float moveHorizontal = Input.GetAxis("Horizontal");
        float moveVertical = Input.GetAxis("Vertical");

        Vector3 movement = new Vector3(moveHorizontal, 0.0f, moveVertical);
        rb.velocity = movement * speed;

        rb.position = new Vector3
        (
        Mathf.Clamp(rb.position.x, boundary.xMin, boundary.xMax),
        0.0f,
        Mathf.Clamp(rb.position.z, boundary.zMin, boundary.zMax)
        );

        rb.rotation = Quaternion.Euler(0.0f, 0.0f, rb.velocity.x * -tilt);
    }
}
- 在Inspector中将tilt的值修改为4:

- 飞船倾斜效果如下:
参考资料:https://unity3d.com/cn/learn/tutorials/s/space-shooter-tutorial
最后
以上就是彪壮煎蛋最近收集整理的关于Unity游戏开发官方入门教程:飞机大战(五)——实现飞船控制脚本的全部内容,更多相关Unity游戏开发官方入门教程内容请搜索靠谱客的其他文章。
本图文内容来源于网友提供,作为学习参考使用,或来自网络收集整理,版权属于原作者所有。


发表评论 取消回复