I0流
- 前言
- 字节流
- InputStream
- OutputStream
- 字符流
- Reader
- Writer
- 缓存流
- 转换流
- 序列化流
- 数据流
- 字节数组流
- 打印流
- 校验流
- 数据压缩
- ZIP压缩和解压
- GZIP压缩和解压
- Java 的 jar
- 标准IO
- 重定向标准 I/O
- 流式IO
- 读写随机访问文件
- 本章小结
前言
对于编程语言的设计者来说,实现良好的输入/输出(I/O)系统是一项比较艰难的任务,不同实现方案的数量就可以证明这点。你不仅要覆盖到不同的 I/O 源和 I/O 接收器(如文件、控制台、网络连接等),还要实现多种与它们进行通信的方式(如顺序、随机访问、缓冲、二进制、字符、按行和按字等)。Java 类库的设计者通过创建大量的类来解决这一难题。一开始,你可能会对 Java I/O 系统提供了如此多的类而感到不知所措。因此,要想充分理解 Java I/O 系统以便正确运用它,我们需要学习一定数量的类。另外,理解 I/O 类库的演化过程也很有必要,因为如果缺乏历史的眼光,很快我们就会对什么时候该使用哪些类,以及什么时候不该使用它们而感到困惑。
Java 类库中的 I/O 类分成了输入和输出两部分。在设计 Java 1.0 时,类库的设计者们就决定让所有与输入有关系的类都继承自 InputStream,所有与输出有关系的类都继承自 OutputStream。所有从 InputStream 或 Reader 派生而来的类都含有名为 read() 的基本方法,用于读取单个字节或者字节数组。同样,所有从 OutputStream 或 Writer 派生而来的类都含有名为 write() 的基本方法,用于写单个字节或者字节数组。但是,我们通常不会用到这些方法,它们之所以存在是因为别的类可以使用它们,以便提供更有用的接口。
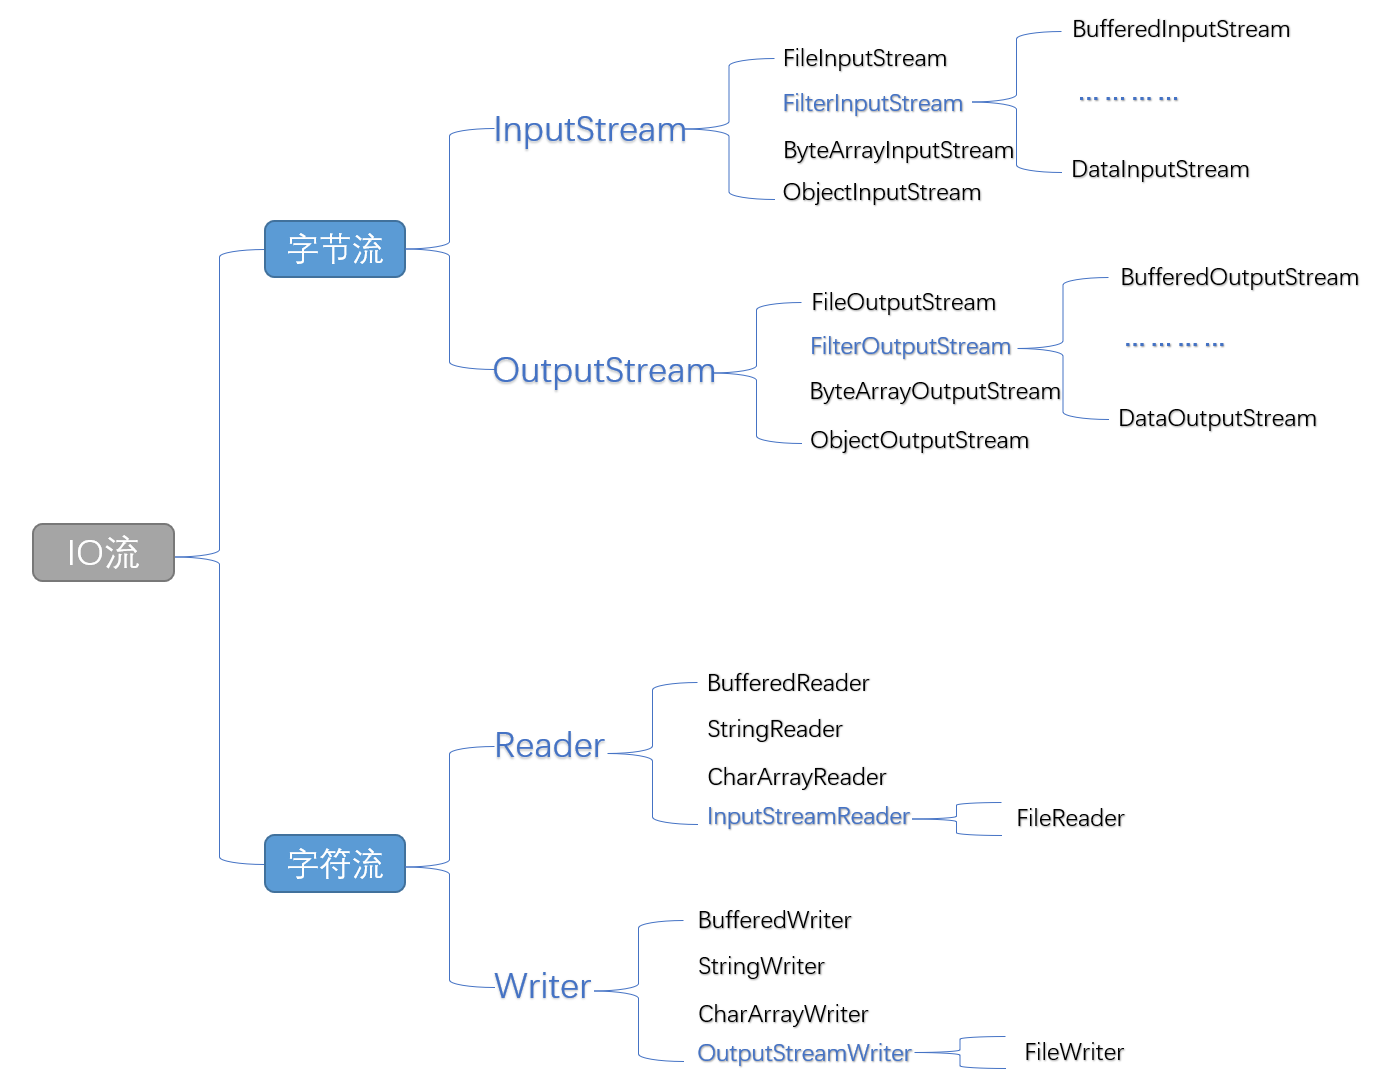
FilterInputStream 和 FilterOutputStream 是用来提供装饰器类接口以控制特定输入流 InputStream 和 输出流 OutputStream 的两个类,但它们的名字并不是很直观。FilterInputStream 和 FilterOutputStream 分别从 I/O 类库中的基类 InputStream 和 OutputStream 派生而来,这两个类是创建装饰器的必要条件(这样它们才能为所有被装饰的对象提供统一接口)。
字节流
一切文件数据(文本、图片、视频等)在存储时,都是以二进制数字的形式保存。
InputStream
InputStream是所有字节输入流的父类,用于获取信息。基本共性功能方法:
read()从输入流中读取下一个字节的数据。read(byte[] b)从输入流中读取全部的字节并将其存储到缓存区,返回读入缓冲区的总字节数 。read(byte b[], int off, int len)从输入流中读取一定长度的字节并将其存储到缓存区 。off表示偏移量;len表示要读取的最大字节数。
示例代码:
public class NewFileTest {
    public static void main(String[] args) throws IOException {
        try(FileInputStream fileInputStream = new FileInputStream("C:\mnt\this.txt")) {
            int read = fileInputStream.read();
            System.out.println(read+":"+(char)read);
        }
        /** Output:
         *  104:h
         */
    }
}
不过这种方式似乎不能读取全部的数据(你会发现我并没有关闭流操作,这是因为try-with-resources在最后自动关闭,如果有兴趣了解请点击),换一种方式读取:
public class NewFileTest {
    public static void main(String[] args) throws IOException {
        try(FileInputStream fileInputStream = new FileInputStream("C:\mnt\this.txt")) {
            byte[] bytes = new byte[1024];
            int len = 0;
            while ((len = fileInputStream.read(bytes)) != -1){
                System.out.println(new String(bytes));
            }
        }
        /** Output:
         *  hello world
         */
    }
}
或许你想每次读取指定长度字节,代码如下:
public class NewFileTest {
    public static void main(String[] args) throws IOException {
        try (FileInputStream fileInputStream = new FileInputStream("C:\mnt\this.txt")) {
            byte[] bytes = new byte[fileInputStream.available()];
            int len = 0;
            while ((len = fileInputStream.read(bytes,0,1)) != -1) {
                System.out.print(new String(bytes).trim());
            }
        }
        /** Output:
         *  helloworld
         */
    }
}
上面的案例,通过available()创建指定文件字节大小的缓存区,它的字面意思就是“在没有阻塞的情况下所能读取的字节数”。对于文件,能够读取的是整个文件;但是对于其它类型的“流”,可能就不是这样,所以要谨慎使用。
OutputStream
OutputStream是所有字节输出流的父类,将指定的字节信息写出到目的地。基本共性功能方法:
write(int b)将指定的字节写入此输出流。write(byte b[])将 b.length个字节从指定的字节数组写入此输出流。write(byte b[], int off, int len)从指定的字节数组写入输出流。off表示起始偏移量;len表示要写入的字节数。
示例代码:
public class NewFileTest {
    public static void main(String[] args) {
        try(FileOutputStream fileOutputStream = new FileOutputStream("C:\mnt\this.txt")) {
            fileOutputStream.write(65);
            fileOutputStream.write(66);
            fileOutputStream.write(67);
        } catch (FileNotFoundException e) {
            e.printStackTrace();
        } catch (IOException e) {
            e.printStackTrace();
        }
    }
}

输入的三个数字对应ascii码表的字母。再看另一种使用方式:
public class NewFileTest {
    public static void main(String[] args) {
        try(FileOutputStream fileOutputStream = new FileOutputStream("C:\mnt\this.txt")) {
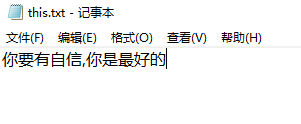
            String strByte = "你要有自信,你是最好的";
            fileOutputStream.write(strByte.getBytes());
        } catch (FileNotFoundException e) {
            e.printStackTrace();
        } catch (IOException e) {
            e.printStackTrace();
        }
    }
}
或许有时候你想要限制输出的内容:
public class NewFileTest {
    public static void main(String[] args) {
        try(FileOutputStream fileOutputStream = new FileOutputStream("C:\mnt\this.txt")) {
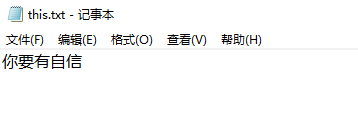
            String strByte = "你要有自信,你是最好的";
            fileOutputStream.write(strByte.getBytes(),0,10);
        } catch (FileNotFoundException e) {
            e.printStackTrace();
        } catch (IOException e) {
            e.printStackTrace();
        }
    }
}
讲解完输入流和输出流,再来做一个小案例,实现copy文件:
public class NewFileTest {
    public static void main(String[] args) {
        try(FileInputStream fileInputStream = new FileInputStream("C:\mnt\this.txt");
            FileOutputStream fileOutputStream = new FileOutputStream("C:\mnt\copy.txt")) {
            byte[] bytes = new byte[fileInputStream.available()];
            int len = 0;
            while ((len=fileInputStream.read(bytes)) !=-1){
                fileOutputStream.write(bytes,0,len);
            }
        } catch (FileNotFoundException e) {
            e.printStackTrace();
        } catch (IOException e) {
            e.printStackTrace();
        }
    }
}

字符流
字节流直接读取中文数据会有乱码的问题,尽管也能有办法解决,略微麻烦。字符流专门用于处理文本文件,因而有了对字符进行高效操作的流对象,如果处理纯文本的数据优先考虑字符流。从另一角度来讲:字符流=字节流+编码表。
Reader
Reader是所有字符输入流的类的父类,用于获取信息。基本共性功能方法:
read()读取单个字符。read(char cbuf[])将字符读入数组,返回读取的字符数。read(char cbuf[], int off, int len)将字符读入数组缓冲区。off字符偏移量;len读取最大字符数read(java.nio.CharBuffer target)试图将字符读入指定的字符缓冲区。
示例代码:
public class NewFileTest {
    public static void main(String[] args) {
            try(Reader reader = new FileReader("C:\mnt\this.txt")) {
                int read = reader.read();
                System.out.println(read+":"+(char)read);
                /** Output:
                 *  20320:你
                 */
            } catch (FileNotFoundException e) {
                e.printStackTrace();
            } catch (IOException e) {
                e.printStackTrace();
            }
    }
}
你可以看到读取数字对应的字符是多少。下面的案例,你会发现缓存区不是byte数组而是char类型,因为这是一个字符流。
public class NewFileTest {
    public static void main(String[] args) {
            try(Reader reader = new FileReader("C:\mnt\this.txt")) {
                char[] chars = new char[1024];
                int read = reader.read(chars);
                System.out.println(new String(chars));
                /** Output:
                 *  你要有自信
                 */
            } catch (FileNotFoundException e) {
                e.printStackTrace();
            } catch (IOException e) {
                e.printStackTrace();
            }
    }
}
或许你要指定读取字节大小
 */
public class NewFileTest {
    public static void main(String[] args) {
            try(Reader reader = new FileReader("C:\mnt\this.txt")) {
                char[] chars = new char[1024];
                int read = 0;
                while ((read = reader.read(chars,0,4)) != -1){
                    System.out.println(new String(chars));
                }
                /** Output:
                 *  你要有自
                 *  信要有自
                 */
            } catch (FileNotFoundException e) {
                e.printStackTrace();
            } catch (IOException e) {
                e.printStackTrace();
            }
    }
}
你会发现在,这样读取的数据有问题,这是因为第二次打印的第一个字符被替换,而后三个字符没有,所以一起输出了。
你可以确认字符大小
public class NewFileTest {
    public static void main(String[] args) {
        File file = new File("C:\mnt\this.txt");
            try(Reader reader = new FileReader(file)) {
                char[] chars = new char[1024];
                int read = 0;
                while ((read = reader.read(chars,0,(int)file.length())) != -1){
                    System.out.println(new String(chars));
                }
                /** Output:
                 *  你要有自信
                 */
            } catch (FileNotFoundException e) {
                e.printStackTrace();
            } catch (IOException e) {
                e.printStackTrace();
            }
    }
}
或者通过String读取有效字符个数。
public class NewFileTest {
    public static void main(String[] args) {
        File file = new File("C:\mnt\this.txt");
            try(Reader reader = new FileReader(file)) {
                char[] chars = new char[1024];
                int read = 0;
                while ((read = reader.read(chars,0,4)) != -1){
                    System.out.println(new String(chars,0,read));
                }
                /** Output:
                 *  你要有自
                 *  信
                 */
            } catch (FileNotFoundException e) {
                e.printStackTrace();
            } catch (IOException e) {
                e.printStackTrace();
            }
    }
}
还有一种新方法,将读取的内容放入字符缓冲区,支持流操作。
public class NewFileTest {
    public static void main(String[] args) {
            try(Reader reader = new FileReader("C:\mnt\this.txt")) {
                CharBuffer allocate = CharBuffer.allocate(10);
                while (reader.read(allocate) != -1){
                    // flip the char buffer
                    allocate.flip();
                    // print the char buffer
                    System.out.println(allocate.toString());
                }
                /** Output:
                 *  你要有自信
                 */
            } catch (FileNotFoundException e) {
                e.printStackTrace();
            } catch (IOException e) {
                e.printStackTrace();
            }
    }
}
Writer
Writer是所有字符输出流的父类,将指定的字符信息写出到目的地。基本共性功能方法:
write(int c)写入单个字符。write(char cbuf[])写入一个字符数组。write(char cbuf[], int off, int len)写入字符数组的一部分。off字符偏移量;len写入的字符数。write(String str)写一个字符串。write(String str, int off, int len)写入字符串的一部分。off字符偏移量;len写入的字符数。
示例代码:
public class NewFileTest {
    public static void main(String[] args) {
            try(Writer writer = new FileWriter("C:\mnt\this.txt")) {
                writer.write(65);
                writer.write("A");
            } catch (IOException e) {
                e.printStackTrace();
            }
    }
}
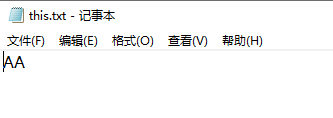
上面的案例写入了一个字符和一个字符串。实际开发中可以会有一大串的字符需要写入,如下:
public class NewFileTest {
    public static void main(String[] args) {
            try(Writer writer = new FileWriter("C:\mnt\this.txt")) {
                char[] chars = "这是一个字符数组".toCharArray();
                writer.write(chars);
            } catch (IOException e) {
                e.printStackTrace();
            }
    }
}
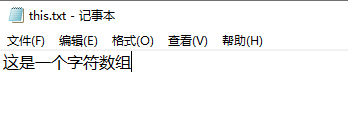
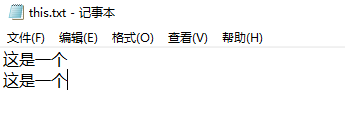
或许你想写入一部分的内容,一种通过字符数组,另一种通过字符串,根据业务需要来定:
public class NewFileTest {
    public static void main(String[] args) {
            try(Writer writer = new FileWriter("C:\mnt\this.txt")) {
                char[] chars = "这是一个字符数组".toCharArray();
                writer.write(chars,0,4);
                writer.write("rn");
                String str = "这是一个字符数组";
                writer.write(str,0,4);
            } catch (IOException e) {
                e.printStackTrace();
            }
    }
}
讲解完字符输入流和字符输出流,依旧做一个小案例,实现copy文件:
public class NewFileTest {
    public static void main(String[] args) {
            try(Reader reader = new FileReader("C:\mnt\this.txt");
                Writer writer = new FileWriter("C:\mnt\copy.txt")) {
                char[] chars = new char[1024];
                int len = 0;
                while ((len = reader.read(chars)) != -1){
                    writer.write(chars,0,len);
                }
                writer.flush();
            } catch (IOException e) {
                e.printStackTrace();
            }
    }
}

上面用到了flush()这个函数是清空的意思,用于清空缓冲区的数据流,当缓存区满的时候你会发现他的效果。这里虽然没有显示的调用close()方法,但还是要讲解下它们的区别:
flush():刷新缓冲区,流对象可以继续使用。close():关闭流操作,流对象不再被使用。
缓存流
缓冲流,也叫高效流,在创建流对象时,会创建一个内置的默认大小的缓冲区数组,通过缓冲区读写,减少系统IO次数,从而提高读写的效率。
- 字节缓冲流:BufferedInputStream,BufferedOutputStream
- 字符缓冲流:BufferedReader,BufferedWriter
先来通过一个案例来介绍非缓存流和缓存流的区别:
public class NewFileTest {
    public static void main(String[] args) {
        long startTime = System.currentTimeMillis();
        System.out.println("startTime:"+startTime);
        try (FileInputStream reader = new FileInputStream("C:\mnt\this.txt");
             FileOutputStream writer = new FileOutputStream("C:\mnt\copy.txt")) {
            byte[] chars = new byte[reader.available()];
            int len = 0;
            while ((len = reader.read(chars)) != -1) {
                writer.write(chars, 0, len);
            }
            writer.flush();
        } catch (IOException e) {
            e.printStackTrace();
        }
        long endTime = System.currentTimeMillis();
        System.out.println("costTime:"+(endTime-startTime));
        /** Output:
         *  startTime:1644505078665
         *  costTime:963
         */
    }
}
上面复制了一个350M左右的一个文本,可以看到普通的流所消耗时常为:963毫秒。下面通过缓存流来测试:
public class NewFileTest {
    public static void main(String[] args) {
        long startTime = System.currentTimeMillis();
        System.out.println("startTime:"+startTime);
        try (BufferedInputStream reader = new BufferedInputStream(new FileInputStream("C:\mnt\this.txt"));
             BufferedOutputStream writer = new BufferedOutputStream(new FileOutputStream("C:\mnt\copy.txt"))) {
            byte[] chars = new byte[reader.available()];
            int len = 0;
            while ((len = reader.read(chars)) != -1) {
                writer.write(chars, 0, len);
            }
            writer.flush();
        } catch (IOException e) {
            e.printStackTrace();
        }
        long endTime = System.currentTimeMillis();
        System.out.println("costTime:"+(endTime-startTime));
        /** Output:
         *  startTime:1644505135172
         *  costTime:811
         */
    }
}
可以看到所消耗的时常明显的减少,这是因为字节流是一个字节一个字节的读取,缓存流先将内容放入内存中减少了与硬盘的频繁操作,从而提高了效率。
字节缓存流讲完,再来讲解下字符缓存流,我们来看字符缓冲流具备的特有方法。:
readLine()读一行数据。newLine()换行代替n符。
public class NewFileTest {
    public static void main(String[] args) {
        try (BufferedReader reader = new BufferedReader(new FileReader("C:\mnt\this.txt"));
             BufferedWriter writer = new BufferedWriter(new FileWriter("C:\mnt\copy.txt"))) {
            String str = null;
            while ((str = reader.readLine()) != null) {
                writer.write(str);
                writer.newLine();//如果不使用换行,有可能会导致输出的内容再一行
            }
        } catch (IOException e) {
            e.printStackTrace();
        }
    }
}
转换流
java提供了将字节输入输出流转换为字符输入输出流的转换流,使用转换流可以在一定程度上避免乱码。比如:屏幕上看到的数字、英文、标点符号、汉字等字符是二进制数转换之后的结果。按照某种规则,将字符存储到计算机中,称为编码 。反之,将存储在计算机中的二进制数按照某种规则解析显示出来,称为解码
- InputStreamReader:将字节输入流转换成字符输入流。
- OutputStreamWriter:将字节输出流转换成字符输出流。
先来讲解什么是字符编码?
自然语言的字符与二进制数之间的对应规则,而编码表则是生活中文字和计算机中二进制的对应规则
常见字符集有ASCII字符集、GBK字符集、Unicode字符集等。
- ASCII字符集(American Standard Code for Information Interchange,美国信息交换标准代码)是基于拉丁字母的一套电脑编码系统,用于显示现代英语,主要包括控制字符(回车键、退格、换行键等)和可显示字符(英文大小写字符、阿拉伯数字和西文符号)。
- ISO-8859-1字符集,拉丁码表,别名Latin-1,用于显示欧洲使用的语言,包括荷兰、丹麦、德语、意大利语、西班牙语等,兼容ASCII编码。
- GB*字符集,GB就是国标的意思,是为了显示中文而设计的一套字符集,比较常用的有:GB2312(简体中文码表)、GBK(双字节编码)兼容 GB2312、GB18030(多字节编码)支持中国国内少数民族的文字,同时支持繁体汉字以及日韩汉字等。
- Unicode字符集,任意语言的任意字符而设计,是业界的一种标准,也称为统一码、标准万国码。
有时候读取文本文件内容时,你会发现乱码问题,就像这样:

public class NewFileTest {
    public static void main(String[] args) throws IOException {
        try (FileReader fileReader = new FileReader("C:\mnt\this.txt")) {
            int len = 0;
            while ((len = fileReader.read()) != -1) {
                System.out.print((char)len);
            }
        }
        /** Output:
         * 浣犲ソ
         */
    }
}
这是因为文本文件和开发工具两者的编码格式不一致,改为相同编码格式即可。这可不是我们想要的处理结果,或许应该通过转换流来解决这个问题
public class NewFileTest {
    public static void main(String[] args) throws IOException {
        try (InputStreamReader fileReader = new InputStreamReader(new FileInputStream("C:\mnt\this.txt"),"utf-8")) {
            char[] chars = new char[1];
            int len = 0;
            while ((len = fileReader.read(chars)) != -1) {
                System.out.print(new String(chars));
            }
        }
        /** Output:
         * 你好
         */
    }
}
接着来讲解输出流的使用,我们可以使用转换输出流设置输出内容的指定编码格式,如下所示:
public class NewFileTest {
    public static void main(String[] args) throws IOException {
        try (OutputStreamWriter outputStreamWriter = new OutputStreamWriter(new FileOutputStream("C:\mnt\this.txt"),"GBK")) {
            outputStreamWriter.write("你好");
        }
        /** Output:
         * 你好
         */
    }
}
序列化流
Java 提供了一种对象序列化的机制,也就是将对象以流的形式进行传输。反之,将流转换为对象称之为反序列化。
- ObjectOutputStream:序列化,将Java对象的原始数据类型写出到文件。
- ObjectInputStream:反序列化,将文件中序列化内容转换为Java对象。
一个对象要想序列化,必须满足两个条件:
- 必须实现
java.io.Serializable接口,Serializable 是一个标记接口,不实现此接口的类将不会使任何状态序列化或反序列化,会抛出NotSerializableException - 所有属性必须是可序列化的。如果有一个属性不需要可序列化的,则该属性必须注明是瞬态的,使用transient 关键字修饰。
public class A implements Serializable {
    public String val;
    public transient String val2;
    public String val3;
}
public class NewFileTest {
    public static void main(String[] args) throws IOException {
        A a = new A();
        a.val="val";
        a.val2="val2";
        a.val3="val3";
        try (ObjectOutputStream objectOutputStream = new ObjectOutputStream(new FileOutputStream("C:\mnt\this.txt"))) {
            objectOutputStream.writeObject(a);
        }
    }
}

我们可以看到序列化的内容中并不包含val2,下面再通过反序列化获取这些对象:
public class NewFileTest {
    public static void main(String[] args) throws IOException {
        try (ObjectInputStream objectInputStream = new ObjectInputStream(new FileInputStream("C:\mnt\this.txt"))) {
            A a = (A) objectInputStream.readObject();
            System.out.println(a);
        } catch (ClassNotFoundException e) {
            e.printStackTrace();
        }
        /** Output:
         *  A{val='val', val2='null', val3='val3'}
         */
    }
}
如果再反序列化过程中报InvalidClassException,有可能是版本号不匹配或者未知数据类型导致的,需要序列化的对象,提供了一个序列版本号。serialVersionUID 该版本号的目的在于验证序列化的对象和对应类是否版本匹配。
private static final long serialVersionUID = 1L;
数据流
DataOutputStream数据输出流允许应用程序将Java基本数据类型写到基础输出流中,而DataInputStream数据输入流允许应用程序以机器无关的方式从底层输入流中读取基本的Java类型。
public class NewFileTest {
    public static void main(String[] args) throws IOException {
        try (DataOutputStream dataOutputStream = new DataOutputStream(new FileOutputStream("C:\mnt\this.txt"));
             DataInputStream dataInputStream = new DataInputStream(new FileInputStream("C:\mnt\this.txt"))) {
            dataOutputStream.writeUTF("你好");
            dataOutputStream.writeBoolean(false);
            dataOutputStream.writeInt(1);
            dataOutputStream.writeDouble(1.1);
            System.out.println(new String(dataInputStream.readUTF().getBytes("GBK")));
            System.out.println(dataInputStream.readBoolean());
            System.out.println(dataInputStream.readInt());
            System.out.println(dataInputStream.readDouble());
        }
        /** Output:
         * 你好
         * false
         * 1
         * 1.1
         */
    }
}
这里只列举部分基本类型,有兴趣的可以都去尝试一遍
字节数组流
字节数组流包含一个内部缓冲区,该缓冲区包含从流中读取的字节;通俗点说,它的内部缓冲区就是一个字节数组。
- ByteArrayInputStream从内存中的字节数组中读取数据,因此它的数据源是一个字节数组。
- ByteArrayOutputStream将数据以字节数组的形式进行输出。
toByteArray()方法可以转换为字节数组
public class NewFileTest {
    public static void main(String[] args) {
        String input = "this is hello world";
        try (ByteArrayInputStream byteArrayInputStream = new ByteArrayInputStream(input.getBytes());
             ByteArrayOutputStream byteArrayOutputStream = new ByteArrayOutputStream()) {
            byte[] bytes = new byte[1024];
            int len = 0;
            while ((len = byteArrayInputStream.read(bytes)) != -1) {
                System.out.println(new String(bytes));
                byteArrayOutputStream.write(bytes);
            }
            System.out.println(new String(byteArrayOutputStream.toByteArray()));
        } catch (IOException e) {
            e.printStackTrace();
        }
        /**
         * Output:
         * this is hello world
         * this is hello world
         */
    }
}
当然也有字符数组流,其使用与字节数组流并无太大差别,这里就不再详细介绍了。
打印流
平时我们在控制台调用print()方法和println()方法打印输出,都是通过PrintStream实现的。打印流只操作目的地,不操作数据源,可以操作任意类型的数据
- PrintStream:字节打印流
- PrintWriter:字符打印流
public class NewFileTest {
    public static void main(String[] args) {
        try (PrintStream reader = new PrintStream("C:\mnt\this.txt");
             PrintWriter writer = new PrintWriter(new FileWriter("C:\mnt\this2.txt"))) {
            reader.println("this");
            reader.println("this new line");
            writer.print("this 2");
        } catch (IOException e) {
            e.printStackTrace();
        }
    }
}

讲解了这么多流,应该对它们都有了一些认识,下面将介绍流的一些新特性。
校验流
CheckedInputStream可以对任意 InputStream 计算校验和CheckedOutputStream可以对任意 OutputStream 计算校验,调用getCheckSum()可以获取校验的和,通过校验和可以确保文件数据的正确性。有两种校验算法Adler32和CRC32,Adler32能够更快地计算校验和和 CRC32简称循环冗余校验对比Adler32速度上可能会慢但是更加准确。
假设:现模拟一个文件,确保输出和输入一致,示例代码如下:
public class NewFileTest {
    public static void main(String[] args) throws IOException {
        CheckedOutputStream checkedOutputStream = new CheckedOutputStream(new FileOutputStream("test.txt"), new Adler32());
        byte[] bytes = "这是一个输出流".getBytes();
        checkedOutputStream.write(bytes);
        System.out.println("checkSum:"+checkedOutputStream.getChecksum().getValue());

        CheckedInputStream checkedInputStream = new CheckedInputStream(new FileInputStream("test.txt"), new Adler32());
        byte[] readByte = new byte[1024];
        int len = 0;
        while ((len = checkedInputStream.read(readByte))!= -1){
            System.out.println(new String(readByte));
        }
        System.out.println("checkSum:"+checkedInputStream.getChecksum().getValue());

        /** Output:
         *  checkSum:1439370131
         *  这是一个输出流
         *  checkSum:1439370131
         */
    }
}
当两个checkSum值一样时,可以说明文件没有被修改过,有效的保证数据的准确性。
数据压缩
Java I/O 类库提供了可以读写压缩格式流的类。你可以将其他 I/O 类包装起来用于提供压缩功能。压缩库处理的是字节,而不是字符。所以属于InputStream 和 OutputStream 层级结构的一部分。
| 压缩类 | 功能 |
|---|---|
| DeflaterOutputStream压缩类的基类 | |
| ZipOutputStream | DeflaterOutputStream 类的一种,用于压缩数据到 Zip 文件结构 |
| GZIPOutputStream | DeflaterOutputStream 类的一种,用于压缩数据到 GZIP 文件结构 |
| InflaterInputStream解压类的基类 | |
| ZipInputStream | InflaterInputStream 类的一种,用于解压 Zip 文件结构的数据 |
| GZIPInputStream | InflaterInputStream 类的一种,用于解压 GZIP 文件结构的数据 |
尽管存在很多压缩算法,但是 Zip 和 GZIP 可能是最常见的。你可以使用许多用于读取和写入这些格式的工具,来轻松操作压缩数据。
ZIP压缩和解压
- 压缩:把某文件里的所有内容压缩,示例代码如下:
public class NewFileTest {
    public static void main(String[] args) throws IOException {
        try (ZipOutputStream zipOutputStream = new ZipOutputStream(new FileOutputStream("C:\mnt\test.zip"));) {
            File file = new File("C:\mnt\apiImages\20220211");
            //注释
            zipOutputStream.setComment("这是一个压缩文件");
            for (File files : file.listFiles()) {
                FileInputStream fileInputStream = new FileInputStream(files);
                zipOutputStream.putNextEntry(new ZipEntry(files.getName()));
                byte[] bytes = new byte[1024];
                int len = 0;
                while ((len = fileInputStream.read(bytes)) != -1) {
                    zipOutputStream.write(bytes, 0, len);
                }
            }
        }
    }
}
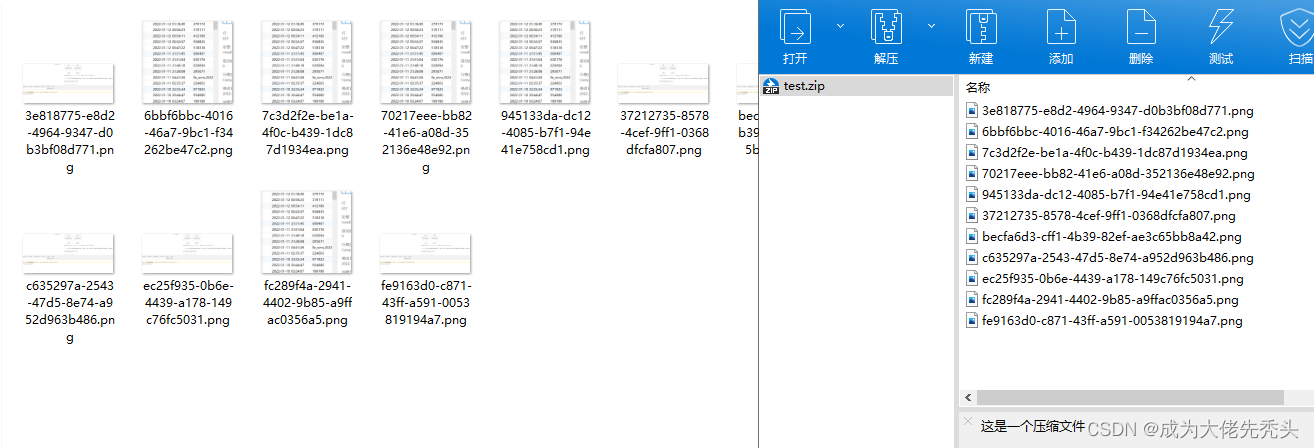
- 解压:解压压缩文件里的内容,示例代码如下:
public class NewFileTest {
    public static void main(String[] args) throws IOException {
        try (ZipInputStream zipInputStream = new ZipInputStream(new FileInputStream("C:\mnt\test.zip"));) {
            int len = 0;
            byte[] bytes = new byte[1024];
            ZipEntry nextEntry;
            while ((nextEntry = zipInputStream.getNextEntry()) != null) {
                String name = nextEntry.getName();
                FileOutputStream fileOutputStream = new FileOutputStream("C:\mnt\img\" + name);
                while ((len = zipInputStream.read(bytes)) != -1) {
                    fileOutputStream.write(bytes, 0, len);
                }
            }
        }
    }
}
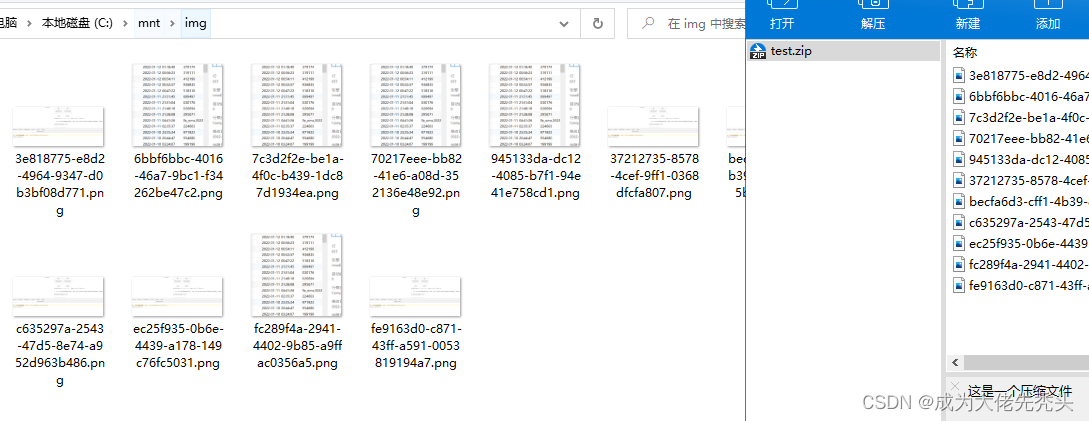
GZIP压缩和解压
- 压缩:把单个文件内容压缩,示例代码如下:
public class NewFileTest {
    public static void main(String[] args) throws IOException {
        try (FileInputStream fileInputStream = new FileInputStream("C:\mnt\server.jpg");
             GZIPOutputStream gzipOutputStream = new GZIPOutputStream(new FileOutputStream("C:\mnt\test.gz"));) {
            byte[] bytes = new byte[1024];
            int len = 0;
            while ((len = fileInputStream.read(bytes)) != -1) {
                gzipOutputStream.write(bytes, 0, len);
            }
        }
    }
}
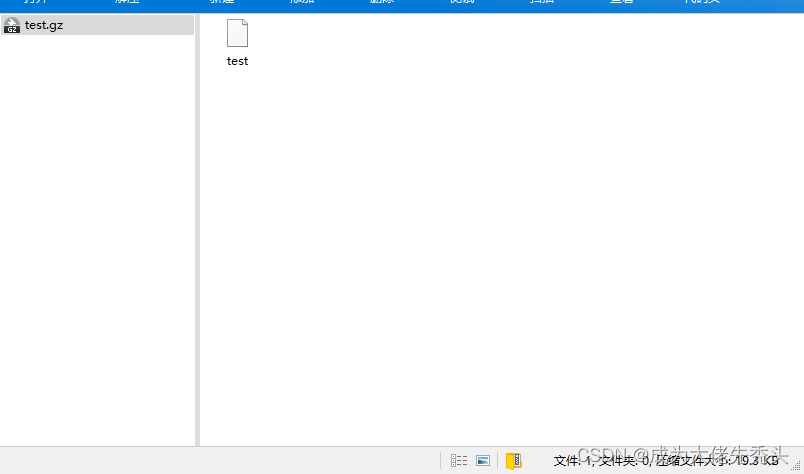
得到一个文本文件流,与.zip文件还不太一样。
- 解压:解压压缩文件里的内容,示例代码如下:
public class NewFileTest {
    public static void main(String[] args) throws IOException {
        try (GZIPInputStream gzipInputStream = new GZIPInputStream(new FileInputStream("C:\mnt\test.gz"));) {
            int len = 0;
            byte[] bytes = new byte[1024];
            FileOutputStream fileOutputStream = new FileOutputStream("C:\mnt\img\test.jpg");
            while ((len = gzipInputStream.read(bytes)) != -1) {
                fileOutputStream.write(bytes, 0, len);
            }
        }
    }
}

Java 的 jar
Zip 格式也用于 JAR(Java ARchive)文件格式,这是一种将一组文件收集到单个压缩文件中的方法,就像 Zip 一样。但是,与 Java 中的其他所有内容一样,JAR 文件是跨平台的,因此你不必担心平台问题。你还可以将音频和图像文件像类文件一样包含在其中。
JAR 文件由一个包含压缩文件集合的文件和一个描述它们的“清单(manifest)”组成。(你可以创建自己的清单文件;否则,jar 程序将为你执行此操作。)你可以在 JDK 文档中,找到更多关于 JAR 清单的信息。
JDK 附带的 jar 工具会自动压缩你选择的文件。你可以在命令行上调用它:
jar [options] destination [manifest] inputfile(s)
| 选项 | 功能 |
|---|---|
| c | 创建一个新的或者空的归档文件 |
| t | 列出内容目录 |
| x | 提取所有文件 |
| x file | 提取指定的文件 |
| f | 这代表着,“传递文件的名称。”如果你不使用它,jar 假定它的输入将来自标准输入,或者,如果它正在创建一个文件,它的输出将转到标准输出。 |
| m | 代表第一个参数是用户创建的清单文件的名称。 |
| v | 生成详细的输出用于表述 jar 所作的事情 |
| 0 | 仅存储文件;不压缩文件(用于创建放在类路径中的 JAR 文件)。 |
| M | 不要自动创建清单文件 |
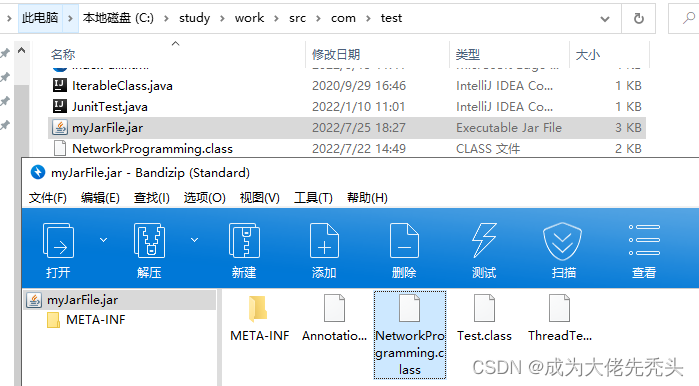
示例:创建名为 myJarFile 的 JAR 文件。 jar 包含当前目录中的所有类文件,以及自动生成的清单文件:
jar cf myJarFile.jar *.class
jar 工具不像 Zip 实用程序那样通用。例如,你无法将文件添加或更新到现有 JAR 文件;只能从头开始创建 JAR 文件。
此外,你无法将文件移动到 JAR 文件中,在移动文件时将其删除。
但是,在一个平台上创建的 JAR 文件可以通过任何其他平台上的 jar 工具透明地读取(这个问题有时会困扰 Zip 实用程序)。
标准IO
程序的所有输入都可以来自于标准输入,其所有输出都可以流向标准输出,并且其所有错误信息均可以发送到标准错误。标准 I/O 的意义在于程序之间可以很容易地连接起来,一个程序的标准输出可以作为另一个程序的标准输入。遵循标准 I/O 模型,Java 提供了标准输入流 System.in、标准输出流 System.out 和标准错误流 System.err。System.out和System.err包装成了 PrintStream 对象,System.in是原生的 InputStream,下面这个例子将输入的每一行显示出来:
public class NewFileTest {
    public static void main(String[] args) {
        new BufferedReader(new InputStreamReader(System.in)).lines().forEach(System.out::print);
        /**
         * Output:
         * hello
         * hello
         * hi
         * hi
         */
    }
}
BufferedReader 提供了 lines() 方法,返回类型是 Stream 。这显示出流模型的的灵活性:仅使用标准输入就能很好地工作。
重定向标准 I/O
Java的 System 类提供了简单的 static 方法调用,从而能够重定向标准输入流、标准输出流和标准错误流:
- setIn(InputStream)
- setOut(PrintStream)
- setErr(PrintStream)
将文件中内容载入到标准输入,并把标准输出和标准错误重定向到另一个文件,下例简单演示了这些方法的使用:
public class NewFileTest {
    public static void main(String[] args) {
        try (BufferedInputStream bufferedInputStream = new BufferedInputStream(new FileInputStream("C:\mnt\this.txt"));
             PrintStream printStream = new PrintStream(new BufferedOutputStream(new FileOutputStream("C:\mnt\this2.txt")))){
            System.setIn(bufferedInputStream);
            System.setOut(printStream);
            System.setErr(printStream);
        } catch (FileNotFoundException e) {
            e.printStackTrace();
        } catch (IOException e) {
            e.printStackTrace();
        }
    }
}

I/O重定向操作的是字节流而不是字符流,因此使用 InputStream 和 OutputStream,而不是 Reader 和 Writer。
流式IO
编程语言的 I/O 类库经常使用流这个抽象概念,它将所有数据源或者数据接收器表示为能够产生或者接收数据片的对象。
注意:Java 8 函数式编程中的 Stream 类和这里的 I/O stream 没有任何关系。这又是另一个例子,如果再给设计者一次重来的机会,他们将使用不同的术语。
我们很少使用单一的类来创建流对象,而是通过叠合多个对象来提供所期望的功能(这是装饰器设计模式)。为了创建一个流,你却要创建多个对象,这也是 Java I/O 类库让人困惑的主要原因。
下面这个例子通过BufferedReader输入信息后,使用流式进行打印:
public class NewFileTest {
    public static void main(String[] args) throws IOException {
        try (BufferedReader bufferedReader = new BufferedReader(new FileReader("C:\mnt\this.txt"))){
            bufferedReader.lines().forEach(System.out::println);
        } catch (IOException e) {
            e.printStackTrace();
        }
    }
}
读写随机访问文件
RandomAccess 实现了 DataInput 和 DataOutput 接口,但实际上它和 I/O 继承体系中的其它部分是分离的。它不支持装饰,故而不能将其与 InputStream 及 OutputStream 子类中的任何一个组合起来,它的构造函数有两个参数:一个是文件地址,一个打开的模式,一共有四种模式,具体如下:
- r:以只读方式打开指定文件。如果试图对该RandomAccessFile指定的文件执行写入方法则会抛出IOException
- rw:以读取、写入方式打开指定文件。如果该文件不存在,则尝试创建文件
- rws:以读取、写入方式打开指定文件。相对于rw模式,还要求对文件的内容或元数据的每个更新都同步写入到底层存储设备,默认情形下(rw模式下),是使用buffer的,只有cache满的或者使用RandomAccessFile.close()关闭流的时候儿才真正的写到文件
- rwd:与rws类似,只是仅对文件的内容同步更新到磁盘,而不修改文件的元数据
RandomAccessFile控制指针的偏离量seek()方法,getFilePointer()方法返回此文件中的当前偏移量。
public class NewFileTest {
    public static void main(String[] args) throws IOException {
        try (RandomAccessFile  randomAccessFile = new RandomAccessFile ("C:\mnt\this.txt","r")){
            System.out.println(randomAccessFile.readLine());
            randomAccessFile.seek(2);
            System.out.println(randomAccessFile.getFilePointer());
            System.out.println(randomAccessFile.readLine());
        } catch (IOException e) {
            e.printStackTrace();
        }
        /** Output:
         *  this
         *  6
         *  2
         *  is
         */
    }
}
本章小结
Java 的 I/O 流类库的确能够满足我们的基本需求:我们可以通过控制台、文件、内存块,甚至因特网进行读写。I/O 流类库让我们喜忧参半。它确实挺有用的,而且还具有可移植性。但是如果我们没有理解“装饰器”模式,那么这种设计就会显得不是很直观。所以,它的学习成本相对较高。一旦你理解了装饰器模式,并且开始在某些需要这种灵活性的场景中使用该类库,那么你就开始能从这种设计中受益了。
最后
以上就是鲤鱼大侠最近收集整理的关于重拾Java基础知识:IO流前言的全部内容,更多相关重拾Java基础知识内容请搜索靠谱客的其他文章。


发表评论 取消回复