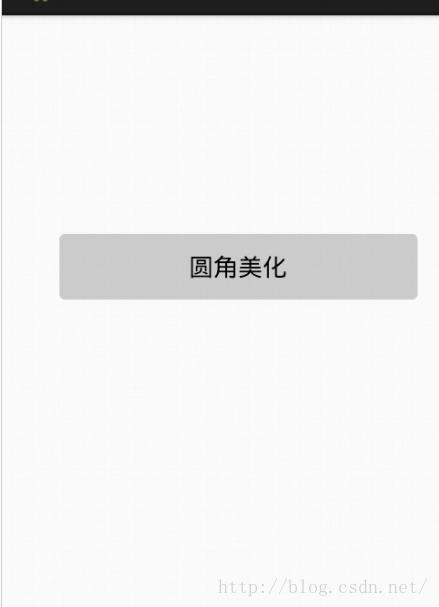
今天给大家介绍一下Android Shape Drawable 美化圆角图形,废话不多说,直接上代码
1、首先你得有一个button,在Android xml中直接创建一个控件
<Button
android:id="@+id/button1"
android:layout_width="fill_parent"
android:layout_height="wrap_content"
android:layout_alignParentLeft="true"
android:layout_alignParentTop="true"
android:layout_marginLeft="26dp"
android:layout_marginTop="144dp"
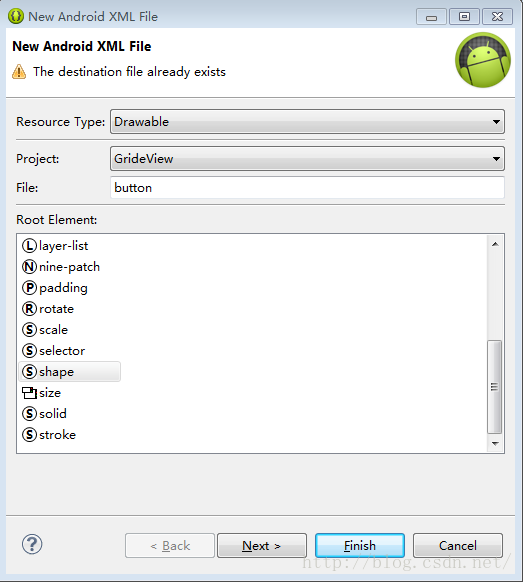
android:text="圆角美化" />2、在drawable 文件夹中新建一个xml文件,右键->NEW->Android XML File ,取名button,Root Element选择shape,
如图:
3、在新建的button.xml中设置属性值
    <corners
        <span style="color:#ff6666;">android:radius="4dp" //此属性为圆角的弧度,值越大弧度越大</span>
        />
    <gradient   //设置渐变色 ,这个属性一定要有,这个属性一定要有,这个属性一定要有,(重要的事情说三遍)
        android:startColor="#cccccc"  //开始颜色,#cccccc设置的是灰色
        android:centerColor="#cccccc" //中间颜色
        android:endColor="#cccccc"    //结尾颜色
        />
    <padding

        android:left="7dp"
        android:right="7dp"
        android:top="7dp"
        android:bottom="7dp"
        />

</shape>
最后
以上就是着急鲜花最近收集整理的关于Android开发学习系列(一)——Android按钮圆角美化的全部内容,更多相关Android开发学习系列(一)——Android按钮圆角美化内容请搜索靠谱客的其他文章。
本图文内容来源于网友提供,作为学习参考使用,或来自网络收集整理,版权属于原作者所有。


发表评论 取消回复