文章目录
- 什么是tensor
- tensor的属性
- 创建tensor
- tensor数据类型转换
- tf.int、tf.double、tf.float 之间相互转换( tf.cast() )
- bool和int类型相互转换( tf.cast() )
- tensor 转换成numpy数组
- tensor的索引与切片
- 1. Basic Indexing
- 2. Numpy-style Indexing
- 3. Selective Indexing
- tf.gather
- tf.gather_nd
- tf.boolean_mask
- tensor的维度变换
- 1. tf.reshape
- 2. tf.transpose
- 3. 增加维度--tf.expand_dims
- 4. 降维--tf.squeeze
- Broadcasting(广播机制)
- 1. broadcasting介绍
- 2. broadcasting VS tile
- tensor的数学运算
- element-wise
- 加减乘除取余
- tf.math.log、tf.exp
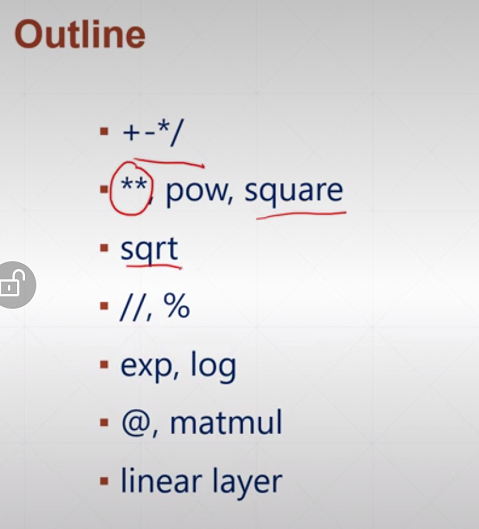
- 乘方、开方
- matrix-wise 矩阵相乘
- @
- tf.matmul(a,b)
- 矩阵相乘中的broadcasting
- dim-wise
- 前向传播实战
什么是tensor
常见的数据载体(data container):
- list(可存放不同类型数据);
- np.array(科学计算库,数值运算,但不支持自动求导);
- tf.Tensor(也可视为一个与numpy类似的科学计算库)。
TensorFlow使用张量(Tensor)作为数据的基本单位。tensor在概念上类似于多维数组,可以用它来描述数学中的标量(0维数组)、向量(一维数组)、矩阵(2维数组)等各种量。
tensor的属性
张量的三个重要属性是其形状、(存放的数据)类型和值。可以通过shape、dtype属性和 numpy() 方法获得。
| 属性/方法 | 描述 |
|---|---|
| a.shape | |
| a.dtype | 存放的数据类型 |
| a.numpy() | 获取a中存放的值 |
| a.ndim | 获得a的维度 |
用 tf.is_tensor(a) 可以判断a是否为tensor(返回布尔型)。
创建tensor
- 用 tf.constant()、tf.Variable() 创建tensor
a = tf.constant(10) # 标量
print(a)  # tf.Tensor(10, shape=(), dtype=int32)

b = tf.constant([2.], dtype=tf.double)  # 加上中括号就为一维向量
print(b)  # tf.Tensor([2.], shape=(1,), dtype=float64)
print(b.dtype)  # <dtype: 'float64'>

c = tf.constant([True, False])
print(c)  # tf.Tensor([ True False], shape=(2,), dtype=bool)

d = tf.constant("hello world")
print(d)  # tf.Tensor(b'hello world', shape=(), dtype=string)
tf.Variable专为神经网络中可训练的参数设置(有trainable属性且为True)
a = tf.Variable(initial_value=1)
print(a)  # <tf.Variable 'Variable:0' shape=() dtype=int32, numpy=1>
print(a.dtype)  # <dtype: 'int32'>
print(a.numpy())  # 1

b = tf.range(5)
print(b.trainable)  # 报错,无此属性 AttributeError: 'tensorflow.python.framework.ops.EagerTensor' object has no attribute 'trainable'
c = tf.Variable(a)
print(c)  # <tf.Variable 'Variable:0' shape=() dtype=int32, numpy=1>
print(c.trainable)  # True
- tf.range()、tf.linspace(start, end, number)
a = tf.range(5)
print(a)  # tf.Tensor([0 1 2 3 4], shape=(5,), dtype=int32)
print(a.numpy())  # [0 1 2 3 4]
- 使用tf.convert_to_tensot() 将numpy或list转换为tensor
import tensorflow as tf
import numpy as np

a = np.arange(5)
b = tf.convert_to_tensor(a)

c = tf.convert_to_tensor(a, dtype=tf.int32)

print(b.dtype)  # <dtype: 'int32'>
print(c.dtype)  # <dtype: 'int32'>
import tensorflow as tf

a = tf.convert_to_tensor([1, 5, 8])
print(a)  # tf.Tensor([1 5 8], shape=(3,), dtype=int32)
- tf.zeros()、tf.zeros_like()、tf.ones()、tf.ones_like()
注:tf.zeros()、tf.ones() 括号中接收的是数组形状
a = tf.zeros([])
print(a.shape)  # ()  即,创建了一个标量

b = tf.zeros([1])
print(b.shape)  # (1,)  创建一维向量

c = tf.zeros([3, 6])
print(c.shape)
a = tf.range(5)
b = tf.zeros_like(a)
print(b.numpy())  # [0 0 0 0 0]
- 用 tf.fill() 创建值相同的tensor
a = tf.fill([4, 6], 8)
print(a.numpy())
6. 创建正态分布、均匀分布随机初始化的tensor
(1)正态分布
a = tf.random.normal([2, 3], mean=0, stddev=2)  # stddev为标准差
print(a)

截断正态分布,避免数据落在sigmoid函数两端导致的梯度消失问题(如参数初始化时)。
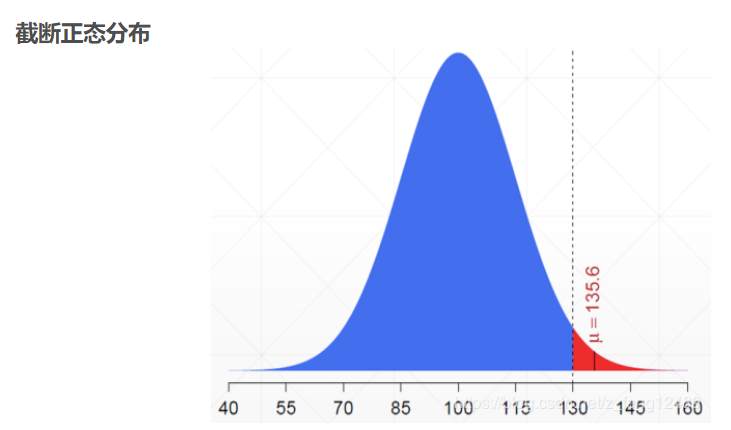
a = tf.random.truncated_normal([2, 6], mean=0, stddev=2)
print(a)
函数注释:The generated values follow a normal distribution with specified mean and standard deviation, except that values whose magnitude is more than 2 standard deviations from the mean are dropped and re-picked.
大于两倍标准差的数值被舍弃。
(2)均匀分布
a = tf.random.uniform([3, 6], minval=1, maxval=6)  # 还可指定dtype
print(a)

7. Random Permutation
ind = tf.range(10)
ind = tf.random.shuffle(ind)

a = tf.random.normal([10, 784])
b = tf.random.uniform([10], maxval=10, dtype=tf.int32)

a = tf.gather(a, ind)
b = tf.gather(b, ind)
| 创建方法 | 说明 |
|---|---|
| tf.range(n) | 创建tensor,值为从0~n-1的向量 |
| tf.constant() | 创建常量tensor |
| tf.Variable() | 创建变量tensor,可训练(trainable属性为True) |
| tf.convert_to_tensor(numpy数组或list) | 将numpy数组或list转换为tensor |
| tf.zeros( [shape] )、tf.ones( [shape] ) | 创建形状为shape的全为0/1的tensor |
| tf.zeros_like(b)、tf.ones_like(b) | 创建与b形状相同的全为0/1的tensor |
| tf.fill([shape], num) | 创建一个值全为num的shape形tensor |
| tf.random.normal( [shape], mean=, steddv = ) | 正态分布 |
| tf.random.truncated_normal([shape], mean=, steddv = ) | 截断正态分布 |
| tf.random.uniform([shape],minval=, maxvla =, dtype = ) | 均匀分布 |
tensor数据类型转换
tf.int、tf.double、tf.float 之间相互转换( tf.cast() )
a = np.arange(5)
b = tf.convert_to_tensor(a, dtype=tf.int32)

c = tf.cast(b, tf.float32)
print(c.numpy())  #
bool和int类型相互转换( tf.cast() )
a = tf.constant([1, 2])
b = tf.cast(a, tf.bool)
print(b.numpy())  # [ True  True]

c = tf.constant([True, False])
d = tf.cast(c, tf.int32)
print(d.numpy())  # [1 0]
tensor 转换成numpy数组
a = tf.constant([1, 2])
b = a.numpy()
print(b)

d = tf.ones([])
e = int(d)
print(e)  # 只有tensor为标量时才可以用int()、float()将tensor转换为numpy数组
tensor的索引与切片
1. Basic Indexing
[ind][ind][ind]
a = tf.ones([1, 5, 5, 3])
print(a[0][0])  # (5, 3)
print(a[0][0][0][1])  # () ----一个标量
2. Numpy-style Indexing
[ind, ind,……] 不同维度之间用逗号隔开
start : end
start : end :step
注意,切片操作包头不包尾!
a = tf.random.normal([4, 28, 28, 3])
print(a[1].shape)  # (28, 28, 3)
print(a[1, 2].shape)  # (28, 3)
a = tf.random.normal([4, 28, 28, 3])
print(a[0:3].shape)  # (3, 28, 28, 3)
print(a[:, 0:6, :, :].shape)  # (4, 6, 28, 3)
a = tf.range(10)
print(a[-3:])  # tf.Tensor([7 8 9], shape=(3,), dtype=int32)
a = tf.random.normal([4, 28, 28, 3])
print(a[:, ::2, :, :].shape)  # (4, 14, 28, 3)
step为负数时:
[大索引值:小索引值:-1] 注意,仍然是包头不包尾!
a = tf.range(10)
print(a[8:2:-1])  # tf.Tensor([8 7 6 5 4 3], shape=(6,), dtype=int32)
切片中…(英文输入法下3个句号)的使用(用来代替多个冒号)
numpy中也支持此用法
a = tf.random.normal([4, 28, 28, 3])
print(a[0, ...].shape)  # (28, 28, 3)
print(a[0, ..., 2].shape)  # (28, 28)
3. Selective Indexing
解决在某一维度随意选n个值的问题。
例:[class, students, subjects] = [4, 35, 8]
tf.gather
a = tf.random.normal([4, 35, 8])
b = tf.gather(a, axis=0, indices=[2, 3])
print(b.shape)  # (2, 35, 8)

c = tf.gather(a, axis=0, indices=[0, 3, 1, 2])  # 改变班级顺序

d = tf.gather(a, axis=1, indices=[2, 3, 4, 6, 8, 9])
print(d.shape)  # (4, 6, 8)
tf.gather_nd
在多个维度上进行选择(某几位学生的某几科成绩)
(1)连用两次tf.gather;
(2)用tf,gather_nd [[样本1],[样本2],……]
a = tf.random.normal([4, 35, 8])

b = tf.gather_nd(a, [0])
print(b.shape)  # (35, 8)

c = tf.gather_nd(a, [0, 1])
print(c.shape)  # 8

d = tf.gather_nd(a, [0, 1, 2])
print(d.shape)  # ()

e = tf.gather_nd(a, [[0, 1, 2]])
print(e.shape)  # (1,)
f = tf.gather_nd(a, [[0, 0], [1, 1], [2, 2]])
print(f.shape)  # (3, 8)

g = tf.gather_nd(a, [[0, 0, 0], [1, 1, 1]])
print(g.shape)  # (2,)

h = tf.gather_nd(a, [[[0, 0, 0], [1, 1, 1]]])
print(h.shape)  # (1, 2)
推荐使用格式:
[[0], [1]]
[[0,0], [1, 1]]
[[0, 0, 0], [1, 1, 1]]
a = tf.constant([1, 2, 3, 4])
b = tf.constant([0, 1, 3, 1, 0, 2])

print(tf.gather(a, b))  # tf.Tensor([1 2 4 2 1 3], shape=(6,), dtype=int32)
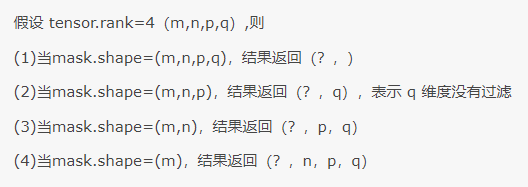
tf.boolean_mask
用布尔值过滤元素
a = tf.random.normal([4, 28, 28, 3])

b = tf.boolean_mask(a, mask=[True, True, False, False])  # 不指定的话默认axis=0
print(b.shape)  # (2, 28, 28, 3)

c = tf.boolean_mask(a, mask=[True, True, False], axis=3)  # 最后一维的前两个
print(c.shape)  # (4, 28, 28, 2)
a = tf.ones([2, 3, 4])
b = tf.boolean_mask(a, mask=[[True, False, False], [False, True, True]])  # 对前两维(2*3)
print(b.shape)  # (3, 4)
tensor的维度变换
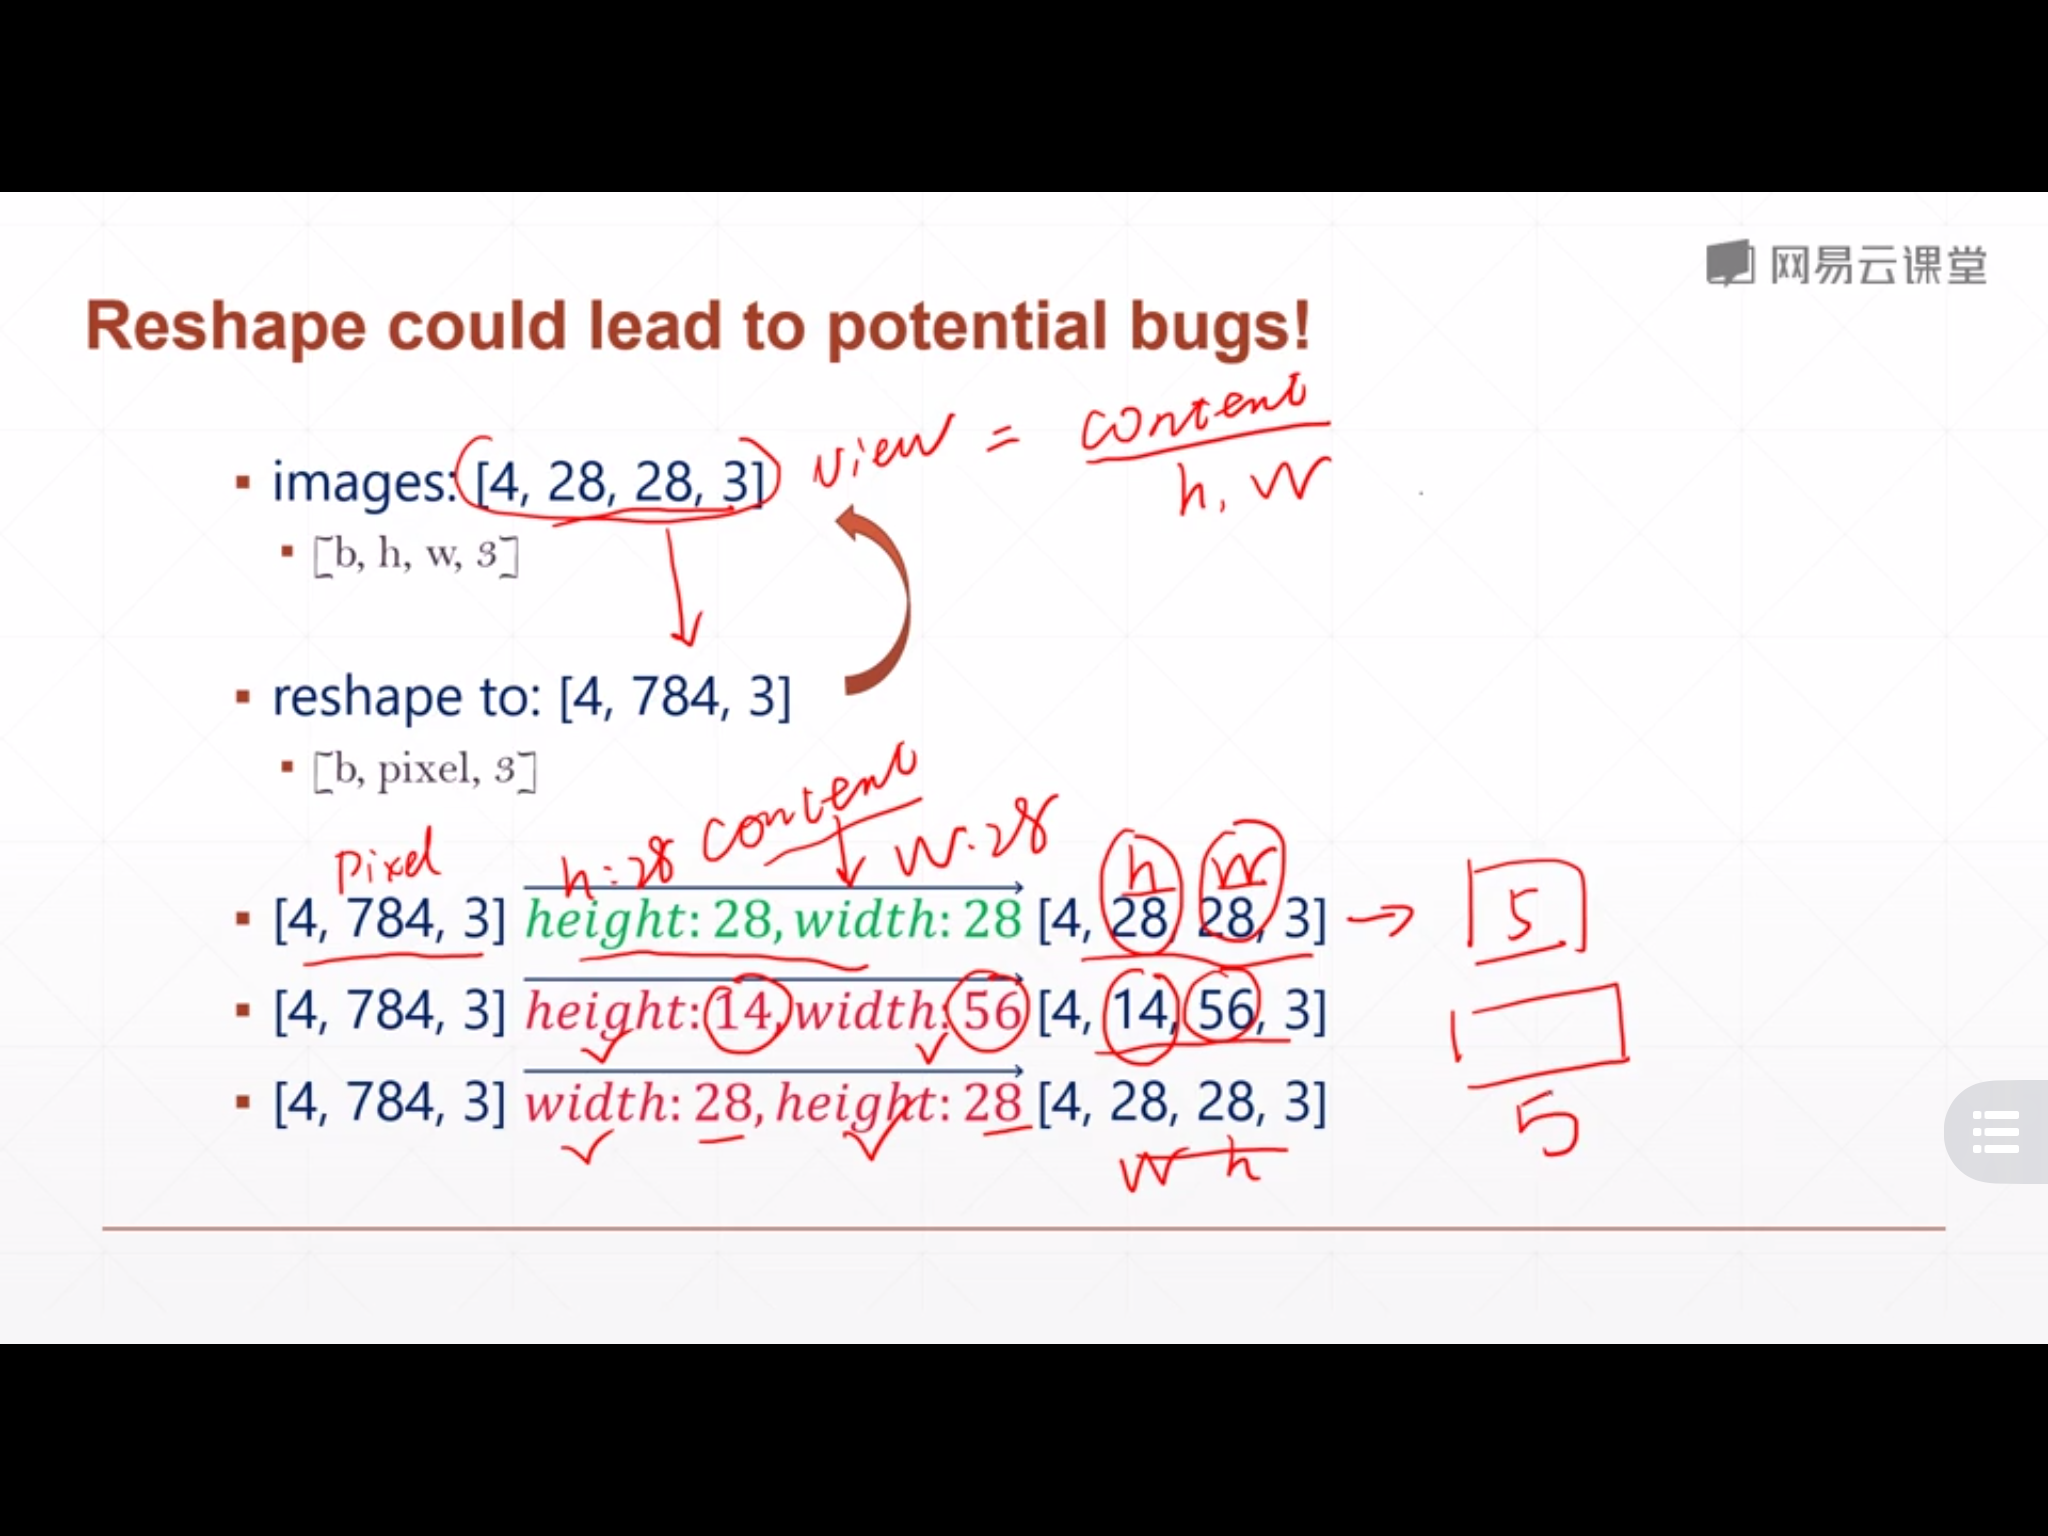
1. tf.reshape
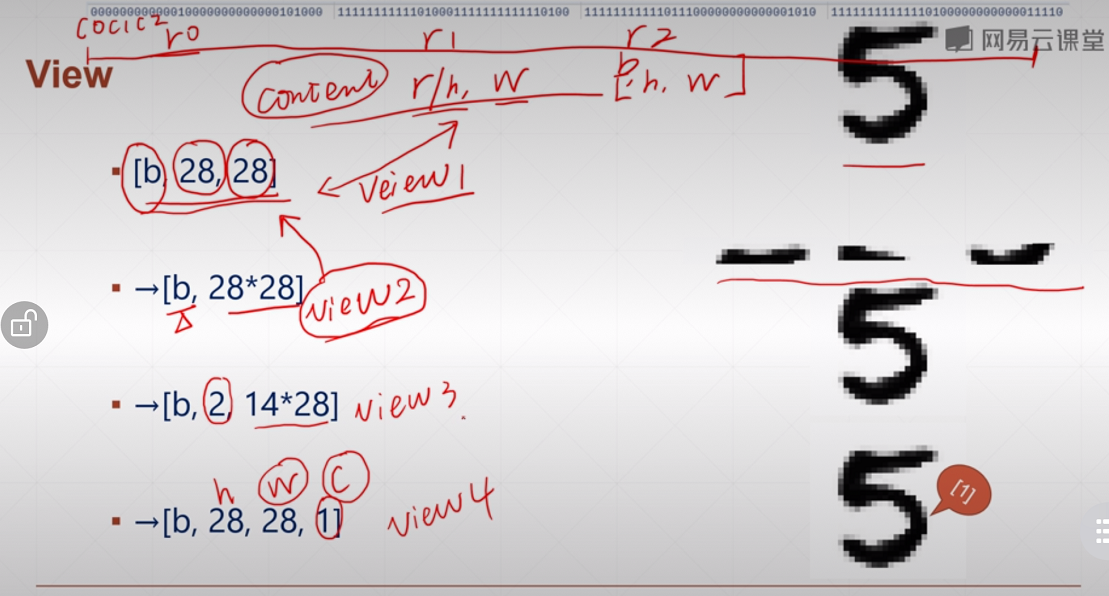
a = tf.random.normal([4, 28, 28, 3])

b = tf.reshape(a, [4, -1, 3])
print(b.shape)  # (4, 784, 3)

c = tf.reshape(a, [4, -1])
print(c.shape)  # (4, 2352)
2. tf.transpose
a = tf.random.normal([4, 3, 2, 1])

b = tf.transpose(a)
print(b.shape)  # (1, 2, 3, 4)

c = tf.transpose(a, perm=[0, 1, 3, 2])
print(c.shape)  # (4, 3, 1, 2)
# pytorch中[b, c, h, w]
b = tf.transpose(a, [0, 3, 1, 2])
3. 增加维度–tf.expand_dims
背景
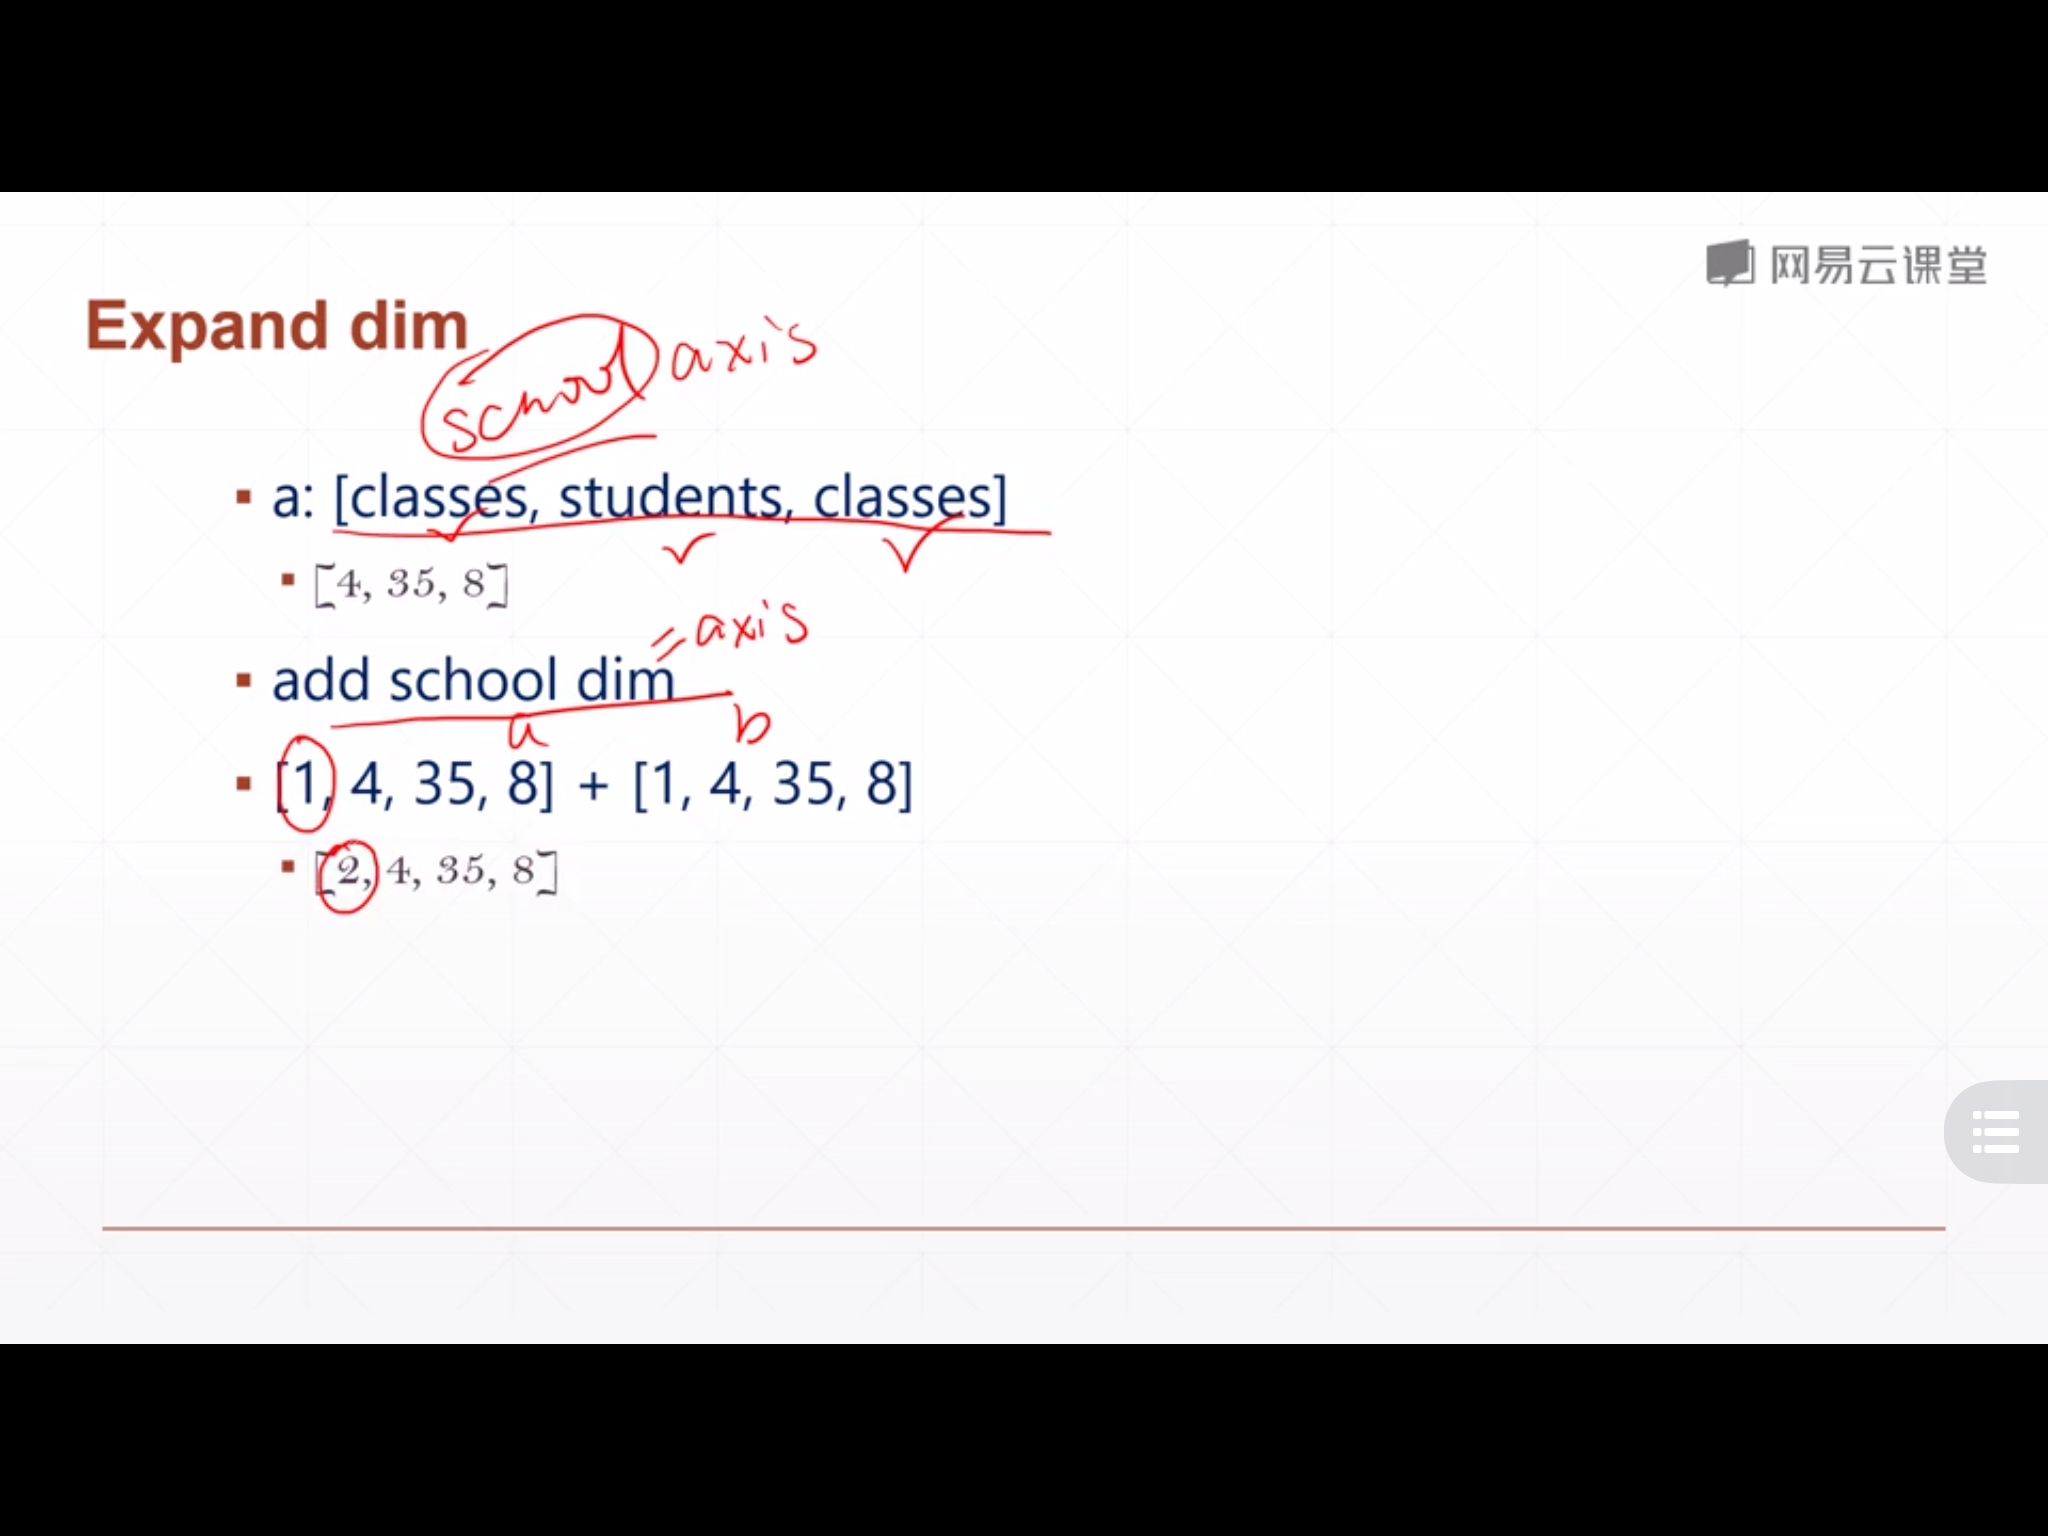
a = tf.random.normal([4, 35, 8])

b = tf.expand_dims(a, axis=0)
print(b.shape)  # (1, 4, 35, 8)

c = tf.expand_dims(a, axis=1)
print(c.shape)  # (4, 1, 35, 8)

d = tf.expand_dims(a, axis=2)
print(d.shape)  # (4, 35, 1, 8)
a = tf.random.normal([4, 35, 8])

b = tf.expand_dims(a, axis=-1)
print(b.shape)  # (4, 35, 8, 1)

c = tf.expand_dims(a, axis=-2)
print(c.shape)  # (4, 35, 1, 8)  ----在-2处增加一维(-1处不动)
4. 降维–tf.squeeze
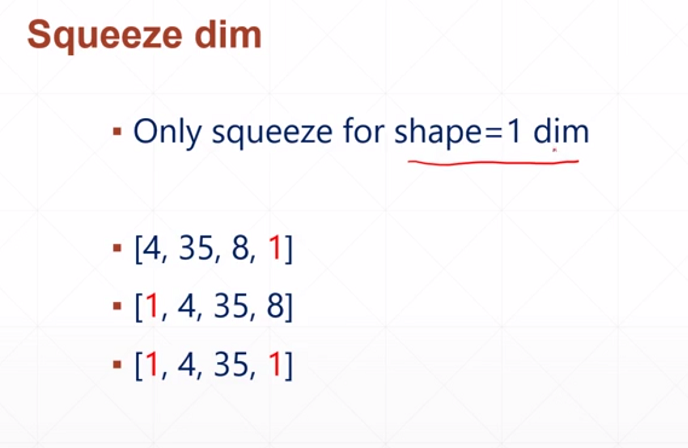
a = tf.zeros([1, 2, 1, 1, 5])

b = tf.squeeze(a)
print(b.shape)  # (2, 5)

c = tf.squeeze(a, axis=0)
print(c.shape)  # (2, 1, 1, 5)

d = tf.squeeze(a, axis=-2)
print(d.shape)  # (1, 2, 1, 5)
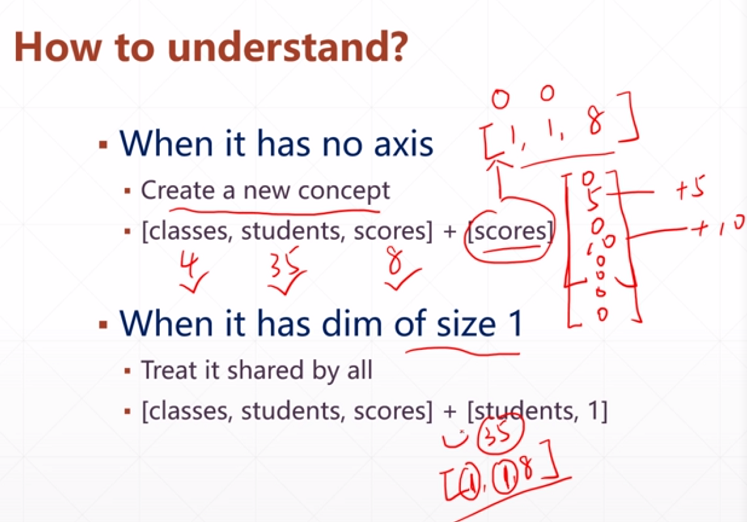
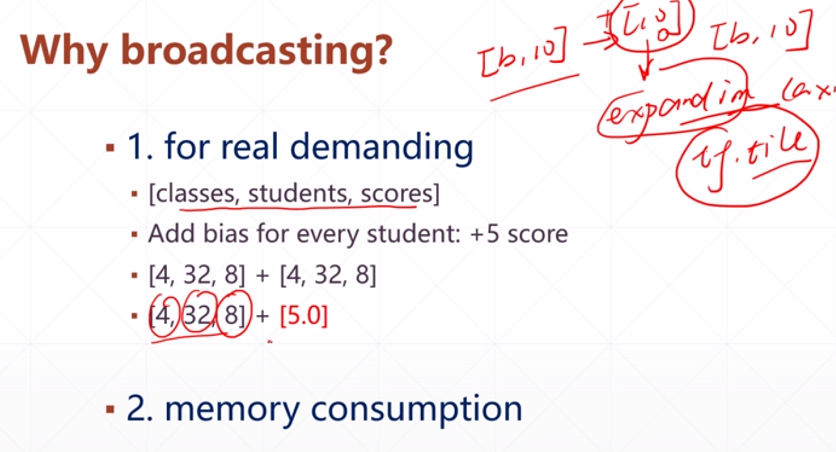
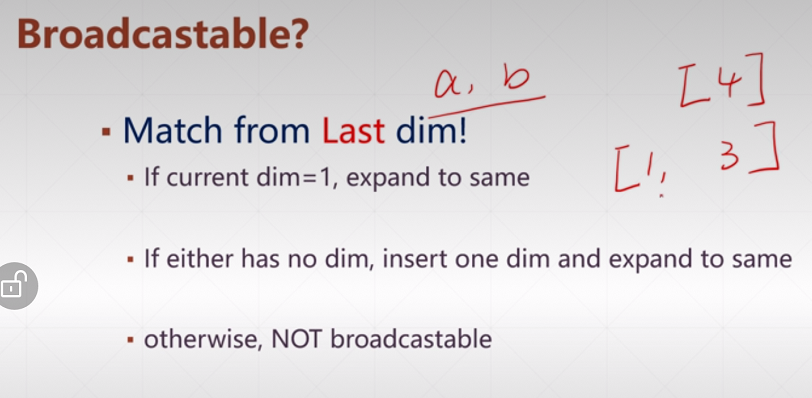
Broadcasting(广播机制)
1. broadcasting介绍
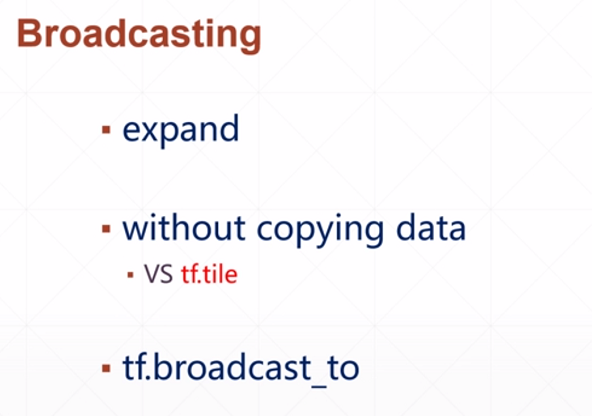
并没有真正复制数据,所以相对于 tf.tile 节省了内存空间。

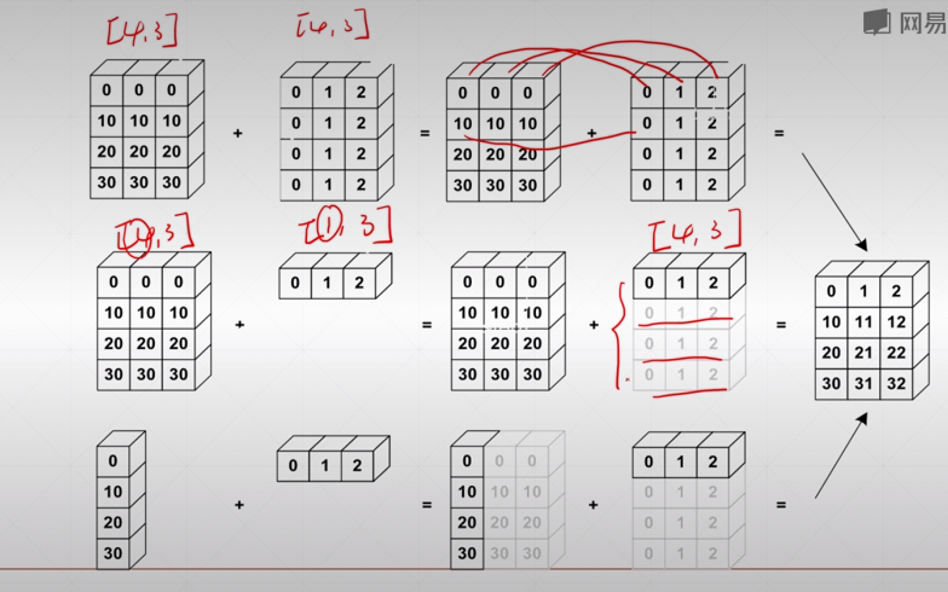
例子:
a = tf.random.normal([4, 32, 32, 3])
b = tf.random.normal([3])
c = a + b
print(c.shape)  # (4, 32, 32, 3)

d = tf.random.normal([32, 32, 1])
e = a + d
print(e.shape)  # (4, 32, 32, 3)
a = tf.random.normal([4, 1, 1, 1])
b = tf.broadcast_to(a, [4, 32, 32, 3])
print(b.shape)  # (4, 32, 32, 3)
2. broadcasting VS tile
a = tf.ones([3, 4])
b1 = tf.broadcast_to(a, [2, 3, 4])
print(b1)

b2 = tf.expand_dims(a, axis=0)
b3 = tf.tile(b2, [2, 1, 1])  # 第一个维度上复制一次,第二、三个维度上复制两次
print(b3)
运行结果:
tensor的数学运算
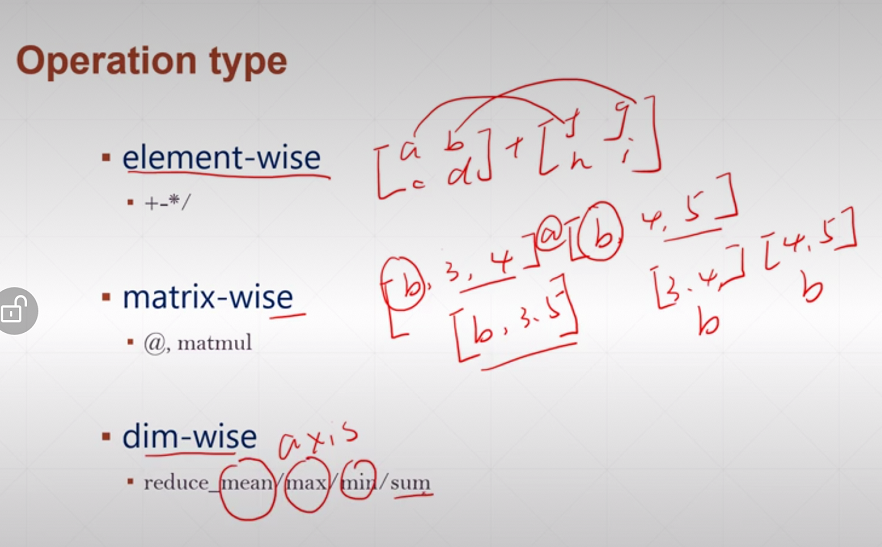
matrix-wise中,[b, 3, 4] @ [b, 4, 5]相当于b个 矩阵相乘 并行运算。
element-wise
加减乘除取余
- 维度相同,对应位置元素操作;
- 维度不同,broadcasting。
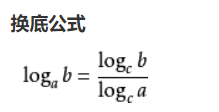
tf.math.log、tf.exp
注意,tf.math.log默认是自然对数(以e为底),可以用换底公式求以其他数为底的对数。
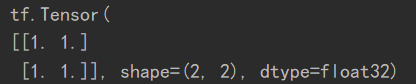
a = tf.ones([2, 2])
b = tf.math.log(a)
print(a)
a = tf.ones([2, 2])
c = tf.exp(a)
print(c)

a = tf.math.log(8.)/tf.math.log(2.)
print(a)
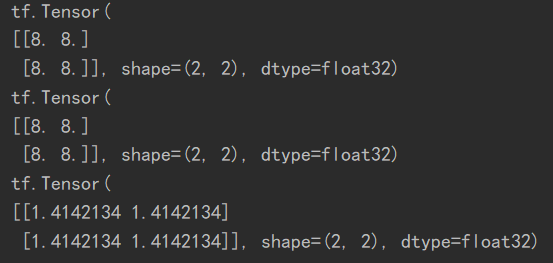
乘方、开方
a = tf.fill([2, 2], 2.)
b = tf.pow(a, 3)
print(b)

c = a ** 3
print(c)

d = tf.sqrt(a)
print(d)
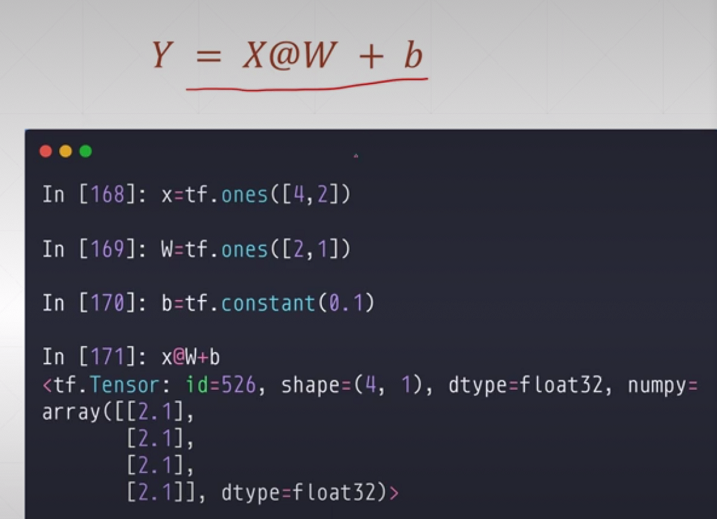
matrix-wise 矩阵相乘
@
a = tf.fill([2, 2], 2.)
b = tf.ones([2, 2])

print(a @ b)
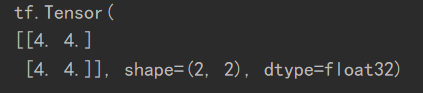
tf.matmul(a,b)
a = tf.fill([2, 2], 2.)
b = tf.ones([2, 2])

print(tf.matmul(a, b))
运行结果:

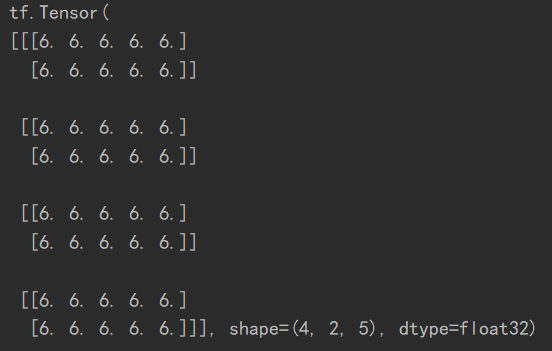
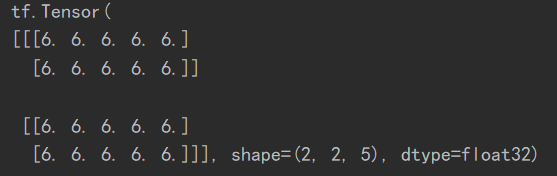
a = tf.fill([4, 2, 3], 2.)
b = tf.ones([4, 3, 5])

print(tf.matmul(a, b))
运行结果:
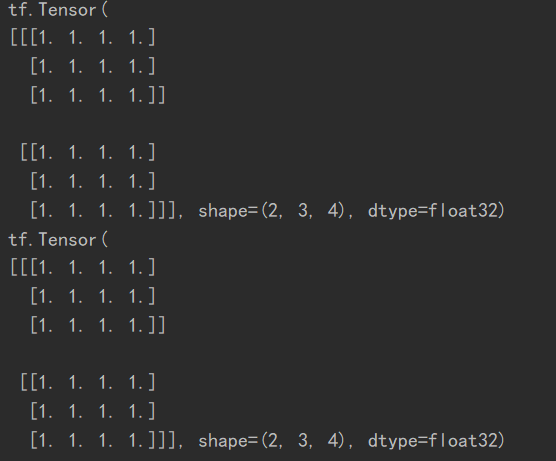
矩阵相乘中的broadcasting
a = tf.fill([2, 2, 3], 2.)
b = tf.ones([3, 5])

print(tf.matmul(a, b))
运行结果:

dim-wise
tf.reduce_mean/max/min/sum(input_tensor, axis= )
注:
(1)axis = 0,按行操作(相加、取最大值等),得到形状为列数(也可理解为列方向进行操作);
(2)axis = 1,形状与行数相同。
若不指定axis的值,则取全局范围的和/最大值等。
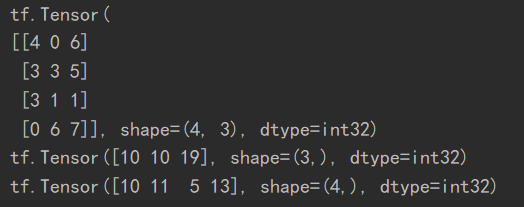
a = tf.random.uniform([4, 3], maxval=8, dtype=tf.int32)
print(a)

print(tf.reduce_sum(a, axis=0))  # 每行相加
print(tf.reduce_sum(a, axis=1))
运行结果:
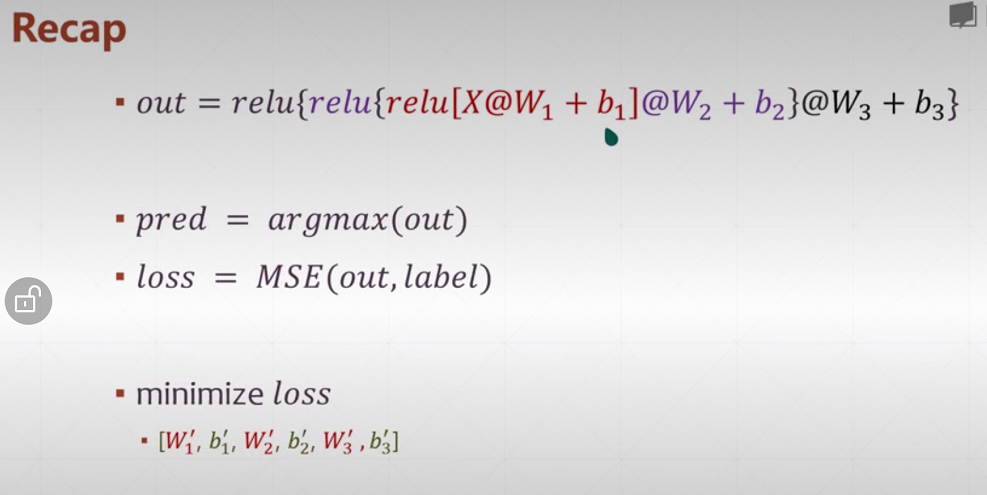
前向传播实战
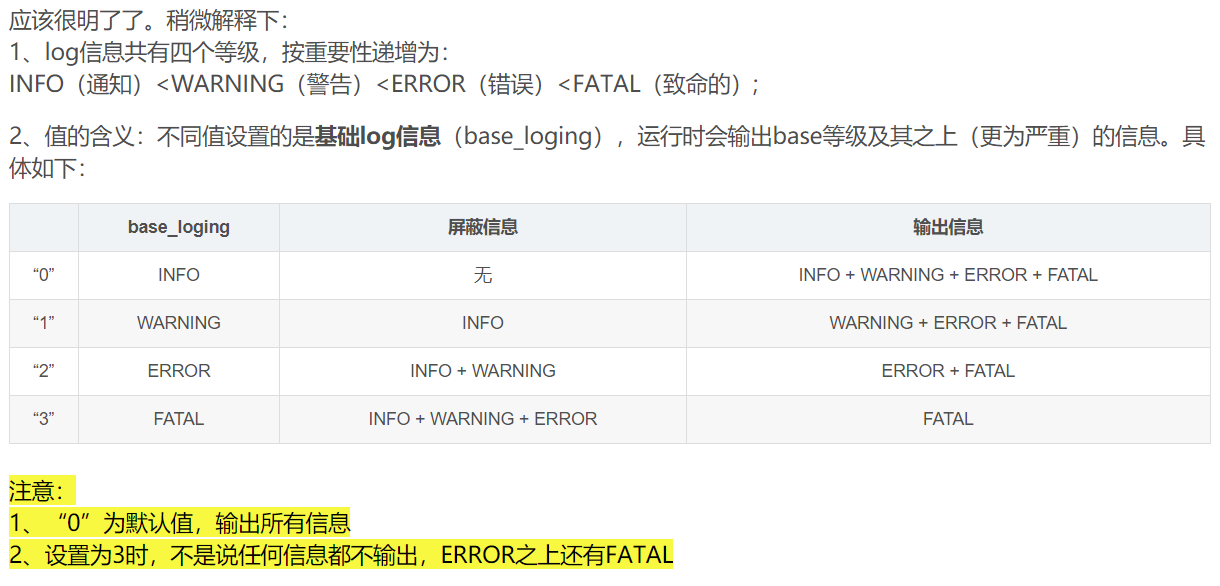
os.environ['TF_CPP_MIN_LOG_LEVEL'] = '2'
import tensorflow as tf
from tensorflow import keras
from tensorflow.keras import datasets
import os

os.environ['TF_CPP_MIN_LOG_LEVEL'] = '2'

# x:[60k, 28, 28]
# y:[60k]
(x, y), _ = datasets.mnist.load_data()  # x,y 是numpy.ndarray类型

x = tf.convert_to_tensor(x, dtype=tf.float32)
y = tf.convert_to_tensor(y, dtype=tf.int32)

# print(x.shape, y.shape, x.dtype, y.dtype)
# (60000, 28, 28) (60000,) <dtype: 'float32'> <dtype: 'int32'>

# 灰度值白色为0,黑色为255
# print(tf.reduce_min(x), tf.reduce_max(x))  # 0~255
# print(tf.reduce_min(y), tf.reduce_max(y))  # 0~9

train_db = tf.data.Dataset.from_tensor_slices((x, y)).batch(128)  # 建立数据集

# print(train_db)  <BatchDataset shapes: ((None, 28, 28), (None,)), types: (tf.float32, tf.int32)>

train_iter = iter(train_db)
sample = next(train_iter)
# print('batch:', sample[0].shape, sample[1].shape)     batch: (128, 28, 28) (128,)

# 为了使得w、b能够自动求导,将其变为tf.Variable类型
w1 = tf.Variable(tf.random.truncated_normal([784, 256], stddev=0.01))
b1 = tf.Variable(tf.zeros([256]))
w2 = tf.Variable(tf.random.truncated_normal([256, 128], stddev=0.01))
b2 = tf.Variable(tf.zeros([128]))
w3 = tf.Variable(tf.random.truncated_normal([128, 10], stddev=0.01))
b3 = tf.Variable(tf.zeros([10]))

lr = 1e-3

for epoch in range(10):  # 10个迭代期
    for step, (x, y) in enumerate(train_db):

        # x:[128, 28, 28]
        # y:[128]

        x = tf.reshape(x, [-1, 28*28])

        with tf.GradientTape() as tape:
            h1 = x@w1 + tf.broadcast_to(b1, [x.shape[0], 256])
            h1 = tf.nn.relu(h1)
            h2 = h1@w2 + b2
            h2 = tf.nn.relu(h2)
            out = h2@w3 + b3

            # compute loss
            y_onehot = tf.one_hot(y, depth=10)

            # mse = mean(sum((y-out)^2))
            a = tf.square(y_onehot - out)   # (128, 10)
            b = tf.reduce_sum(a, axis=1)  # (128,)
            loss = tf.reduce_mean(b)
        grads = tape.gradient(loss, [w1, b1, w2, b2, w3, b3])
        # print(type(grads))  # list
        # print(len(grads)) # 6

        # 要是不加最外层第一个tf.Variable则会报错 即:w1 = w1 - tf.Variable(tf.convert_to_tensor(lr * grads[0]))
        # print(isinstance(w1, tf.Variable)) False
        # print(isinstance(w1, tf.Tensor)) True
        # 更新一次之后得到的w1不再是一个tf.Variable类型
        # w1 = tf.Variable(w1 - tf.Variable(tf.convert_to_tensor(lr * grads[0])))
        # 可以用assign_sub实现原地更新
        w1.assign_sub(lr * grads[0])
        b1.assign_sub(lr * grads[1])
        w2.assign_sub(lr * grads[2])
        b2.assign_sub(lr * grads[3])
        w3.assign_sub(lr * grads[4])
        b3.assign_sub(lr * grads[5])

        if  step % 100 == 0:
            # print(step)
            print(float(loss))
            # 如果loss为nan,那么梯度爆炸,在初始化w时将标准差调小即可改善
最后
以上就是高贵龙猫最近收集整理的关于tensorflow2.0---笔记1 tensor基本操作的全部内容,更多相关tensorflow2.0---笔记1内容请搜索靠谱客的其他文章。


![在tensorflow[1.x/2.x]下,实现tensor与numpy互转](https://www.shuijiaxian.com/files_image/reation/bcimg2.png)


发表评论 取消回复