文章目录
- 搭建YUM仓库
- 线网源
- 本地源
- 远程服务器
- 服务端配置
- 客户端配置
- NFS共享存储
- 服务器配置
- 客户机配置
搭建YUM仓库
线网源
当我们配好网卡NAT可上网以后,我们就可以直接使用YUM安装软件,在/etc/yum.repos.d/的目录下会有我们软件包仓库CentOS-Base.repo,里面配置好了我们可以到相关网站去下载。
[root@localhost yum.repos.d]# cat /etc/yum.repos.d/CentOS-Base.repo
# CentOS-Base.repo
#
# The mirror system uses the connecting IP address of the client and the
....省略部分内容
# remarked out baseurl= line instead.
#
#

[base]
name=CentOS-$releasever - Base     ##仓库名
mirrorlist=http://mirrorlist.centos.org/?release=$releasever&arch=$basearch&repo=os&infra=$infra                        ##包路径
#baseurl=http://mirror.centos.org/centos/$releasever/os/$basearch/
gpgcheck=1	##秘钥验证开启
gpgkey=file:///etc/pki/rpm-gpg/RPM-GPG-KEY-CentOS-7   ##秘钥
本地源
一台centos7,网卡NAT模式
先将原来有的源文件移到别的路径下
[root@localhost ~]# cd /etc/yum.repos.d/
[root@localhost yum.repos.d]# ls
CentOS-Base.repo  CentOS-Debuginfo.repo  CentOS-Media.repo    CentOS-Vault.repo
CentOS-CR.repo    CentOS-fasttrack.repo  CentOS-Sources.repo
[root@localhost yum.repos.d]# mkdir bak
[root@localhost yum.repos.d]# mv Cen* bak
[root@localhost yum.repos.d]# ls
bak
[root@localhost yum.repos.d]#
使用yum去安装软件包,这时就会报错,说没有可用软件源
[root@localhost ~]# yum -y install keepalived
已加载插件:fastestmirror, langpacks
Loading mirror speeds from cached hostfile
There are no enabled repos.
 Run "yum repolist all" to see the repos you have.
 To enable Red Hat Subscription Management repositories:
     subscription-manager repos --enable <repo>
 To enable custom repositories:
     yum-config-manager --enable <repo>
[root@localhost ~]#
本地源搭建
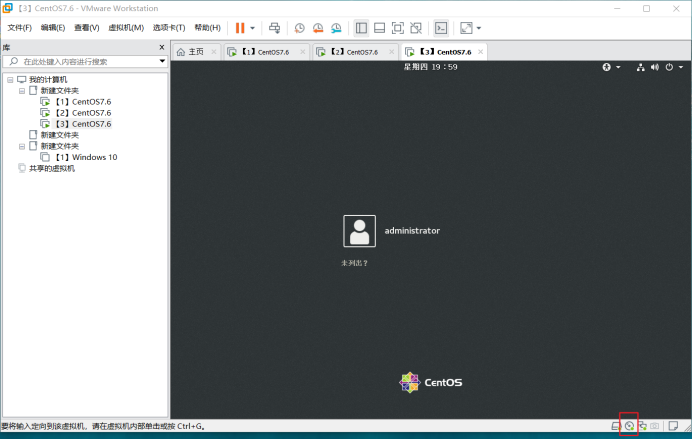
首先确保光盘连接上了,右击->连接

挂载光盘
软件源包在光盘里,挂载之后可在/mnt/Packeges/下查看,/mnt为挂载目录
[root@localhost ~]# vi /etc/fstab

#
# /etc/fstab
# Created by anaconda on Sun Apr 26 16:55:49 2020
...省略部分内容
#
/dev/mapper/centos-root /                       xfs     defaults        0 0
UUID=849619f2-7753-4786-bd51-239bbd09d560 /boot                   xfs     defaults        0 0
/dev/mapper/centos-home /home                   xfs     defaults        0 0
/dev/mapper/centos-swap swap                    swap    defaults        0 0
/dev/cdrom /mnt iso9660 defaults 0 0    ##添加上
[root@localhost ~]# mount -a       ##使配置生效
本地仓库搭建
[root@localhost ~]#touch /etc/yum.repos.d/local.repo    ##创建仓库文件,local可改后缀.repo不可改
[root@localhost ~]# vim /etc/yum.repos.d/local.repo

[base]
name=local
baseurl=file:///mnt
enabled=1
gpgcheck=0
[root@localhost ~]# yum clean all                    ##清理缓存
已加载插件:fastestmirror, langpacks
正在清理软件源: base
Cleaning up list of fastest mirrors
Other repos take up 214 M of disk space (use --verbose for details)
[root@localhost ~]# yum list                    ##重新加载
...省略部分内容
再次使用yum安装软件,可以正常安装
[root@localhost ~]# yum -y install keepalived
本地仓库搭建完成
远程服务器
两台centos7,网卡nat模式
服务端配置
防火墙设置
[root@localhost ~]# iptables -F
[root@localhost ~]# setenforce 0
光盘挂载
[root@localhost ~]# mount /dev/cdrom /mnt
[root@localhost ~]# df -Th
文件系统                类型      容量  已用  可用 已用% 挂载点
/dev/mapper/centos-root xfs        50G  8.7G   42G   18% /
...省略部分内容
/dev/sda1               xfs      1014M  179M  836M   18% /boot
/dev/mapper/centos-home xfs       247G   33M  247G    1% /home
tmpfs                   tmpfs     182M  4.0K  182M    1% /run/user/42
tmpfs                   tmpfs     182M   36K  182M    1% /run/user/0
/dev/sr0                iso9660   4.3G  4.3G     0  100% /mnt
安装开启vsftpd服务
[root@localhost ~]# yum -y install vsftp*
...省略安装过程
[root@localhost ~]# mkdir /var/ftp/centos7 /var/ftp/other      ##创建两个目录与服务端传输,centos7用来放软件源,other用来放索引(加快寻找软件的速度)

复制软件源到ftp站点
[root@localhost ~]# cp -rf /mnt/* /var/ftp/centos7/ &
建立yum索引环境
[root@localhost ftp]# createrepo -g /mnt/repodata/repomd.xml other/
开启ftp服务
[root@localhost ~]#systemctl start vsftpd
客户端配置
防火墙设置
[root@localhost ~]# iptables -F
[root@localhost ~]# setenforce 0
安装开启vsftpd服务
[root@localhost ~]# yum -y install vsftp*
[root@localhost ~]# systemctl start vsftpd
搭建仓库
[root@localhost ~]# mkdir /etc/yum.repos.d/bak
[root@localhost ~]# mv /etc/yum.repos.d/Centos* /etc/yum.repos.d/bak
[root@localhost ~]# touch /etc/yum.repos.d/ftp.repo
[root@localhost ~]# vi /etc/yum.repos.d/ftp.repo
[base]
name=ftp
baseurl=ftp://20.0.0.31/centos7
enable=1
gpgcheck=1
gpgkey=ftp://20.0.0.31/centos7/RPM-GPG-KEY-CentOS-7

[other]
name=other.ftp
baseurl=ftp://20.0.0.31/other
enable=1
gpgcheck=0
[root@localhost ~]#yum clean all
[root@localhost ~]#yum list
NFS共享存储
两台centos7,NAT网卡,服务器20.0.0.61,客户端20.0.0.31
服务器配置
防火墙
[root@server ~]# iptables -F
[root@server ~]# setenforce 0
NFS配置
[root@localhost ~]# hostnamectl set-hostname server      ##改名
[root@localhost ~]#su
[root@server ~]# yum -y install nfs-utils rpcbind
[root@server ~]# mkdir /opt/wwwroot          ##创建一个共享出去的目录
[root@server ~]# vi /etc/exports
/opt/wwwroot 20.0.0.0/24(rw,sync,no_root_squash)  ##共享目录 客户机地址(权限,rw表示可读可写,sync表示同步,no_root_squash表示不降权)
[root@server ~]# systemctl start nfs
[root@server ~]# showmount -e      ##查看
Export list for server:
/opt/wwwroot 20.0.0.0/24
[root@server ~]#
客户机配置
防火墙设置
[root@client ~]# iptables -F
[root@client ~]# setenforce 0
[root@localhost ~]# hostnamectl set-hostname client      ##改名
[root@localhost ~]#su
[root@client ~]# yum -y install nfs-util rpcbind
[root@client ~]# systemctl start rpcbind
[root@client ~]# showmount -e 20.0.0.61                ##查看
Export list for 20.0.0.61:
/opt/wwwroot 20.0.0.0/24
[root@client ~]# mount 20.0.0.61:/opt/wwwroot /var/www/html   ##挂载,首先要安装httpd,才会有这个目录,挂别的也可以
[root@client ~]# df -Th
文件系统                类型      容量  已用  可用 已用% 挂载点
/dev/mapper/centos-root xfs        50G  4.8G   46G   10% /
devtmpfs                devtmpfs  894M     0  894M    0% /dev
tmpfs                   tmpfs     910M     0  910M    0% /dev/shm
tmpfs                   tmpfs     910M   11M  900M    2% /run
tmpfs                   tmpfs     910M     0  910M    0% /sys/fs/cgroup
/dev/sda1               xfs      1014M  179M  836M   18% /boot
/dev/mapper/centos-home xfs       247G   33M  247G    1% /home
tmpfs                   tmpfs     182M  4.0K  182M    1% /run/user/42
tmpfs                   tmpfs     182M   44K  182M    1% /run/user/0
/dev/sr0                iso9660   4.3G  4.3G     0  100% /run/media/root/CentOS 7 x86_64
20.0.0.61:/opt/wwwroot  nfs4      297G  4.1G  293G    2% /var/www/html
[root@client ~]# vi /var/www/html/index.html      ##建一个网页文件,在服务器上也会有

<h1>shenm ma</h1>
[root@client ~]#
客户端配置完成
到服务器上去查看,在共享的目录下有没有我们刚刚创建的文件
[root@server ~]# ls /opt/wwwroot
index.html
[root@server ~]#
客户端挂载共享目录的另一种方法
[root@client ~]# vi /etc/fstab


#
#/etc/fstab
#Created by anaconda on Sun Apr 26 16:55:49 2020
#
#Accessible filesystems, by reference, are maintained under '/dev/disk'
#See man pages fstab(5), findfs(8), mount(8) and/or blkid(8) for more info
#
/dev/mapper/centos-root /                       xfs     defaults        0 0
UUID=849619f2-7753-4786-bd51-239bbd09d560 /boot                   xfs     defaults        0 0
/dev/mapper/centos-home /home                   xfs     defaults        0 0
/dev/mapper/centos-swap swap                    swap    defaults        0 0
20.0.0.61:/opt/wwwroot /var/www/html nfs defaults,_netdev 0 0       ##添加挂载
[root@client ~]#
强制解挂载
[root@client ~]# umount -lf /var/www/html
最后
以上就是烂漫航空最近收集整理的关于NFS共享存储和搭建YUM仓库的三种方法--本地源、线网源和远程服务器搭建YUM仓库NFS共享存储的全部内容,更多相关NFS共享存储和搭建YUM仓库内容请搜索靠谱客的其他文章。
本图文内容来源于网友提供,作为学习参考使用,或来自网络收集整理,版权属于原作者所有。


发表评论 取消回复