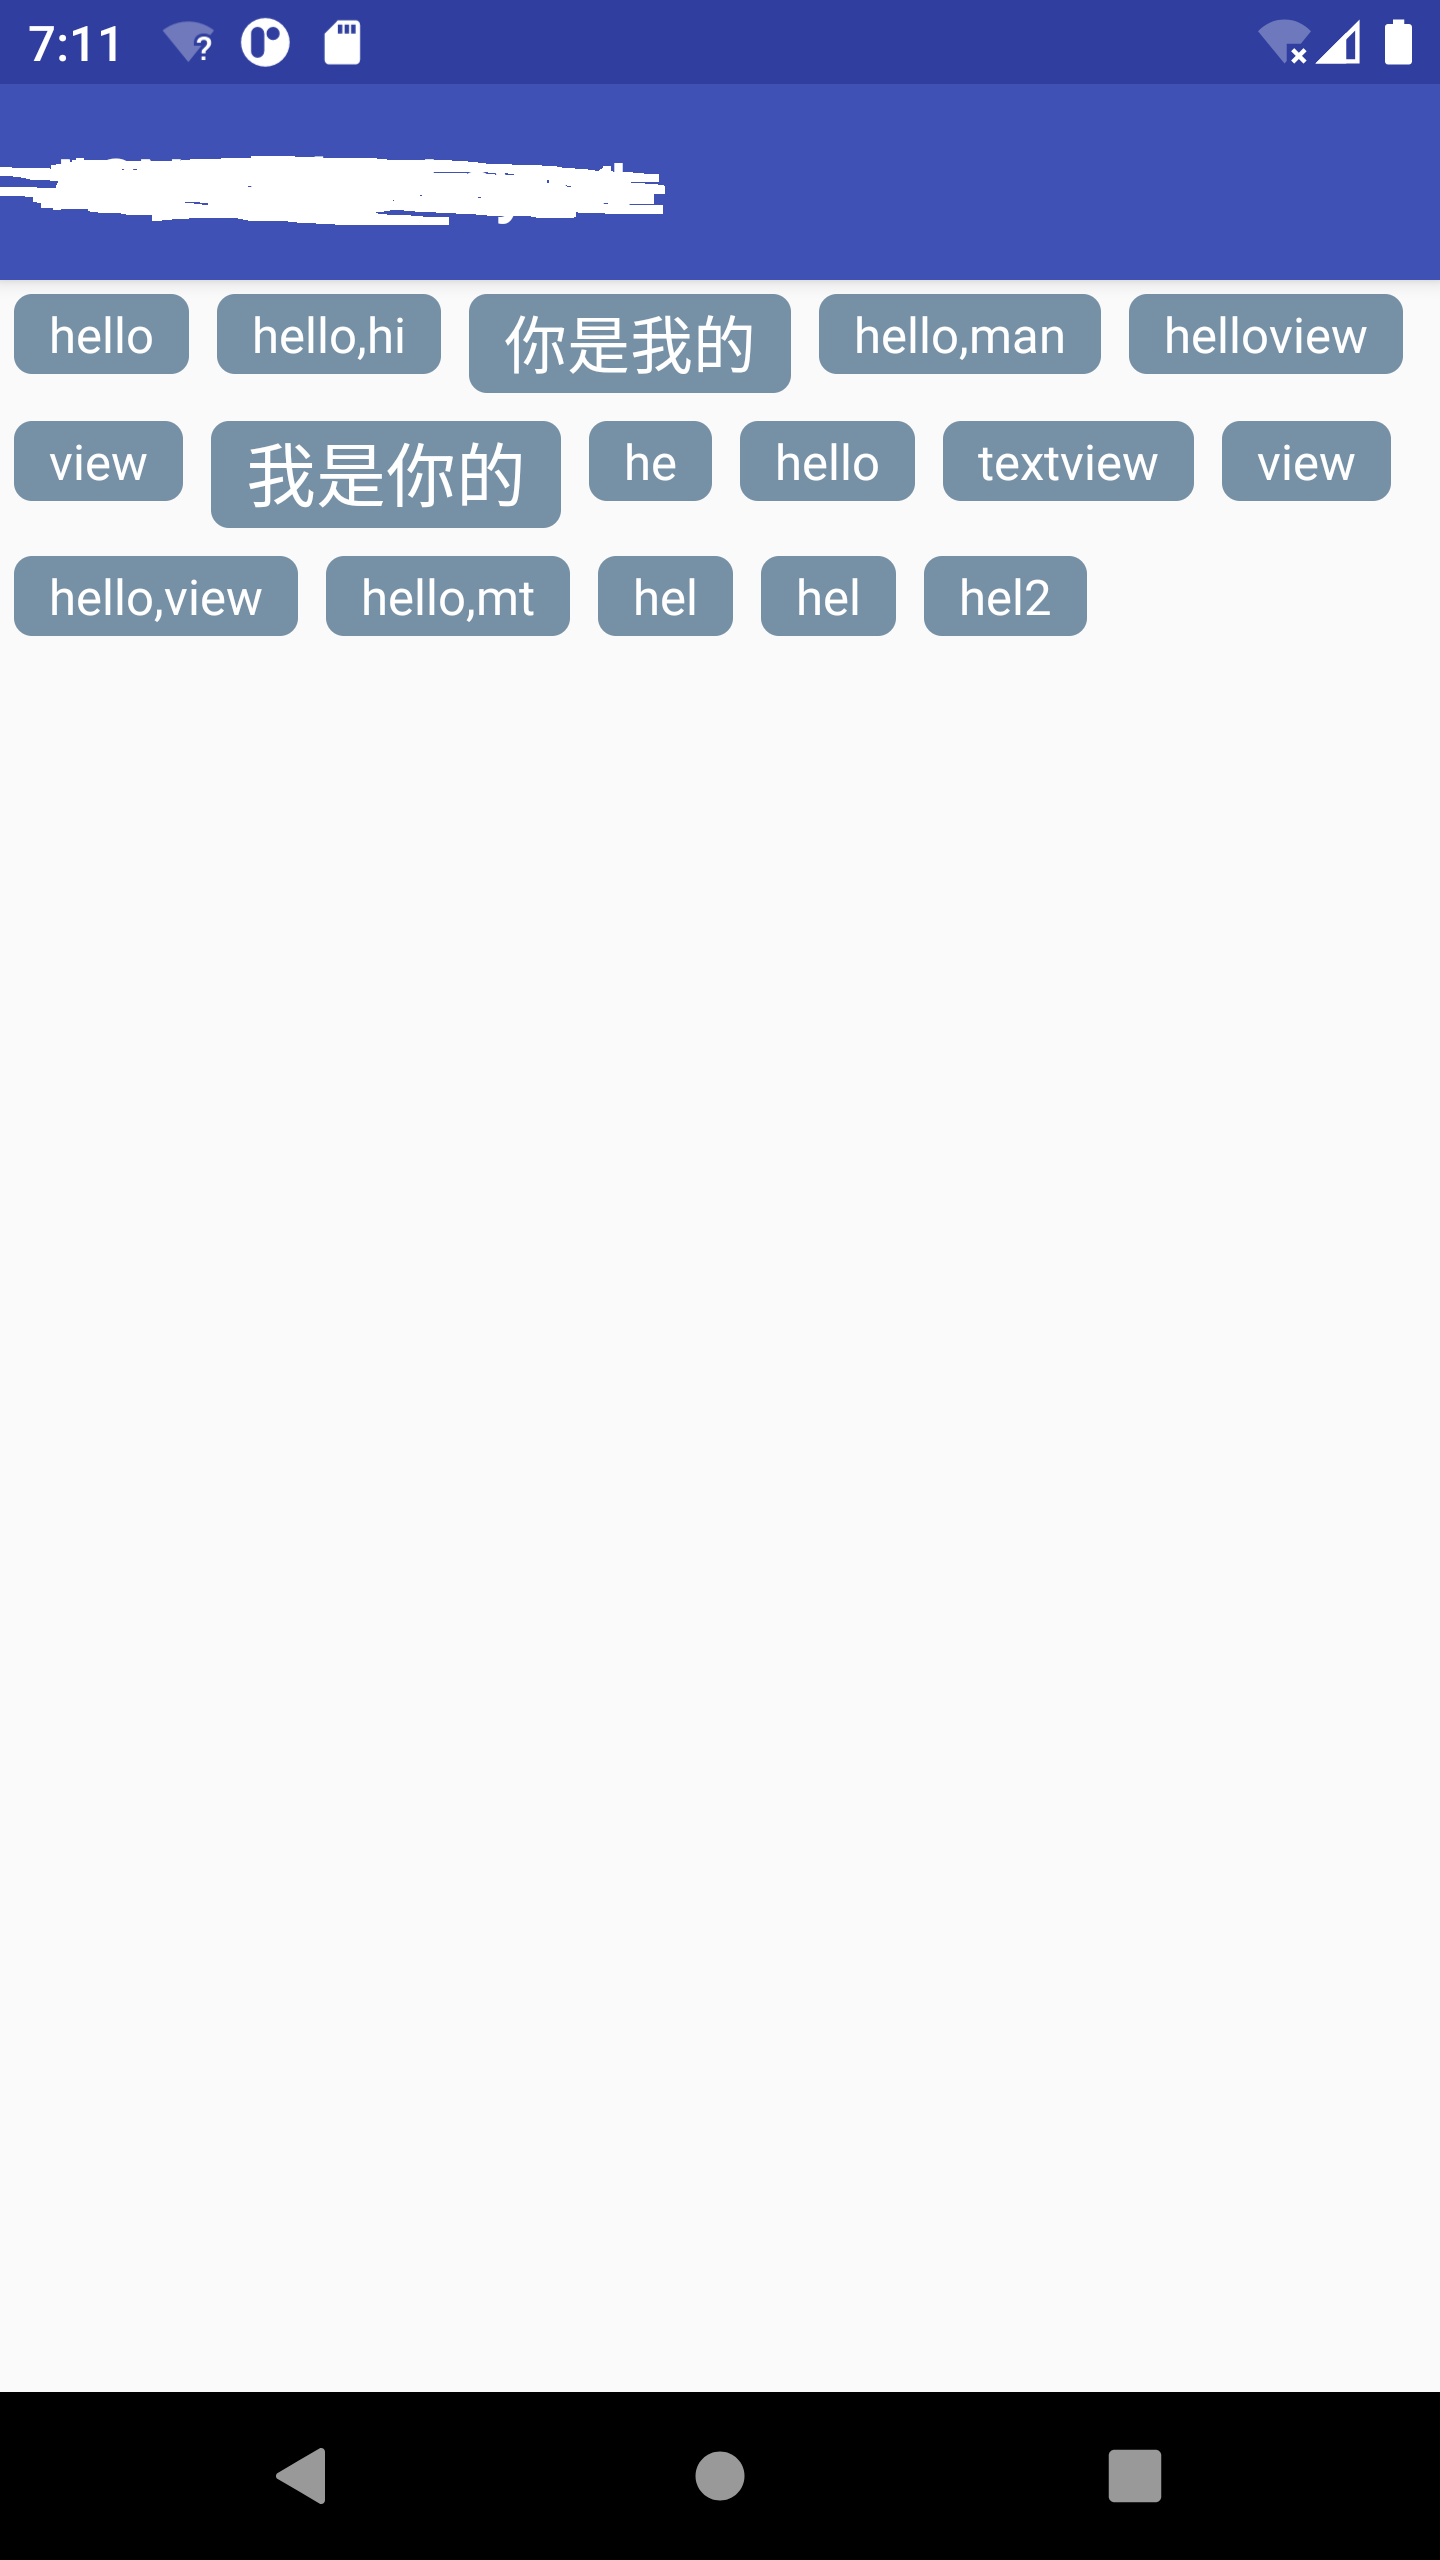
先上效果

具体实现请参考如下:
import android.content.Context;
import android.os.Build;
import android.support.annotation.RequiresApi;
import android.util.AttributeSet;
import android.view.View;
import android.view.ViewGroup;

import java.util.ArrayList;
import java.util.List;

public class WaterfallFlowLayout3 extends ViewGroup {
    // 存储每一行的View
    private List<List<View>> mEachLineView = new ArrayList<>();

    // 每一行的宽度,以每行最高View的宽度为每行的宽度
    private List<Integer> mEachLineHeight = new ArrayList<>();

    public WaterfallFlowLayout3(Context context) {
        super(context);
    }

    public WaterfallFlowLayout3(Context context, AttributeSet attrs) {
        super(context, attrs);
    }

    public WaterfallFlowLayout3(Context context, AttributeSet attrs, int defStyleAttr) {
        super(context, attrs, defStyleAttr);
    }

    @RequiresApi(api = Build.VERSION_CODES.LOLLIPOP)
    public WaterfallFlowLayout3(Context context, AttributeSet attrs, int defStyleAttr, int defStyleRes) {
        super(context, attrs, defStyleAttr, defStyleRes);
    }

    @Override
    public LayoutParams generateLayoutParams(AttributeSet attrs) {
        return new MarginLayoutParams(getContext(), attrs);
    }

    @Override
    protected void onLayout(boolean b, int i, int i1, int i2, int i3) {
        // onLayout其实就是获取左、上、右、下四个值,然后设置此4个值
        int left;
        int top;
        int right;
        int bottom;

        // 当前行的左和上位置
        int curLeft = 0;
        int curTop = 0;

        // 一行一行的遍历
        for (int index = 0; index < mEachLineView.size(); index++) {
            List<View> listView = mEachLineView.get(index);
            if (listView == null || listView.isEmpty()) {
                continue;
            }

            // 遍历一行的每一个View
            for (View view : listView) {
                if (view == null) {
                    continue;
                }

                // 获取间距布局参数
                MarginLayoutParams marginLayoutParams = (MarginLayoutParams) view.getLayoutParams();
                if (marginLayoutParams == null) {
                    continue;
                }

                // 获取当前View的四个点的坐标值
                left = curLeft + marginLayoutParams.leftMargin;
                top = curTop + marginLayoutParams.topMargin;
                right = left + view.getMeasuredWidth();
                bottom = top + view.getMeasuredHeight();

                // 最终就是调用这个方法进行摆放
                view.layout(left, top, right, bottom);

                // 将当前的左坐标位置往后移动,用于下一个view的计算
                curLeft += view.getMeasuredWidth() + marginLayoutParams.leftMargin + marginLayoutParams.rightMargin;
            }

            // 新的一行要从左边开始
            curLeft = 0;

            // 换行要将顶部的坐标往下移动
            curTop += mEachLineHeight.get(index);
        }

        mEachLineHeight.clear();
        mEachLineView.clear();
    }

    @Override
    protected void onMeasure(int widthMeasureSpec, int heightMeasureSpec) {
        mEachLineView.clear();
        mEachLineHeight.clear();

        // 1.获取父容器的参数
        int widthMode = MeasureSpec.getMode(widthMeasureSpec);
        int heightMode = MeasureSpec.getMode(heightMeasureSpec);
        int widthSize = MeasureSpec.getSize(widthMeasureSpec);
        int heightSize = MeasureSpec.getSize(heightMeasureSpec);

        // 2.onMeasure的目的也就是获取本View的宽和高的值,此处先定义变量
        int measureWidth = 0;
        int measureHeight = 0;

        // 3.根据父容器的模式来获设置本View的宽和高,也就是2中的数值
        // 3.1 宽和高都是match_parent
        if (widthMode == MeasureSpec.EXACTLY && heightMode == MeasureSpec.EXACTLY) {
            // 如果都是match_parent那就不需要计算,直接设置为父容器的宽和高
            measureWidth = widthSize;
            measureHeight = heightSize;
        } else {
            // 用来统计当前行的宽和高
            int curLineWidth = 0;
            int curLineMaxHeight = 0;

            // 当前子view的宽度和高度
            int curChildWidth = 0;
            int curChildHeight = 0;

            // 每行摆放的子view的集合
            List<View> curLineViews = new ArrayList<>();

            // 获取该容器中所有的子View进行遍历计算
            int childCount = getChildCount();
            for (int i = 0; i < childCount; i++) {
                View childView = getChildAt(i);
                if (childView == null) {
                    continue;
                }

                // 首先测量子View
                measureChild(childView, widthMeasureSpec, heightMeasureSpec);

                // 获取子view的宽高
                MarginLayoutParams marginLayoutParams = (MarginLayoutParams) childView.getLayoutParams();

                // 计算当前子view的宽和高
                curChildWidth = marginLayoutParams.leftMargin + childView.getMeasuredWidth() + marginLayoutParams.rightMargin;
                curChildHeight = marginLayoutParams.topMargin + childView.getMeasuredHeight() + marginLayoutParams.bottomMargin;

                // 判断如果当前行的宽度和已经大于父容器的宽度,那么就需要换行
                if (curChildWidth + curLineWidth > widthSize) {
                    // 需要换行,先将换行前最后一行参数(也就是当前行)
                    // 总的View的宽度和高度赋值后(这也是我们测量获取的两个目标值),然后保存当前行的信息
                    measureWidth = Math.max(measureWidth, curLineWidth);
                    measureHeight += curLineMaxHeight;
                    mEachLineView.add(curLineViews);
                    mEachLineHeight.add(curLineMaxHeight);

                    // 创建新的一行
                    curLineViews = new ArrayList<>();

                    // 将当前的子view放到新一行的开头
                    curLineViews.add(childView);

                    // 新的一行目前只摆放了一个view所以当前行的宽度和高度都是当前子view的宽和高
                    curLineWidth = curChildWidth;
                    curLineMaxHeight = curChildHeight;
                } else {
                    // 不需要换行
                    curLineViews.add(childView);
                    curLineWidth += curChildWidth;
                    curLineMaxHeight = Math.max(curLineMaxHeight, curChildHeight);
                }

                // 最后一个处在最后一行上,因最后一行因为不需要换行,所以最后一行的view数列没有被添加到数列中,此处需要单独处理
                if (i == childCount - 1) {
                    // 最后一行同样也要参与到想要获取的目标值之中
                    measureWidth = Math.max(measureWidth, curLineWidth);
                    measureHeight += curLineMaxHeight;

                    mEachLineView.add(curLineViews);
                    mEachLineHeight.add(curChildHeight);
                }
            }
        }


        // 最终目的就是在此处设置已经计算好的本容器的宽和高
        setMeasuredDimension(measureWidth, measureHeight);
    }
}
最后
以上就是炙热犀牛最近收集整理的关于Android 自定义流式布局的全部内容,更多相关Android内容请搜索靠谱客的其他文章。
本图文内容来源于网友提供,作为学习参考使用,或来自网络收集整理,版权属于原作者所有。


发表评论 取消回复