Springboot 集成swagger2 即springfox-swagger2的方法请参考
Swagger:JAVA 前后端调试利器,接口文档自动生成工具的简单使用示例_奋斗鱼-CSDN博客
下面介绍SpringMVC集成springfox-swagger2的方法(当中遇到的问题和解决方案请看文章末尾)
步骤一:引入依赖包
<!--SpringBoot整合Swagger-ui-->
	  <dependency>
		  <groupId>io.springfox</groupId>
		  <artifactId>springfox-swagger2</artifactId>
		  <version>2.7.0</version>
	  </dependency>
	  <dependency>
		  <groupId>io.springfox</groupId>
		  <artifactId>springfox-swagger-ui</artifactId>
		  <version>2.7.0</version>
	  </dependency>
	  <dependency>
		  <groupId>com.github.xiaoymin</groupId>
		  <artifactId>swagger-bootstrap-ui</artifactId>
		  <version>1.9.6</version>
	  </dependency>
步骤二:添加配置文件
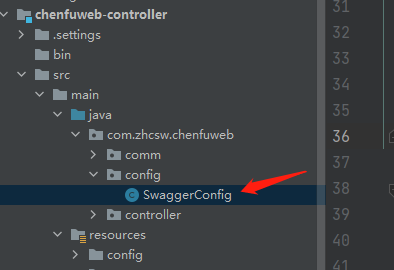
在controller同级目录下新建config文件夹,并创建 SwaggerConfig类。

注意:basePackage需要修改成你的controller路径,若有多个controller层则配置到上一级即可。
如存在com.zhc.a.controller和com.zhc.b.controller两个目录,配置为"com.zhc"
package com.zhcsw.chenfuweb.config;


import com.github.xiaoymin.swaggerbootstrapui.annotations.EnableSwaggerBootstrapUI;
import org.springframework.context.annotation.Bean;
import org.springframework.context.annotation.Configuration;
import springfox.documentation.builders.ApiInfoBuilder;
import springfox.documentation.builders.PathSelectors;
import springfox.documentation.builders.RequestHandlerSelectors;
import springfox.documentation.service.ApiInfo;
import springfox.documentation.service.Contact;
import springfox.documentation.spi.DocumentationType;
import springfox.documentation.spring.web.plugins.Docket;
import springfox.documentation.swagger2.annotations.EnableSwagger2;

/**
 * @ClassName SwaggerConfig
 * @Description TODO
 */
// 启动时加载类
@Configuration
// 启用Swagger API文档
@EnableSwagger2
//动态添加响应类注释字段
@EnableSwaggerBootstrapUI
//@Import(BeanValidatorPluginsConfiguration.class)
public class SwaggerConfig {

    @Bean
    public Docket buildDocket(){
        return new Docket(DocumentationType.SWAGGER_2)
                .apiInfo(buildApiInf())
                .select()       .apis(RequestHandlerSelectors.basePackage("com.zhcsw.chenfuweb.controller"))//修改成你的controller路径
                .paths(PathSelectors.any())
                .build();
    }

    private ApiInfo buildApiInf(){
        return new ApiInfoBuilder()
                .title("标题")
                .termsOfServiceUrl("http://网址链接")
                .description("springmvc swagger2")
                .contact(new Contact("quan", "http://*.com", "*@163.com"))
                .build();

    }
}
步骤三:添加配置文件
在spring.xml配置文件中设置swagger的静态资源目录和访问页面。doc.html是swagger UI的固定首页名称(默认是swagger-ui.html,xiaoymin这个UI版本样式会更好看些,名称是doc.html)
	<!-- swagger 静态资源-->
	<mvc:resources mapping="doc.html" location="classpath:/META-INF/resources/"/>
	<mvc:resources mapping="/webjars/**" location="classpath:/META-INF/resources/webjars/"/>
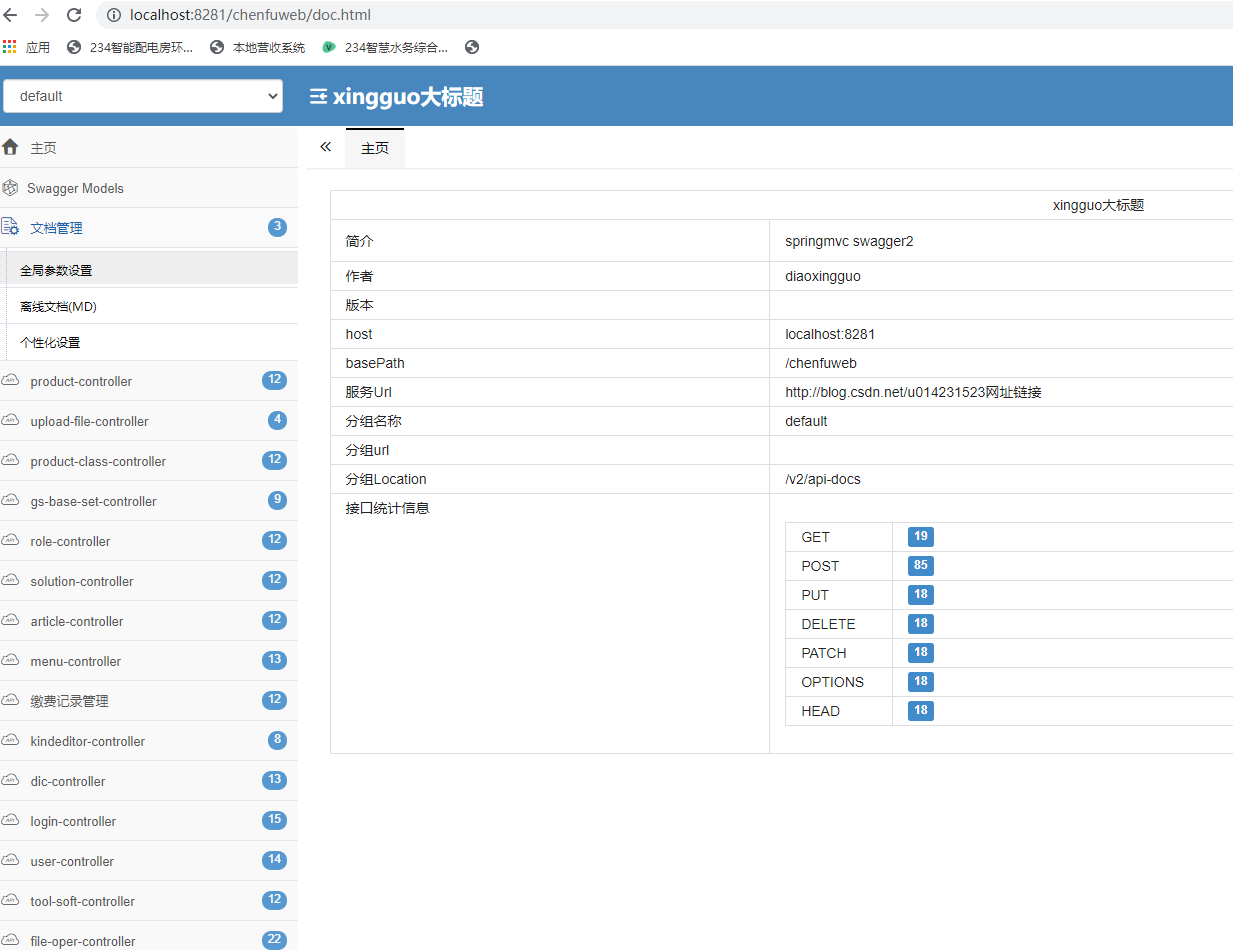
步骤四:预览页面
配置完以上步骤,就可以在浏览器上访问看到预览页面了。地址为http://localhost:端口/项目名/doc.html

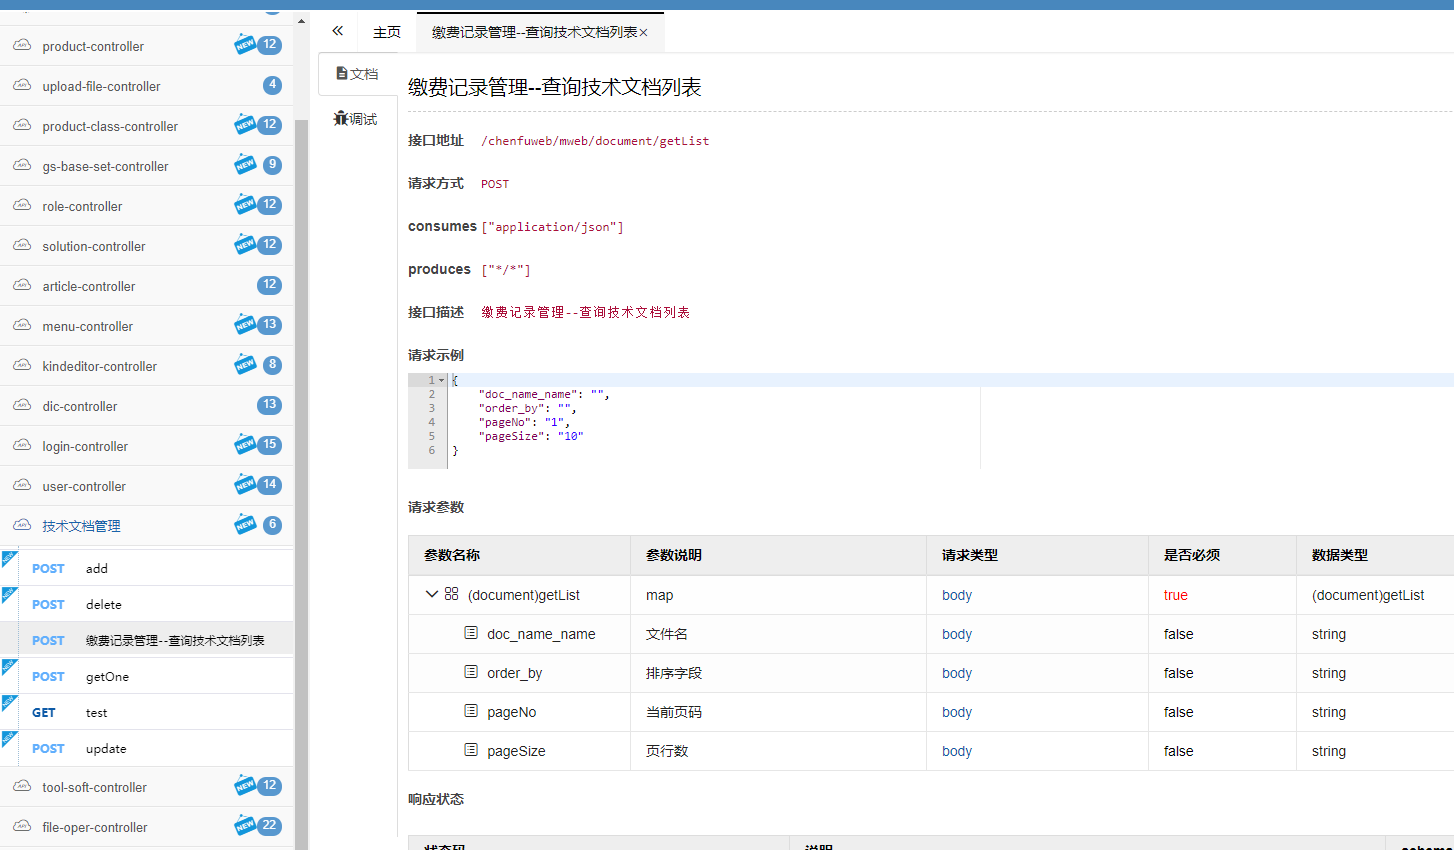
步骤五:Controller方法配置
现在看下在我们的Controller方法中如何使用。
/**
 * @author Quan
 * @后台:技术文档管理
 */
@Api(value = "技术文档管理接口",tags = "技术文档管理",protocols = "http")
@RequestMapping("/mweb/document")
@Controller
public class DocumentController {
	protected final static Logger logger = LoggerFactory.getLogger(DocumentController.class);


	// 查询技术文档列表
	@ApiOperation(value = "缴费记录管理--查询技术文档列表",notes="缴费记录管理--查询技术文档列表")
	@DynamicParameters(name ="(document)getList",properties = {
			@DynamicParameter(value = "文件名",name = "doc_name_name"),
			@DynamicParameter(value = "排序字段",name = "order_by"),
			@DynamicParameter(value = "当前页码",name = "pageNo",example = "1"),
			@DynamicParameter(value = "页行数",name = "pageSize",example = "10")
	})
	@RequestMapping(value = "/getList", method = RequestMethod.POST)
	@ResponseBody
	public ResultMsg list(HttpServletResponse response, @RequestBody HashMap<String, String> map) {
		String estr = "查询技术文档列表(document/getList)===:";
		logger.debug(estr + map.toString());
		ResultMsg rMsg = new ResultMsg();
		try {
			logger.debug(rMsg.toString());
		} catch (Exception e) {
			logger.error(estr + e.toString());
			return rMsg;
		}
	}
}
预览效果

以上配置完成。
遇到的问题
1.提示probably due to a new Java class file version that isn't supported yet
说明不支持你当前spring版本不支持,需要升级到高版本,在pom.xml中调整下,我这边改成5.2.4
	<properties>
		<project.build.sourceEncoding>UTF-8</project.build.sourceEncoding>
		<spring.version>5.2.4.RELEASE</spring.version>
	</properties>
2.Cannot find class [org.springframework.web.servlet.mvc.annotation.AnnotationMethodHandlerAdapter
在Spring 3.x版中启动Spring MVC的注解功能,完成请求和注解POJO的映射你可能会用到这个类,但新版中已经过时不用此类可以直接删除。
3.org.springframework.web.servlet.mvc.method.annotation.RequestMappingHandlerAdapter报错
如果你要处理日期格式时你可以用下面这样
	<mvc:annotation-driven>
		<!-- 处理responseBody 里面日期类型 -->
		<mvc:message-converters>
			<bean class="org.springframework.http.converter.json.MappingJackson2HttpMessageConverter">
				<property name="objectMapper">
					<bean class="com.fasterxml.jackson.databind.ObjectMapper">
						<property name="dateFormat">
							<bean class="java.text.SimpleDateFormat">
								<constructor-arg type="java.lang.String" value="yyyy-MM-dd HH:mm:ss" />
							</bean>
						</property>
					</bean>
				</property>
			</bean>
		</mvc:message-converters>
	</mvc:annotation-driven>
4.提示:swagger2 Unable to infer base url. This is common when using dynamic servlet
这可能是由于你配置了拦截器,可以尝试把拦截器先取消掉,验证下是否可以正常。如果你确定是拦截器引起,把swagger的首页doc.html从拦截器中排除掉即可。
拦截的接口有:
1. http://localhost:8088/base-app/swagger-resources/configuration/ui

2. http://localhost:8088/base-app/swagger-resources

3. http://localhost:8088/base-app/v2/api-docs
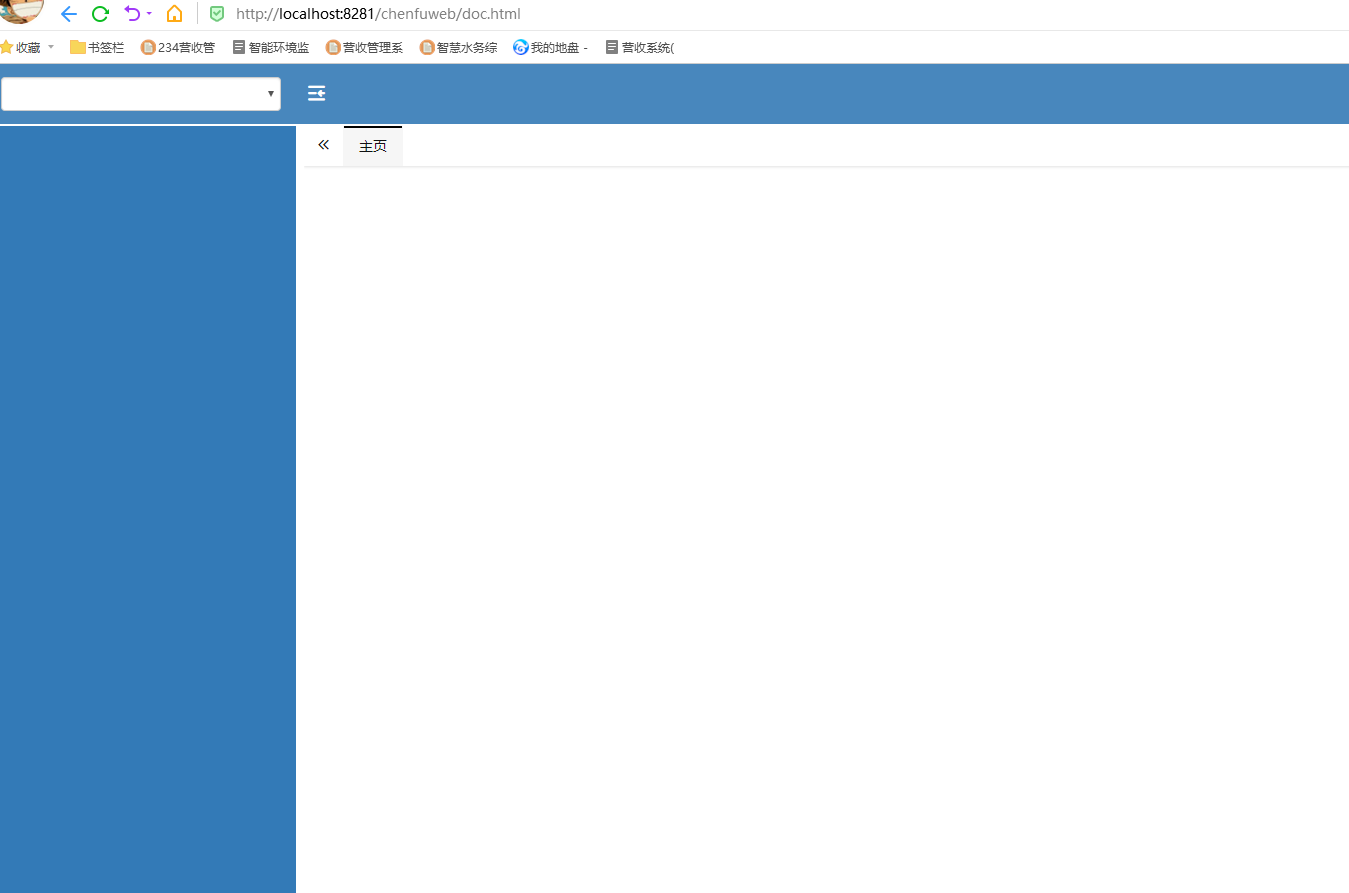
5.首页显示出页面却无任何内容
原因和解决方法同4。

最后
以上就是笑点低飞鸟最近收集整理的关于SpringMvc:整合springfox-swagger2生成在线API文档的全部内容,更多相关SpringMvc内容请搜索靠谱客的其他文章。


发表评论 取消回复