仅作为记录,大佬请跳过。
文章目录
- 参考
- 实例一完整代码
- 实例二完整代码
参考
感谢大佬博主文章
实例1传送门
实例2传送门
实例一完整代码
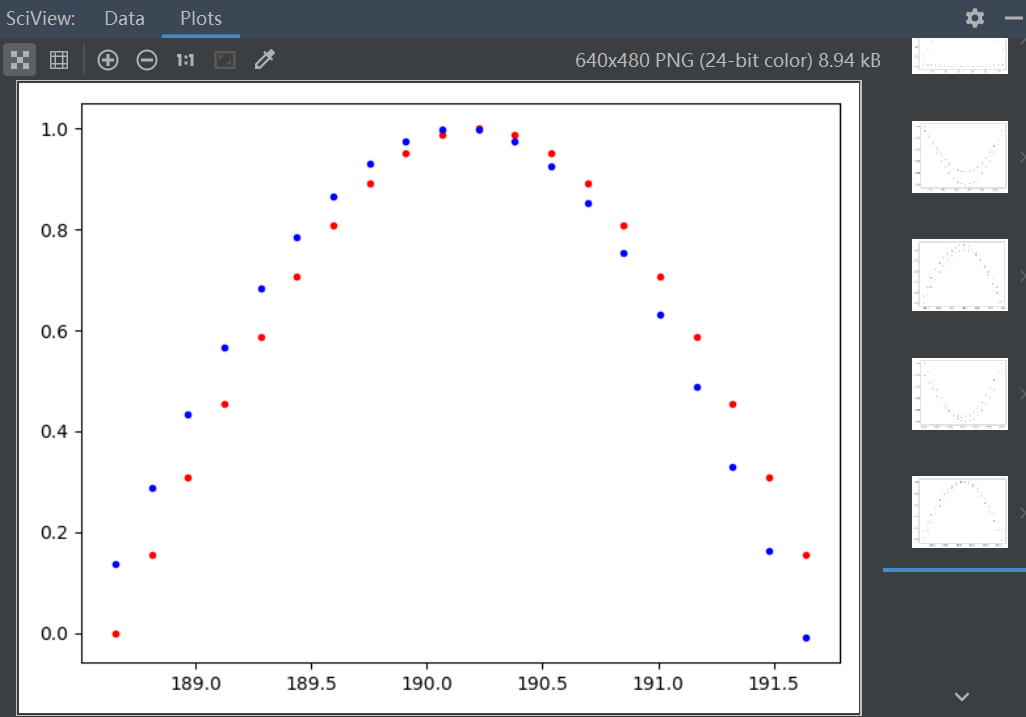
简介:输入了这个正弦曲线,输出一个移位的正弦曲线
代码:
import torch
from torch import nn
import numpy as np
import matplotlib.pyplot as plt

plt.figure(figsize=(8, 5))

# how many time steps/data pts are in one batch of data
seq_length = 20

# generate evenly spaced data pts
time_steps = np.linspace(0, np.pi, seq_length + 1)
data = np.sin(time_steps)
data.resize((seq_length + 1, 1))  # size becomes (seq_length+1, 1), adds an input_size dimension

x = data[:-1]  # all but the last piece of data
y = data[1:]  # all but the first

# # display the data
# plt.plot(time_steps[1:], x, 'r.', label='input, x')  # x
# plt.plot(time_steps[1:], y, 'b.', label='target, y')  # y
#
# plt.legend(loc='best')
# plt.show()


class RNN(nn.Module):
    def __init__(self, input_size, output_size, hidden_dim, n_layers):
        super(RNN, self).__init__()

        self.hidden_dim = hidden_dim

        # define an RNN with specified parameters
        # batch_first means that the first dim of the input and output will be the batch_size
        self.rnn = nn.RNN(input_size, hidden_dim, n_layers, batch_first=True)

        # last, fully-connected layer
        self.fc = nn.Linear(hidden_dim, output_size)

    def forward(self, x, hidden):
        # x (batch_size, seq_length, input_size)
        # hidden (n_layers, batch_size, hidden_dim)
        # r_out (batch_size, time_step, hidden_size)
        batch_size = x.size(0)

        # get RNN outputs
        r_out, hidden = self.rnn(x, hidden)
        # shape output to be (batch_size*seq_length, hidden_dim)
        r_out = r_out.view(-1, self.hidden_dim)

        # get final output
        output = self.fc(r_out)

        return output, hidden


# **********************#
# 检查输入和输出维度
# **********************#

# test that dimensions are as expected
test_rnn = RNN(input_size=1, output_size=1, hidden_dim=10, n_layers=2)

# generate evenly spaced, test data pts
time_steps = np.linspace(0, np.pi, seq_length)
data = np.sin(time_steps)
data.resize((seq_length, 1))

test_input = torch.Tensor(data).unsqueeze(0)  # give it a batch_size of 1 as first dimension
print('Input size: ', test_input.size())

# test out rnn sizes
test_out, test_h = test_rnn(test_input, None)
print('Output size: ', test_out.size())
print('Hidden state size: ', test_h.size())


# **********************#
# 训练网络
# **********************#


# decide on hyperparameters
input_size=1
output_size=1
hidden_dim=32
n_layers=1
# instantiate an RNN
rnn = RNN(input_size, output_size, hidden_dim, n_layers)
print(rnn)


# **********************#
# 损失函数和优化器
# **********************#


# MSE loss and Adam optimizer with a learning rate of 0.01
criterion = nn.MSELoss()
optimizer = torch.optim.Adam(rnn.parameters(), lr=0.01)


# **********************#
# 定义训练函数
# **********************#

# train the RNN
def train(rnn, n_steps, print_every):
    # initialize the hidden state
    hidden = None
    loss_value=[]

    for batch_i, step in enumerate(range(n_steps)):
        # defining the training data
        time_steps = np.linspace(step * np.pi, (step + 1) * np.pi, seq_length + 1)
        data = np.sin(time_steps)
        data.resize((seq_length + 1, 1))  # input_size=1

        x = data[:-1]
        y = data[1:]

        # convert data into Tensors
        x_tensor = torch.Tensor(x).unsqueeze(0)  # unsqueeze gives a 1, batch_size dimension
        y_tensor = torch.Tensor(y)

        # outputs from the rnn
        prediction, hidden = rnn(x_tensor, hidden)

        ## Representing Memory ##
        # make a new variable for hidden and detach the hidden state from its history
        # this way, we don't backpropagate through the entire history
        hidden = hidden.data

        # calculate the loss
        loss = criterion(prediction, y_tensor)
        # zero gradients
        optimizer.zero_grad()
        # perform backprop and update weights
        loss.backward()
        optimizer.step()

        # display loss and predictions
        if batch_i % print_every == 0:
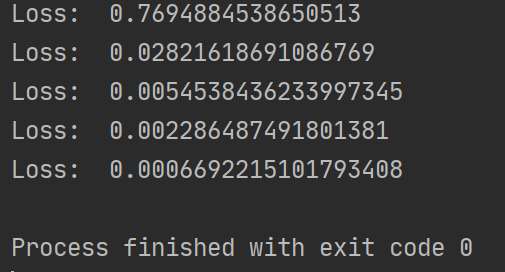
            print('Loss: ', loss.item())
            plt.plot(time_steps[1:], x, 'r.')  # input
            plt.plot(time_steps[1:], prediction.data.numpy().flatten(), 'b.')  # predictions

            loss_value.append(loss.item())

            plt.show()

    return rnn,loss_value


# train the rnn and monitor results
n_steps = 75
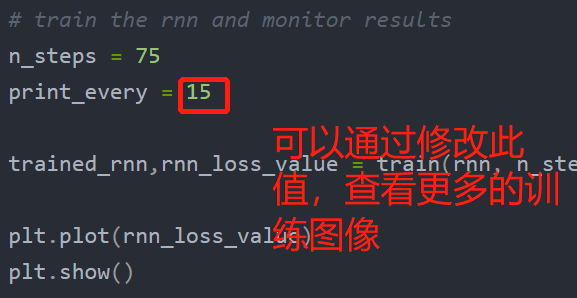
print_every = 15

trained_rnn,rnn_loss_value = train(rnn, n_steps, print_every)

plt.plot(rnn_loss_value)
plt.show()
效果:


注:

实例二完整代码
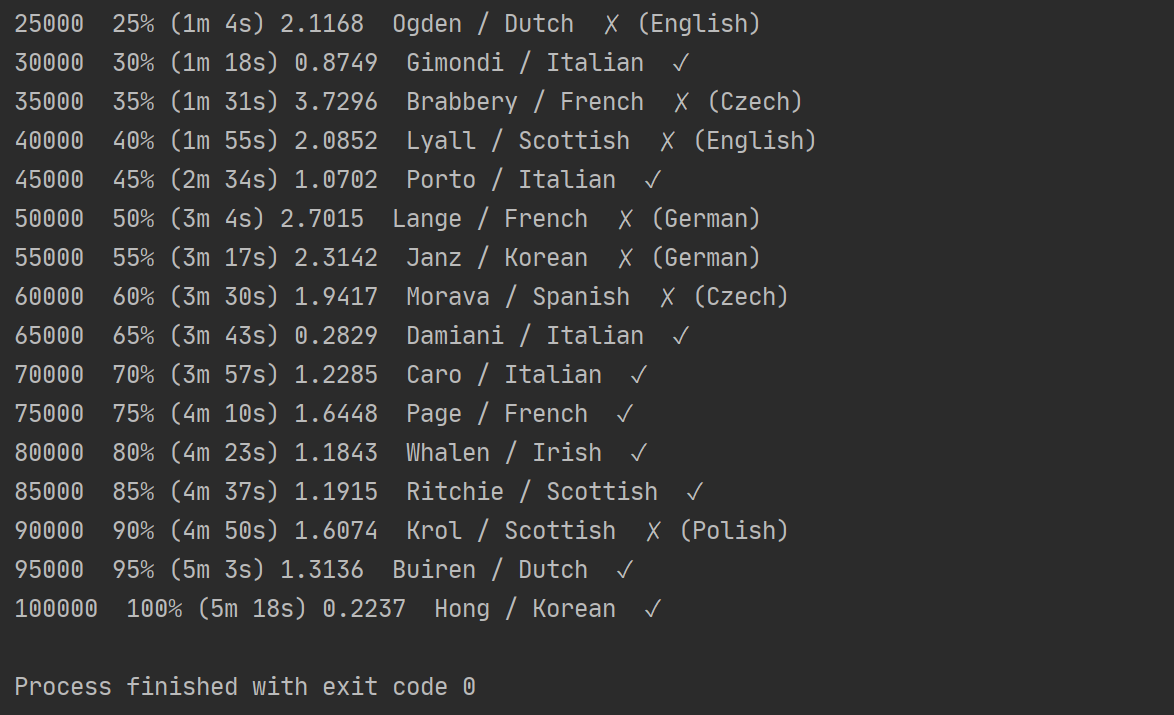
简介:输入一个姓名,网络判断该名字是什么国家语言
需要用到数据,下载网址是在文首实例2传送门里的:

from __future__ import unicode_literals, print_function, division
from io import open
import glob
import os

'''
1.准备数据
'''

# ****************************#
# 查找数据txt文件的相对路径
# ****************************#


def findFiles(path): return glob.glob(path)

# print(findFiles('data/names/*.txt'))

import unicodedata
import string

all_letters = string.ascii_letters + " .,;'"
n_letters = len(all_letters)

# ****************************#
# 数据变成ASCII
# ****************************#

# 将Unicode字符串转换为纯ASCII, 感谢https://stackoverflow.com/a/518232/2809427
def unicodeToAscii(s):
    return ''.join(
        c for c in unicodedata.normalize('NFD', s)
        if unicodedata.category(c) != 'Mn'
        and c in all_letters
    )

# print(unicodeToAscii('Ślusàrski'))


# 构建category_lines字典,每种语言的名字列表
category_lines = {}     # 装.txt文件夹里的每行,且都属于这个语言类-用字典
all_categories = []     # 装.txt文件夹的名字

# 读取文件并分成几行
def readLines(filename):
    lines = open(filename, encoding='utf-8').read().strip().split('n')
    return [unicodeToAscii(line) for line in lines]

for filename in findFiles('data/names/*.txt'):
    category = os.path.splitext(os.path.basename(filename))[0]      # 将文件名和扩展名分开    https://blog.csdn.net/ztf312/article/details/83039392
    all_categories.append(category)
    lines = readLines(filename)
    category_lines[category] = lines        # 一个字典对应一个list类型

n_categories = len(all_categories)


# print(category_lines['Italian'][:5])


# ****************************#
# 单词转变为张量
# ****************************#

import torch

# 从all_letters中查找字母索引,例如 "a" = 0
def letterToIndex(letter):
    return all_letters.find(letter)

# 仅用于演示,将字母转换为<1 x n_letters> 张量
def letterToTensor(letter):
    tensor = torch.zeros(1, n_letters)
    tensor[0][letterToIndex(letter)] = 1
    return tensor

# 将一行转换为<line_length x 1 x n_letters>,
# 或一个0ne-hot字母向量的数组
def lineToTensor(line):
    tensor = torch.zeros(len(line), 1, n_letters)
    for li, letter in enumerate(line):
        tensor[li][0][letterToIndex(letter)] = 1
    return tensor

# print(letterToTensor('J'))

# print(lineToTensor('Jones').size())


'''
2.构造神经网络
'''

# ****************************#
# 构建rnn
# ****************************#

import torch.nn as nn

class RNN(nn.Module):
    def __init__(self, input_size, hidden_size, output_size):
        super(RNN, self).__init__()

        self.hidden_size = hidden_size

        self.i2h = nn.Linear(input_size + hidden_size, hidden_size)
        self.i2o = nn.Linear(input_size + hidden_size, output_size)
        self.softmax = nn.LogSoftmax(dim=1)     # 好像是类似sigmoid的激活函数

    def forward(self, input, hidden):
        combined = torch.cat((input, hidden), 1)        # torch.cat是将两个张量(tensor)拼接在一起      https://blog.csdn.net/qq_39709535/article/details/80803003
        hidden = self.i2h(combined)
        output = self.i2o(combined)
        output = self.softmax(output)
        return output, hidden

    def initHidden(self):
        return torch.zeros(1, self.hidden_size)

n_hidden = 128
rnn = RNN(n_letters, n_hidden, n_categories)        # rnn输入个数:所有英文字母字符的个数;输出:18种类别


# ****************************#
# 字母例子——输出值和隐层值
# ****************************#


input = letterToTensor('A')         # 要预测的A,在所有字母字符的全零序列中(input),将A所在的位置置一
hidden =torch.zeros(1, n_hidden)

output, next_hidden = rnn(input, hidden)
# print(output)


# ****************************#
# 单词例子——输出值和隐层值
# ****************************#


input = lineToTensor('Albert')
hidden = torch.zeros(1, n_hidden)

output, next_hidden = rnn(input[0], hidden)     # input[0],是单词‘Albert’中的字母'A'
# print(output)


'''
2.2 训练
'''
# ****************************#
# 使用 Tensor.topk函数得到最大值在结果中的位置索引
# ****************************#


def categoryFromOutput(output):
    top_n, top_i = output.topk(1)
    category_i = top_i[0].item()
    return all_categories[category_i], category_i

# print(categoryFromOutput(output))


# ****************************#
# 一种快速获取训练示例(得到一个名字及其所属的语言类别)的方法
# ****************************#

import random

def randomChoice(l):
    return l[random.randint(0, len(l) - 1)]

def randomTrainingExample():
    category = randomChoice(all_categories)
    line = randomChoice(category_lines[category])
    category_tensor = torch.tensor([all_categories.index(category)], dtype=torch.long)      # 所选择的语言在所有语言类数组中的索引
    line_tensor = lineToTensor(line)
    return category, line, category_tensor, line_tensor

# for i in range(10):
#     category, line, category_tensor, line_tensor = randomTrainingExample()
#     print('category =', category, '/ line =', line)


# ****************************#
# 训练神经网络
# ****************************#


criterion = nn.NLLLoss()

learning_rate = 0.005 # If you set this too high, it might explode. If too low, it might not learn

def train(category_tensor, line_tensor):
    hidden = rnn.initHidden()

    rnn.zero_grad()

    for i in range(line_tensor.size()[0]):
        output, hidden = rnn(line_tensor[i], hidden)        # 【将‘Albert’字母,依次一个一个地是那个如神经网络;每次都输出一个输出值和隐层值;当最后一个字母输入完后,得到最终的out值;将最终的output值(tensor序列:在本类所在的位置数值最大)与target类别比较,得到loss,迭代训练】————采取随机抽取的方式进行训练

    loss = criterion(output, category_tensor)
    loss.backward()

    # 将参数的梯度添加到其值中,乘以学习速率
    for p in rnn.parameters():
        p.data.add_(-learning_rate, p.grad.data)

    return output, loss.item()


import time
import math

n_iters = 100000
print_every = 5000
plot_every = 1000

# 跟踪绘图的损失
current_loss = 0
all_losses = []

def timeSince(since):
    now = time.time()
    s = now - since
    m = math.floor(s / 60)
    s -= m * 60
    return '%dm %ds' % (m, s)

start = time.time()

for iter in range(1, n_iters + 1):
    category, line, category_tensor, line_tensor = randomTrainingExample()
    output, loss = train(category_tensor, line_tensor)
    current_loss += loss

    # 打印迭代的编号,损失,名字和猜测
    if iter % print_every == 0:
        guess, guess_i = categoryFromOutput(output)             # print_every次数后,用于预测一个值
        correct = '✓' if guess == category else '✗ (%s)' % category
        print('%d  %d%% (%s) %.4f  %s / %s  %s' % (iter, iter / n_iters * 100, timeSince(start), loss, line, guess, correct))

    # 将当前损失平均值添加到损失列表中
    if iter % plot_every == 0:
        all_losses.append(current_loss / plot_every)            # plot_every次数后,得到这一段时间的平均loss,用于画loss曲线
        current_loss = 0


'''
2.3、绘画出结果
'''


import matplotlib.pyplot as plt
import matplotlib.ticker as ticker

plt.figure()
plt.plot(all_losses)

plt.show()
效果:

最后
以上就是故意汉堡最近收集整理的关于两个rnn实例,可直接运行参考实例一完整代码实例二完整代码的全部内容,更多相关两个rnn实例内容请搜索靠谱客的其他文章。
本图文内容来源于网友提供,作为学习参考使用,或来自网络收集整理,版权属于原作者所有。


发表评论 取消回复