文章目录
- 添加服务
- 日志采集Flume配置
- 启动Flume
添加服务
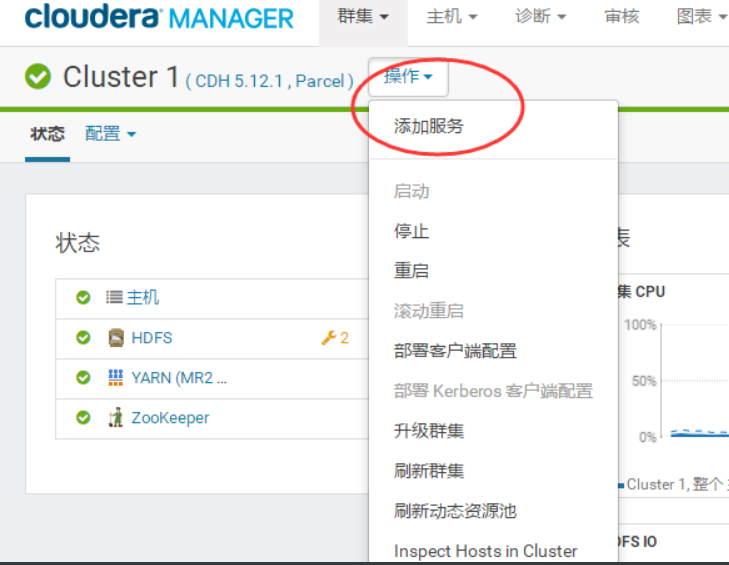
选择所有节点
![[外链图片转存失败(img-hwz9Zinf-1563700993583)(1563700068147.png)]](https://www.shuijiaxian.com/files_image/2023060222/20190721172348206.png)
然后完成
日志采集Flume配置
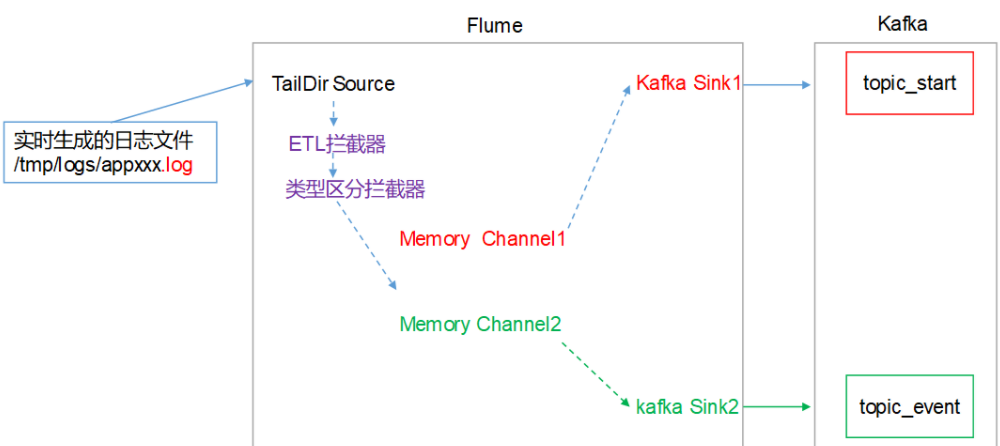
Flume直接读log日志的数据,log日志的格式是app-yyyy-mm-dd.log。两台Flume生产一台消费.如果直接点击配置,配置的是所有集群中的Flume
点击Flume中的实例

点击Agent
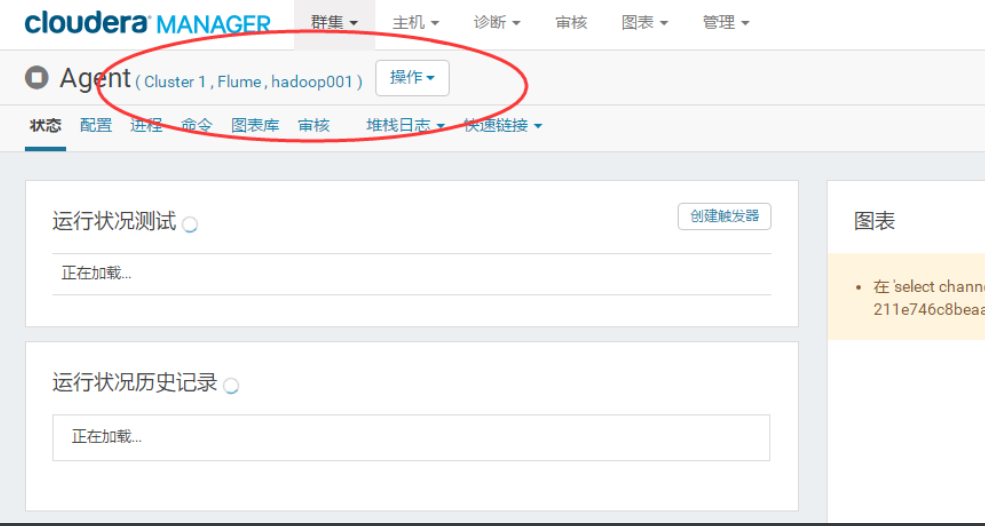
在这里点击配置,只配置hadoop001的,修改配置中Agent为a1,并添加配置
a1.sources=r1
a1.channels=c1 c2
a1.sinks=k1 k2

# configure source
a1.sources.r1.type = TAILDIR
a1.sources.r1.positionFile = /opt/module/flume/log_position.json
a1.sources.r1.filegroups = f1
a1.sources.r1.filegroups.f1 = /tmp/logs/*.log
a1.sources.r1.fileHeader = true
a1.sources.r1.channels = c1 c2

#interceptor
a1.sources.r1.interceptors = i1 i2
a1.sources.r1.interceptors.i1.type = com.atguigu.flume.interceptor.LogETLInterceptor$Builder
a1.sources.r1.interceptors.i2.type = com.atguigu.flume.interceptor.LogTypeInterceptor$Builder

# selector
a1.sources.r1.selector.type = multiplexing
a1.sources.r1.selector.header = topic
a1.sources.r1.selector.mapping.topic_start = c1
a1.sources.r1.selector.mapping.topic_event = c2

# configure channel
a1.channels.c1.type = memory
a1.channels.c1.capacity=10000
a1.channels.c1.byteCapacityBufferPercentage=20

a1.channels.c2.type = memory
a1.channels.c2.capacity=10000
a1.channels.c2.byteCapacityBufferPercentage=20

# configure sink
# start-sink
a1.sinks.k1.type = org.apache.flume.sink.kafka.KafkaSink
a1.sinks.k1.kafka.topic = topic_start
a1.sinks.k1.kafka.bootstrap.servers = hadoop001:9092,hadoop002:9092,hadoop003:9092
a1.sinks.k1.kafka.flumeBatchSize = 2000
a1.sinks.k1.kafka.producer.acks = 1
a1.sinks.k1.channel = c1

# event-sink
a1.sinks.k2.type = org.apache.flume.sink.kafka.KafkaSink
a1.sinks.k2.kafka.topic = topic_event
a1.sinks.k2.kafka.bootstrap.servers = hadoop001:9092,hadoop002:9092,hadoop003:9092
a1.sinks.k2.kafka.flumeBatchSize = 2000
a1.sinks.k2.kafka.producer.acks = 1
a1.sinks.k2.channel = c2
架构图
配置hadoop001和hadoop002的flume一致,都是采集
采用root用户将flume-interceptor-1.0-SNAPSHOT.jar包放入到hadoop001/opt/cloudera/parcels/CDH-5.12.1-1.cdh5.12.1.p0.3/lib/flume-ng/lib/文件夹下面。
[root@hadoop001 lib]# ls | grep interceptor
flume-interceptor-1.0-SNAPSHOT.jar
启动Flume
下拉选启动Flume
最后
以上就是现实自行车最近收集整理的关于CDH中Flume的基本安装的全部内容,更多相关CDH中Flume内容请搜索靠谱客的其他文章。
本图文内容来源于网友提供,作为学习参考使用,或来自网络收集整理,版权属于原作者所有。


发表评论 取消回复