利用verilog,有两种连接方式:按顺序连接和按名称连接。
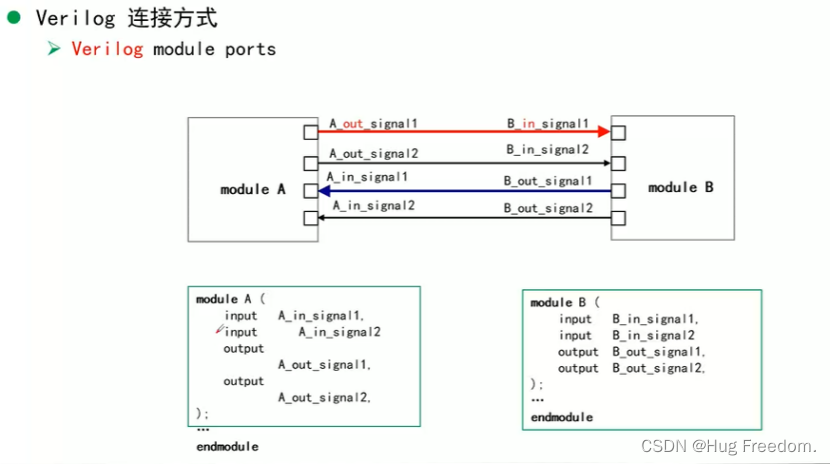
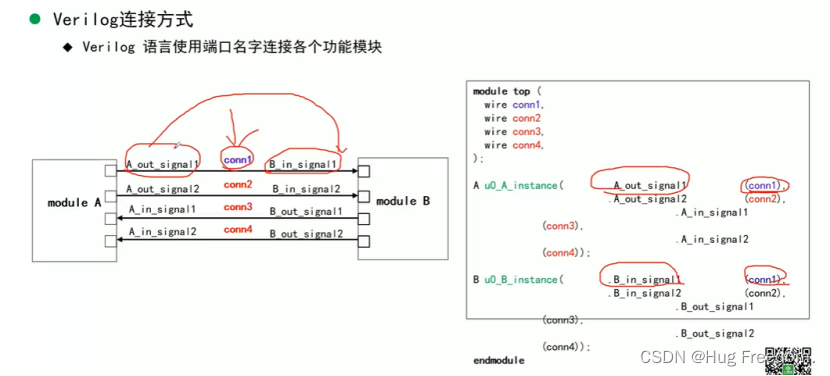
verilog的连接非常繁琐!!!如果将一个信号名儿修改了,那就需要修改其他与他有关的信号名儿,麻烦且容易出错!!!

system采用接口解决这种繁琐。
接口可以用作设计,也可以用作验证,接口可以使得信号连接变得简洁并且不容易出错。 接口减少了模块之间错误连接的可能性;如果要添加新的信号,只需要在接口中声明,不需要在模块中声明。
interface集合了多个verilog类型的信号,是一个独立的端口类型,可以是一个独立的文件。
Interface和module相同点:
1.可以定义端口与双向信号
2.可以使用initial和always语句
3.可以定义function与task
Interface和module不同点:
模块可以例化接口,接口不可以例化模块
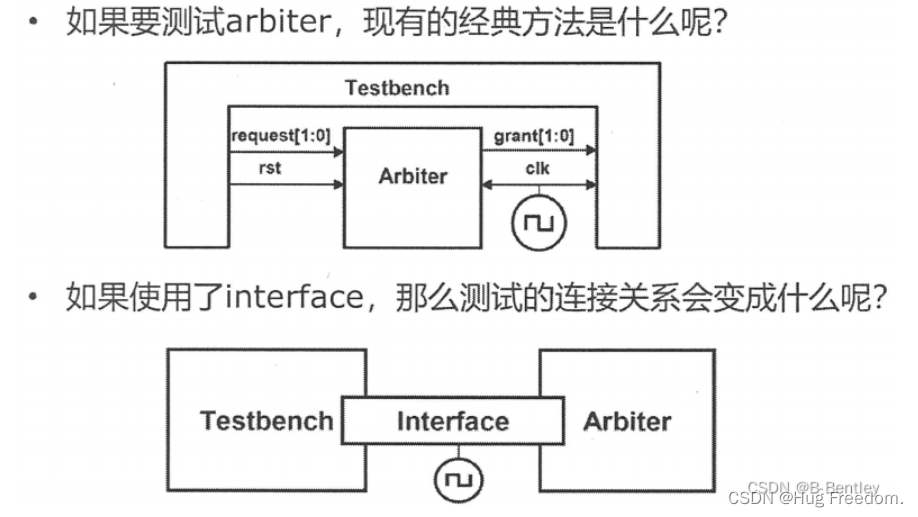
DUT和TB之间的驱动关系可以使用interface这个插排完成。
1.interface声明
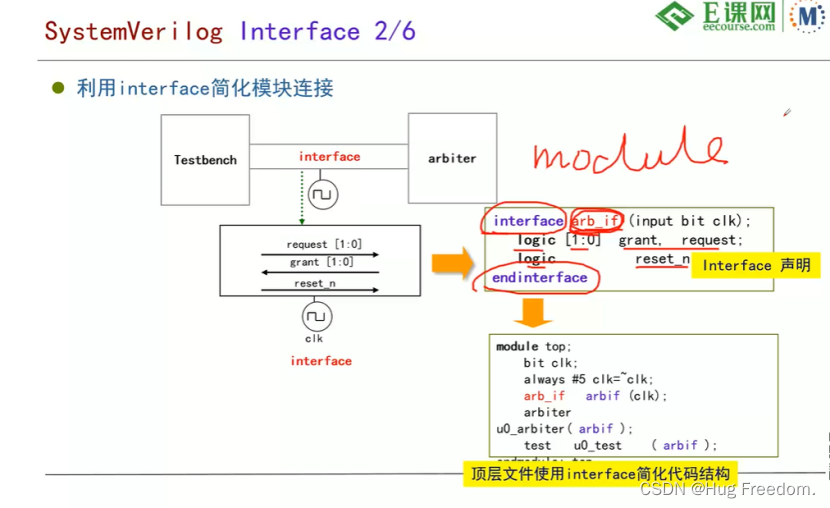
利用interface简化模块连接,interface声明如下:
interface arb_if(
    input bit clk
);

logic [1:0] grant,request;
logic       reset_n;

endinterface
顶层文件例化interface如下:
module top;
    bit clk;
    always #5 clk=~clk;

    arb_if arbif(clk);

    arbiter u_arbiter(arbif);
    test    u_test(arbif);

endmodule
可以看出,信号端口的连接就不针对内部具体的端口了,如果之后修改信号名或者信号位宽,直接去interface中修改即可。
2.interface中信号的使用
//接口声明
interface arb_if(
    input bit clk
);

logic [1:0] request,grant;
logic       reset_n;

endinterface


module tb(
    arb_if arbif  //arbif相当于组长
);

initial begin
    @(posedge arbif.clk) //arbif.clk相当于组员
        arbif.request <= 2'b01;
        ...

    if(arbif.grant != 2'b01)
    ...

    $finish
end
3.接口与端口的连接
//接口声明
interface arb_if(
    input bit clk
);

logic [1:0] request,grant;
logic       reset_n;

endinterface


module top;

bit clk;
always #5 clk = ~clk;
arb_if arbif(clk);

//两种方式
arbiter u_arbiter(
    .grant(arbif.grant),
    .request(arbif.request),
    .reset_n(arbif.reset_n),
    .clk(arbif.clk)
);//比较麻烦


test u_test(arbif);//推荐

endmodule
4.接口信号分组:modport
为接口内部信号提供不同的视图,只是声明连接模块的信号的端口方向
也就是将大组分为多个小组
//接口声明
interface arb_if(
    input bit clk
);

logic [1:0] request,grant;
logic       reset_n;

//在interface中声明modport
modport DUV(
    input request,clk,reset_n,
    output grant
);


modport TEST(
    input grant,clk,
    output request,reset_n
);

endinterface

//设计模块中使用interface中的modport
module arbiter(
    arbif.DUV arbif_duv
);
...
endmodule

//测试案例中使用interface的modport
module tb(
    arbif.TEST arbif_test
);
...
endmodule
interface总结:
1. 功能:
一组信号/线网;
独立的文件;
在interface中定义通信协议;
在interface中定义协议检查和验证函数:task function assertion
2.modport可以定义interface的不同视图(DUV,test program)
3.interface不能有rtl
4.interface可综合
5.interface中可以包含多个modport
实例说明:接口使用四步骤
1.定义接口:
interface arb_if(
    input bit clk
);

logic [1:0] request,grant;
logic reset_n;

endinterface
2.DUT调用inetrface
module arb(arb_if arbif);//接口传入模块中
...


always@(posedge arbif.clk or negedge arbif.reset_n)
    if(arbif.reset_n)
        arbif.grant <= 2'b00;
    else
        arbif.grant <= next_grant;

endmodule
3.TEST调用interface
module test(arb_if arbif);

initial begin
    initial begin
    @(posedge arbif.clk) //arbif.clk相当于组员
        arbif.request <= 2'b01;
        ...
    @(posedge arbif.clk)
        if(arbif.grant != 2'b01)
        ...

    $finish

end
4.top层例化接口 DUT TEST
module top;

    bit clk;

    always #5 clk=~clk;


    arb_if arbif(clk);

    arb_al(arbif);

    test_al(arbif);

endmodule
最后
以上就是霸气外套最近收集整理的关于SystemVerilog学习1——interface的全部内容,更多相关SystemVerilog学习1——interface内容请搜索靠谱客的其他文章。


发表评论 取消回复