我是靠谱客的博主 合适外套,这篇文章主要介绍安卓开发——做一个简单的底部导航栏一、思维导图二、使用步骤2.创建需要的Fragment3.在MainActivity创建一个方法对Fragment进行实例化4.创建一个方法 绑定创建的Fragment5.对创建的Fragment和下面的BottomNavigationView进行绑定总结,现在分享给大家,希望可以做个参考。
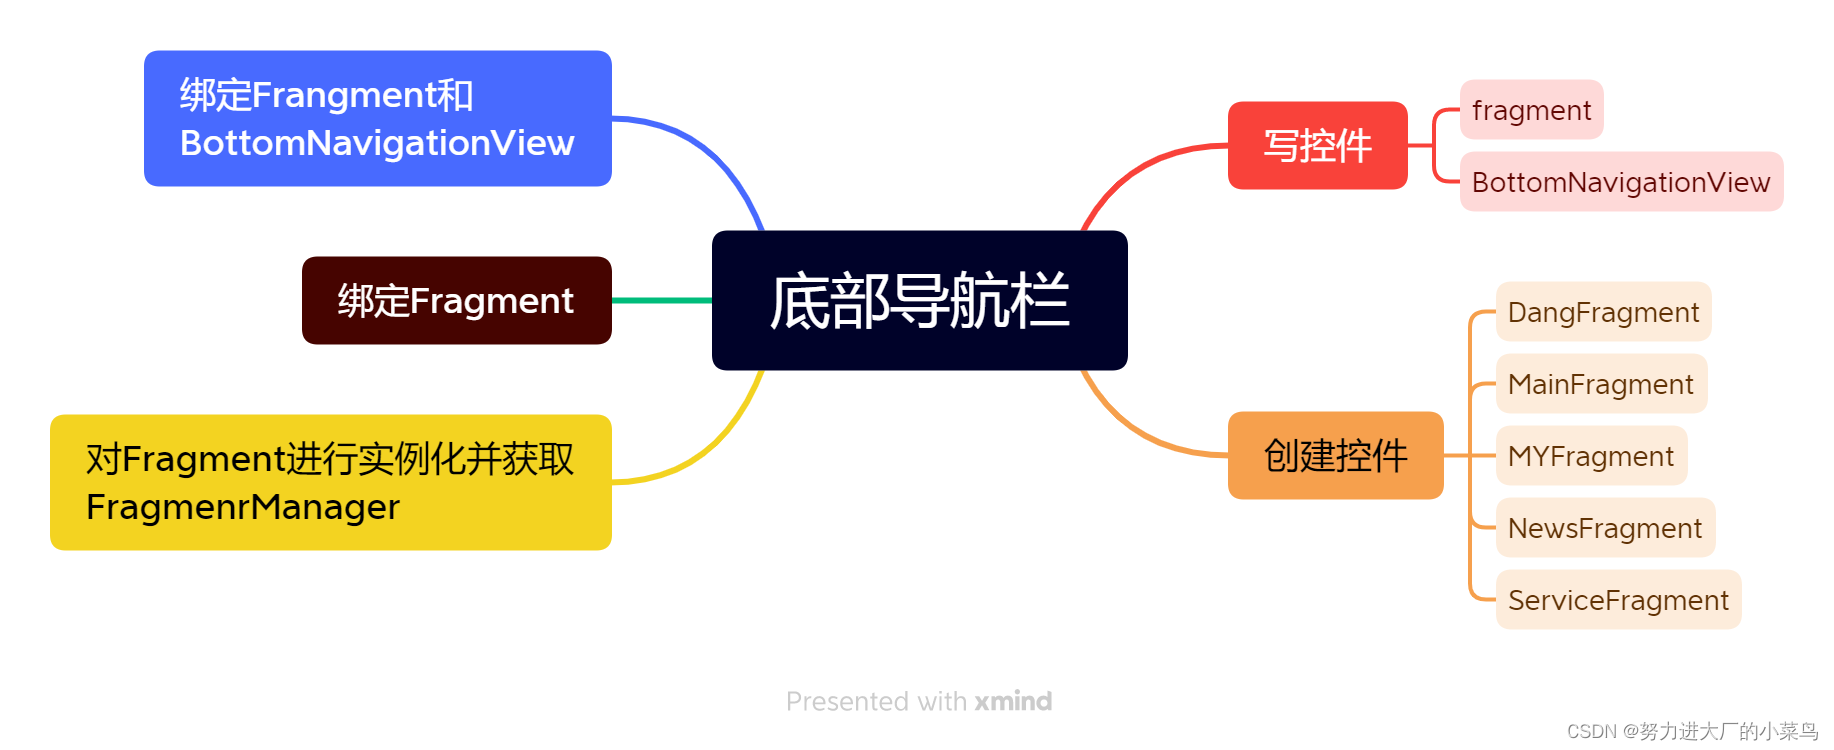
一、思维导图
1.思维导图大概思路

二、使用步骤
1.写控件
在R.layout.activity_main 创建Fragment和BottomNavigationView俩个控件
说明:
BottomNavigationView
1).在BottomNavigationView中需要写一个显示底部图标和文字的菜单
app:menu="@menu/menu
<menu xmlns:android="http://schemas.android.com/apk/res/android"
    xmlns:app="http://schemas.android.com/apk/res-auto"
    xmlns:tools="http://schemas.android.com/tools"
    tools:context="com.example.city.MainActivity">
    <item
        android:id="@+id/city_home"

        android:orderInCategory="100"
        android:title="首页"
        android:icon="@drawable/home" />
    <!--id用来表示这个item的标识 后面需要用它绑定点击时间
    tltle用来表示上面显示的文字
    icon用来表示图标
    -->
    <item
        android:id="@+id/city_service"
        android:orderInCategory="100"
        android:title="全部服务"
        android:icon="@drawable/fuwu"
        app:showAsAction="never" />
    <item
        android:id="@+id/city_dangjian"
        android:orderInCategory="100"
        android:title="智慧党建"
        android:icon="@drawable/study"
        app:showAsAction="never" />
    <item
        android:id="@+id/city_news"
        android:orderInCategory="100"
        android:icon="@drawable/news"
        android:title="新闻"
        app:showAsAction="never" />
    <item
        android:id="@+id/city_geren"
        android:orderInCategory="100"
        android:icon="@drawable/geren"
        android:title="个人中心"
        app:showAsAction="never" />

    <!--    首页、全部服务、智慧党建、新闻、个人中心-->
</menu>
R.layout.activity_main
<?xml version="1.0" encoding="utf-8"?>
<RelativeLayout xmlns:android="http://schemas.android.com/apk/res/android"
    xmlns:app="http://schemas.android.com/apk/res-auto"
    xmlns:tools="http://schemas.android.com/tools"
    android:layout_width="match_parent"
    android:layout_height="match_parent"
    android:orientation="vertical"
    tools:context=".MainActivity">

    <FrameLayout
        android:id="@+id/fragment_main"
        android:layout_width="match_parent"
        android:layout_height="match_parent" />
    <com.google.android.material.bottomnavigation.BottomNavigationView
        android:id="@+id/bottom_view"
        android:layout_alignParentBottom="true"
        android:layout_width="match_parent"
        app:menu="@menu/menu"
        android:layout_height="wrap_content"/>


</RelativeLayout>
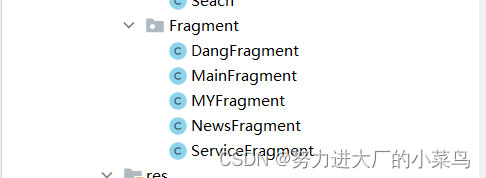
2.创建需要的Fragment

3.在MainActivity创建一个方法对Fragment进行实例化
对Fragment进行实例化然后对 FragmentManager进行获取
 private void initFragemnt() {
        dangFragment = new DangFragment();
        mainFragment = new MainFragment();
        myFragment = new MYFragment();
        serviceFragment = new ServiceFragment();

        newsFragment = new NewsFragment();
        fragmentManager =getSupportFragmentManager();
Swich(mainFragment);

    }
4.创建一个方法 绑定创建的Fragment
   private void Swich(Fragment targrFragment) {
        FragmentTransaction fragmentTransaction=fragmentManager.beginTransaction();
        fragmentTransaction.replace(R.id.main_pav,targrFragment);
        fragmentTransaction.commit();
        }
5.对创建的Fragment和下面的BottomNavigationView进行绑定
  BottomNavigationView bnv= findViewById(R.id.boomview);

        bnv.setOnNavigationItemSelectedListener(item -> {


            Log.d(TAG,"title>"+item.getTitle());
            if(item.getItemId()==R.id.city_home){
                Log.d(TAG,"title>"+item.getItemId());
              Swich(mainFragment);
            }else if(item.getItemId()==R.id.city_news){
                Log.d(TAG,"title>"+item.getItemId());
                Swich(newsFragment);
            }else if(item.getItemId()==R.id.city_service){
                Swich(serviceFragment);
                Log.d(TAG,"title>"+item.getItemId());
            }else if(item.getItemId()==R.id.city_dangjian){
                Log.d(TAG,"title>"+item.getItemId());
                Swich(dangFragment);
            }else if(item.getItemId()==R.id.city_geren){
                Log.d(TAG,"title>"+item.getItemId());
                Swich(myFragment);
            }

            return true;
        });
总结
通过给的思维导图了解思路
最后
以上就是合适外套最近收集整理的关于安卓开发——做一个简单的底部导航栏一、思维导图二、使用步骤2.创建需要的Fragment3.在MainActivity创建一个方法对Fragment进行实例化4.创建一个方法 绑定创建的Fragment5.对创建的Fragment和下面的BottomNavigationView进行绑定总结的全部内容,更多相关安卓开发——做一个简单的底部导航栏一、思维导图二、使用步骤2.创建需要的Fragment3.在MainActivity创建一个方法对Fragment进行实例化4.创建一个方法内容请搜索靠谱客的其他文章。
本图文内容来源于网友提供,作为学习参考使用,或来自网络收集整理,版权属于原作者所有。


发表评论 取消回复