nginx优化配置
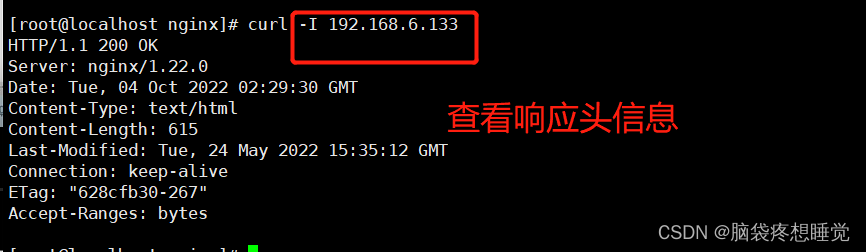
隐藏版本号:
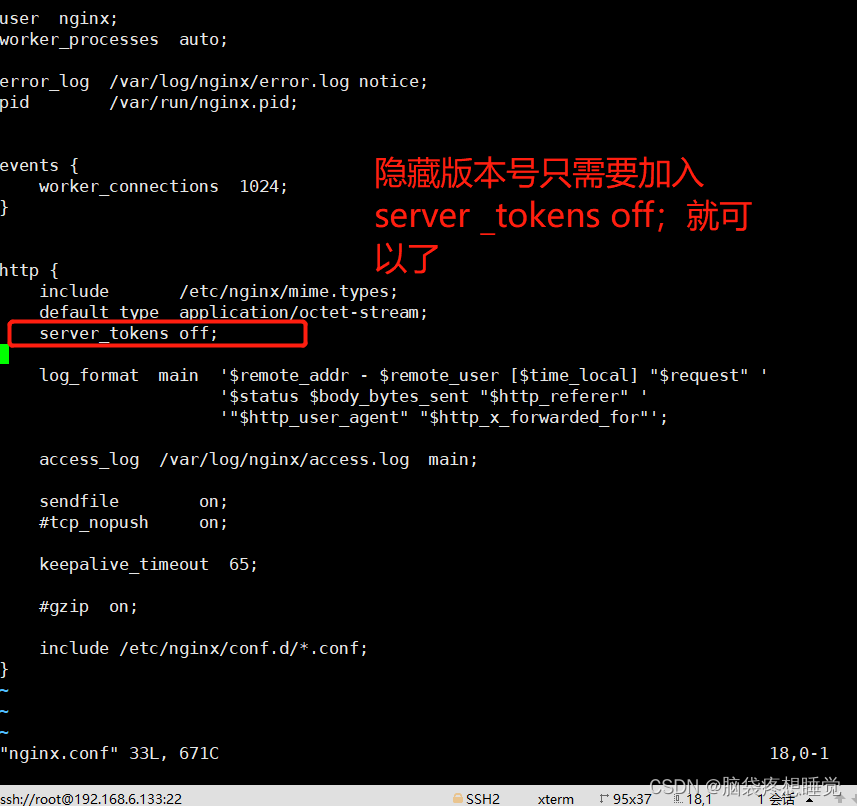
方法二:
cd /opt/nginx-1.12.0/src/core
[root@localhost nginx]# cd /opt/nginx-1.12.2/src/core
[root@localhost core]# ls
nginx.c ngx_crc.h ngx_md5.c ngx_proxy_protocol.c ngx_sha1.h
nginx.h ngx_crypt.c ngx_md5.h ngx_proxy_protocol.h ngx_shmtx.c
ngx_array.c ngx_crypt.h ngx_module.c ngx_queue.c ngx_shmtx.h
ngx_array.h ngx_cycle.c ngx_module.h ngx_queue.h ngx_slab.c
ngx_buf.c ngx_cycle.h ngx_murmurhash.c ngx_radix_tree.c ngx_slab.h
ngx_buf.h ngx_file.c ngx_murmurhash.h ngx_radix_tree.h ngx_spinlock.c
ngx_conf_file.c ngx_file.h ngx_open_file_cache.c ngx_rbtree.c ngx_string.c
ngx_conf_file.h ngx_hash.c ngx_open_file_cache.h ngx_rbtree.h ngx_string.h
ngx_config.h ngx_hash.h ngx_output_chain.c ngx_regex.c ngx_syslog.c
ngx_connection.c ngx_inet.c ngx_palloc.c ngx_regex.h ngx_syslog.h
ngx_connection.h ngx_inet.h ngx_palloc.h ngx_resolver.c ngx_thread_pool.c
ngx_core.h ngx_list.c ngx_parse.c ngx_resolver.h ngx_thread_pool.h
ngx_cpuinfo.c ngx_list.h ngx_parse.h ngx_rwlock.c ngx_times.c
ngx_crc32.c ngx_log.c ngx_parse_time.c ngx_rwlock.h ngx_times.h
ngx_crc32.h ngx_log.h ngx_parse_time.h ngx_sha1.c
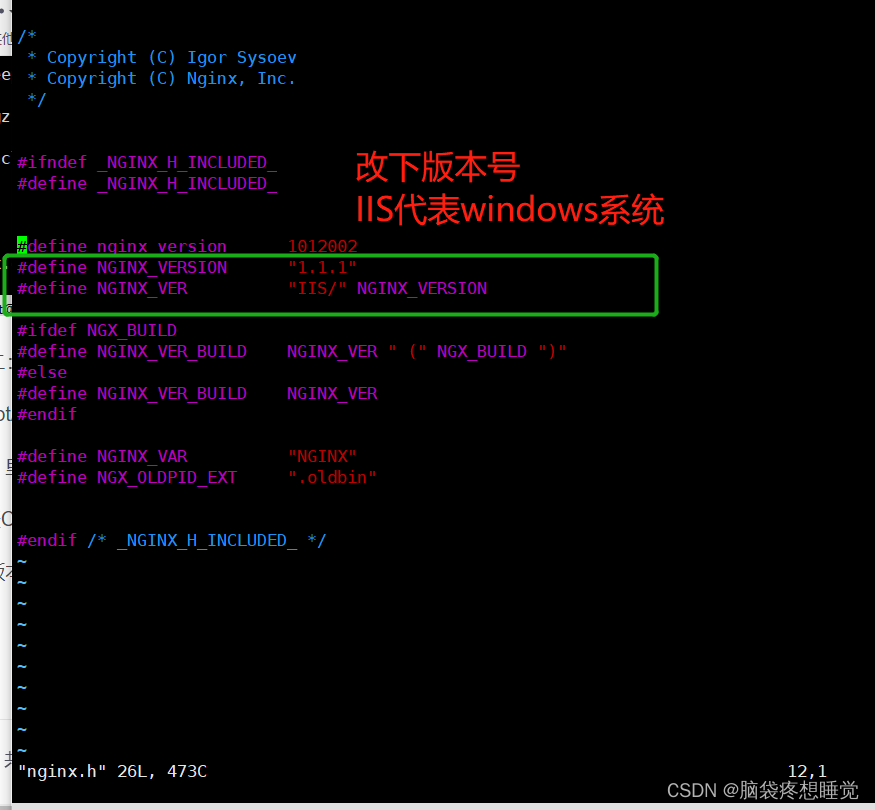
[root@localhost core]# vim nginx.h
注解:里面全是以.c .h 结尾的文件
.c代表C语言编写的软件 .h代表头部文件
隐藏版本信息
修改完之后,重新编译安装就生效
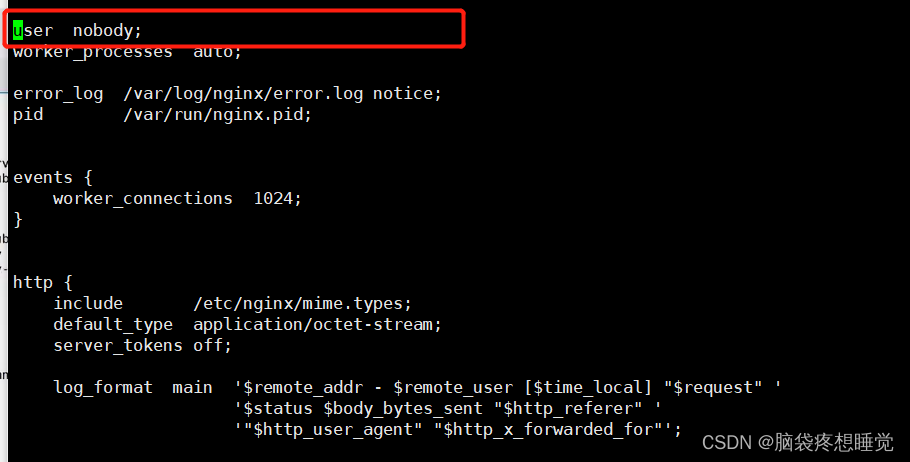
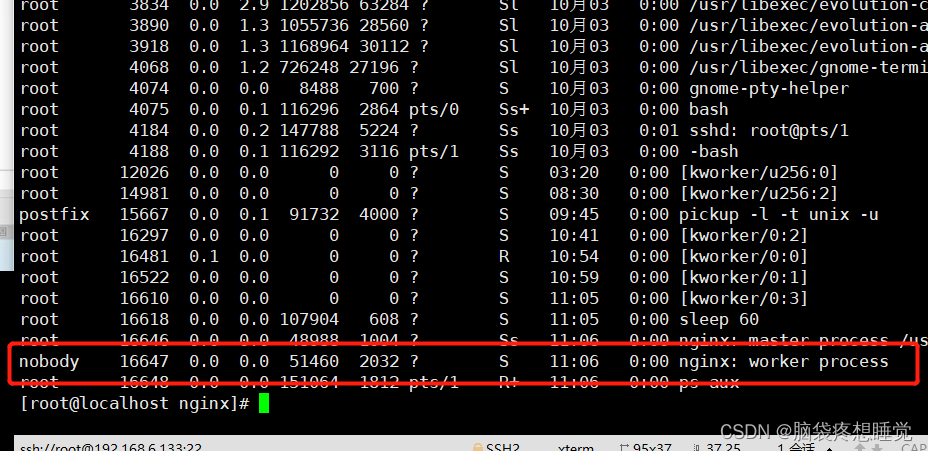
修改nginx用户和组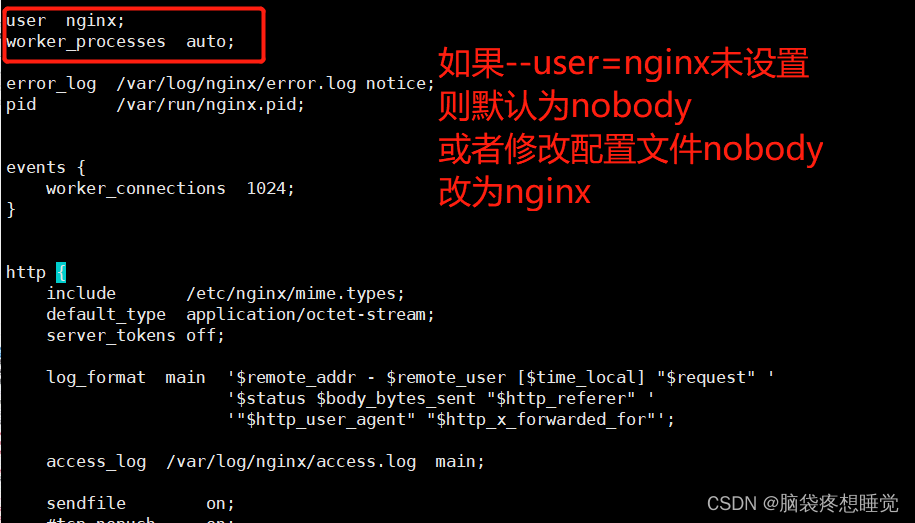
修改主用户
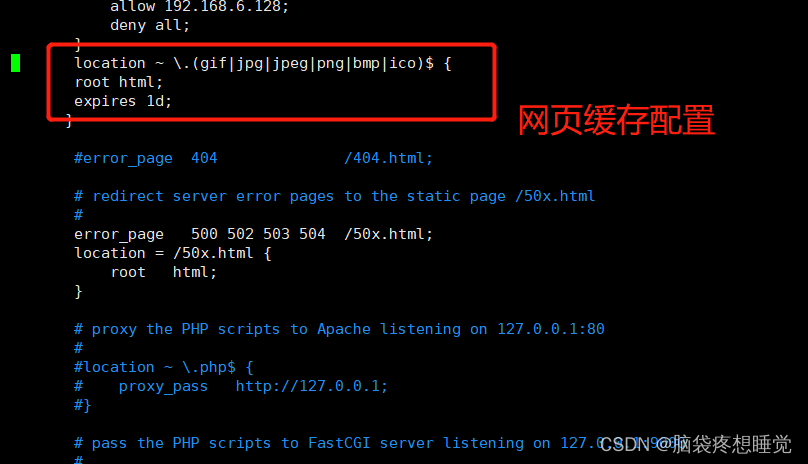
网页缓存:~代表匹配正则表达式
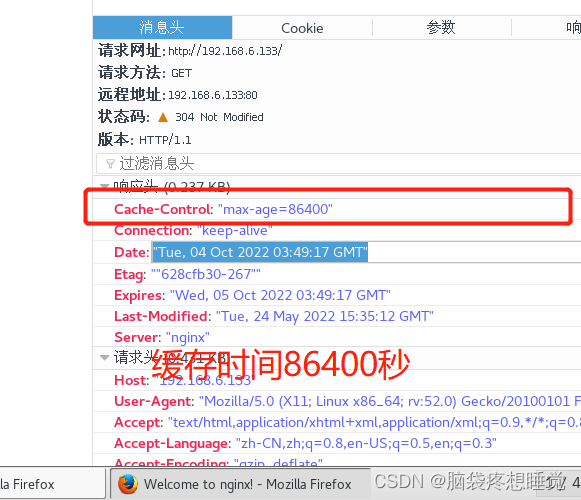
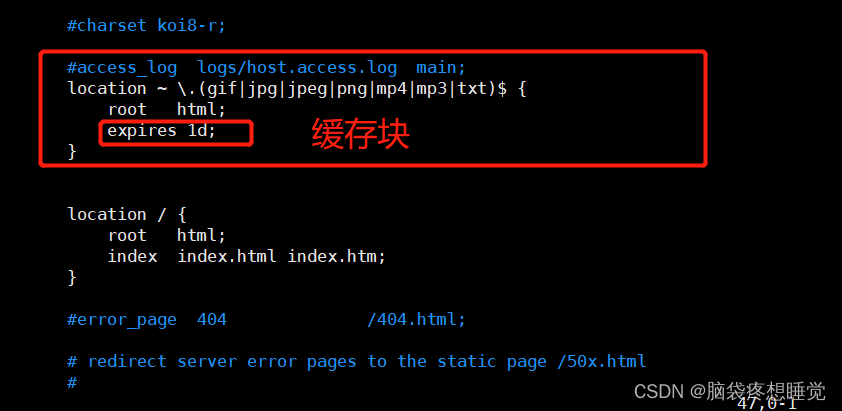
访问地址:

日志分割脚本:
1.通过mv命令将原有日志移动到日志目录中
2.kill -USR1 < PID> 重新生成日志文件
3.删除30天之前的日志文件
#!/bin/bash
#des this is logs fenge files
#指定日志放的路径
log="/var/log/nginx"
#定义获取nginx进程的pid文件
pid="/usr/local/nginx/logs/nginx.pid"
#定义变量获取前一天的日期
last=$(date -d "-1 day" +%Y-%m-%d)
#判断目录是否存在,如不存在创建此目录
if [ ! -d $log ]
then
  mkdir -p $log


fi

#移动并重名名日志文件
mv /usr/local/nginx/logs/access.log $log/access.log-$last
mv /usr/local/nginx/logs/error.log $log/error.log-$last

#重建新日志文件,以便后续日志正常写入
kill -USR1 $(cat $pid)
#删除超过30天文件
find $log -mtime +30 | xargs rm -rf
执行脚本,生成日志文件

有多少ESTABLISHED就有多少并发连接 
keepalive(保持连接)
在企业网站中,为了避免同一个客户长时间占用连接,造成资源浪费,可设置相应的连接超时参数,实现控制连接访问时间。可以修改配置文件 nginx.conf,设置 keepalive_timeout超时。
keepalive 0; 设置后就相当于连接保持给关闭了,使用短链接。
短链接:一个tcp连接对应一个http请求请求结束,即断开连接
keepalive 60 50; 一个tcp连接可响应多个请求,访问结束后60s断开连接;
50s 代表客户端经过50s后,客户端断开tcp连接
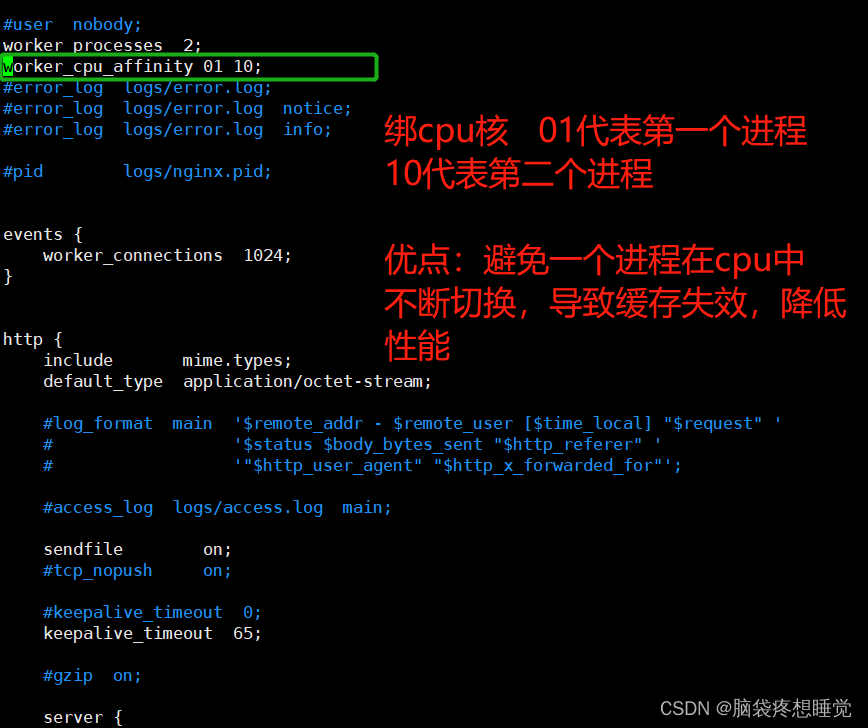
惊群效应:
惊群效应(thundering herd)是指多进程(多线程)在同时阻塞等待同一个事件的时候(休眠状态),如果等待的这个事件发生,那么他就会唤醒等待的所有进程(或者线程),但是最终却只能有一个进程(线程)获得这个时间的“控制权”,对该事件进行处理,而其他进程(线程)获取“控制权”失败,只能重新进入休眠状态,这种现象和性能浪费就叫做惊群效应。

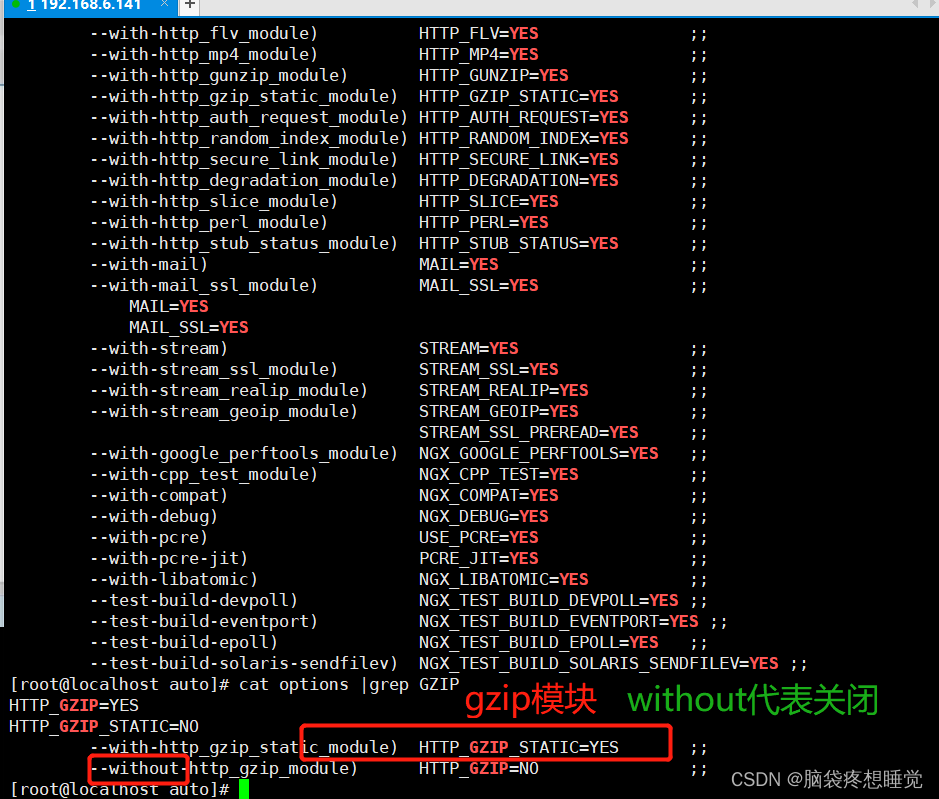
网页压缩:ngx http gzip_module模块
允许Nginx服务器将输出内容在发送客户端之前进行压缩,以节约网站带宽,提升用户的访问体验,默认已经安装。
路径:
[root@localhost conf]# cd /opt
[root@localhost opt]# cd nginx-1.12.2/
[root@localhost nginx-1.12.2]# cd auto
[root@localhost auto]# ls
cc          feature       headers  install  module   options  stubs    types
define      have          include  lib      modules  os       summary  unix
endianness  have_headers  init     make     nohave   sources  threads
[root@localhost auto]# cat options
配置:
 vim /usr/local/nginx/conf/nginx.conf

 http {
 ......
    gzip on;                 #取消注释,开启gzip压缩功能
    gzip_min_length 1k;      #最小压缩文件大小
    gzip_buffers 4 64k;      #压缩缓冲区,大小为4个64k缓冲区
    gzip_http_version 1.1;   #压缩版本(默认1.1,前端如果是squid2.5请使用1.0)
    gzip_comp_level 6;       #压缩比率
    gzip_vary on;            #支持前端缓存服务器存储压缩页面

    #压缩类型,表示哪些网页文档启用压缩功能
    gzip_types text/plain text/javascript application/x-javascript text/css text/xml application/xml application/xml+rss image/jpg image/jpeg image/png image/gif application/x-httpd-php application/javascript application/json;
 ......
 }
浏览器访问测试 在Linux系统中,打开火狐浏览器,右击点查看元素 选择 网络 ---> 选择 HTML、WS、其他 访问 http://www.benet.com ,双击响应消息查看响应头中包含 Content-Encoding: gzip
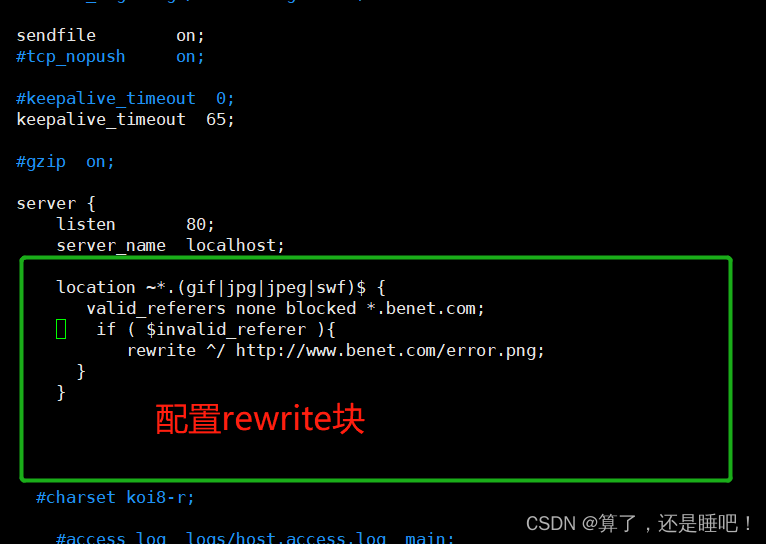
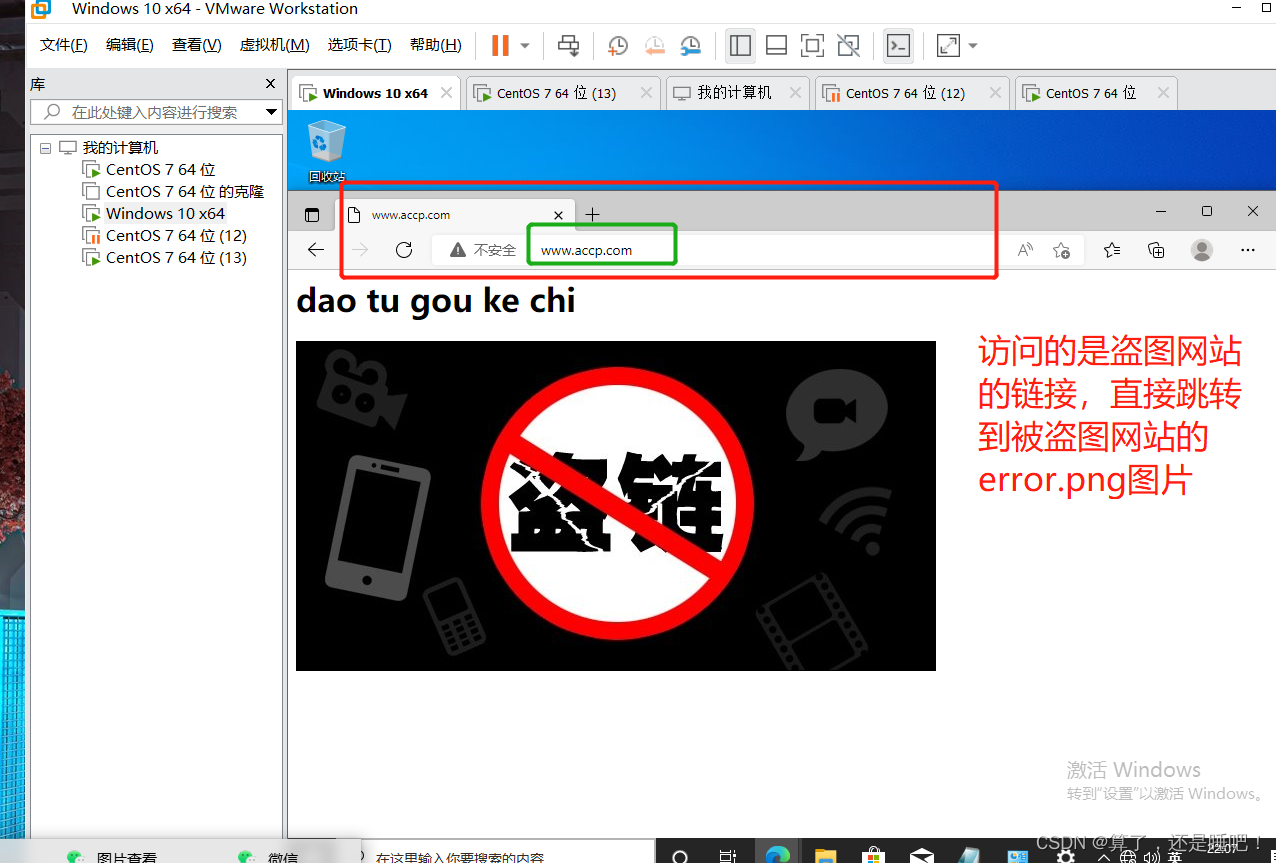
配置防盗链
- 在企业网站服务中,一般都要配置防盗链功能,以避免网站内容被非法盗用,造成经济损失,也避免了不必要的带宽浪费。
- Nginx 的防盗链功能也非常强大,在默认情况下,只需要进行很简单的配置,即可实现防盗链处理。
http{


      location ~* .(gif|jpg|jpeg|swf|)$ {

            valid_referers none blocked *.benet.com;

            if ( $invalid_referer ){

              rewrite ^/ http://www.benet.com/error.png;
           }

       }


}
盗图网站配置:
[root@localhost html]# cd /var/www/html
[root@localhost html]# ls
index.html
[root@localhost html]# cat index.html
<html>
<body>
<h1>dao tu gou ke chi </h1>
<img src="http://www.benet.com/fdl.jpg"/>
</body>
</html>
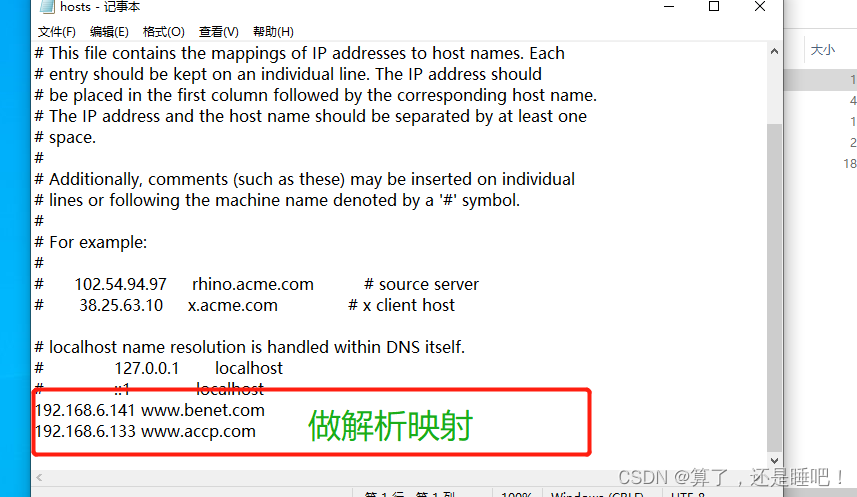
[root@localhost html]# cat /etc/hosts
127.0.0.1 localhost localhost.localdomain localhost4 localhost4.localdomain4
::1 localhost localhost.localdomain localhost6 localhost6.localdomain6
192.168.6.141 www.benet.com
192.168.6.133 www.accp.com
[root@localhost html]#

在windows10中配置解析映射
C:/windows/system32/drivers/etc/hosts文件
用windows10 访问的盗图网站
最后
以上就是过时百褶裙最近收集整理的关于nginx优化配置与防盗链的全部内容,更多相关nginx优化配置与防盗链内容请搜索靠谱客的其他文章。


发表评论 取消回复