官方文档
Guide - Accompanist
已经废弃了 但是要使用
WindowCompat.setDecorFitsSystemWindows(window, false)所以我们使用这个库
https://google.github.io/accompanist/systemuicontroller/
onCreate当中 完整代码
        WindowCompat.setDecorFitsSystemWindows(window, false)

        val statusBarHeight = StatusBarUtil.getStatusBarHeightByDp(this)
        setContent {
            Column(
                modifier = Modifier
                    .fillMaxSize()
                    .padding(top = statusBarHeight.dp)
            ) {

                    You code
            }


            val systemUiController = rememberSystemUiController()
            SideEffect {
                // Update all of the system bar colors to be transparent, and use
                // dark icons if we're in light theme
                systemUiController.setSystemBarsColor(
                    color = androidx.compose.ui.graphics.Color.Transparent,
//                    color = Companion.Black,
                    darkIcons = true
                )


            }
        }
https://google.github.io/accompanist/systemuicontroller/
添加依赖
    //沉浸式状态栏
    implementation "com.google.accompanist:accompanist-systemuicontroller:0.25.1"
    //设置padding 等
    implementation 'com.google.accompanist:accompanist-insets:0.25.1'
方案0 顶部有拿个状态栏的神色还有浅色没有生效
使用
            val systemUiController = rememberSystemUiController()
            val useDarkIcons = MaterialTheme.colors.isLight
            SideEffect {
                // Update all of the system bar colors to be transparent, and use
                // dark icons if we're in light theme
                systemUiController.setSystemBarsColor(
                    color = androidx.compose.ui.graphics.Color.Transparent,
                    darkIcons = useDarkIcons
                )

                // setStatusBarsColor() and setNavigationBarColor() also exist
            }
完整代码
    //获取状态栏高度
    fun getStatusBarHeight(context: Context): Int {
        var result: Int = 0
        val resourceId: Int = context.getResources().getIdentifier(
            "status_bar_height", "dimen", "android"
        )
        if (resourceId > 0) {
            result = context.getResources().getDimensionPixelSize(resourceId)
        }
        return result
    }

    fun getStatusBarHeightByDp(context: Context): Int {
        val px=getStatusBarHeight(context)
        val statusBarHeight = ScreenUtil.px2dp(px)
        return statusBarHeight
    }
/**
* px转换为dp值
*
* @param context 应用程序上下文
* @param pxValue px值
* @return 转换后的dp值
*/
fun px2dp(context: Context, pxValue: Int): Int {
return (pxValue / getDensity(context) + 0.5f).toInt()
}
fun px2dp(dpValue: Int): Int {
return px2dp(HaiveApplication.gContext, dpValue)
}方案1
样式
<?xml version="1.0" encoding="utf-8"?>
<resources>

    <style name="Theme.Android_compose_learn" parent="android:Theme.Material.Light.NoActionBar">
        <item name="android:statusBarColor">@color/blue_700</item>
<!--        <item name="android:windowTranslucentStatus">true</item>-->
    </style>
</resources>
依然需要0的依赖 外加
accompanist-insetsonCreate中
        var statusBarHeight = 0
        val resourceId = resources.getIdentifier("status_bar_height", "dimen", "android")
        if (resourceId > 0) {
            statusBarHeight = resources.getDimensionPixelSize(resourceId)
        }
        //让内容 显示在状态栏和系统导航栏后面 :状态栏和导航栏会遮盖部分内容
//        WindowCompat.setDecorFitsSystemWindows(window, false)
        //处理不同机型 状态栏 不透明问题
        window.statusBarColor = Color.Transparent.value.toInt()
        //导航栏遮盖问题
        window.decorView.systemUiVisibility =
            View.SYSTEM_UI_FLAG_LAYOUT_FULLSCREEN or View.SYSTEM_UI_FLAG_LAYOUT_STABLE
这次我们从外部拿出了状态栏高度 并且传递给组件
        setContent {
            Android_compose_learnTheme {
                // A surface container using the 'background' color from the theme
                Surface(modifier = Modifier.fillMaxSize(),
                    color = MaterialTheme.colors.background) {
                    MainFrame(statusBarHeight)
                }
            }
        }
在最后使用顶部视图的过程中 我们高度还有padiing同时加上去
@Composable
fun TopAppBar(statusBarHeight: Int,content: @Composable () -> Unit) {
    //标题栏高度
    val appBarHeight = 56.dp
    //将状态栏高度px转换为dp
    val statusBarHeightDp = with(LocalDensity.current) {
        statusBarHeight.toDp()
    }
    Row(modifier =
    Modifier
        .fillMaxWidth()
        .height(appBarHeight+statusBarHeightDp)
        .background(
            Brush.linearGradient(
                listOf(Blue700, Blue200)
            ))
        .padding(top = statusBarHeightDp),
        horizontalArrangement = Arrangement.Center,
        verticalAlignment = Alignment.CenterVertically
    ) {
        content()
    }
}
从而 效果美滋滋
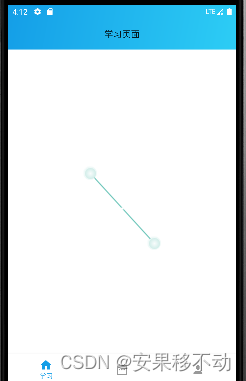
但是这个方法过时了

还有更佳的方案
方案2 结合了方案0还有方案1
    var accompanist_version = "0.23.1"

    implementation "com.google.accompanist:accompanist-systemuicontroller:$accompanist_version"
    implementation "com.google.accompanist:accompanist-insets:$accompanist_version"
class MainActivity : ComponentActivity() {
override fun onCreate(savedInstanceState: Bundle?) {
super.onCreate(savedInstanceState)
WindowCompat.setDecorFitsSystemWindows(window, false)
setContent {
Android_compose_learnTheme {
ProvideWindowInsets() {
// A surface container using the 'background' color from the theme
Surface(modifier = Modifier.fillMaxSize(),
color = MaterialTheme.colors.background) {
MainFrame()
}
}
}
}
}
}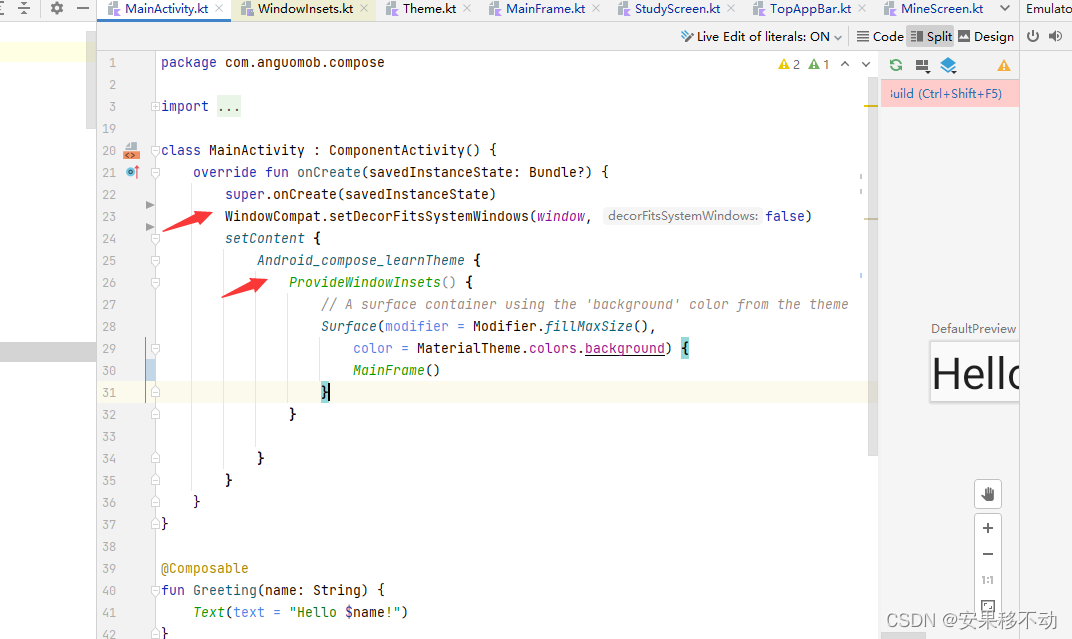
这样底部也不会有问题了。否则会遮挡底部 因为顶部往下迁移了
package com.anguomob.compose.ui.screens

import androidx.compose.foundation.layout.Box
import androidx.compose.material.*
import androidx.compose.material.icons.Icons
import androidx.compose.material.icons.filled.DateRange
import androidx.compose.material.icons.filled.Home
import androidx.compose.material.icons.filled.Person
import androidx.compose.runtime.*
import androidx.compose.ui.Modifier
import androidx.compose.ui.graphics.Color
import com.anguomob.compose.model.NavigationItem
import com.google.accompanist.insets.navigationBarsPadding

@Composable
fun MainFrame() {
    val navigationItems = listOf(
        NavigationItem(title = "学习", icon = Icons.Filled.Home),
        NavigationItem(title = "任务", icon = Icons.Filled.DateRange),
        NavigationItem(title = "我的", icon = Icons.Filled.Person),
    )

    var currentNavigationIndex by remember {
        mutableStateOf(0)
    }

    Scaffold(bottomBar = {
        BottomNavigation(
            backgroundColor = MaterialTheme.colors.surface,
            modifier = Modifier.navigationBarsPadding()
        ) {
            navigationItems.forEachIndexed() { index, navigationItem ->
                BottomNavigationItem(

                    selected = currentNavigationIndex == index,
                    onClick = {
                        currentNavigationIndex = index
                    },
                    icon = {
                        Icon(imageVector = navigationItem.icon, contentDescription = null)
                    },
                    label = {
                        Text(text = navigationItem.title)
                    },
                    alwaysShowLabel = false,
                    selectedContentColor = Color(0xFF149ee7),
                    unselectedContentColor = Color(0xFF999999)
                )
            }
        }
    }) { padding ->
        when (currentNavigationIndex) {
            0 -> StudyScreen()
            1 -> TaskScreen()
            2 -> MineScreen()
        }
    }
}

//@Preview
//@Composable
//fun pieview() {
//    MainFrame()
//}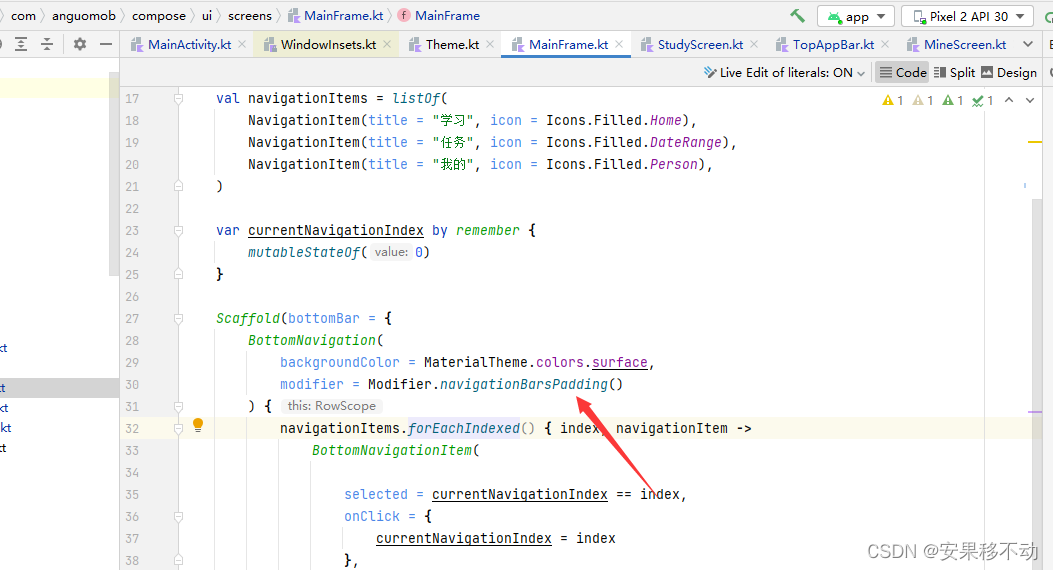
底部对底部进行适配
顶部对顶部进行适配
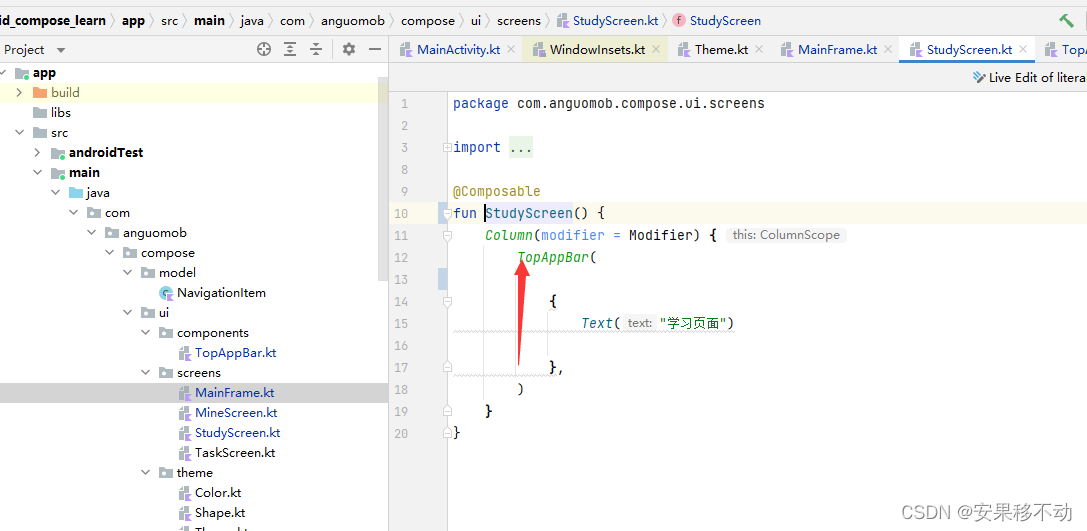
用到了自定的TopAppBar
package com.anguomob.compose.ui.components

import androidx.compose.foundation.background
import androidx.compose.foundation.layout.*
import androidx.compose.material.MaterialTheme
import androidx.compose.runtime.Composable
import androidx.compose.runtime.LaunchedEffect
import androidx.compose.ui.Alignment
import androidx.compose.ui.Modifier
import androidx.compose.ui.graphics.Brush
import androidx.compose.ui.graphics.Color
import androidx.compose.ui.platform.LocalDensity
import androidx.compose.ui.unit.Dp
import androidx.compose.ui.unit.dp
import com.anguomob.compose.ui.theme.Blue200
import com.anguomob.compose.ui.theme.Blue700
import com.google.accompanist.insets.LocalWindowInsets
import com.google.accompanist.systemuicontroller.rememberSystemUiController

@Composable
fun TopAppBar(content: @Composable () -> Unit) {
    val systemUiController = rememberSystemUiController()

    LaunchedEffect(key1 = Unit) {
        systemUiController.setSystemBarsColor(Color.Transparent)
    }

    //标题栏高度
    val appBarHeight = 56.dp
    //将状态栏高度px转换为dp
    val statusBarHeightDp = with(LocalDensity.current) {
        LocalWindowInsets.current.statusBars.top.toDp()
    }
    Row(modifier =
    Modifier
        .fillMaxWidth()
        .height(appBarHeight + statusBarHeightDp)
        .background(
            Brush.linearGradient(
                listOf(Blue700, Blue200)
            ))
        .padding(top = statusBarHeightDp),
        horizontalArrangement = Arrangement.Center,
        verticalAlignment = Alignment.CenterVertically
    ) {
        content()
    }
} 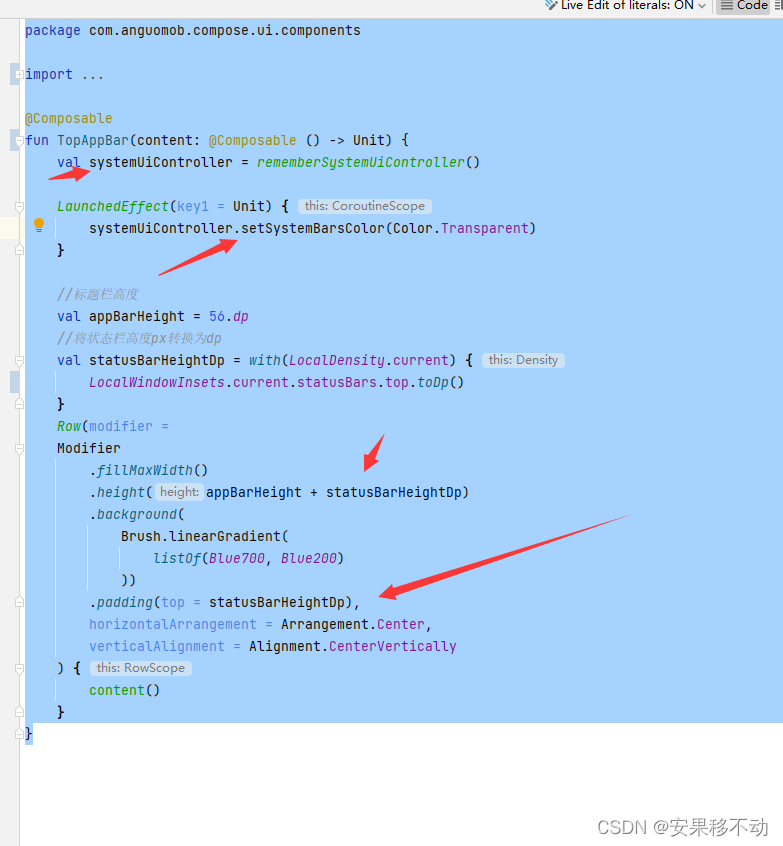
四点要注意
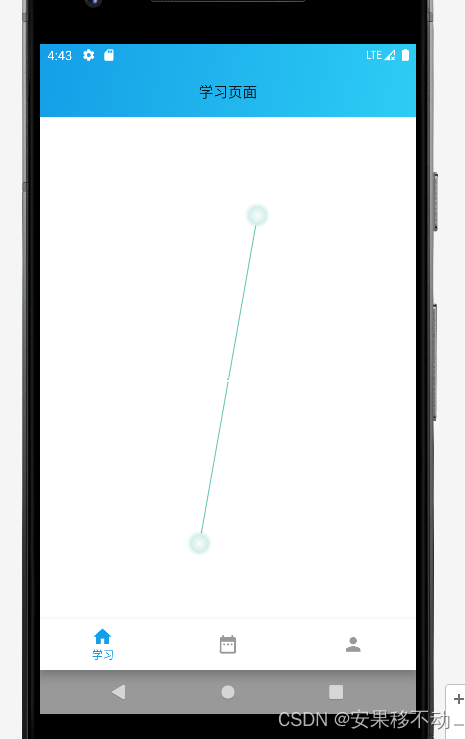
来看效果
最后
以上就是直率画板最近收集整理的关于Android Compose 沉浸式状态栏的全部内容,更多相关Android内容请搜索靠谱客的其他文章。
本图文内容来源于网友提供,作为学习参考使用,或来自网络收集整理,版权属于原作者所有。


发表评论 取消回复