前言
如果是第一次使用Moveit!,建议先按照 Moveit与rviz官方教程 做一次,主要熟悉Moveit!能干什么。
上一篇文章说明了Moveit的配置方法。实际上,网上关于Moveit!的配置与使用有着大把的教程。然而,它们大都是基于官方说明文档的思路,即在Moveit!中进行配置,编写控制算法后在rviz中进行可视化,很少有探讨如何在Gazebo中进行仿真的。
Gazebo是一款与ROS深度融合的仿真器,相比于rviz,其对环境的模拟更加真实。因此,我在网络上搜集大量资料,并结合自己的实验后,验证了一种Moveit!与Gazebo结合的联合仿真方法,在此总结。
- 系统:ubuntu 18.04
- ROS:melodic
- 其余软件要求:Moveit!配置已完成(已有Moveit!创建的功能包);Gazebo可用;ros_control插件可用
概述
Moveit!与Gazebo的联合仿真,其主要思路为搭建ros_control和Moveit!的桥梁。先在Moveit!端配置关节和传感器接口yaml文件,将其加载到rviz端;再在机器人端配置ros_control和接口yaml文件,将机器人加载到Gazebo。最后同时启动加载有ros_control的Gazebo和加载有Moveit的rviz,达到联合仿真的目的。
Moveit!端的配置
在进行Moveit!端的配置之前,首先要保证你已经用配置助手成功生成了Moveit!配置功能包。
例如你的Moveit!配置功能包名为ROBOT_moveit_config,可以在终端中运行如下命令:
roslaunch ROBOT_moveit_config demo.launch如果成功启动了rviz,界面中包含有你的机器人模型以及rviz控制界面,则说明满足要求。
建立控制器配置文件 controllers.yaml
首先,在 ROBOT_moveit_config/config/ 目录下创建名为 controllers.yaml 的配置文件:
  controller_manager_ns: ''
  controller_list:
    - name: ROBOT/group1_controller
      action_ns: follow_joint_trajectory
      type: FollowJointTrajectory
      default: true
      joints:
        - joint_1
        - joint_2
        - joint_3
        - joint_4
        - joint_5
        ...
    - name: ROBOT/group2_controller
      action_ns: follow_joint_trajectory
      type: FollowJointTrajectory
      default: true
      joints:
        - joint_6
        - joint_7
        - joint_8
        ...
其中,“name”的内容为机器人的规划组,前面要加入命名空间;“joints”的内容为关节名称。其余内容不变。
修改启动文件 ROBOT_moveit_controller_manager.launch.xml
只要是正常生成的配置功能包,其 launch 文件夹中就已经含有ROBOT_moveit_controller_manager.launch.xml 文件了,在此我们只需要将其内容修改如下:
<launch>

  <!--Set the param that trajectory_execution_manager needs to find the controller plugin-->
  <arg name="moveit_controller_manager" default="moveit_simple_controller_manager/MoveItSimpleControllerManager" />
  <param name="moveit_controller_manager" value="$(arg moveit_controller_manager)"/>

  <!--load controller_list-->
  <rosparam file="$(find ROBOT_movei_config)/config/controllers.yaml"/>

</launch>
修改ROBOT_moveit_config 功能包为你的机器人的配置功能包。
文件内容很简单,首先加载 moveit_controller_manager ,这是已经配置到的;再加载刚才创建的 controllers.yaml 文件到参数服务器。
创建新的启动文件 moveit_planning_execution.launch
创建一个新的启动文件moveit_planning_execution.launch用以加载Moveit和rviz:
<launch>

  <!--The planning and execution components of MoveIt! configured to
      publish the current configuration of the robot (simulated or real)
      and the current state of the world as seen by the planner-->
  <include file="$(find ROBOT_moveit_config)/launch/move_group.launch">
    <arg name="publish_monitored_planning_scene" value="true" />
  </include>

  <!--The visualization component of MoveIt!-->
  <include file="$(find ROBOT_moveit_config)/launch/moveit_rviz.launch"/>
    <arg name="config" value="true"/>
    <arg name="debug" value="false"/>

    <!-- We do not have a robot connected, so publish fake joint states -->
  <node name="joint_state_publisher" pkg="joint_state_publisher" type="joint_state_publisher">
    <param name="/use_gui" value="false"/>
    <rosparam param="/source_list">[/ROBOT/joint_states]</rosparam>
  </node>

</launch>
首先加载机器人的配置文件;然后其的rviz;最后运行关节状态发布器,用以向Gazebo中发布指令。
机器人端的配置
ROBOT_control 的配置
一般来说,只要使用 ros_control 插件,就会在类似于 ROBOT_control 的功能包中添加一个yaml文件,其中定义了控制器的相关参数。这里,由于我们要联合moveit!进行控制,因此在同样的目录下新建一个ROBOT_control_moveit.yaml文件:
ROBOT:
  joint_state_controller:
    type: joint_state_controller/JointStateController
    publish_rate: 50
  group1_controller:
    type: position_controllers/JointTrajectoryController
    joints:
      - joint_1
      - joint_2
      - joint_3
      - joint_4
      - joint_5
      ...
  group2_controller:
    type: position_controllers/JointTrajectoryController
    joints:
      - joint_6
      - joint_7
      - joint_8
      ...
ROBOT/gazebo_ros_control/pid_gains:
      joint_1:   {p: 100, i: 0.01, d: 10.0}
      joint_2:   {p: 100, i: 0.01, d: 10.0}
      joint_3:   {p: 100, i: 0.01, d: 10.0}
      joint_4:   {p: 100, i: 0.01, d: 10.0}
      joint_5:   {p: 100, i: 0.01, d: 10.0}
      joint_6:   {p: 100, i: 0.01, d: 10.0}
      joint_7:  {p: 100, i: 0.01, d: 10.0}
      joint_8:  {p: 100, i: 0.01, d: 10.0}
      ...
替换机器人名称ROBOT、规划组和关节名称joint_*。尤其要注意的是,其中的规划组名称一定要和之前的 controllers.yaml 一致,这样才能保证建立gazebo和moveit!的通信。
建立Gazebo启动文件 ROBOT_world_moveit.launch :
在 ROBOT_gazebo/launch/ 目录下新建拉launch文件:
<launch>

  <!-- these are the arguments you can pass this launch file, for example paused:=true -->
  <arg name="world_name" value="$(find pigot_gazebo)/worlds/ROBOT.world"/>
  <arg name="paused" default="false"/>
  <arg name="use_sim_time" default="true"/>
  <arg name="gui" default="true"/>
  <arg name="headless" default="false"/>
  <arg name="debug" default="false"/>

  <!-- We resume the logic in empty_world.launch, changing only the name of the world to be launched -->
  <include file="$(find gazebo_ros)/launch/empty_world.launch">
    <arg name="world_name" value="$(arg world_name)"/>
    <arg name="debug" value="$(arg debug)" />
    <arg name="gui" value="$(arg gui)" />
    <arg name="paused" value="$(arg paused)"/>
    <arg name="use_sim_time" value="$(arg use_sim_time)"/>
    <arg name="headless" value="$(arg headless)"/>
  </include>

    <param name="robot_description" command="$(find xacro)/xacro --inorder $(find ROBOT_description)/urdf/ROBOT.xacro"/>

    <node name="urdf_spawner" pkg="gazebo_ros" type="spawn_model" respawn="false" output="screen" args="-urdf -model pigot -param robot_description"/>

    <!-- Load joint controller configurations from YAML file to parameter server -->
    <rosparam file="$(find pigot_control)/config/ROBOT_control_moveit.yaml" command="load"/>

    <!-- load the controllers -->
    <node name="controller_spawner" pkg="controller_manager" type="spawner" respawn="false" ns="/ROBOT"
    output="screen" args="group1_controller
                          group2_controller"/>

    <!-- convert joint states to TF transforms for rviz, etc -->
    <node name="robot_state_publisher" pkg="robot_state_publisher" type="robot_state_publisher" respawn="false" output="screen">
      <remap from="/joint_states" to="/ROBOT/joint_states" />
    </node>

</launch>
这是一个最通用的Gazebo模型加载launch文件,首先加载了Gazebo世界的启动参数,然后载入了机器人模型;最后加载了控制参数和参数控制器。
只需要其中的ROBOT名称的内容替换为自己的机器人对应的内容,将controller_spawner节点的规划组参数替换为自己的规划组即可。
进行测试
分别启动 ROBOT_world_moveit.launch 和 moveit_planning_execution.launch 即可开启联合仿真:
roslaunch ROBOT_gazebo ROBOT_world_moveit.launch
roslaunch ROBOT_moveit_config moveit_planning_execution.launch
注意:应当等第一个文件加载完成后再加载第二个。
仿真效果
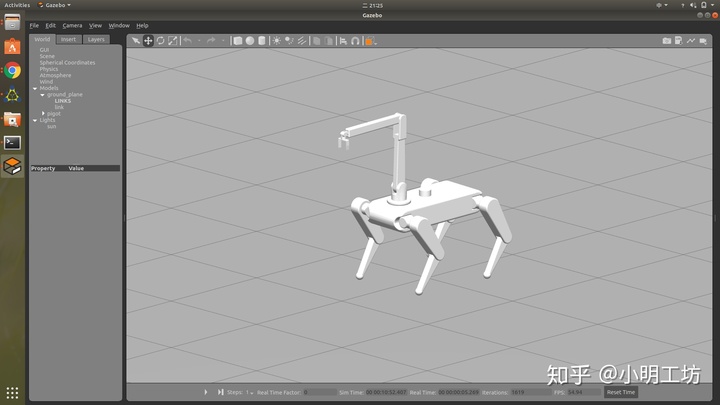
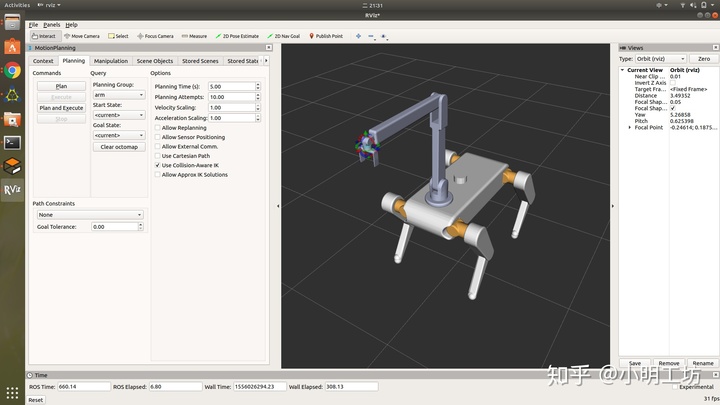
以我的四足机器人pigot为例,展示Moveit!和Gazebo联合仿真的效果。
启动Gazebo界面如图:

启动rviz界面如图

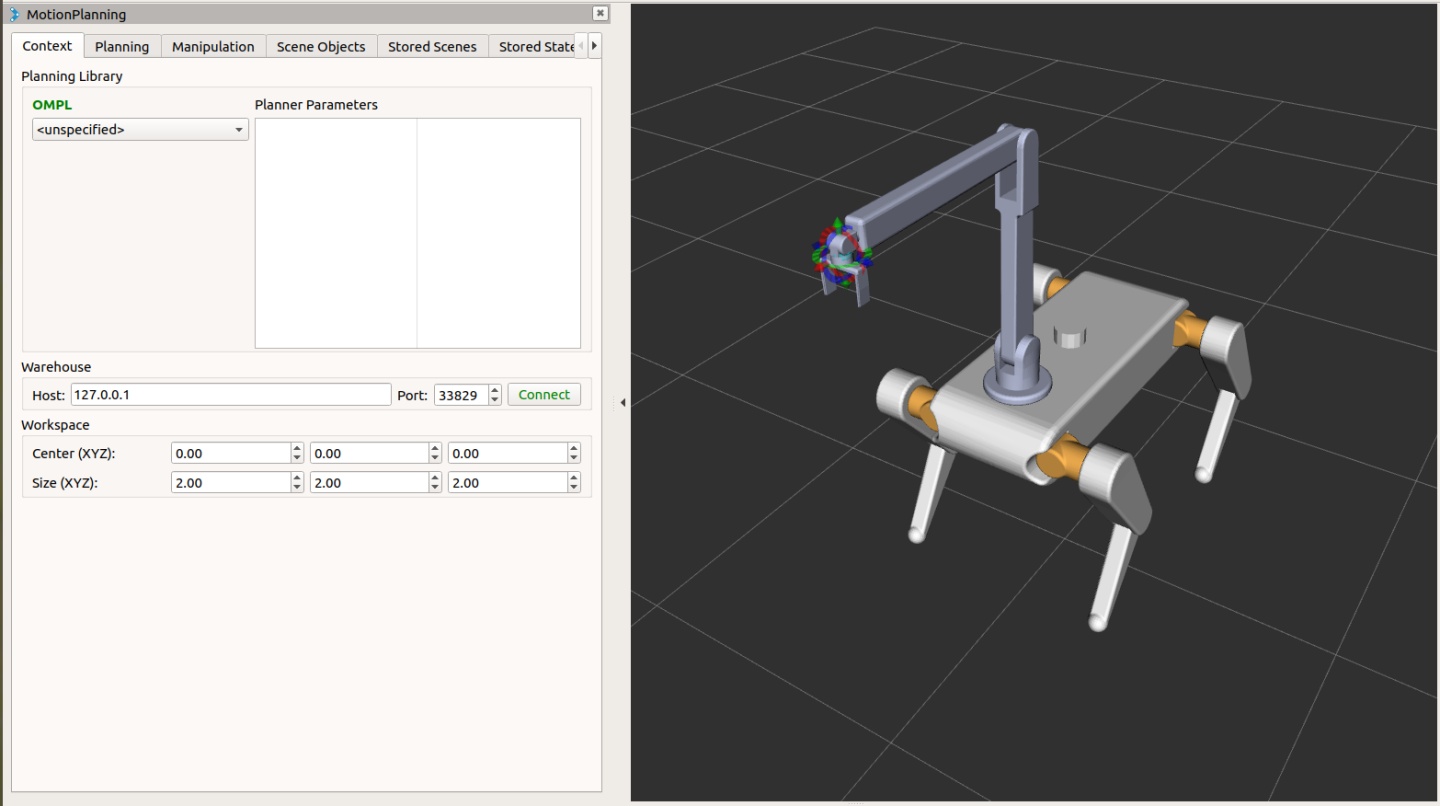
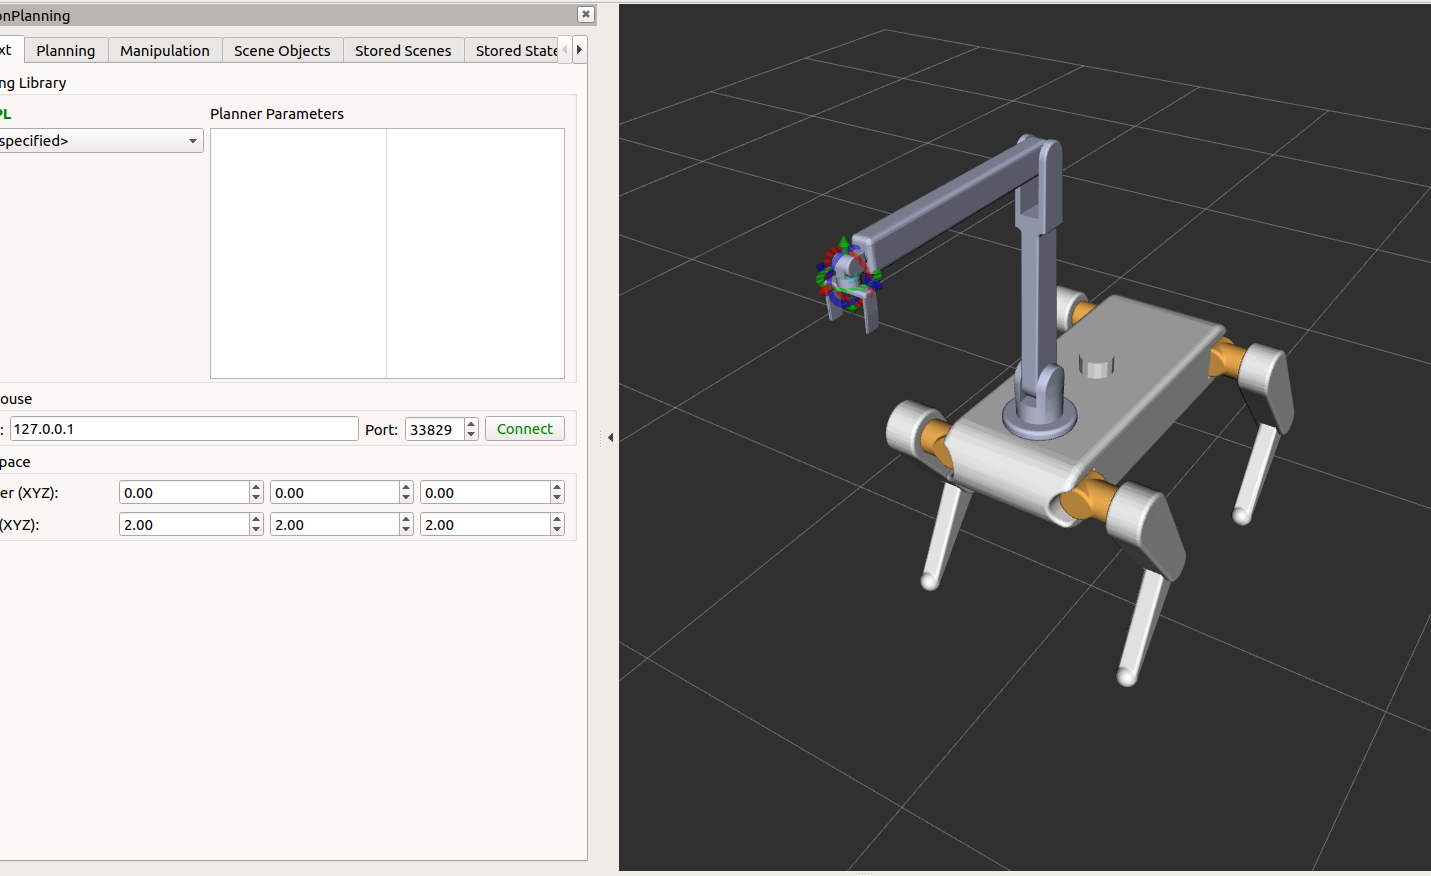
可以看到,左侧即为Moveit!的运动规划GUI,我们用它来测试联合仿真的通信是否成功建立。
选择 Planning 栏目,将 goal state 设为 random,将为机械臂设定一个新的位姿, 点击Plan and execute 即可看到规划执行效果,此时控制信号将同时输入到Gazebo中,运动同步发生,达到联合仿真的目的。

项目地址
XM522706601/pigot_projectgithub.com
注意事项
重要BUG——Gazebo7无法模拟重力
[ WARN] [1555932764.794421751, 650.789000000]: The default_robot_hw_sim plugin is using the Joint::SetPosition method without preserving the
link velocity.
[ WARN] [1555932764.794760002, 650.789000000]: As a result, gravity will not be simulated correctly for your model.
[ WARN] [1555932764.794843510, 650.789000000]: Please set gazebo_pid parameters, switch to the VelocityJointInterface or EffortJointInterface, or upgrade to Gazebo 9.
[ WARN] [1555932764.794914569, 650.789000000]: For details, see https://github.com/ros-simulation/gazebo_ros_pkgs/issues/612
这里遇到一个很头疼的问题:由于 position_controllers/JointTrajectoryController 不支持PID,因此无法设置pid参数。
当不设置PID参数时,gazebo7的bug会导致重力无法模拟,因此机器人呈现出失重以及无摩擦状态。对于移动机器人,这将导致无法行走;对于固定机械臂,将导致拿不住物体。
可以看到,报错提示中建议换用速度或力控制器,或者更新到Gazebo9
我尝试采用力控,仿真环境可以恢复正常,但是不能成功将规划参数传递到GAZEBO
Gazebo9目前似乎不能安装在Kinetic版本的ROS中,因此我更新到了Melodic版本,之后仿真结果正常。
Github中关于此问题的讨论:
https://github.com/ros-simulation/gazebo_ros_pkgs/issues/612
https://github.com/ros-simulation/gazebo_ros_pkgs/issues/479
rviz规划界面的不稳定性
rviz的规划控制界面原本是单向的,即直接将规划路径发送到rviz模型即可。
但本文采用的联合仿真是一个双向通信过程。不仅是Moveit!控制器,Gazebo模拟器的物理世界也在同时影响机器人的状态。
因此,在某些时候,执行规划动作的操作会失败。这是因为Moveit!的规划需要一定时间,而这段时间内,机器人的实际状态已经发生改变,导致初始状态不能吻合。
这一问题在下一章采用API进行编程控制时将会得到解决。
最后
以上就是谦让金鱼最近收集整理的关于ros控制arduino的方法_【ROS-Moveit!】机械臂控制探索(2)——Moveit!与Gazebo联合仿真方法...的全部内容,更多相关ros控制arduino内容请搜索靠谱客的其他文章。


发表评论 取消回复