我是靠谱客的博主 健壮康乃馨,这篇文章主要介绍Arduino UNO驱动TM1637四位时钟数码管显示时间一、TM1637简介二、引脚定义三、Arduino UNO与数码管模块接线四、测试代码五、实验结果,现在分享给大家,希望可以做个参考。
Arduino UNO驱动TM1637四位时钟数码管显示时间
- 一、TM1637简介
- 二、引脚定义
- 三、Arduino UNO与数码管模块接线
- 四、测试代码
- 五、实验结果
一、TM1637简介
TM1637 是一种带键盘扫描接口的LED(发光二极管显示器)驱动控制专用电路,内部集成有MCU 数字接口、数据锁存器、LED 高压驱动、键盘扫描等电路。
显示模式(8 段×6 位),支持共阳数码管输出
键扫描(8×2bit),增强型抗干扰按键识别电路
辉度调节电路(占空比 8 级可调)
两线串行接口(CLK,DIO)
振荡方式:内置RC 振荡(450KHz+5%)
内置上电复位电路
内置自动消隐电路
二、引脚定义
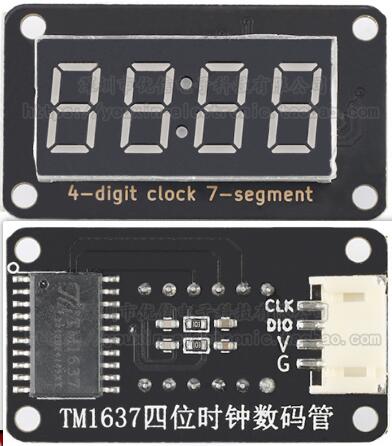
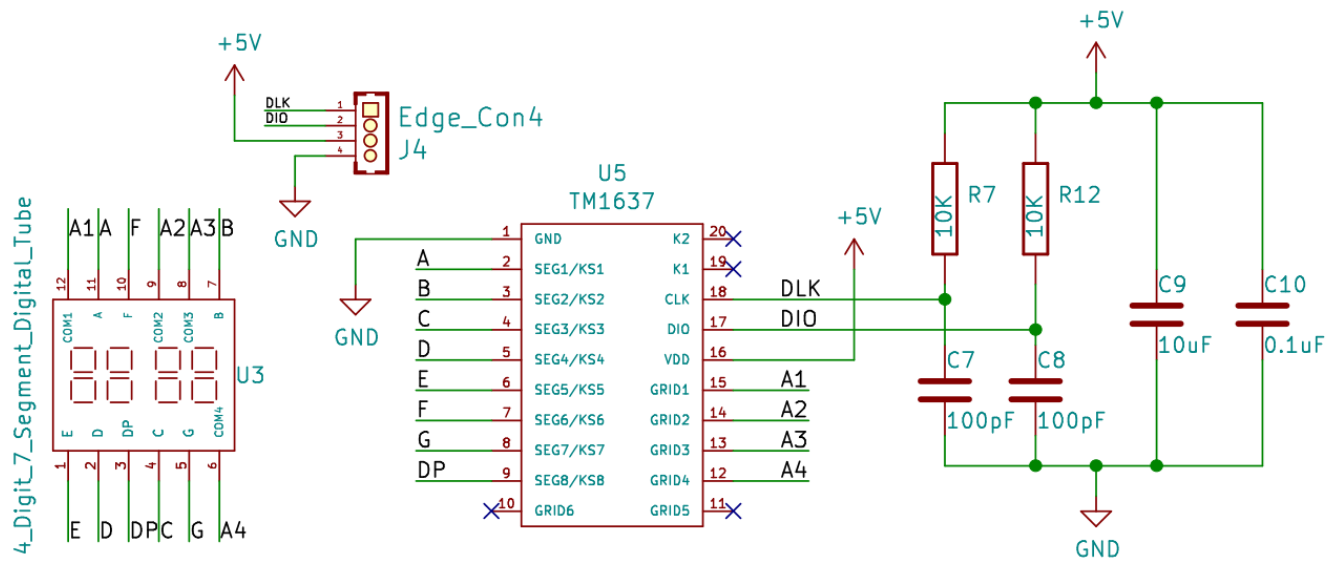
CLK时钟输入,DIO数据输入输出,V电源5V正极,G电源负极
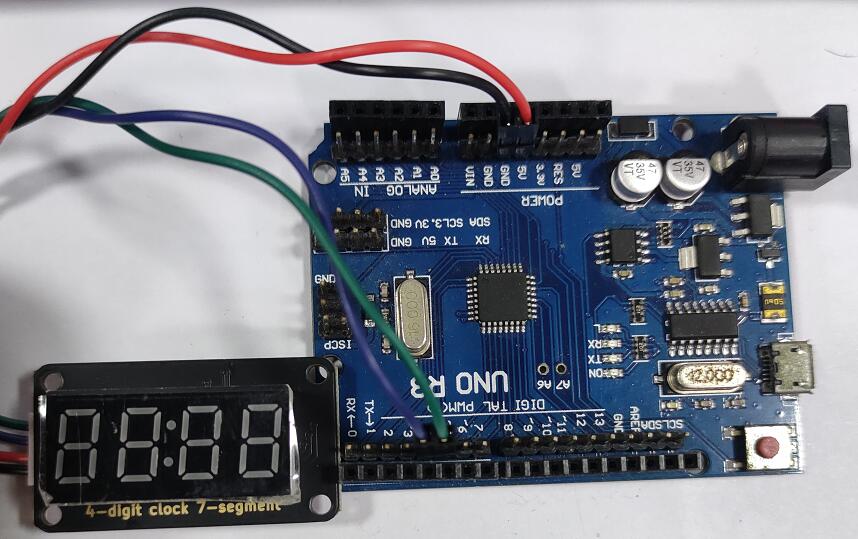
三、Arduino UNO与数码管模块接线
| Arduino UNO | TM1637 |
|---|---|
| A4 | DIO |
| A5 | CLK |
| 5V | VCC |
| GND | GND |
四、测试代码
在Arduino IDE库管理器搜索TM1637,并安装如图示所例程库
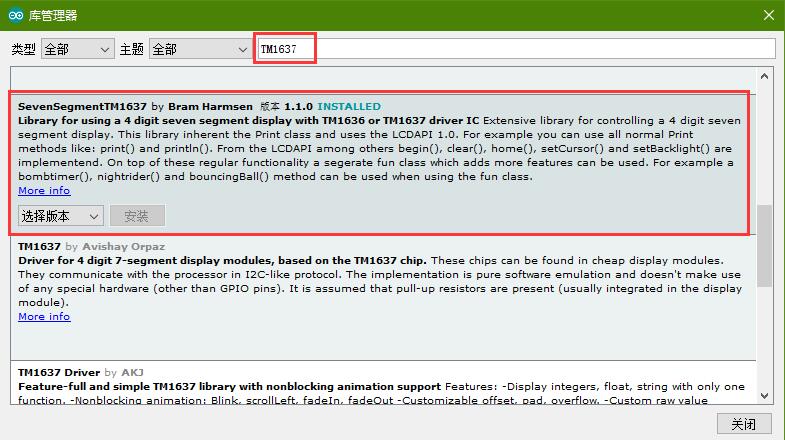
打开ExtClock.ino例程
/*
	Clock example example (Extended class example)
  Display a clock on the display. For this demo you can add a speed multiplier to make the clock run faster. For a real clock you want to use a delay of 1 min or even use a Real Time Clock module (RTC)
	The circuit:
  * connect TM1637 pin CLK to Arduino pin D4
  * connect TM1637 pin DIO to Arduino pin D5
  * connect TM1637 pin Vcc to Arduino pin 5V
  * connect TM1637 pin GND to Arduino pin GND
	Created 25 September 2015
	By Bram Harmsen
	https://github.com/bremme/arduino-tm1637
*/
// include the SevenSegmentTM1637 library
#include "SevenSegmentTM1637.h"
#include "SevenSegmentExtended.h"

/* initialize global TM1637 Display object
*  The constructor takes two arguments, the number of the clock pin and the digital output pin:
* SevenSegmentTM1637(byte pinCLK, byte pinDIO);
*/
const byte PIN_CLK = 4;   // define CLK pin (any digital pin)
const byte PIN_DIO = 5;   // define DIO pin (any digital pin)
SevenSegmentExtended      display(PIN_CLK, PIN_DIO);

const unsigned int clockSpeed = 10000;    // speed up clock for demo

// run setup code
void setup() {
  Serial.begin(9600);         // initializes the Serial connection @ 9600 baud
  display.begin();            // initializes the display
  display.setBacklight(100);  // set the brightness to 100 %
  delay(1000);                // wait 1000 ms
};

// run loop (forever)
void loop() {

  byte hours    = 14;                           // initialize hours
  byte minutes  = 39;                           // initialize minutes

  for ( ; hours < 24; hours++) {                // count hours   up to 24
    for ( ; minutes < 60; minutes++) {          // count minutes up to 59
      display.printTime(hours, minutes, true);  // display time
      delay(60000 / clockSpeed);                // clock delay ms
    };
    minutes = 0;                                // reset minutes
  };
};
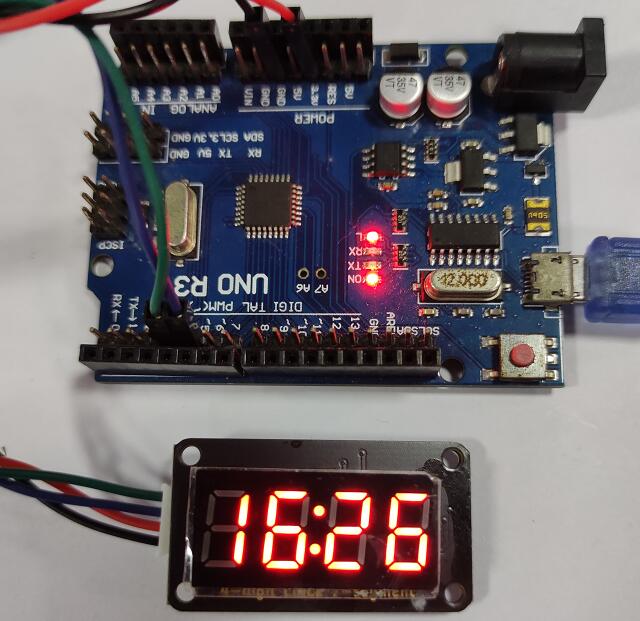
五、实验结果
编译上传代码到Arduino UNO后数码管显示出时钟走时
最后
以上就是健壮康乃馨最近收集整理的关于Arduino UNO驱动TM1637四位时钟数码管显示时间一、TM1637简介二、引脚定义三、Arduino UNO与数码管模块接线四、测试代码五、实验结果的全部内容,更多相关Arduino内容请搜索靠谱客的其他文章。
本图文内容来源于网友提供,作为学习参考使用,或来自网络收集整理,版权属于原作者所有。


发表评论 取消回复