前言: 本栏目除特别说明以外,均采用的黑金AX7103开发板,该开发板时钟频率为200M,并且是双端时钟,因此在每个项目中都有一段原语将双端时钟变成200MHz的单端时钟。文章仅作为学习记录,如有不足请在评论区指出,博主不会对各位的问题作出解答,请谅解。博主深知网络上关于HDL Coder的资料十分稀少,特别是中文资料几乎没有,并且官方给出的例子大多挺难不适合入门,因此将自己摸索的过程记录下来,希望给后人一些启发。
文章目录
- 1. Simulink 模型
- 2. 生成HDL代码
- 3. 完整代码
- 4. 完整使用流程
1. Simulink 模型
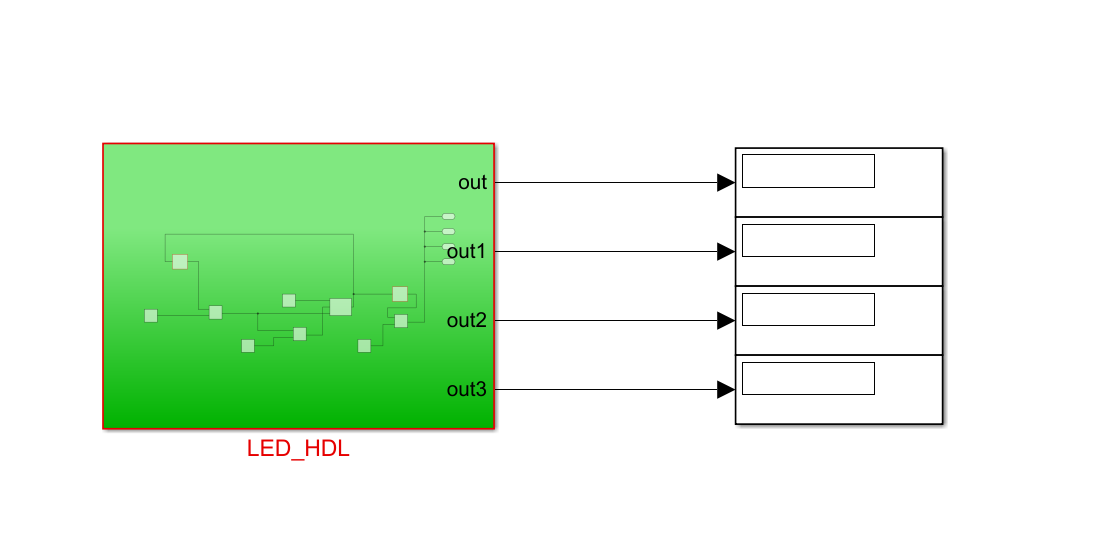
LED_HDL模块内部结构
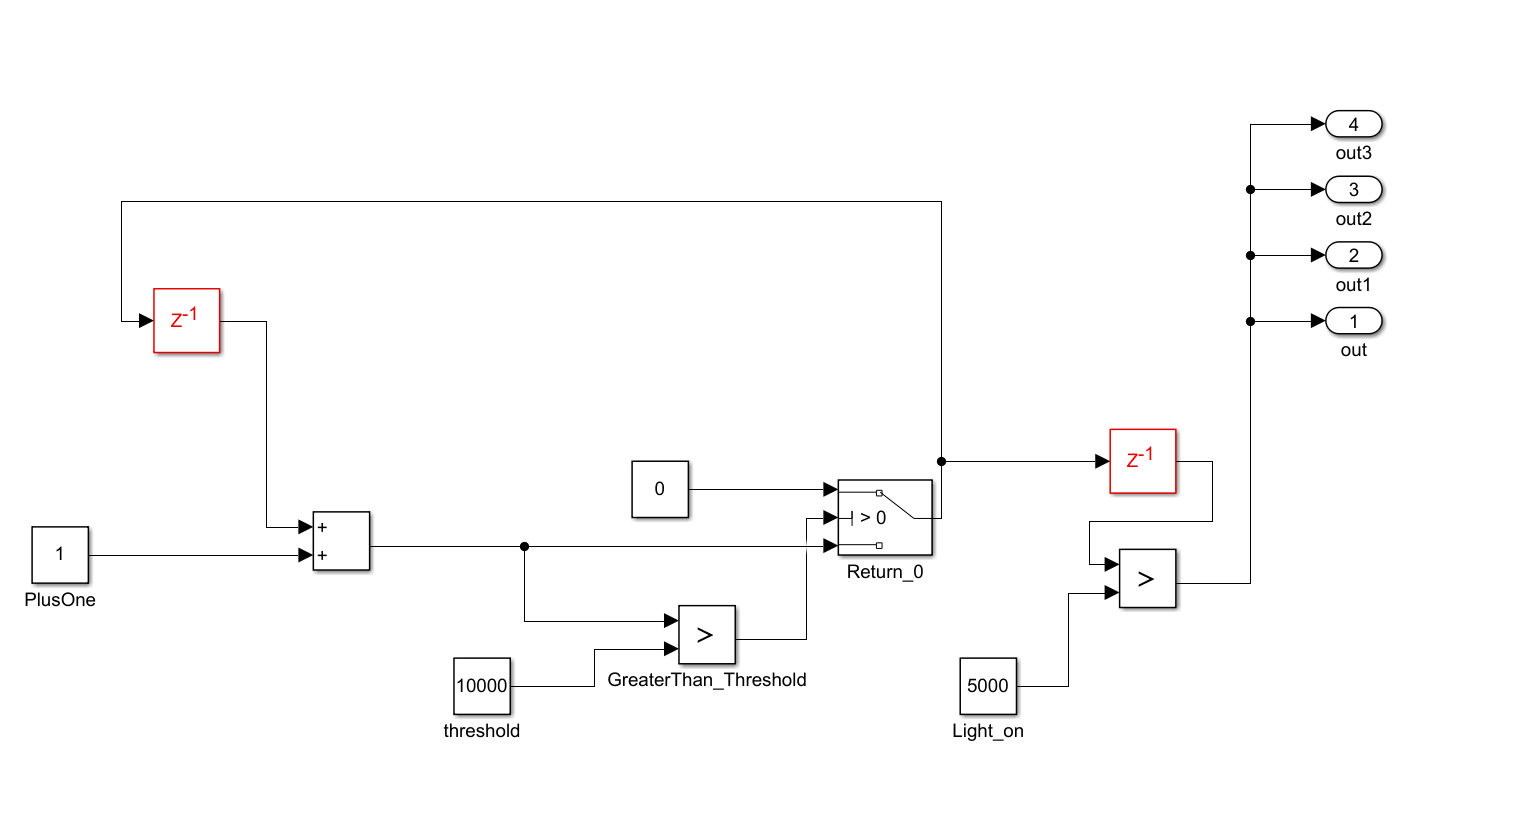
首先计算1s所需要多少个时钟周期,然后当计数器大于一半的时候亮,小于一半的时候灭,就可以达到呼吸灯的效果了。
2. 生成HDL代码
// -------------------------------------------------------------
//
// File Name: hdlsrcled_mbdLED_HDL.v
// Created: 2022-03-09 17:06:11
//
// Generated by MATLAB 9.10 and HDL Coder 3.18
//
//
// -- -------------------------------------------------------------
// -- Rate and Clocking Details
// -- -------------------------------------------------------------
// Model base rate: 0.2
// Target subsystem base rate: 0.2
//
//
// Clock Enable  Sample Time
// -- -------------------------------------------------------------
// ce_out        0.2
// -- -------------------------------------------------------------
//
//
// Output Signal                 Clock Enable  Sample Time
// -- -------------------------------------------------------------
// out                           ce_out        0.2
// out1                          ce_out        0.2
// out2                          ce_out        0.2
// out3                          ce_out        0.2
// -- -------------------------------------------------------------
//
// -------------------------------------------------------------


// -------------------------------------------------------------
//
// Module: LED_HDL
// Source Path: led_mbd/LED_HDL
// Hierarchy Level: 0
//
// -------------------------------------------------------------

`timescale 1 ns / 1 ns

module LED_HDL  // 由于使用的开发板是双端时钟,这里需要将默认生成的时钟稍微修改一下
          (clk_p,
          clk_n,
           reset,

           out,
           out1,
           out2,
           out3);


  input   clk_n;
  input  clk_p;
  input   reset;

  output  out;
  output  out1;
  output  out2;
  output  out3;


  wire enb;
  wire [31:0] PlusOne_out1;  // uint32
  wire [31:0] threshold_out1;  // uint32
  wire [31:0] Constant5_out1;  // uint32
  wire [31:0] Return_0_out1;  // uint32
  reg [31:0] Delay_out1;  // uint32
  wire [31:0] Add_out1;  // uint32
  wire GreaterThan_Threshold_relop1;
  wire switch_compare_1;
  reg [31:0] Delay1_out1;  // uint32
  wire [31:0] Light_on_out1;  // uint32
  wire GreaterThan2_relop1;


IBUFDS sys_clk_ibufgds  // 这部分需要自行添加,用于生成单端时钟
       (
         .O              (clk                  ),
         .I              (clk_p                ),
         .IB             (clk_n                )
       );

  assign enb = 1;

  assign PlusOne_out1 = 32'b00000000000000000000000000000001;  // 加1


  assign threshold_out1 = 32'd200_000_000;  // 计数到1s


  assign Constant5_out1 = 32'b00000000000000000000000000000000;  //归零


  always @(posedge clk or posedge reset)
    begin : Delay_process
      if (reset == 1'b0) begin
        Delay_out1 <= 32'b00000000000000000000000000000000;
      end
      else begin
        if (enb) begin
          Delay_out1 <= Return_0_out1;
        end
      end
    end


  assign Add_out1 = Delay_out1 + PlusOne_out1;


  assign GreaterThan_Threshold_relop1 = Add_out1 > threshold_out1;


  assign switch_compare_1 = GreaterThan_Threshold_relop1 > 1'b0;


  assign Return_0_out1 = (switch_compare_1 == 1'b0 ? Add_out1 :
              Constant5_out1);


  always @(posedge clk or posedge reset)
    begin : Delay1_process
      if (reset == 1'b0) begin
        Delay1_out1 <= 32'b00000000000000000000000000000000;
      end
      else begin
        if (enb) begin
          Delay1_out1 <= Return_0_out1;
        end
      end
    end


  assign Light_on_out1 = 32'd100_000_000;


  assign GreaterThan2_relop1 = Delay1_out1 > Light_on_out1;


  assign out = GreaterThan2_relop1;

  assign out1 = GreaterThan2_relop1;

  assign out2 = GreaterThan2_relop1;

  assign out3 = GreaterThan2_relop1;


endmodule  // LED_HDL
3. 完整代码
链接:https://pan.baidu.com/s/10W2LXTxMCCltrfUWeCo_lQ?pwd=1111
提取码:1111
–来自百度网盘超级会员V6的分享
4. 完整使用流程
如果对HDL Coder的使用流程不熟悉,请根据另一篇文章从头练习一边,见Simulink HDL Coder FPGA开发实践之 基本使用流程介绍。
最后
以上就是复杂摩托最近收集整理的关于Simulink HDL Coder FPGA初级开发实践(二) LED流水灯的全部内容,更多相关Simulink内容请搜索靠谱客的其他文章。
本图文内容来源于网友提供,作为学习参考使用,或来自网络收集整理,版权属于原作者所有。


发表评论 取消回复