欢迎来到 Carla 自动驾驶汽车教程系列的第 2 部分。在本教程中,我们将向您介绍 Carla 的 Python API 方面。
首先,Carla 中有几种类型的对象:
- world:这是你的环境;
- actors:actors是您的汽车、汽车上的传感器、行人等;
- blueprint:blueprint是我们actor的属性。
有了这些信息,让我们开始编写一些实际的代码。首先,让我们制作一辆生成并简单地向前行驶的汽车,然后我们希望看到来自我们将放置在汽车引擎盖上的常规 RGB 相机的信息。
前几行代码,我只是从示例目录中的其他脚本之一复制和粘贴,我也将在示例目录中编写此代码。
import glob
import os
import sys
try:
sys.path.append(glob.glob('../carla/dist/carla-*%d.%d-%s.egg' % (
sys.version_info.major,
sys.version_info.minor,
'win-amd64' if os.name == 'nt' else 'linux-x86_64'))[0])
except IndexError:
pass
import carla
上面的代码非常简单,除了 try/except 之外。这里所做的就是找到 carla egg 文件,这是我们用于 Carla 包本身的文件。为了真正导入 carla,我们需要找到它,这也是我们现在只是将文件扔到示例目录中的原因。您也可以将所需的 Carla 文件移动到您的 Python site-packages中,并以这种方式导入。
接下来,我们将做更多的导入:
import random
import time
import numpy as np
import cv2
如果需要,可以安装 numpy 和 cv2:
pip install numpy
pip install opencv-python
我们将立即处理的第一件事是演员列表,并在我们完成后清理它们。回想一下,我们既有客户端也有服务器。当我们开始在服务器上运行客户端时,我们会在服务器上创建参与者。如果我们直接退出而不进行清理,我们的演员仍将在服务器上。
actor_list = []
try:
finally:
print('destroying actors')
for actor in actor_list:
actor.destroy()
print('done.')
在这里,我们将在 try/finally 中封装主要的大部分代码。我们将把所有的逻辑和actor创建放在try中,然后finally位会为我们清理它。
接下来,回想一下我们在 Carla 中有 3 个主要“事物”:世界、蓝图和演员。首先,我们将连接到我们的服务器,获取世界,然后访问蓝图。
actor_list = []
try:
client = carla.Client('localhost', 2000)
client.set_timeout(2.0)
world = client.get_world()
blueprint_library = world.get_blueprint_library()
请注意,您需要运行 carla(shell 或 .exe)才能连接。
现在我们有了蓝图,我们可以过滤一些东西。例如:
bp = blueprint_library.filter('model3')[0]
这将为我们提供特斯拉model 3的默认蓝图。现在我们有了蓝图,我们可以生成这辆车,但是在哪里呢? Carla 有 200 个出生点,所以我们可以随机选择其中一个:
spawn_point = random.choice(world.get_map().get_spawn_points())
现在我们可以生成那辆车:
vehicle = world.spawn_actor(bp, spawn_point)
我们还可以通过以下方式控制汽车:
vehicle.apply_control(carla.VehicleControl(throttle=1.0, steer=0.0))
最后,我们不要忘记将这辆车添加到我们需要跟踪和清理的演员列表中:
actor_list.append(vehicle)
太好了,我们有一辆汽车,我们实际上可以用它来运行。让我们运行 5 秒钟然后清理:
time.sleep(5)
现在,您可能很难在 5 秒内找到您的汽车,但您可以转到可视化 carla 环境的服务器位,使用鼠标向下看,然后 s 开始放大。您应该对环境有一个俯视图,例如:
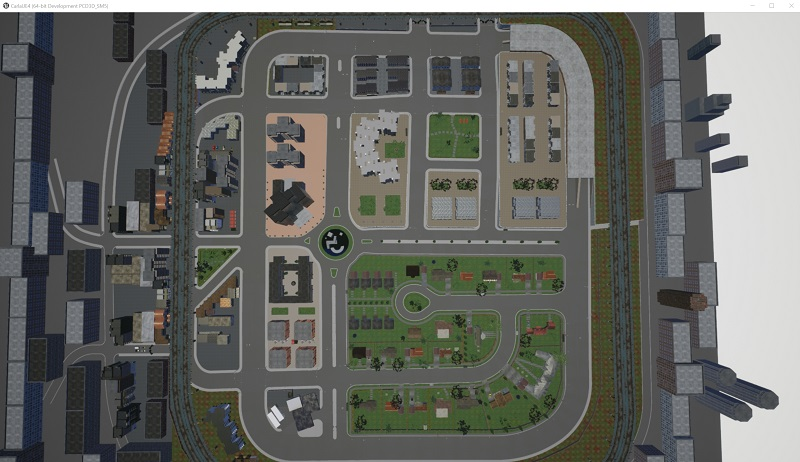
到目前为止,我们可以运行我们的脚本,从上面看,我们可能会发现它是直行的:
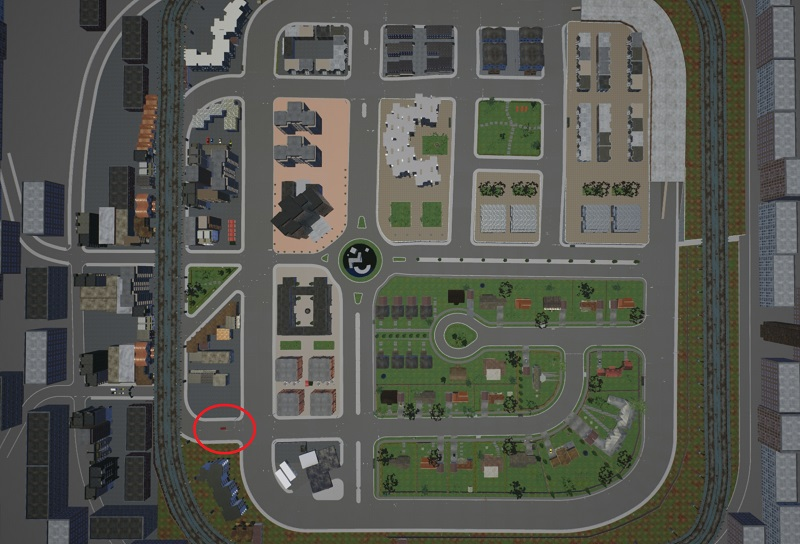
很难看到,但是,当它移动时,很容易发现。请注意,汽车可能在隧道中生成。如果您没有碰巧看到您的车辆,只需再次运行该脚本。
好的,很好,到目前为止一切正常。我们接下来想要的是在我们的汽车上安装一个摄像头,并弄清楚如何访问这些数据。理想情况下,这款引擎盖相机将是我们的主要传感器。我们以后也可以合并其他传感器,但引擎盖摄像头似乎是一个好的开始。
您可以在此处了解有关各种可用传感器以及如何使用它们的更多信息:Carla Sensors。现在,我将只展示如何使用 RGB 相机:
在我们脚本的顶部,让我们设置几个常量:
IM_WIDTH = 640
IM_HEIGHT = 480
现在,我们加载传感器的蓝图并设置一些属性:
# https://carla.readthedocs.io/en/latest/cameras_and_sensors
# get the blueprint for this sensor
blueprint = blueprint_library.find('sensor.camera.rgb')
# change the dimensions of the image
blueprint.set_attribute('image_size_x', f'{IM_WIDTH}')
blueprint.set_attribute('image_size_y', f'{IM_HEIGHT}')
blueprint.set_attribute('fov', '110')
接下来,我们需要将它添加到我们的汽车中。首先,我们将从相对位置调整传感器,然后将其连接到我们的汽车上。所以我们会说这个传感器,从它的相对位置(汽车),我们想要向前移动 2.5 和向上 0.7。我不知道这是以米为单位还是什么。随意根据您选择的车辆调整这些值,或者只使用我的。
# Adjust sensor relative to vehicle
spawn_point = carla.Transform(carla.Location(x=2.5, z=0.7))
# spawn the sensor and attach to vehicle.
sensor = world.spawn_actor(blueprint, spawn_point, attach_to=vehicle)
现在我们想将此传感器添加到我们的演员列表中:
# add sensor to list of actors
actor_list.append(sensor)
最后,我们想用这个传感器做点什么。我们想从中获得图像,所以我们想听。
要对我们从传感器获得的数据做一些事情,我们可以使用 lambda 函数:
sensor.listen(lambda data: process_img(data))
在这种情况下,我们将从传感器获取数据,并将其传递给一个名为 process_img 的函数。这还不存在,所以让我们让它:
def process_img(image):
i = np.array(image.raw_data)
# convert to an array
i2 = i.reshape((IM_HEIGHT, IM_WIDTH, 4))
# was flattened, so we're going to shape it.
i3 = i2[:, :, :3]
# remove the alpha (basically, remove the 4th index
of every pixel. Converting RGBA to RGB)
cv2.imshow("", i3)
# show it.
cv2.waitKey(1)
return i3/255.0
# normalize
完整的代码是:
import argparse
import glob
import os
import sys
try:
sys.path.append(glob.glob('./carla/dist/carla-*%d.%d-%s.egg' % (
sys.version_info.major,
sys.version_info.minor,
'win-amd64' if os.name == 'nt' else 'linux-x86_64'))[0])
except IndexError:
pass
import carla
import random
import time
import numpy as np
import cv2
IM_WIDTH = 640
IM_HEIGHT = 480
def process_img(image):
i = np.array(image.raw_data)
i2 = i.reshape((IM_HEIGHT, IM_WIDTH, 4))
i3 = i2[:, :, :3]
cv2.imshow("", i3)
cv2.waitKey(1)
return i3 / 255.0
actor_list = []
try:
argparser = argparse.ArgumentParser(
description=__doc__)
argparser.add_argument(
'--host',
metavar='H',
default='127.0.0.1',
help='IP of the host server (default: 127.0.0.1)')
argparser.add_argument(
'-p', '--port',
metavar='P',
default=2000,
type=int,
help='TCP port to listen to (default: 2000)')
args = argparser.parse_args()
actor_list = []
client = carla.Client(args.host, args.port)
client.set_timeout(2.0)
world = client.get_world()
blueprint_library = world.get_blueprint_library()
bp = blueprint_library.filter('model3')[0]
print(bp)
spawn_point = random.choice(world.get_map().get_spawn_points())
vehicle = world.spawn_actor(bp, spawn_point)
vehicle.apply_control(carla.VehicleControl(throttle=1.0, steer=0.0))
# vehicle.set_autopilot(True)
# if you just wanted some NPCs to drive.
actor_list.append(vehicle)
# https://carla.readthedocs.io/en/latest/cameras_and_sensors
# get the blueprint for this sensor
blueprint = blueprint_library.find('sensor.camera.rgb')
# change the dimensions of the image
blueprint.set_attribute('image_size_x', f'{IM_WIDTH}')
blueprint.set_attribute('image_size_y', f'{IM_HEIGHT}')
blueprint.set_attribute('fov', '110')
# Adjust sensor relative to vehicle
spawn_point = carla.Transform(carla.Location(x=2.5, z=0.7))
# spawn the sensor and attach to vehicle.
sensor = world.spawn_actor(blueprint, spawn_point, attach_to=vehicle)
# add sensor to list of actors
actor_list.append(sensor)
# do something with this sensor
sensor.listen(lambda data: process_img(data))
time.sleep(20)
finally:
print('destroying actors')
for actor in actor_list:
actor.destroy()
print('done.')
这应该会弹出一个新窗口来显示相机传感器:
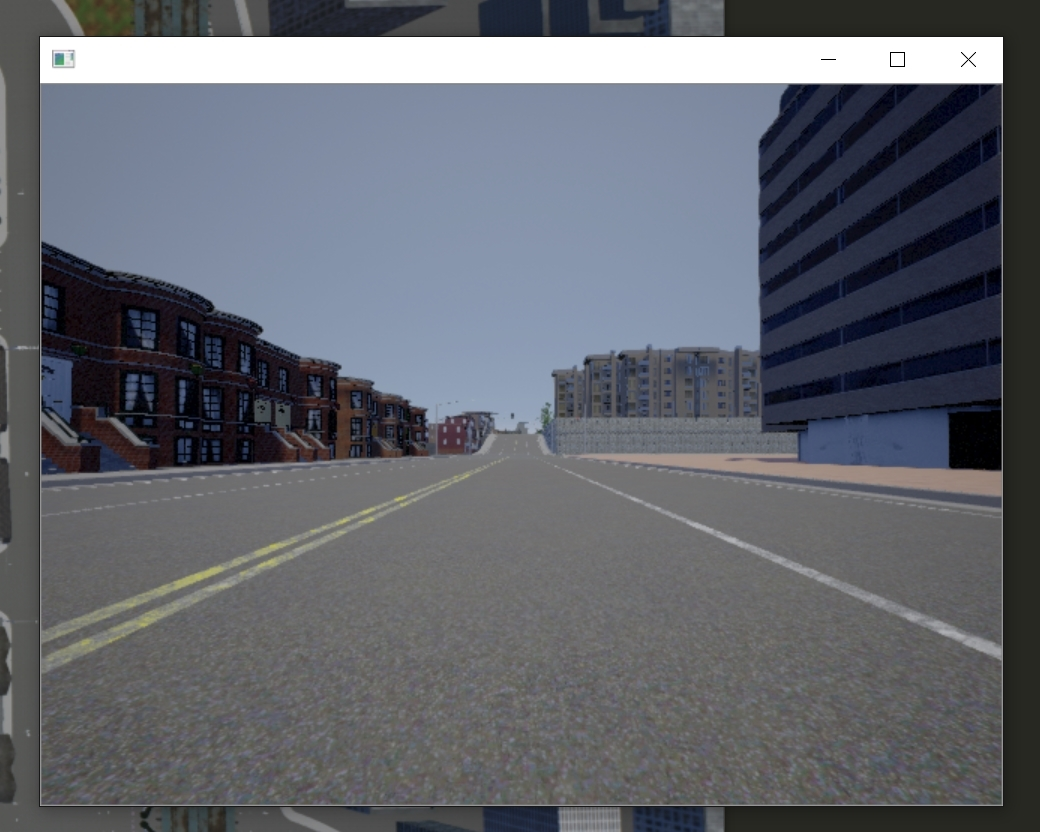
伟大的!现在,让我们在这里进行一些强化学习!应该很容易…对吧?
最后
以上就是酷酷仙人掌最近收集整理的关于使用 Carla 和 Python 的自动驾驶汽车第 2 部分 —— 控制汽车并获取传感器数据的全部内容,更多相关使用内容请搜索靠谱客的其他文章。


发表评论 取消回复