我是
靠谱客的博主
时尚小懒猪,这篇文章主要介绍
Photoshop手绘制青翠欲滴的绿色植物,现在分享给大家,希望可以做个参考。

1.先从背景开始,一般我们认为这是绝对没有必要的,因为我们绘画时只注意到画法与细节。但是背景色可以让我们更好的感受到整幅画的色调。我们先给背景铺上一层柔和的色彩。

2.新建一层,快速勾出叶子的轮廓。

3.勾完轮廓后我们通过调色板选取绿色给植物上色,考虑到受光面与背光面。

4.多选取几种绿色,这样会使叶子的颜色过度更加自然。

5.用橡皮擦除植物周围不平滑的部分,使植物的曲线更加自然。

6.把画笔的不透明度调整为30%,勾出叶脉。

7.把画笔的不透明度调回100%来刻画颜色较深的区域,就是说用画笔与橡皮工具从叶底向叶尖画起。

用减淡工具(高光75%)处理叶子受光面,使叶脉看起来更加清晰。

9.然后使用加深工具(中间调50%)处理叶子的阴影部分,这样叶子看起来更加的立体与真实。

10.用画笔工具,橡皮工具与加深工具来刻画植物的根茎。

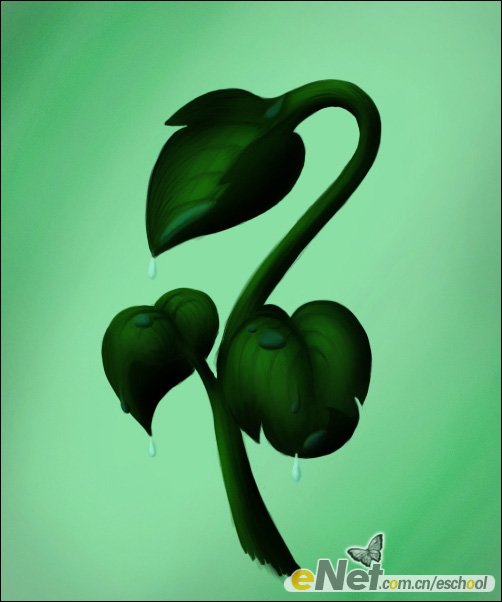
11.植物基本上完成了。现在我们开始画露珠。还是先用简单的画笔工具勾出露珠的轮廓。

12.用吸管工具提取露珠下面叶子的颜色,明度稍为调亮,画出露珠,然后删除轮廓层。

13.接下来画出露珠的阴影部分。

14.选择画笔工具,模式为“颜色”,不透明度为30%。正确地填充露珠,不要超出边界。
15.用减淡工具把露珠提亮。

16.给露珠点上高光,使其变得更加真实。

17.用橡皮工具涂抹露珠中间部分,使其变得更加透明。

18. 用减淡工具(高光100%)继续处理露珠,使其变得更加通透。

19.用加深工具(中间调30%)来绘制露珠的阴影。
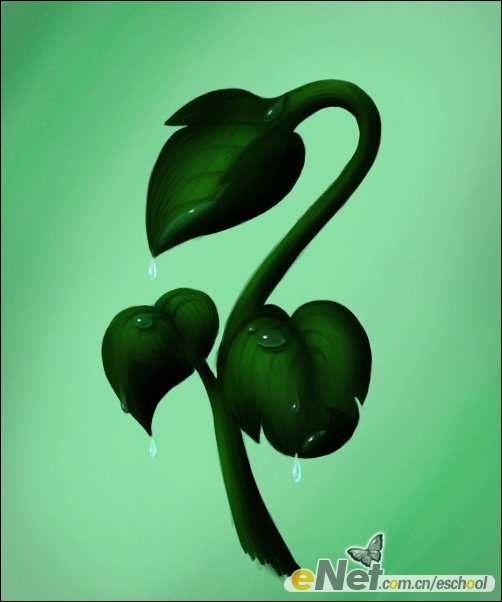
20.运用减淡工具(高光)不透明度(50%),使露珠的顶部变得更加清晰。

21.新建一层,给每个露珠上加上彩虹,使其色彩变得更加艳丽,然后用模糊工具涂抹。

22.用涂抹工具使彩虹变得透明,使其与露珠融为一体。

23.然后把彩虹层的不透明度调为30%-40%

24.用减淡工具(高光,100%)画出叶子上露珠的倒影。

25.用十字星笔刷(不透明度20%,颜色:白)画出露珠的光芒。
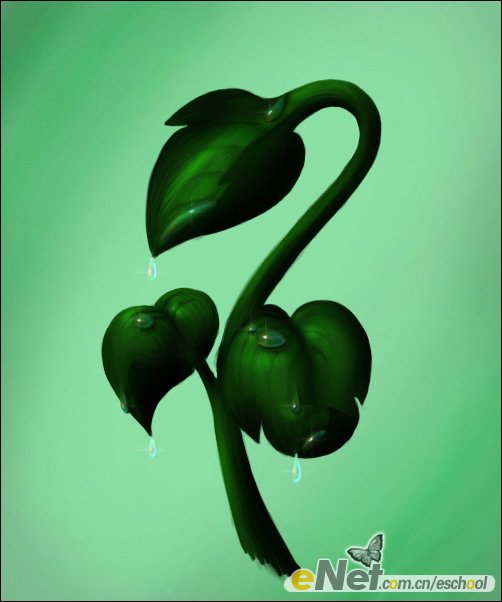
26.用减淡工具调整露珠内部。

27.最后一步,用模糊工具把叶子打磨圆滑,然后用深色画笔修正植物的轮廓。

最终效果:
最后
以上就是时尚小懒猪最近收集整理的关于Photoshop手绘制青翠欲滴的绿色植物的全部内容,更多相关Photoshop手绘制青翠欲滴内容请搜索靠谱客的其他文章。
本图文内容来源于网友提供,作为学习参考使用,或来自网络收集整理,版权属于原作者所有。


发表评论 取消回复