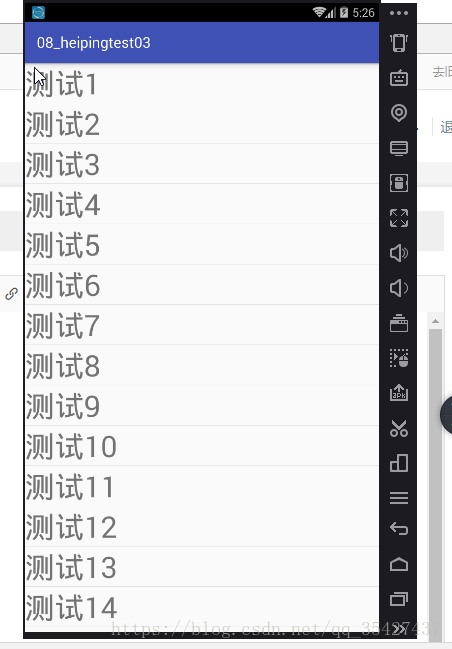
竖屏
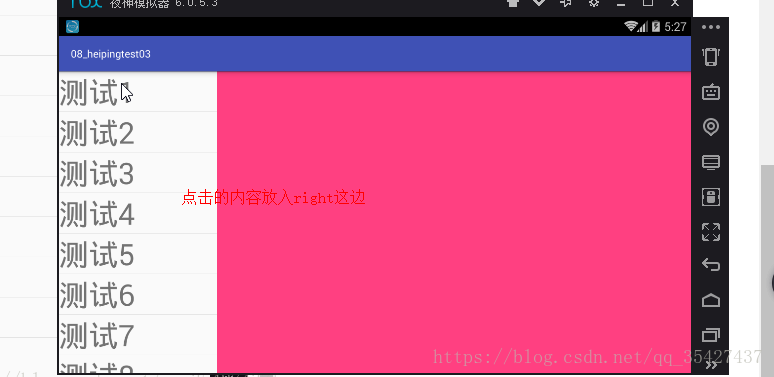
横屏
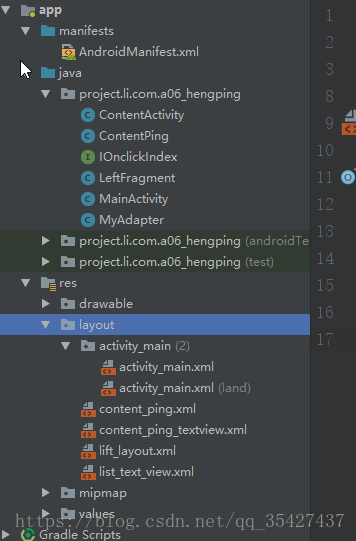
程序结构
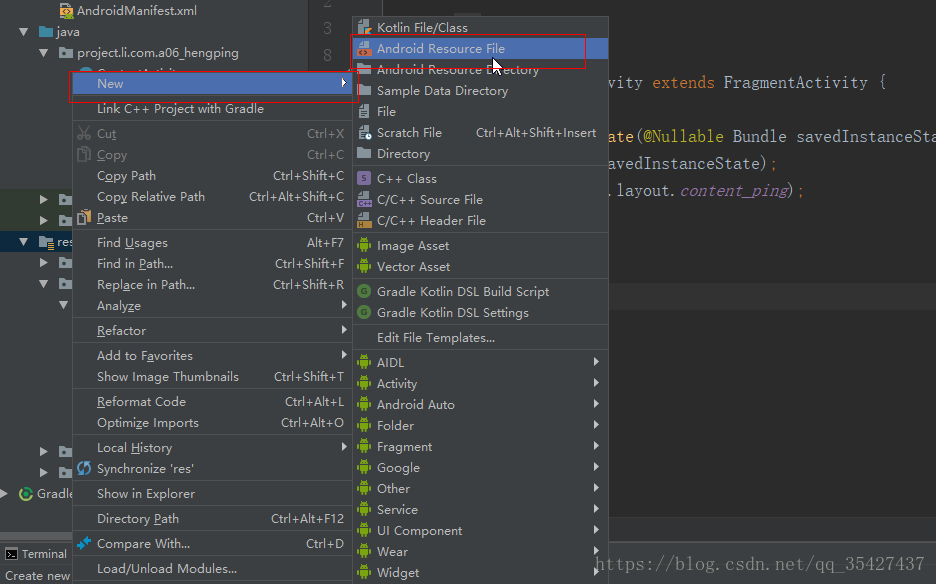
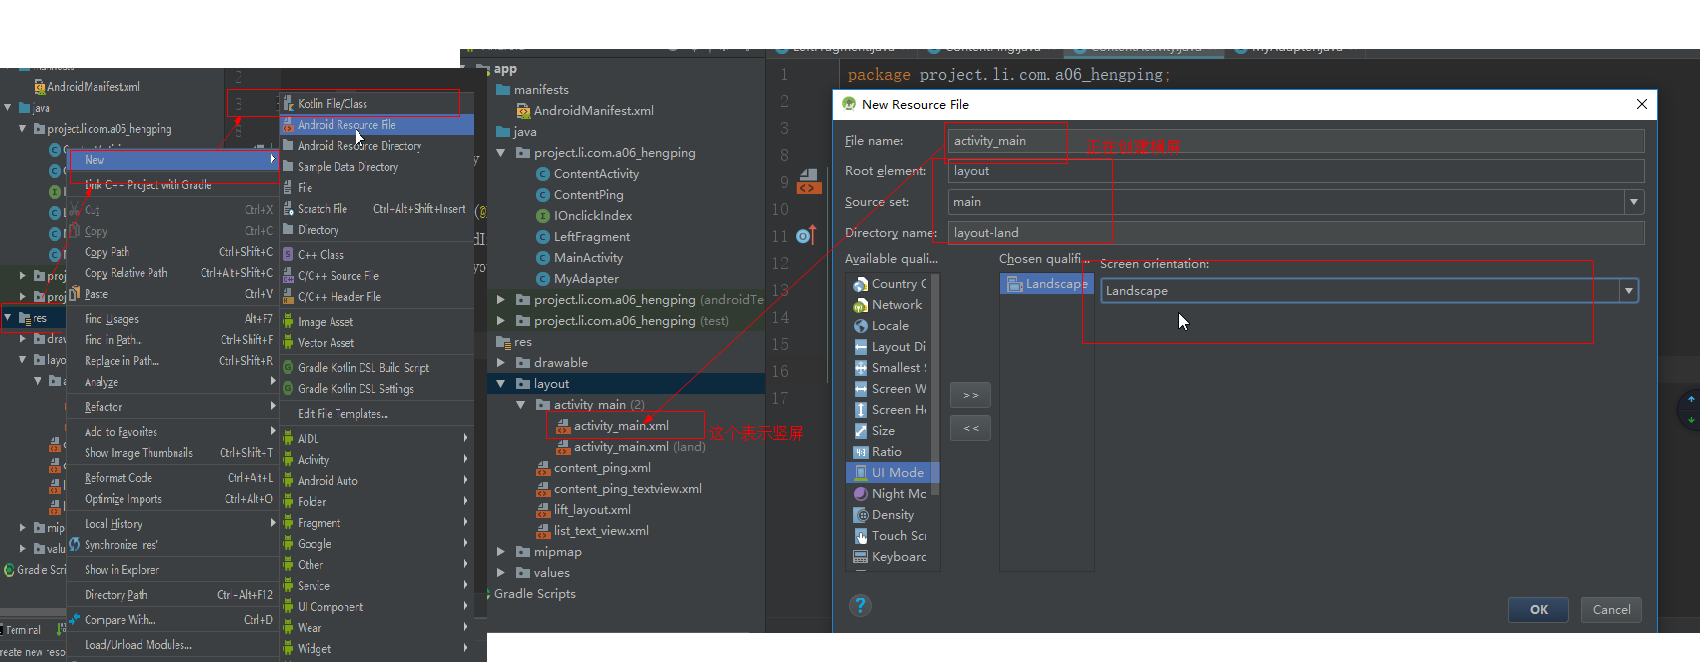
创建一个横屏LinearLayout
ContentActivity.java
public class ContentActivity extends FragmentActivity {
    @Override
    protected void onCreate(@Nullable Bundle savedInstanceState) {
        super.onCreate(savedInstanceState);
        setContentView(R.layout.content_ping);
    }

}
Cont
entPing.java
<?xml version="1.0" encoding="utf-8"?>
<LinearLayout xmlns:android="http://schemas.android.com/apk/res/android"
    android:orientation="horizontal" android:layout_width="match_parent"
    android:layout_height="match_parent"
    android:weightSum="2"
    >
    <fragment
        android:layout_width="0dp"
        android:layout_height="match_parent"
        android:layout_weight="0.5"
        android:tag="lift"
        android:name="project.li.com.a06_hengping.LeftFragment"
        ></fragment>
    <fragment
        android:layout_width="0dp"
        android:layout_height="match_parent"
        android:layout_weight="2"
        android:tag="content"
        android:name="project.li.com.a06_hengping.ContentPing"
        ></fragment>
</LinearLayout>
entPing.java
public class ContentPing extends Fragment{
    private TextView textView;
    @Nullable
    @Override
    public View onCreateView(LayoutInflater inflater, @Nullable ViewGroup container, @Nullable Bundle savedInstanceState) {
        View view=inflater.inflate(R.layout.content_ping,null);
        //textView=view.findViewById(R.id.contentPingTextView);
        return view;
    }
    public void setIndex(int index){
        Log.v("wang","index  = "+index);
        textView.setText("点击了"+index);
    }
}
IOnclickIndex.java
public interface IOnclickIndex {
    void onClick(int index);
}
LeftFragment.java
public class LeftFragment extends Fragment {
    private ArrayList<String> list;
    private ListView mListView;
    private IOnclickIndex iOnclickIndex;
    @Nullable
    @Override
    public View onCreateView(LayoutInflater inflater, @Nullable ViewGroup container, @Nullable Bundle savedInstanceState) {
        View view = inflater.inflate(R.layout.lift_layout,null);
        mListView=view.findViewById(R.id.listView);
        return view;
    }

    @Override
    public void onActivityCreated(@Nullable Bundle savedInstanceState) {
        super.onActivityCreated(savedInstanceState);
        list=new ArrayList<String>();
        initData();
        iOnclickIndex=(IOnclickIndex) getActivity();
    }

    //初始化数据
    private void initData(){
        for (int i=1;i<51;i++){
            list.add("测试"+i);
        }
        MyAdapter myAdapter = new MyAdapter(list);
        mListView.setAdapter(myAdapter);
        mListView.setOnItemClickListener(new AdapterView.OnItemClickListener() {
            @Override
            public void onItemClick(AdapterView<?> adapterView, View view, int i, long l) {
                iOnclickIndex.onClick(i);
            }
        });
    }
}
MainActivity.java
    public void onClick(int index) {
        Intent intent = new Intent(this,ContentActivity.class);
        startActivity(intent);
    }
}
MyAdapter.java
public class MyAdapter extends BaseAdapter {
    ArrayList<String> list;
    public MyAdapter(ArrayList<String> list){
        this.list=list;
    }

    @Override
    public View getView(int i, View view, ViewGroup viewGroup) {
        LayoutInflater inflter = LayoutInflater.from(viewGroup.getContext());
        View vies=inflter.inflate(R.layout.list_text_view,null);
        TextView textView=vies.findViewById(R.id.list_text_view);
        textView.setTextSize(30);
        textView.setText(""+list.get(i));
        return vies;
    }
    @Override
    public int getCount() {
        return list.size();
    }

    @Override
    public Object getItem(int i) {
        return list.get(i);
    }

    @Override
    public long getItemId(int i) {
        return i;
    }


}
activity_main.xml
<?xml version="1.0" encoding="utf-8"?>
<LinearLayout xmlns:android="http://schemas.android.com/apk/res/android"
    xmlns:tools="http://schemas.android.com/tools"
    android:layout_width="match_parent"
    android:layout_height="match_parent"
    android:orientation="vertical"
    tools:context=".MainActivity">

    <fragment
        android:layout_width="match_parent"
        android:layout_height="match_parent"
        android:name="project.li.com.a06_hengping.LeftFragment"
        android:tag="liftn">

    </fragment>

</LinearLayout>
activity_main.xml(land)
<?xml version="1.0" encoding="utf-8"?>
<LinearLayout xmlns:android="http://schemas.android.com/apk/res/android"
    android:orientation="horizontal" android:layout_width="match_parent"
    android:layout_height="match_parent"
    android:weightSum="2"
    >
    <fragment
        android:layout_width="0dp"
        android:layout_height="match_parent"
        android:layout_weight="0.5"
        android:tag="lift"
        android:name="project.li.com.a06_hengping.LeftFragment"
        ></fragment>
    <fragment
        android:layout_width="0dp"
        android:layout_height="match_parent"
        android:layout_weight="2"
        android:tag="content"
        android:name="project.li.com.a06_hengping.ContentPing"
        ></fragment>
</LinearLayout>
content_ping.xml
<?xml version="1.0" encoding="utf-8"?>
<LinearLayout xmlns:android="http://schemas.android.com/apk/res/android"
    android:orientation="vertical"
    android:layout_width="match_parent"
    android:layout_height="match_parent"
    android:background="@color/colorAccent">


</LinearLayout>
content_ping_textview.xml
<?xml version="1.0" encoding="utf-8"?>
<RelativeLayout xmlns:android="http://schemas.android.com/apk/res/android"
    android:layout_width="match_parent" android:layout_height="match_parent">

    <TextView
        android:id="@+id/contentPingTextView"
        android:layout_width="wrap_content"
        android:layout_height="wrap_content"
        android:textSize="50sp"
        android:layout_centerInParent="true"
         />
</RelativeLayout>
lift_layout.xml
<?xml version="1.0" encoding="utf-8"?>
<LinearLayout
    xmlns:android="http://schemas.android.com/apk/res/android" android:layout_width="match_parent"
    android:layout_height="match_parent"
    android:orientation="vertical">
    <ListView
        android:layout_width="wrap_content"
        android:layout_height="wrap_content"
        android:id="@+id/listView">
    </ListView>
</LinearLayout>
list_text_view.xml
<?xml version="1.0" encoding="utf-8"?>
<LinearLayout xmlns:android="http://schemas.android.com/apk/res/android"
    android:orientation="vertical" android:layout_width="match_parent"
    android:layout_height="match_parent">
<TextView
    android:layout_width="wrap_content"
    android:layout_height="wrap_content"
    android:id="@+id/list_text_view"/>
</LinearLayout>
最后
以上就是靓丽唇膏最近收集整理的关于Fragment横竖屏切换竖屏横屏创建一个横屏LinearLayout的全部内容,更多相关Fragment横竖屏切换竖屏横屏创建一个横屏LinearLayout内容请搜索靠谱客的其他文章。
本图文内容来源于网友提供,作为学习参考使用,或来自网络收集整理,版权属于原作者所有。


发表评论 取消回复