#include <iostream>
#include <opencv2/opencv.hpp>
#include <opencv2/imgproc/imgproc.hpp>
#include "time.h"

#define CLOCKS_PER_SEC ((clock_t)1000)
using namespace cv;
using namespace std;


//鼠标事件声明
void onMouse(int event,int x,int y,int flags,void *utsc);
Point2f srcTri[4],dstTri[4];
int clickTimes=0;  //在图像上单击次数
Mat image;
Mat imageWarp;

int main(int argc,char *argv[])
{
    clock_t start_time, end_time;
    start_time = clock();

    image=imread("/home/leoxae/KeekoRobot/TestPic/编程贴纸/bc01.jpg");
    imshow("Source Image",image);
    //回调函数:鼠标事件
    setMouseCallback("Source Image",onMouse);
    waitKey(0);

    end_time = clock();
    cout << "运行时间==" << ((end_time - start_time) / CLOCKS_PER_SEC) << "ms" << endl;

    return 0;
}


/**
 * 鼠标事件:点选四边形坐标 进行透视变换人工矫正
 * @param event
 * @param x
 * @param y
 * @param flags
 * @param utsc
 */
void onMouse(int event,int x,int y,int flags,void *utsc)
{
    if(event == EVENT_LBUTTONUP)   //响应鼠标左键抬起事件
    {
        circle(image,Point(x,y),2.5,Scalar(0,0,255),2.5);  //标记选中点
        imshow("Source Image",image);
        srcTri[clickTimes].x=x;
        srcTri[clickTimes].y=y;
        clickTimes++;
    }

    if(clickTimes == 4)
    {
        dstTri[0].x = 0;
        dstTri[0].y = 0;
        dstTri[1].x = image.rows-1;
        dstTri[1].y = 0;
        dstTri[2].x = 0;
        dstTri[2].y = image.cols-161;
        dstTri[3].x = image.rows-1;
        dstTri[3].y = image.cols-161;
        Mat transform = Mat::zeros(3,3,CV_32FC1); //透视变换矩阵
        transform = getPerspectiveTransform(srcTri, dstTri);  //获取透视变换矩阵
        warpPerspective(image, imageWarp, transform, Size(image.rows,image.cols-160));  //透视变换
        imshow("After WarpPerspecttive",imageWarp);
    }
}
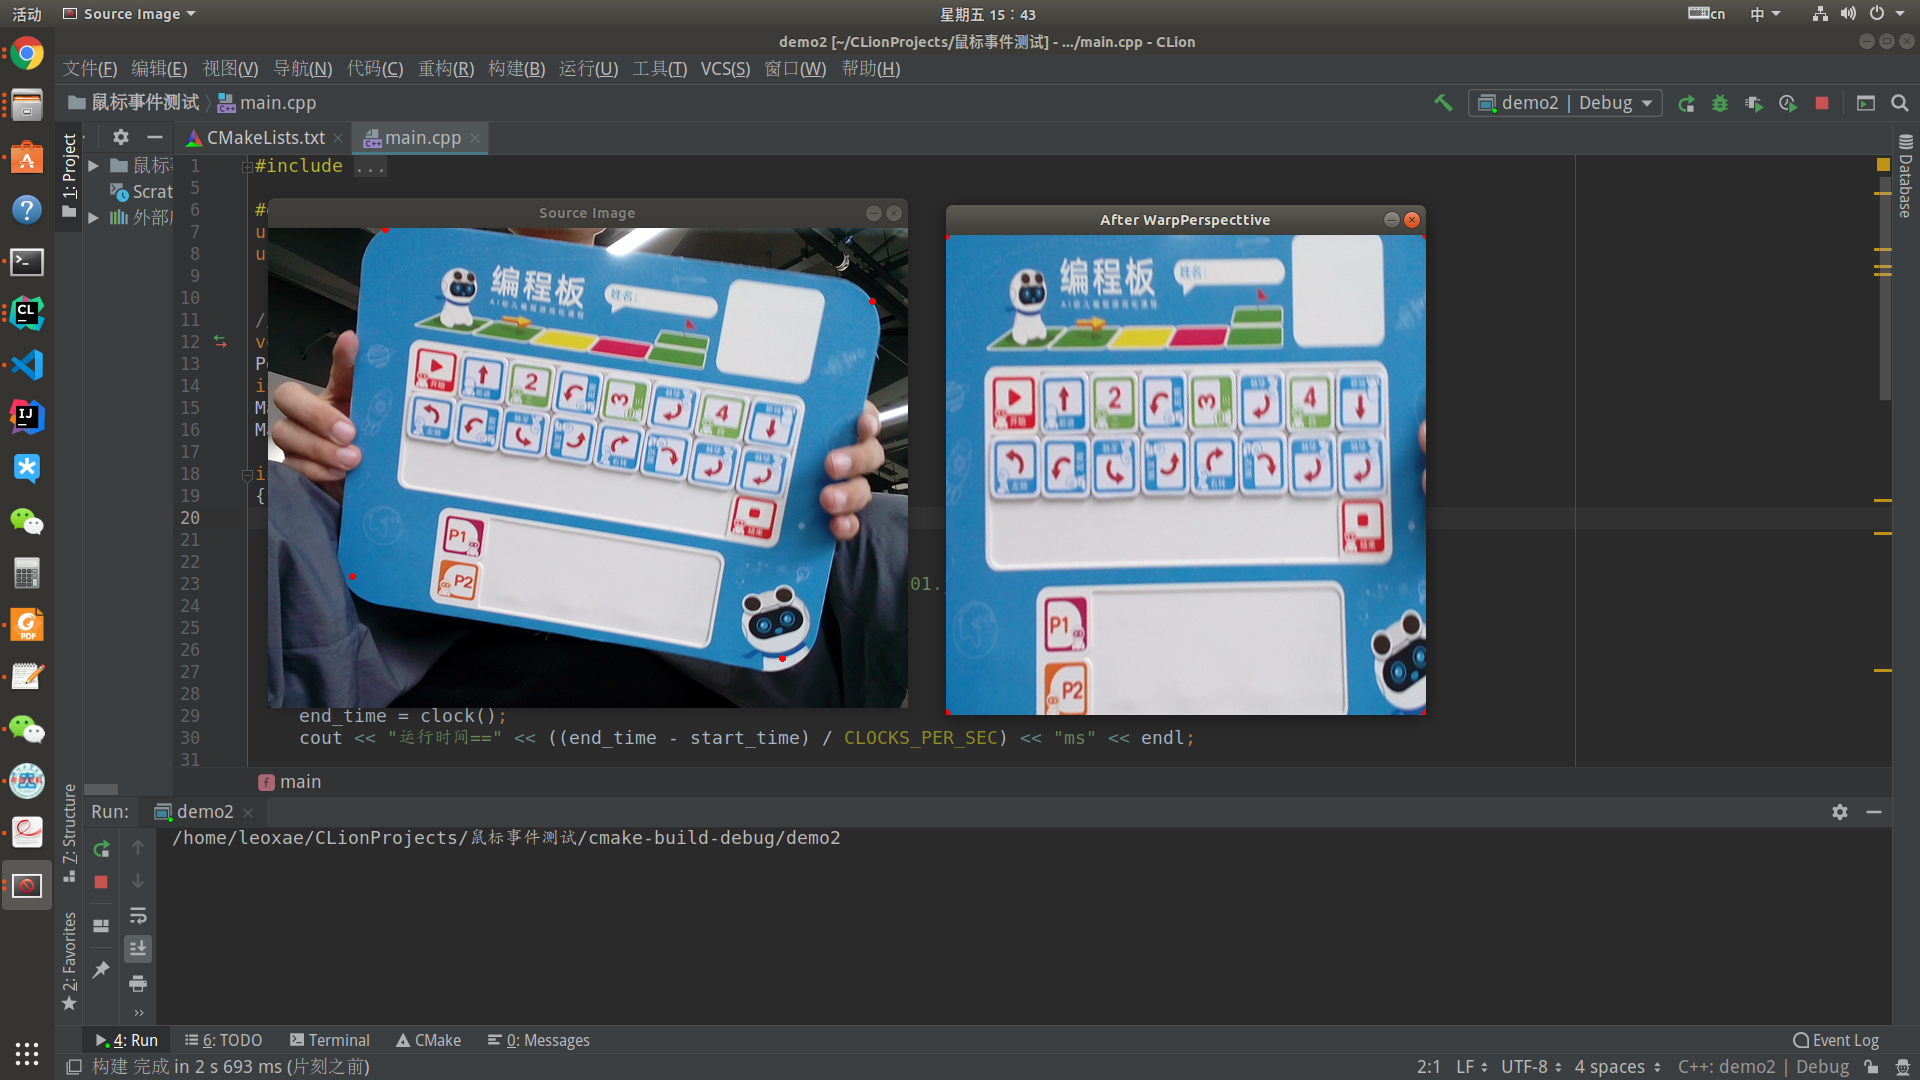
效果图如下:

转载于:https://www.cnblogs.com/lx17746071609/p/11103078.html
最后
以上就是高大柜子最近收集整理的关于[opencv]利用鼠标事件选取坐标进行透视变换矫正图像的全部内容,更多相关[opencv]利用鼠标事件选取坐标进行透视变换矫正图像内容请搜索靠谱客的其他文章。
本图文内容来源于网友提供,作为学习参考使用,或来自网络收集整理,版权属于原作者所有。


![[opencv]利用鼠标事件选取坐标进行透视变换矫正图像](https://www.shuijiaxian.com/files_image/reation/bcimg7.png)


发表评论 取消回复