目录
一.登录注册界面的前后端逻辑(只上传了重要的代码部分)
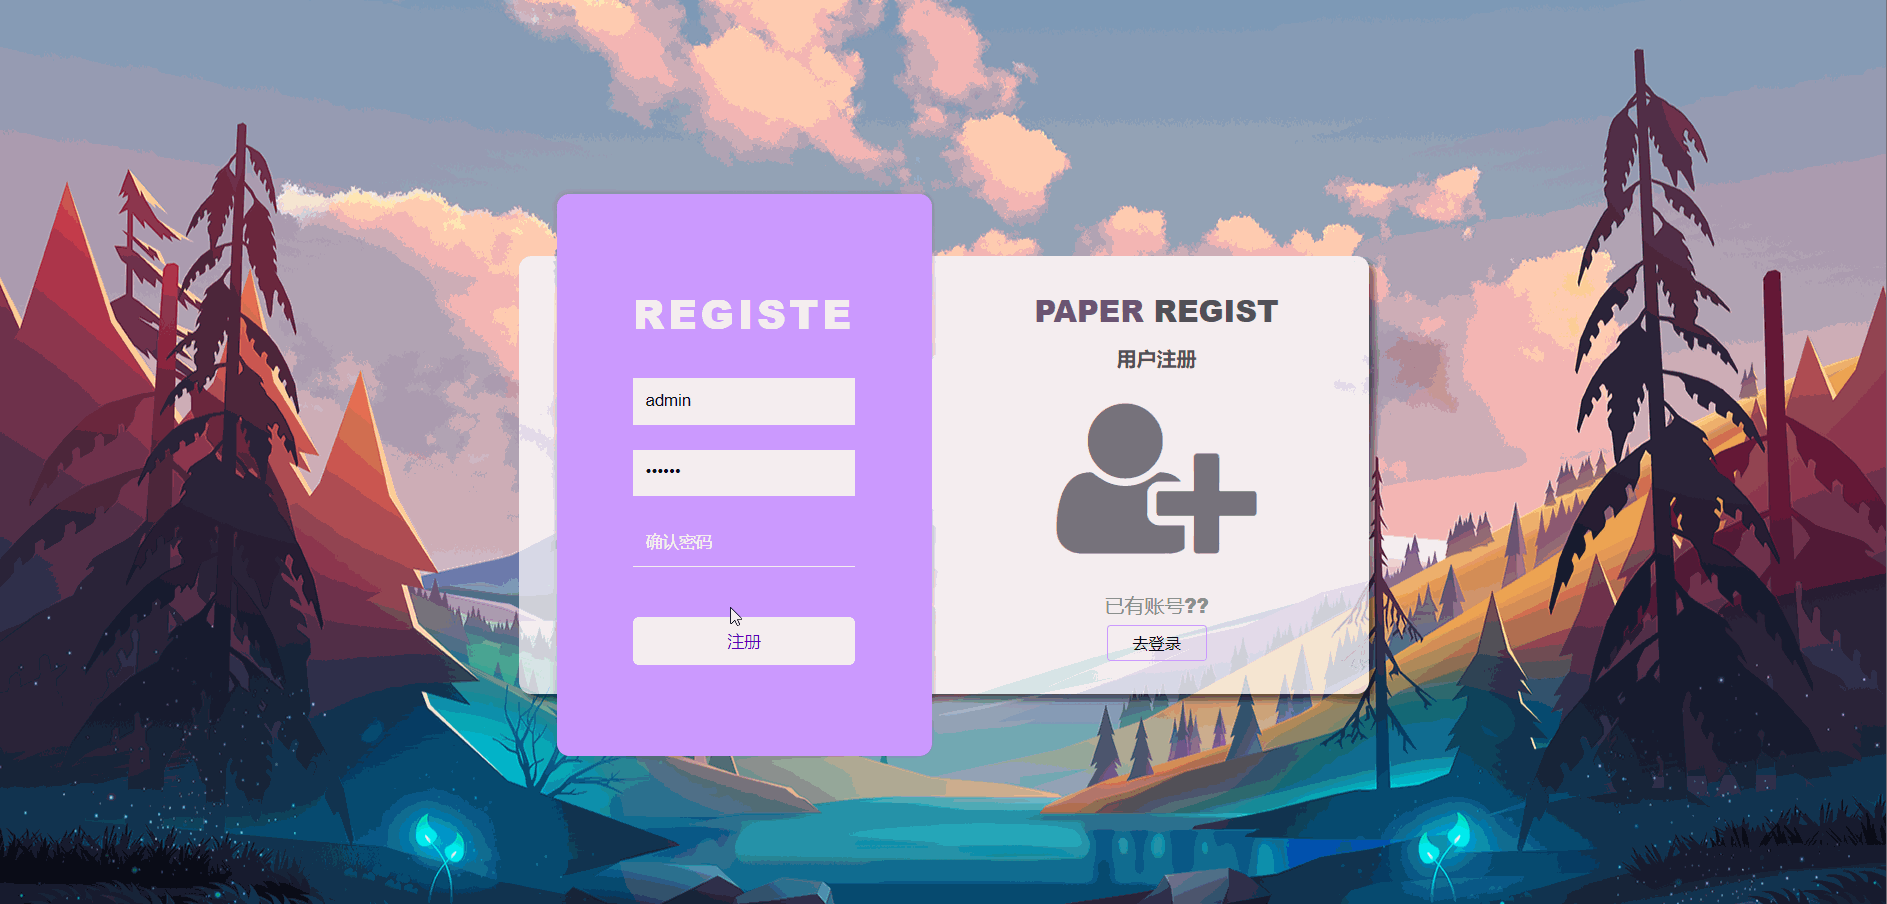
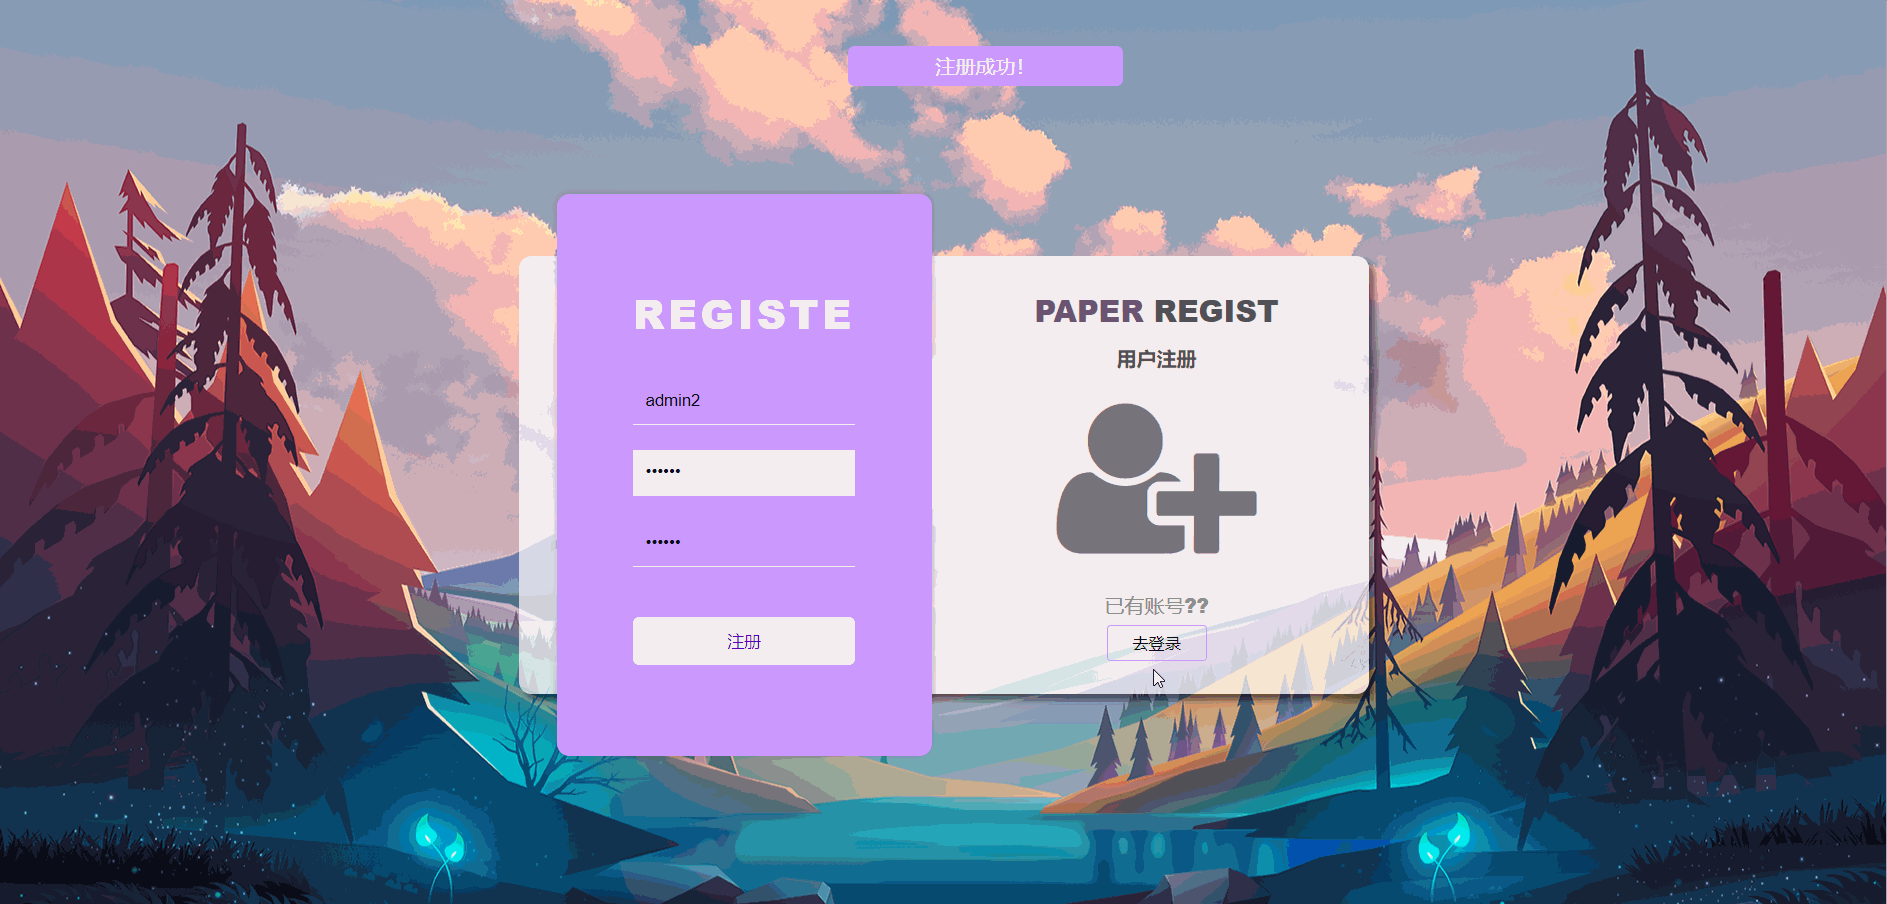
1.注册页面的验证
(1)效果图
(2)注册页面的前后端逻辑
2.登录页面的验证
(1)效果图
(2)登录页面的前后端逻辑
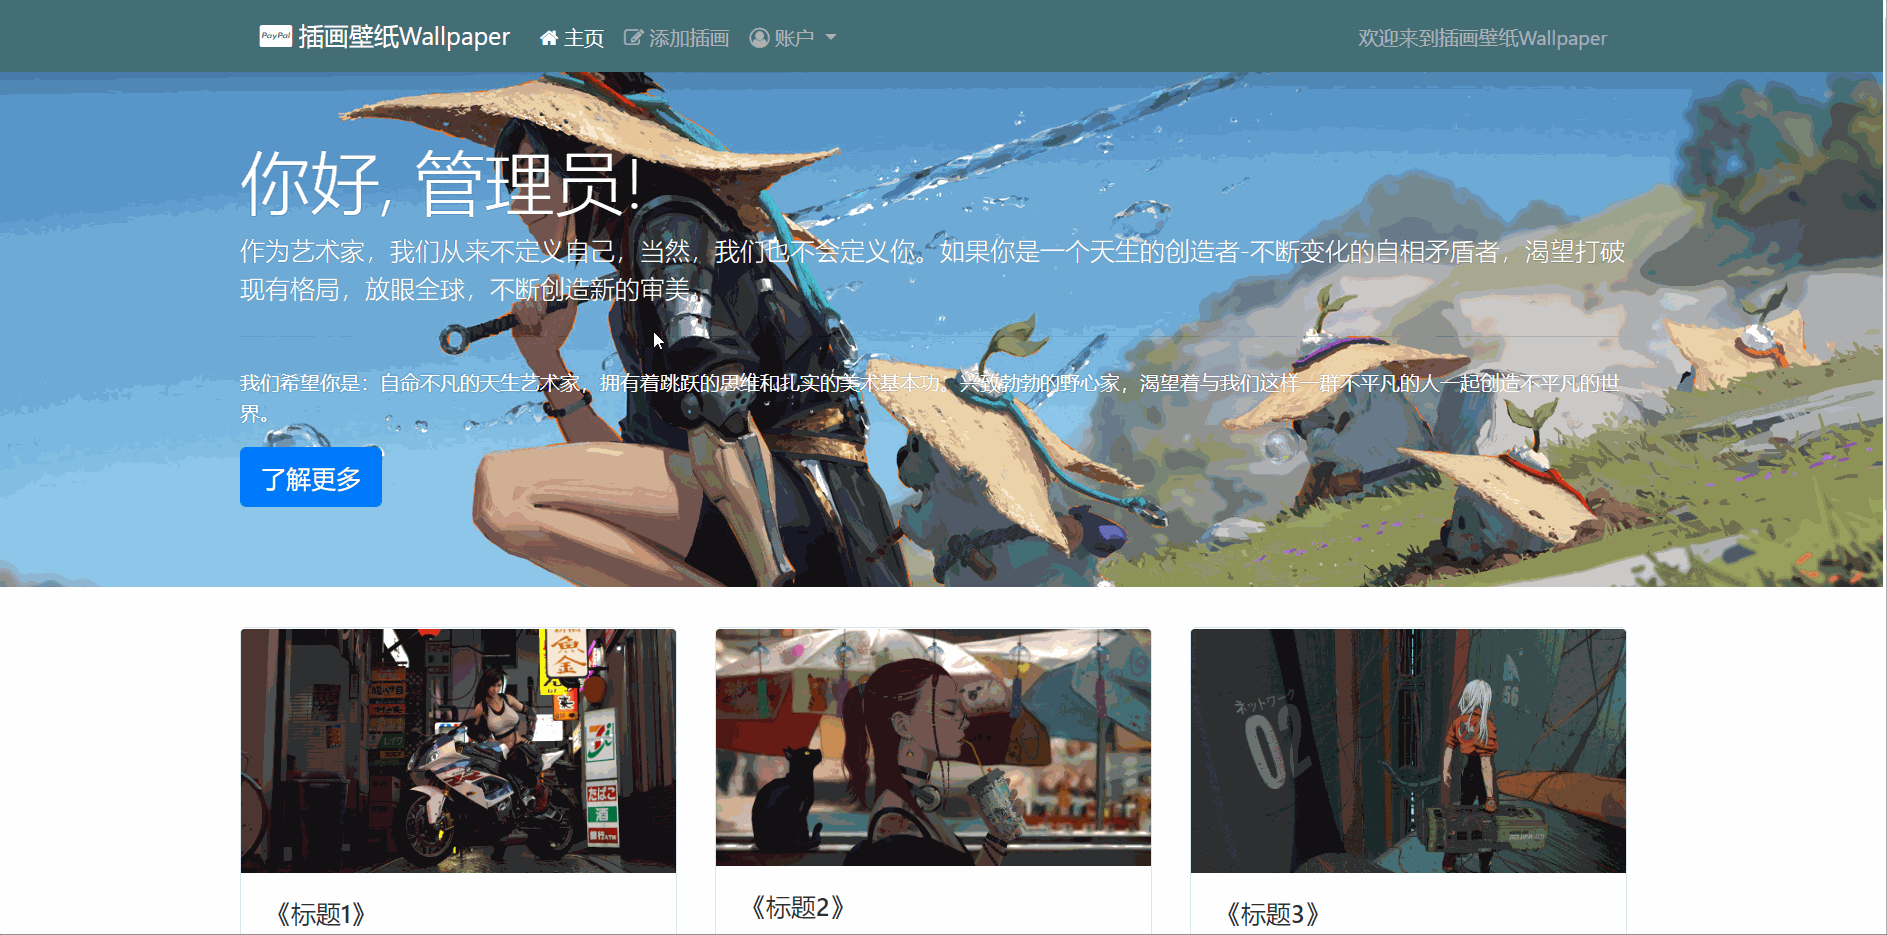
二.主页页面
1.主页页面响应式展示
(1)效果图
(2)页面的卡片数据渲染
2.跳转添加页面和退出登录
(1)效果图
(2)导航栏选项跳转
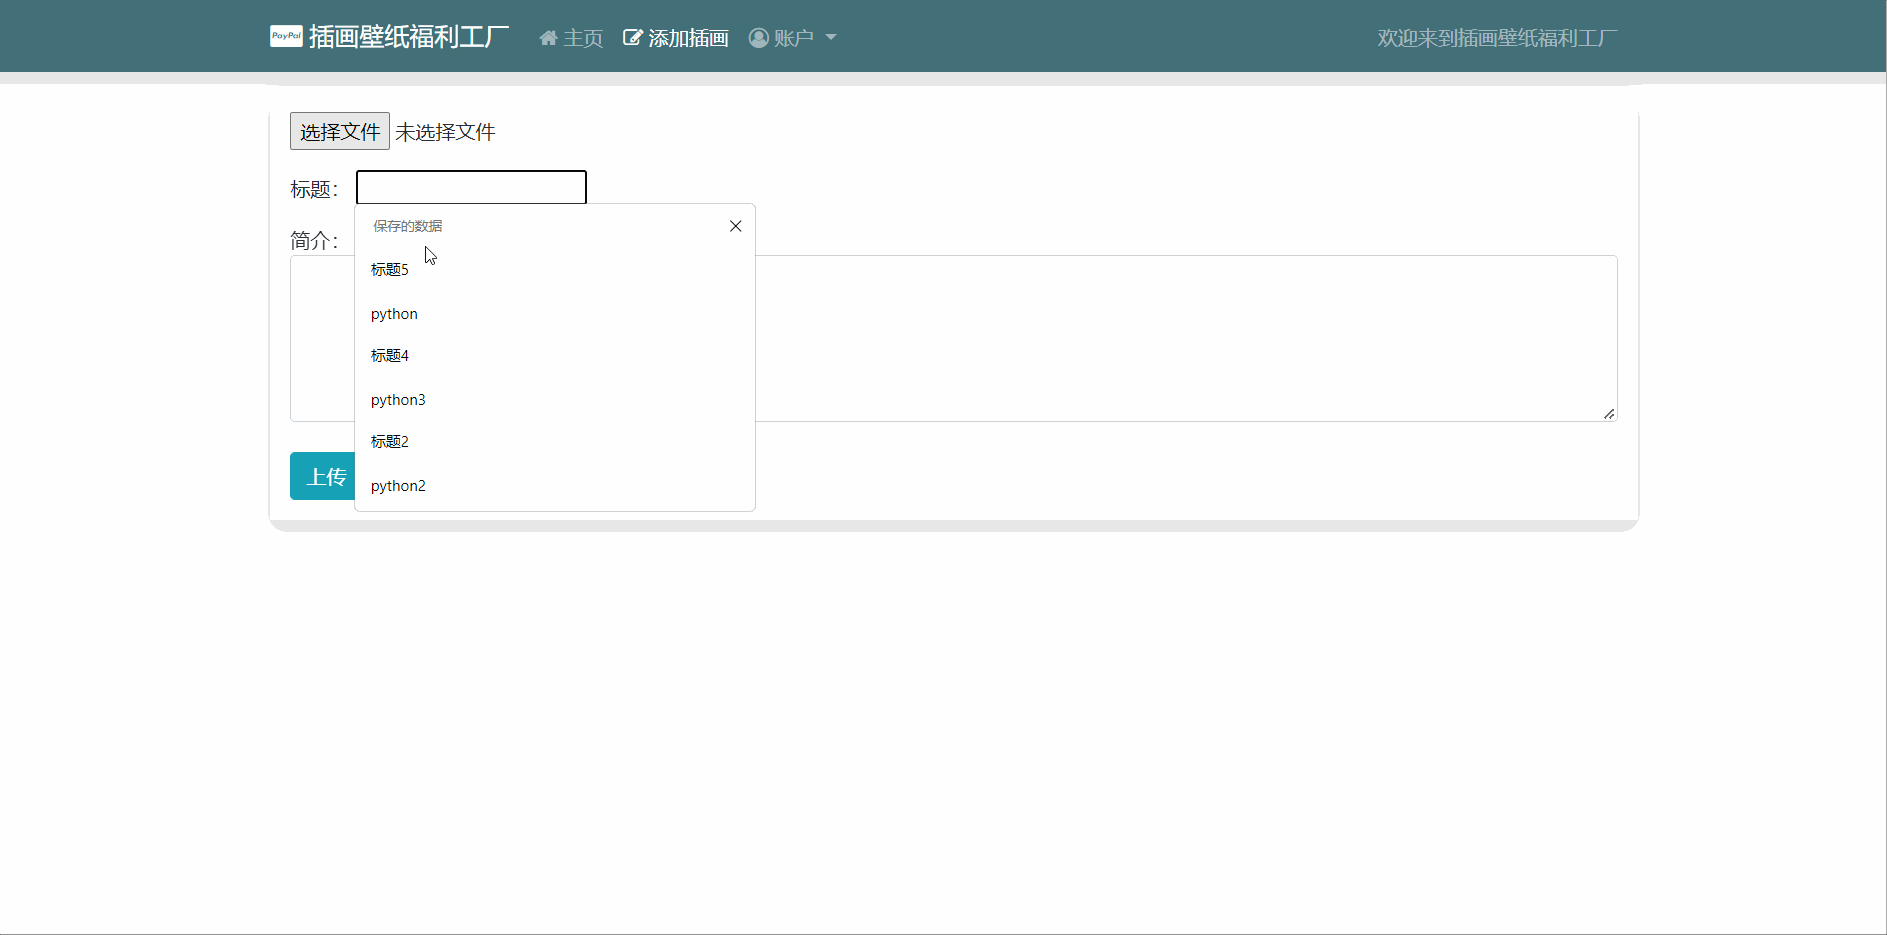
三.添加卡片壁纸信息
1.页面实现壁纸的添加
(1)效果图
(2) 添加壁纸的前后端逻辑
四.编辑和删除壁纸
1.更改壁纸信息
(1)效果图
(2)更新页面的前后端逻辑
(3)提交表单时的逻辑
2.删除壁纸信息
(1)效果图
(2)删除壁纸的前后端逻辑
一.登录注册界面的前后端逻辑(只上传了重要的代码部分)
1.注册页面的验证
(1)效果图
(2)注册页面的前后端逻辑
models模型用户表就设置了简单的id,账户名和密码
class WallpaperUser(models.Model):
    id = models.AutoField(primary_key=True)
    user = models.CharField(max_length=20)
    password = models.CharField(max_length=11)
views视图函数验证方法只添加了判断输入的表单项为不为空,用户名重复,以及两次输入的密码是否一致
# 注册页面
def register(request):
    u = request.POST.get('username')
    p = request.POST.get('password')
    p2 = request.POST.get('password2')
    if u and p and p2 and p == p2:
        u_count = WallpaperUser.objects.filter(user=u).count()
        if u_count >= 1:
            return_json = {'text': '账户名已存在!', }
            return HttpResponse(json.dumps(return_json), content_type='application/json')
        else:
            re_user = WallpaperUser(user=u, password=p)
            re_user.save()
            return_json = {'text': '注册成功!'}
            return HttpResponse(json.dumps(return_json), content_type='application/json')
    elif p and p2 and p != p2:
        return_json = {'text': '两次输入的密码不一致!', }
        return HttpResponse(json.dumps(return_json), content_type='application/json')
    else:
        return_json = {'text': '账号或者密码不能为空!', }
        return HttpResponse(json.dumps(return_json), content_type='application/json')
前端使用Ajax传递参数到后端
表单内容
<form>
      {% csrf_token %}
      <h1 style="margin-bottom: 30px;">REGISTE</h1>
      <input class="username2" type="text" placeholder="账号">
      <div class="tips0">账号不能为空!</div>
      <input class="password2" type="password" placeholder="密码">
      <div class="tips1">密码不能为空!</div>
      <input class="password2_1" type="password" placeholder="确认密码">
      <div class="tips2">密码不一致!</div>
      <button class="register_btn" type="button">注册</button>
</form>
Ajax点击注册按钮的逻辑
$('.register_btn').click(function () {
            $.ajax({
                url: 'register',
                type: 'post',
                data: {
                    'username': $('.username2').val(),
                    'password': $('.password2').val(),
                    'password2': $('.password2_1').val(),
                    'csrfmiddlewaretoken': '{{ csrf_token }}'
                },
                success: function (res) {
                    console.log(res.text)
                    $('.tips3').text(res.text)
                    $('.tips3').fadeIn(500)
                }
            })
        })
2.登录页面的验证
(1)效果图
(2)登录页面的前后端逻辑
views视图函数中的逻辑,先判断输入的表单为不为空,再判断数据库中存不存在该用户名,最后再判断输入的密码是否一致,三个条件都满足之后再跳转主页页面
# 登录页面
def to_index(request):
    u = request.POST.get('username')
    p = request.POST.get('password')
    if u and p:
        user = WallpaperUser.objects.filter(user=u)
        num = user.count()
        if num >= 1:
            for pwd in user:
                password = pwd.password
            if password != p:
                return_json = {'text': '密码错误!', }
                return HttpResponse(json.dumps(return_json), content_type='application/json')
            else:
                return_json = {'text': '登录成功', }
                return HttpResponse(json.dumps(return_json), content_type='application/json')
        else:
            return_json = {'text': '用户不存在!', }
            return HttpResponse(json.dumps(return_json), content_type='application/json')
    else:
        return_json = {'text': '用户名或密码不能为空!', }
        return HttpResponse(json.dumps(return_json), content_type='application/json')
表单内容
 <form>
     {% csrf_token %}
    <h1 style="margin-bottom: 50px; text-align: center;">LOGIN</h1>
    <input class="username" type="text" placeholder="账号" name="username">
    <div class="tips4">账号不能为空!</div>
    <input class="password" type="password" placeholder="密码" name="password">
    <div class="tips5">密码不能为空!</div>
    <button class="login_btn" type="button">登录</button>
</form>
Ajax点击登录按钮之后的逻辑判断,返回的值为登录成功时就跳转主页,否则就弹出错误提示
$('.login_btn').click(function () {
            $.ajax({
                url: 'to_index',
                type: 'post',
                data: {
                    'username': $('.username').val(),
                    'password': $('.password').val(),
                    'csrfmiddlewaretoken': '{{ csrf_token }}'
                },
                success: function (res) {
                    console.log(res.text)
                    if (res.text == '登录成功') {
                        location.href = "/index";
                    } else {
                        $('.tips3').text(res.text)
                        $('.tips3').fadeIn(500)
                    }
                }
            })
        })
二.主页页面
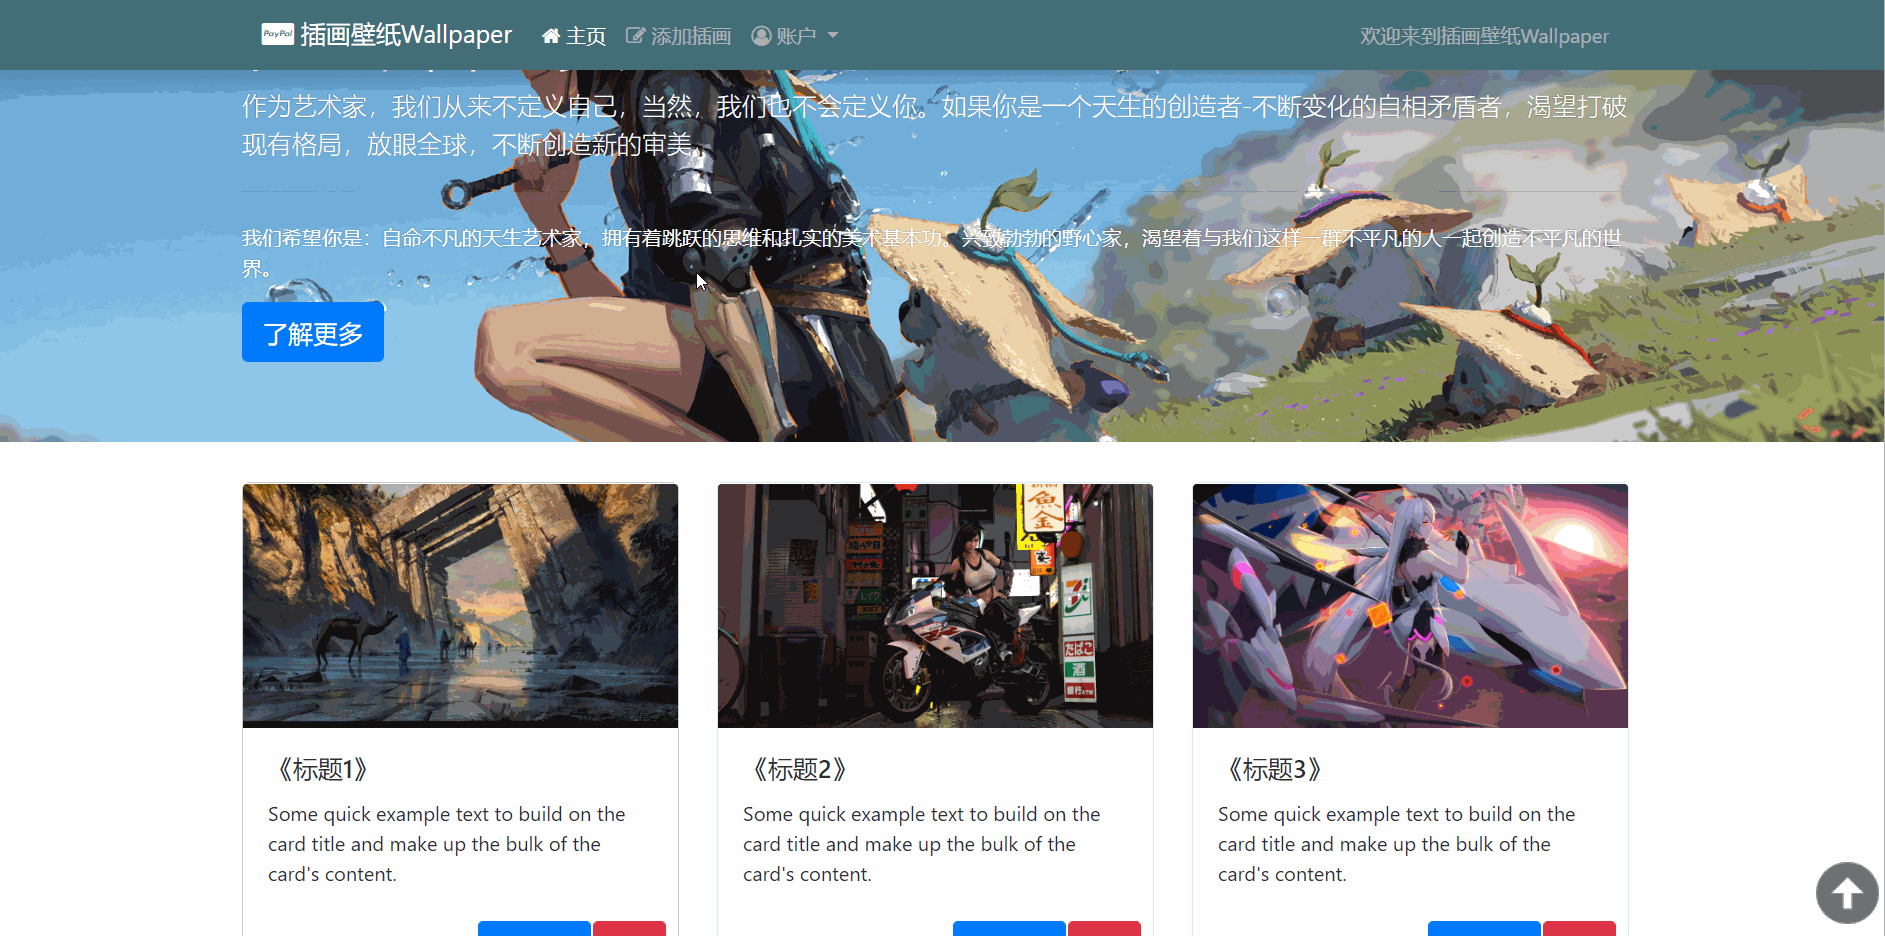
1.主页页面响应式展示
(1)效果图
样式框架用的bootstrap

(2)页面的卡片数据渲染
models中的卡片模型表,创建了id,标题和简介,以及图片的上传,默认保存在media下的img文件夹下面
# 壁纸简介
class Cards(models.Model):
    id = models.AutoField(primary_key=True)
    title = models.CharField('壁纸名', max_length=10)
    introduction = models.CharField('壁纸简介', max_length=255)
    img = models.ImageField(upload_to='img')
setting里面最后需要添加一个媒体资源配置
MEDIA_ROOT = os.path.join(BASE_DIR, 'media').replace('\', '/')     #设置静态文件路径为主目录下的media文件夹
MEDIA_URL = '/media/'                                                 #url映射
子路由中尾部添加一句代码
+ static(settings.MEDIA_URL, document_root=settings.MEDIA_ROOT)
urlpatterns = [
    path('', login, name='login'),
    path('index', index, name='index'),
    path('to_index', to_index, name='to_index'),
    path('edit', edit, name='edit'),
    path('uploadfile', uploadfile, name='uploadfile'),
    path('register', register, name='register'),
    path('delete/<int:cardId>', deleteCard, name='deleteCard'),
    path('update/<int:cardId>', update, name='update'),
    path('updateCard/<int:cardId>', updateCard, name='updateCard'),
] + static(settings.MEDIA_URL, document_root=settings.MEDIA_ROOT)
views视图函数中主页页面逻辑,从数据库中拿到数据,并传到前端页面中
# 主页页面
def index(request):
    carditem = Cards.objects.all()
    return render(request, 'index.html', locals())
前端页面渲染数据
   <!-- 卡片内容开始 -->
        <div class="container">
            <!-- 卡片 -->
            <div class="row">
                <!--  -->
                {% for card in carditem %}
                    <div class="col-12 mb-3 col-lg-4">
                        <div class="show card w-100" style="width: 18rem;">
                            <img src="{{ card.img.url }}" class="card-img-top img-fluid">
                            <div class="card-body">
                                <p style="display: none">{{ card.id }}</p>
                                <h5 class="card-title card-hidden2">《{{ card.title }}》</Card>
                                </h5>
                                <p class="card-text card-hidden">{{ card.introduction }}</p>
<!--                               <a  float-right btn-danger" ysqysqy -->
<!--                                   data-toggle="modal" data-target="#staticBackdrop">删除</a> -->
                                <a class="btn float-right btn-danger" href="/delete/{{ card.id }}">删除</a>
                                <a href="update/{{ card.id }}" class="btn float-right btn-primary">更改简介</a>
                            </div>
                        </div>
                    </div>
                {% endfor %}
                <!--  -->
            </div>
            <!-- 卡片结束 -->
        </div>
    </div>
    <!-- 卡片内容结束 -->
2.跳转添加页面和退出登录
(1)效果图
(2)导航栏选项跳转
views试图中定义跳转逻辑
添加壁纸页面和登录页面视图
# 添加壁纸页面
def edit(request):
    return render(request, 'edit.html')
# 登录view
def login(request):
return render(request, 'login.html')路由配置
path('', login, name='login'),
path('edit', edit, name='edit'),
前端点击时的跳转链接
 <a class="nav-link" href="{% url 'edit' %}">
        <i class="fa fa-pencil-square-o" aria-hidden="true"></i>
        添加插画
</a>
<a class="dropdown-item" href="/">
<i class="fa fa-share" aria-hidden="true"></i>
退出登录
</a>三.添加卡片壁纸信息
1.页面实现壁纸的添加
(1)效果图
(2) 添加壁纸的前后端逻辑
views视图添加壁纸的函数逻辑,判断提交时任一表单为不为空,并弹框提示上传情况
# 添加壁纸信息
def uploadfile(request):
    title = request.POST.get('title')
    introduction = request.POST.get('introduction')
    url = request.FILES.get('img')
    if title and introduction and url:
        card_file = Cards(title=title, introduction=introduction, img=url)
        card_file.save()
        messages.success(request, '上传成功')
        # return HttpResponseRedirect(reverse('edit'))
        return redirect('../edit')
    else:
        messages.error(request, '任一表单项都不能为空')
        return HttpResponseRedirect('../edit')
前端页面的表单
 <form action="uploadfile" method="post" enctype="multipart/form-data">
        {% csrf_token %}
        <div class="flex-column shadow p-3 ml-3">
            <input class="mb-3 imgs" type="file" name="img">
            <br>
            <lable>标题:</lable>
            <input class="mb-3 title" type="text" name="title">
            <br>
            <lable>简介:</lable>
            <textarea name="introduction" class="form-control introduction" id="exampleFormControlTextarea1" rows="5"></textarea>
            <br>
            <button id="loadup" type="submit" class="btn btn-info">上传</button>
        </div>
    </form>
前端页面的弹框逻辑
{% if messages %}
<script>
        {% for msg in messages %}
            alert('{{ msg.message }}');
        {% endfor %}
</script>
{% endif %}
四.编辑和删除壁纸
1.更改壁纸信息
(1)效果图
(2)更新页面的前后端逻辑
views视图函数定义一个参数cardId,前端通过路由传递id过来,filter() 方法遍历出传递过来与数据库中相同id的数据,并将数据传递到前端页面当中
# 更新页面
def update(request, cardId):
    lists = Cards.objects.filter(id=cardId)
    return render(request, 'update.html', locals())
路由书写方式
path('update/<int:cardId>', update, name='update'),传递的数据渲染到前端的表单中
<div class="container pb-5" style="margin-top:80px">
{% for list in lists %}
<!-- 保存成功轻量弹框 -->
<div class="position-fixed bottom-0 right-0 p-3" style="z-index: 100; right: 0; top: 60px;">
<div id="liveToast" class="toast hide" role="alert" aria-live="assertive" aria-atomic="true"
data-delay="4000">
<div class="toast-header">
<i style="font-size: 20px" class="fa fa-pencil-square-o mt-1 mr-1" aria-hidden="true"></i>
<strong class="mr-5 pr-5">更改壁纸信息</strong>
<button type="button" class="ml-2 mb-1 close" data-dismiss="toast" aria-label="Close">
<span aria-hidden="true">×</span>
</button>
</div>
<div class="toast-body">
Hello, world! This is a toast message.
</div>
</div>
</div>
<!-- 保存成功轻量弹框结束 -->
<form>
{% csrf_token %}
<div class="card-id" style="display: none">{{ list.id }}</div>
<div class="ml-3 mt-3 shadow p-3 w-75 m-auto" style="border-radius: 5px">
<img src="{{ list.img.url }}" class="img-fluid mb-4 shadow-sm" style="border-radius: 5px">
<br>
<lable class="font-weight-bold" style="font-size: 20px">标题:</lable>
<input class="title" class="mb-3 p-1" style="border: 1px solid black; border-radius: 5px" type="text"
value="{{ list.title }}">
<br>
<lable class="font-weight-bold" style="font-size: 20px">简介:</lable>
<textarea class="form-control introduction" id="exampleFormControlTextarea1"
rows="5">{{ list.introduction }}</textarea>
<br>
<button id="tj" type="button" class="btn btn-info">保存</button>
<button class="btn btn-info"><a href="/index" style="text-decoration: none;color: white"> 回到首页</a>
</button>
</div>
</form>
{% endfor %}
</div>(3)提交表单时的逻辑
views视图函数点击更改按钮时的提交表单逻辑,定义一个参数cardId,并将前端页面的参数传递过来,遍历出与数据库相同id值的一条数据,使用update() 方法更新数据并弹出提示信息
# 更新页面提交表单逻辑
def updateCard(request, cardId):
    title = request.POST.get('title')
    introduction = request.POST.get('introduction')
    if title and introduction:
        lists = Cards.objects.filter(id=cardId)
        lists.update(title=title, introduction=introduction)
        messages.success(request, '更改成功')
        # return redirect('../update')
        return render(request, 'update.html', locals())
    else:
        lists = Cards.objects.filter(id=cardId)
        messages.error(request, '更改失败,表单项不能为空')
        return render(request, 'update.html', locals())
路由书写方式
path('updateCard/<int:cardId>', updateCard, name='updateCard'),前端Ajax提交逻辑
//保存按钮
        $('#tj').click(function () {
            card_id = $('.card-id').text()
            console.log(card_id)
            $.ajax({
                url: '/updateCard/' + card_id,
                type: 'post',
                data: {
                    'title': $('.title').val(),
                    'introduction': $('.introduction').val(),
                    'csrfmiddlewaretoken': '{{ csrf_token }}'
                },
                success: function (res) {
                    console.log(res.text)
                    $('.toast-body').text(res.text)
                    $('.toast').toast('show');
                }//success
            })//ajax
        })
2.删除壁纸信息
(1)效果图

(2)删除壁纸的前后端逻辑
views视图删除函数逻辑,定义一个cardId参数,前端通过路由的方式传递id到视图函数,filter()
方法遍历出相同id的数据,并获取出图片的存放地址,通过操作系统删除图片文件,并弹出提示框
# 删除壁纸
def deleteCard(request, cardId):
    Info = Cards.objects.filter(id=cardId)
    for c in Info:
        media_img = c.img
    Info.delete()
    os.remove(r"D:wallpaper_demomedia{}".format(media_img))  # 删除文件
    messages.success(request, '删除成功')
    return redirect('../index')
路由书写方式
path('delete/<int:cardId>', deleteCard, name='deleteCard'),前端删除按钮链接
<a class="btn float-right btn-danger" href="/delete/{{ card.id }}">删除</a>前端Ajax删除按钮逻辑
 //删除按钮点击提示
        $('.del').click(function () {
            $(this).parent().parent().prev().css('display', 'block')
            $(this).parents('.col_father').siblings().children("div:first-child").css('display','none')
        })
        //取消按钮
        $('.cancel').click(function () {
            $(this).parent().css('display', 'none')
        })


        //确认删除逻辑
        $('.confirm').click(function () {
            card_id = $(this).prev().text()
            console.log(card_id)
            $.ajax({
                url: '/delete/' + card_id,
                type: 'post',
                data: {
                    'csrfmiddlewaretoken': '{{ csrf_token }}'
                },
                success: function (res) {
                    console.log(res.text)
                    if (res.text == '删除成功') {
                        location.href = "/index";
                        alert(res.text)
                    }
                }//success
             })//ajax
        })
最后
以上就是孝顺小土豆最近收集整理的关于期末实训:Django+bootstrap实现登录注册和数据的增删查改一.登录注册界面的前后端逻辑(只上传了重要的代码部分) 二.主页页面三.添加卡片壁纸信息四.编辑和删除壁纸的全部内容,更多相关期末实训:Django+bootstrap实现登录注册和数据内容请搜索靠谱客的其他文章。


发表评论 取消回复