

效果:
- 图标列表可打开/关闭,可拖拽主图标。
- 使用foundation-icons.css的图标系统,这个系统有超多常用图标,不用再自己找了。
- 使用jquery-ui.min.js来实现拖拽。
- 使用anime.js实现移动动画。anime.js内置超多动画选项,再也不用自己一个个去css里设计了,只要传传参即可。
- 使用jquery,但并无复杂逻辑,上手难度:简单。
学习笔记(javascript分步详细解释):
html和css并没有什么好说的,三个js都是调用库而已,真正要说的是只有index.js了。
第一步:
先是这样,很简单。
var timeOut;
var menu = new Menu("#myMenu");

var item1 = new Item("list");
var item2 = new Item("die-five", "#FF5C5C");
var item3 = new Item("social-facebook", "#5CD1FF");
var item4 = new Item("social-drive", "#FFF15C");
var item5 = new Item("link", "#64F592");

menu.add(item1);
menu.add(item2);
menu.add(item3);
menu.add(item4);
menu.add(item5);
第二步:
new了这么多东西究竟是什么呢?先看看Menu。用了一个class类。class和css以及html的class不同不要弄混了哦。这儿的class与c的结构体很像,constructor就是构造函数。定义了一些变量。
class Menu {
    constructor(menu) {
//在网页中创建一个<div id = "menu"></div>
        this.$element = $(menu);
        this.size = 0;
        this.first = null;
        this.last = null;
        this.timeOut = null;
        this.hasMoved = false;
        this.status = "closed";
    }
}
Item也是这样的。定义了一些,还有,根据传来的background设置背景颜色,还有,使用fundation-icons设置图标。
class Item {
    constructor(icon, backgroundColor) {
        this.$element = $(document.createElement("div"));
        this.icon = icon;
        this.$element.addClass("item");
        this.$element.css("background-color", backgroundColor);
        var i = document.createElement("i");
        $(i).addClass("fi-" + icon);
        this.$element.append(i);
        this.prev = null;
        this.next = null;
        this.isMoving = false;
    }
}
fundation-icons:
注意这两句:根据传来的icon参数为其添加上相应的类。对,你想的没错,就是根据class来确定图片。
var i = document.createElement("i");
$(i).addClass("fi-" + icon);
随便看看fundation-icons中的两句,这是使用伪元素加上content。很方便。我们只要在js中调用,添加class就行了。
.fi-address-book:before { content: "f100"; }
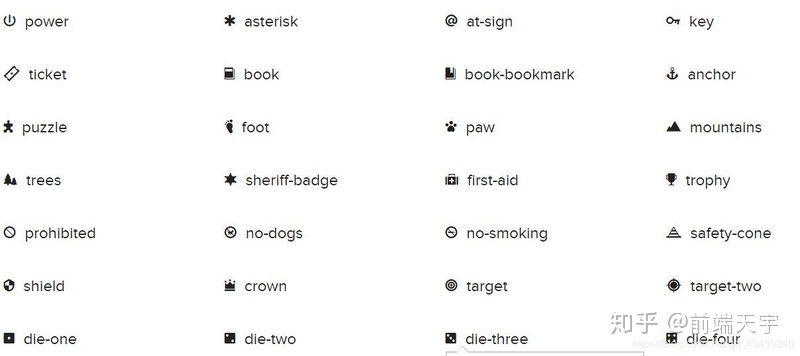
.fi-alert:before { content: "f101"; }如果你觉得图标大小不合适,也可以用transform:scale()方法改大小哦。奉上fundation-icons官网,可以查看名字对应的图标
部分图标一览,还是很好看的
第三步:
然后是将item们加入menu。注意五个图标,包括”三横“的列表图标,都属于item,通过add函数把他们添加进menu。menu更像是看不见却又掌管一切的元素。qwq。
注意那个draggable的地方,实际是调用了jquery-ui.min.js来实现的拖拽。
jQuery UI 是建立在 jQuery JavaScript 库上的一组用户界面交互、特效、小部件及主题。无论您是创建高度交互的 Web 应用程序还是仅仅向窗体控件添加一个日期选择器,jQuery UI 都是一个完美的选择
因为在this.first == null里面,所以只有第一个列表图标即”三横“的图标才能拖拽。结合函数实际内容也很好理解,开始时干什么,拖拽过程中干什么,拖拽完成干什么。
add(item) {
        var menu = this;
        if (this.first == null) {
            this.first = item;
            this.last = item;
            //当点击menu的第一个图标,即样子为三个横的图标时,menu打开或关闭
            this.first.$element.on("mouseup", function () {
                    menu.click();
            });
             //使用jquery-ui库实现拖拽
            item.$element.draggable(
                {
                    start: function () {
                        item.isMoving = true;
                    }
                },
                {
                    drag: function () {
                        item.next.updatePosition();
                    }
                },
                {
                    stop: function () {
                        item.isMoving = false;
                        item.next.moveTo(item);
                    }
                }
            );
        } else {
            this.last.next = item;
            item.prev = this.last;
            this.last = item;
        }
//把该item加到menu最后
        this.$element.after(item.$element);
}
只看这个可能有个疑问, item.next.updatePosition()以及下面那个moveto都只用了一次,那岂不是只有第二个图标能换位置,第三到第五个都换不了了?这个其实看看updatePosition()和moveto就能理解——它们是递归调用的。
第四步:列表打开/关闭实现:
如何点击列表图标让剩下四个图标”滚出来“或者”滚回去“呢?还记得click函数吗?
嗯,用while循环和迭代器,让每个元素依次展开/关闭。
open() {
        this.status = "open";
        var current = this.first.next;
        var iterator = 1;
        var head = this.first;
        var sens = head.$element.css("left") < head.$element.css("right") ? 1 : -1;
        while (current != null) {
            console.log(iterator);
            anime({
                targets: current.$element[0],
                left: parseInt(head.$element.css("left"), 10) + (sens * (iterator * 50)),
                top: head.$element.css("top"),
                duration: 500
            });
            iterator++;
            current = current.next;
        }
    }

    close() {
        this.status = "closed";
        var current = this.first.next;
        var head = this.first;
        var iterator = 1;
        while (current != null) {
            anime({
                targets: current.$element[0],
                left: head.$element.css("left"),
                top: head.$element.css("top"),
                duration: 500
            });
            iterator++;
            current = current.next;
        }
    }

    click() {
        if (this.status == "closed") {
            this.open();
        } else {
            this.close();
        }
    }
注意到下面这句话了吗?当列表图标左侧空间比右侧空间大时,往左侧展开,反之往右侧展开。
var sens = head.$element.css("left") < head.$element.css("right") ? 1 : -1;然后是anime。这儿实际上调用了anime.js,来帮助更好的实现动画,不用再去费心在css里面改来改去了,一个anime.js让你轻松不止一点!
anime({
       targets: current.$element[0],
       left: parseInt(head.$element.css("left"), 10) + (sens * (iterator * 50)),
       top: head.$element.css("top"),
       duration: 500
});
第五步:图标跟随
:
之前说过,当拖拽为首的图标,那个”三横“的图标时候,如果列表是打开状态,其余的图标也会跟着移动。
这儿也用了anime.js。当拖拽过程中,每个item调用updateposition,把自己的位置更新成自己前面那个item的位置。
拖拽结束,调用moveTo,把自己的位置更新成第一个图标,即”三横“图标的位置。
moveTo(item) {

        anime({
            targets: this.$element[0],
            left: item.$element.css("left"),
            top: item.$element.css("top"),
            duration: 700,
            elasticity: 500
        });
        if (this.next) {
            this.next.moveTo(item);
        }
    }

    updatePosition() {
        anime({
            targets: this.$element[0],
            left: this.prev.$element.css("left"),
            top: this.prev.$element.css("top"),
            duration: 200
        });

        if (this.next) {
            this.next.updatePosition();
        }
    }
删去多余部分的完整js代码:
class Item {
    constructor(icon, backgroundColor) {
        this.$element = $(document.createElement("div"));
        this.icon = icon;
        this.$element.addClass("item");
        this.$element.css("background-color", backgroundColor);
        var i = document.createElement("i");
        $(i).addClass("fi-" + icon);
        this.$element.append(i);
        this.prev = null;
        this.next = null;
        this.isMoving = false;
    }

    moveTo(item) {
        anime({
            targets: this.$element[0],
            left: item.$element.css("left"),
            top: item.$element.css("top"),
            duration: 700,
            elasticity: 500
        });
        if (this.next) {
            this.next.moveTo(item);
        }
    }

    updatePosition() {
        anime({
            targets: this.$element[0],
            left: this.prev.$element.css("left"),
            top: this.prev.$element.css("top"),
            duration: 200
        });

        if (this.next) {
            this.next.updatePosition();
        }
    }
}

class Menu {
    constructor(menu) {
        this.$element = $(menu);
        this.size = 0;
        this.first = null;
        this.last = null;
        this.timeOut = null;
        this.hasMoved = false;
        this.status = "closed";
    }

    add(item) {
        var menu = this;
        if (this.first == null) {
            this.first = item;
            this.last = item;
            this.first.$element.on("mouseup", function () {
                    menu.click();
            });
            item.$element.draggable(
                {
                    start: function () {
                        item.isMoving = true;
                    }
                },
                {
                    drag: function () {
                        item.next.updatePosition();
                    }
                },
                {
                    stop: function () {
                        item.isMoving = false;
                        item.next.moveTo(item);
                    }
                }
            );
        } else {
            this.last.next = item;
            item.prev = this.last;
            this.last = item;
        }
        this.$element.after(item.$element);

    }

    open() {
        this.status = "open";
        var current = this.first.next;
        var iterator = 1;
        var head = this.first;
        var sens = head.$element.css("left") < head.$element.css("right") ? 1 : -1;
        while (current != null) {
            console.log(iterator);
            anime({
                targets: current.$element[0],
                left: parseInt(head.$element.css("left"), 10) + (sens * (iterator * 50)),
                top: head.$element.css("top"),
                duration: 500
            });
            iterator++;
            current = current.next;
        }
    }

    close() {
        this.status = "closed";
        var current = this.first.next;
        var head = this.first;
        var iterator = 1;
        while (current != null) {
            anime({
                targets: current.$element[0],
                left: head.$element.css("left"),
                top: head.$element.css("top"),
                duration: 500
            });
            iterator++;
            current = current.next;
        }
    }

    click() {
        if (this.status == "closed") {
            this.open();
        } else {
            this.close();
        }
    }

}

var timeOut;
var menu = new Menu("#myMenu");

var item1 = new Item("list");
var item2 = new Item("die-five", "#FF5C5C");
var item3 = new Item("social-facebook", "#5CD1FF");
var item4 = new Item("social-drive", "#FFF15C");
var item5 = new Item("link", "#64F592");

menu.add(item1);
menu.add(item2);
menu.add(item3);
menu.add(item4);
menu.add(item5);
更多大型互联网web前端实战操作,在线解析,学习指导,学习资源,点:【WEB前端资源】
最后
以上就是天真钢铁侠最近收集整理的关于js背景特效_web前端入门到实战:html5网页特效-拖拽可跟随的图标的全部内容,更多相关js背景特效_web前端入门到实战:html5网页特效-拖拽可跟随内容请搜索靠谱客的其他文章。


发表评论 取消回复