一、插入图片的位置
默认方式:
是跟.tex文件具有相同路径,所以直接写图片名称即可。
includegraphics[width=1linewidth]{graph_rela.png}
当前子文件夹下的图片
是相对路径,写:文件夹名+图片名
includegraphics[width=1linewidth]{figures//graph_rela.png}
其他文件夹的图片
可以采用绝对路径。
includegraphics{D:/matlab/image/zs.eps}
二、图片的导入部分
usepackage{subfigure}
usepackage[graphicx]{realboxes}
三、插入单张图片
begin{figure}
centering %表示居中
includegraphics[height=4.5cm,width=9.5cm]{111.eps}
% [height=4.5cm]表示高度
%[width=9.5cm]表示宽度
%{111.eps}表示eps格式的图片,名为111
caption{pic1}
%图片的名称
label{2}
%图片的标签,用于文章中的引用,注意到标签的数字与实际文章显示的数字可能不同
end{figure}
四、插入单排多图无小标题共享大标题
	begin{figure}[htbp]%%图,[htbp]是浮动格式
	subfigure[]{
	includegraphics[width=2.5cm,height=2.5cm]{figures//hx2.png} label{Fig.6(b)}
}
	hspace{2mm}
	subfigure[]{
	includegraphics[width=2.5cm,height=2.5cm]{figures//hx2.png} label{Fig.6(b)}
}
	hspace{2mm}
	subfigure[]{
		includegraphics[width=2.5cm,height=2.5cm]{figures//hx2.png} label{Fig.6(b)}
	}

	caption{Geographical location and relationship of four types of bike stations }
	end {figure}
注意:不要有回车enter,否则图片会自动跳到下一行
有回车的情况!!!–单排变多排
	begin{figure}[htbp]%%图,[htbp]是浮动格式
	subfigure[]{
	includegraphics[width=2.5cm,height=2.5cm]{figures//hx2.png} label{Fig.6(b)}
}
	hspace{2mm}
	subfigure[]{
	includegraphics[width=2.5cm,height=2.5cm]{figures//hx2.png} label{Fig.6(b)}
}

%% 有回车
	hspace{2mm}
	subfigure[]{
		includegraphics[width=2.5cm,height=2.5cm]{figures//hx2.png} label{Fig.6(b)}
	}

	caption{Geographical location and relationship of four types of bike stations }
	end {figure}
五、插入单排多图有小标题大标题
	begin{figure}[htbp]%%图,[htbp]是浮动格式

	begin{minipage}[t]{0.3linewidth}  label{Fig.4}      %图片占用一行宽度的30%
		hspace{2mm}
		includegraphics[width=3.5cm,height=2cm]{figures//singlegraph.png}
		caption{The relationship between different types of sites.}
	end{minipage}
	begin{minipage}[t]{0.3linewidth}  label{Fig.4}      %图片占用一行宽度的30%
	hspace{2mm}
	includegraphics[width=3.5cm,height=2cm]{figures//singlegraph.png}
	caption{The relationship between different types of sites.}
end{minipage}
		begin{minipage}[t]{0.3linewidth}  label{Fig.4}      %图片占用一行宽度的30%
		hspace{2mm}
		includegraphics[width=3.5cm,height=2cm]{figures//singlegraph.png}
		caption{The relationship between different types of sites.}
	end{minipage}
	end {figure}
如图所示:
注意:如果图片本身过大的时候,如果只调整图片占据的篇幅大小0.3/linewith,则会出先图片重叠的现象。此时,只要对图片的高度和宽度重新调整缩小即可。
六、图片的位置
latex定义了两种浮动体环境:figure 和table,通常分别用于图和表的排版。
6.1 figure环境的语法格式如下:
\begin{figure}[(允许位置)]
(任意内容)
end{figure}
6.2 位置参数
able环境与之类似。其中可选参数(允许位置)用来设定浮动环境可以出现在页面的位置,即h、t、b、p四个选项的组合:
- h 此处(here),浮动体的内容被放在代码所在的上下文位置。
- t 页顶(top),浮动体被放在一页的顶部,这可以是代码所在环境的页面或之后的页面,注意当页排版的浮动体可能出现在实际代码之前。
- b 页底(bottom),浮动体被放在一页的底部。
- d 独立一页(page),一个或多个浮动体被放在单独的页面中,这个页面被称为浮动页(float page),与之对应,有正文的页面称为文本页(text page)。
6.3 栗子
例如用选项 [hbp]就表示允许浮动体出现在环境所在位置、页面底部或单独一页,但不允许出现在一页顶部。浮动体允许位置选项的顺序并不重要,latex总是以htbp的顺序尝试防止浮动体-图片。
七、图片的标题
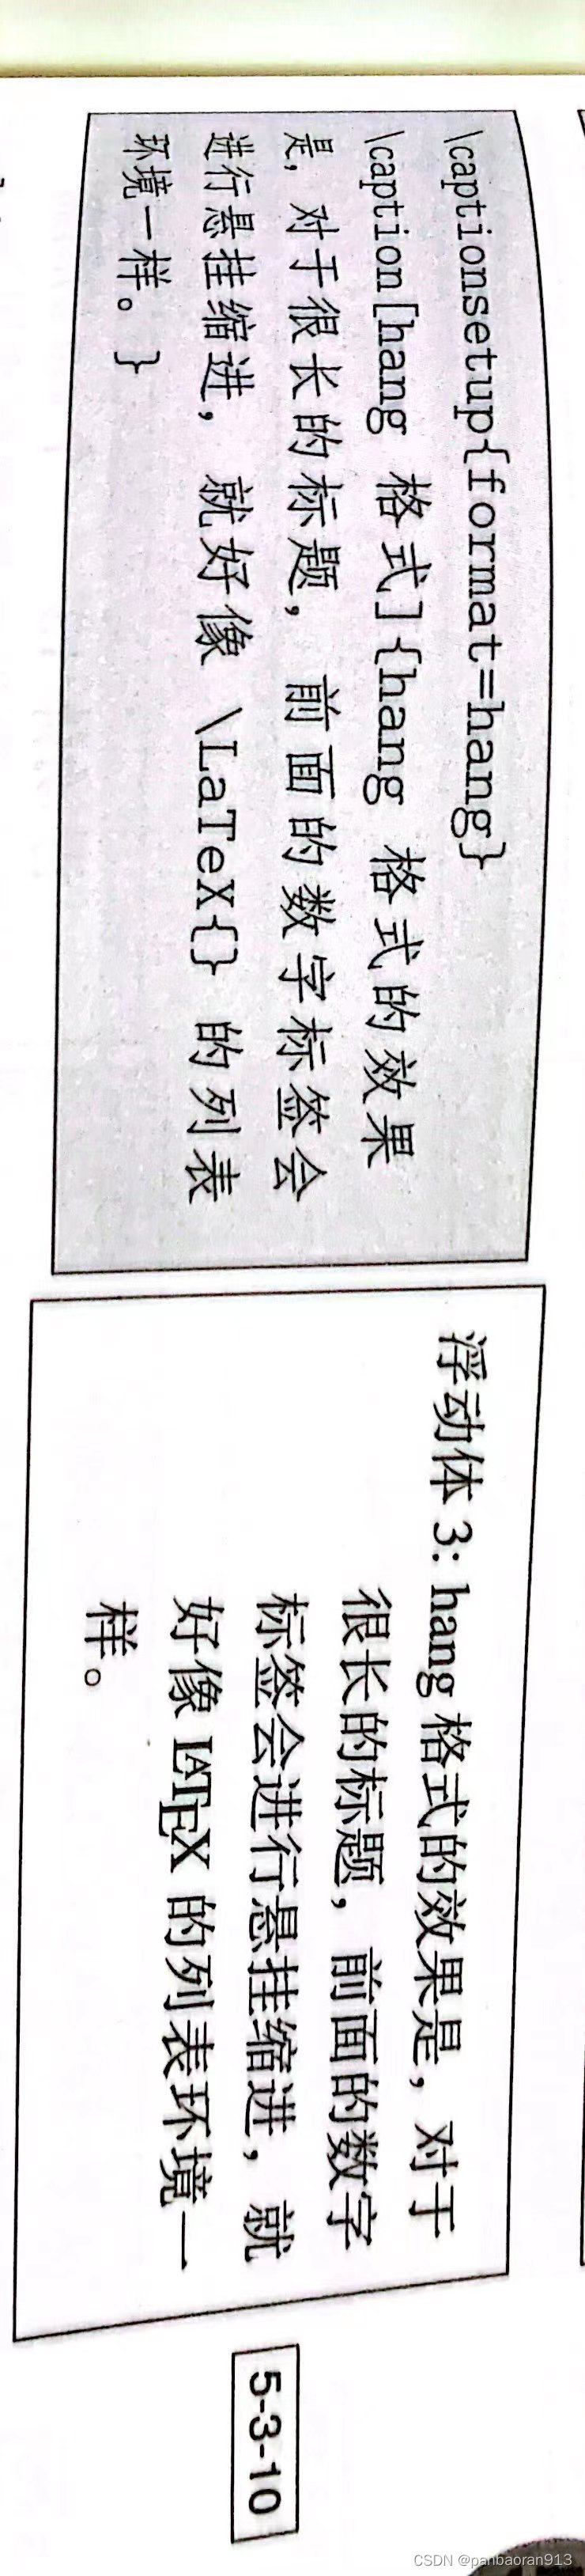
caption宏包定义了plain和hang两种格式。默认格式是plain.
7.1 plain格式
caption{默认居中的短标题}

caption{plain格式下,如果标题很长,折成几行,就会像普通的正文段落一样显示。    只要设置好短标题,就可以把标题分成好几段。}
| 代码 | 图片演示 |
|---|---|
caption{An architecture of GHRL model} |  |
caption{The data representation and information extraction.The figure on the left shows the key information travel record and station information extracted from the bicycle network; The middle figure shows the temporary network and spatial networks built with the bicycle station as the node in the complex network and the relationship between nodes as the edge; The figure on the right shows the node features extracted according to different attributes in time and space and the topology between nodes.} | 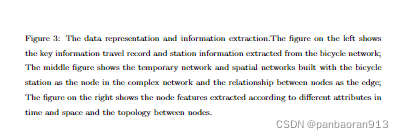 |
7.2 hang格式
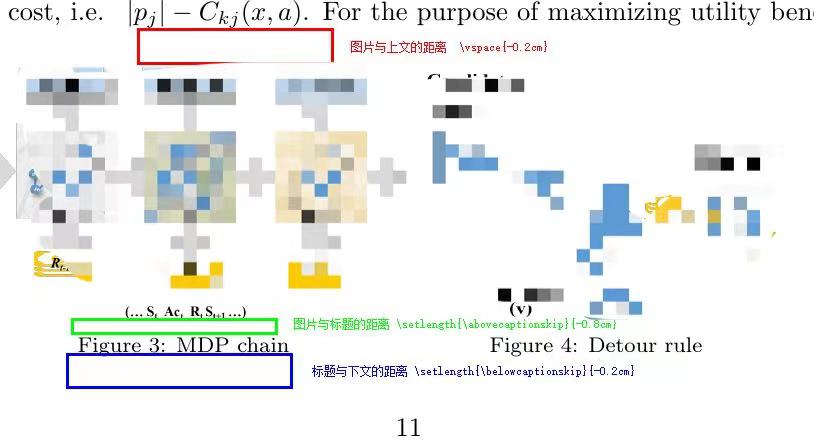
八、图片的间距
	vspace{-0.2cm}  %调整图片与上文的垂直距离
	setlength{abovecaptionskip}{-0.2cm}   %调整图片标题与图距离
	setlength{belowcaptionskip}{-0.2cm} %调整图片标题与下文距离
原代码
begin{figure}[hbp]%%图,[htbp]是浮动格式
   	 	vspace{-0.2cm} %调整图片与上文的垂直距离
    	setlength{abovecaptionskip}{-0.8cm}   %调整图片标题与图距离
    	setlength{belowcaptionskip}{-0.2cm} %调整图片标题与下文距离
	begin{minipage}{0.45linewidth}%%%%%%%%node1
	includegraphics[width=5.5cm,height=3.5cm]{MDPchain.png}
	label{Fig.2}
	caption{MDP chain}
	end{minipage}%%%%%%%%%%node2
	begin{minipage}{0.45linewidth}
	includegraphics[width=5.5cm,height=3.5cm]{userchoose.png}
	caption{Detour rule}
	label{Fig.3}
	end{minipage}
图片参考:
最后
以上就是碧蓝花卷最近收集整理的关于[latex]插入图片的全部内容,更多相关[latex]插入图片内容请搜索靠谱客的其他文章。
本图文内容来源于网友提供,作为学习参考使用,或来自网络收集整理,版权属于原作者所有。


![[latex]插入图片](https://www.shuijiaxian.com/files_image/reation/bcimg5.png)


发表评论 取消回复