首先呢!需要知道上传图片的一个实现逻辑是怎样的。
选择图片——获取图路径——压缩图片——上传获取图片链接
图片上传使用的是view图片上传:
Upload 上传 | uView 2.0 - 全面兼容nvue的uni-app生态框架 - uni-app UI框架
图片压缩使用的是插件库的(支持h5):
图片压缩 - DCloud 插件市场
选择图片
			afterRead(event){ //获取图片地址
				console.log(event.file)
				let files = event.file.map(e=>{ //选择一张或多张时处理
					return e.url
				})
				this.compress(files)  //压缩的方法
			},
获取图片并压缩
			compress(files){//图片压缩并上传
				const that =this
				let compressFile = []
				files.forEach(e=>{  //循环压缩并上传
					that.$refs.wCompress.start(e, { //调用压缩组件方法
							// pixels: 630000,  // 最大分辨率,默认二百万
					        quality: 0.8,     // 压缩质量,默认0.8
					        base64: true,     // 是否返回base64,默认false,非H5有效
					    })
					.then(res => {
					    // console.log(res) //base64格式
						this.uploadFile(res) //调用上传方法
					})
					.catch(e => {
					    console.log(e)
					})
				})
			},
上传获取图片链接
			uploadFile(blobUrl){ //上传获取图片链接
				const that =this
				let url = { //回显格式所以处理了下
					url:blobUrl
				}
				uni.showLoading({title: '上传中'})
					uni.uploadFile({
						url: that.urlA,// 上传地址
						filePath:blobUrl,
						name: 'file',
						header:that.header,
						formData: {
							'safety': 'question'
						},
						success: (res) => {
							let data = JSON.parse(res.data); //解析照片数据格式
							console.log(data)
							if(data.code == 10000){
								that.fileList1.push(url) //成功后回显
								that.imgurl.push(data.data) // 链接地址
								uni.hideLoading();
							}else{
								uni.hideLoading();
								that.$api.msg(`${data.message}`)
							}
						}
				});
			},
以下是整个文件
<template>
	<view class="">
		<w-compress ref='wCompress' />
		<u-upload :fileList="fileList1" @afterRead="afterRead"
			@delete="deletePic" name="1" multiple :maxCount="3" >
		</u-upload>
	</view>
</template>

<script>
	import WCompress from '@/components/w-compress/w-compress.vue'
	export default{
		data(){
			return {
				urlA: '------------', //假的地址
				header:{
					bigDataToken : 'Bearer' + ' ' + uni.getStorageSync('Token'),
					proToken : 'Bearer' + ' ' + uni.getStorageSync('proToken')
				},
				fileList1: [],
				imgurl:[]
			}
		},
		methods:{
			afterRead(event){ //获取图片地址
				console.log(event.file)
				let files = event.file.map(e=>{ //选择一张或多张时处理
					return e.url
				})
				this.compress(files)  //压缩的方法
			},
			deletePic(e){ //删除图片
				console.log(e.index)
				this.imgurl.splice(e.idnex,1)
				this.fileList1.splice(e.index,1)
			},
			compress(files){//图片压缩并上传
				const that =this
				let compressFile = []
				files.forEach(e=>{  //循环压缩并上传
					that.$refs.wCompress.start(e, { //调用压缩组件方法
							// pixels: 630000,  // 最大分辨率,默认二百万
					        quality: 0.8,     // 压缩质量,默认0.8
					        base64: true,     // 是否返回base64,默认false,非H5有效
					    })
					.then(res => {
					    // console.log(res) //base64格式
						this.uploadFile(res) //调用上传方法
					})
					.catch(e => {
					    console.log(e)
					})
				})
			},
			uploadFile(blobUrl){ //上传获取图片链接
				const that =this
				let url = { //回显格式所以处理了下
					url:blobUrl
				}
				uni.showLoading({title: '上传中'})
					uni.uploadFile({
						url: that.urlA,// 上传地址
						filePath:blobUrl,
						name: 'file',
						header:that.header,
						formData: {
							'safety': 'question'
						},
						success: (res) => {
							let data = JSON.parse(res.data); //解析照片数据格式
							console.log(data)
							if(data.code == 10000){
								that.fileList1.push(url) //成功后回显
								that.imgurl.push(data.data) // 链接地址
								uni.hideLoading();
							}else{
								uni.hideLoading();
								that.$api.msg(`${data.message}`)
							}
						}
				});
			},
		}
	}
</script>

<style>
</style>
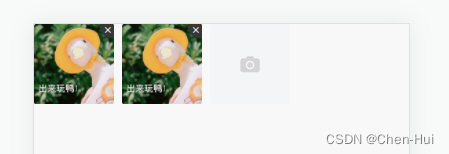
效果图:

最后
以上就是无语耳机最近收集整理的关于uniapp选择图片压缩并上传选择图片获取图片并压缩上传获取图片链接的全部内容,更多相关uniapp选择图片压缩并上传选择图片获取图片并压缩上传获取图片链接内容请搜索靠谱客的其他文章。
本图文内容来源于网友提供,作为学习参考使用,或来自网络收集整理,版权属于原作者所有。


发表评论 取消回复