代码示例
public class WorldCount {

    public static void main(String[] args) throws Exception {

        StreamExecutionEnvironment env = StreamExecutionEnvironment.getExecutionEnvironment();

        //所以算子的并行度为1
        //方便调试
        env.setParallelism(1);


        DataStream<Tuple2<String, Integer>> dataStream = env
                .socketTextStream("localhost", 9001)
                .flatMap(new Splitter())
                .keyBy(0)
                .timeWindow(Time.seconds(5))
                .sum(1);

        dataStream.print();


        System.out.println(env.getExecutionPlan());

        env.execute("Window WordCount");
    }

    public static class Splitter implements FlatMapFunction<String, Tuple2<String, Integer>> {
        @Override
        public void flatMap(String sentence, Collector<Tuple2<String, Integer>> out) throws Exception {
            for (String word : sentence.split(" ")) {
                out.collect(new Tuple2<String, Integer>(word, 1));
            }
        }
    }
}
DefaultScheduler
默认的调度器,任务全部调度起来
入口
前面部分可参考 https://blog.csdn.net/qq_22222499/article/details/106179435
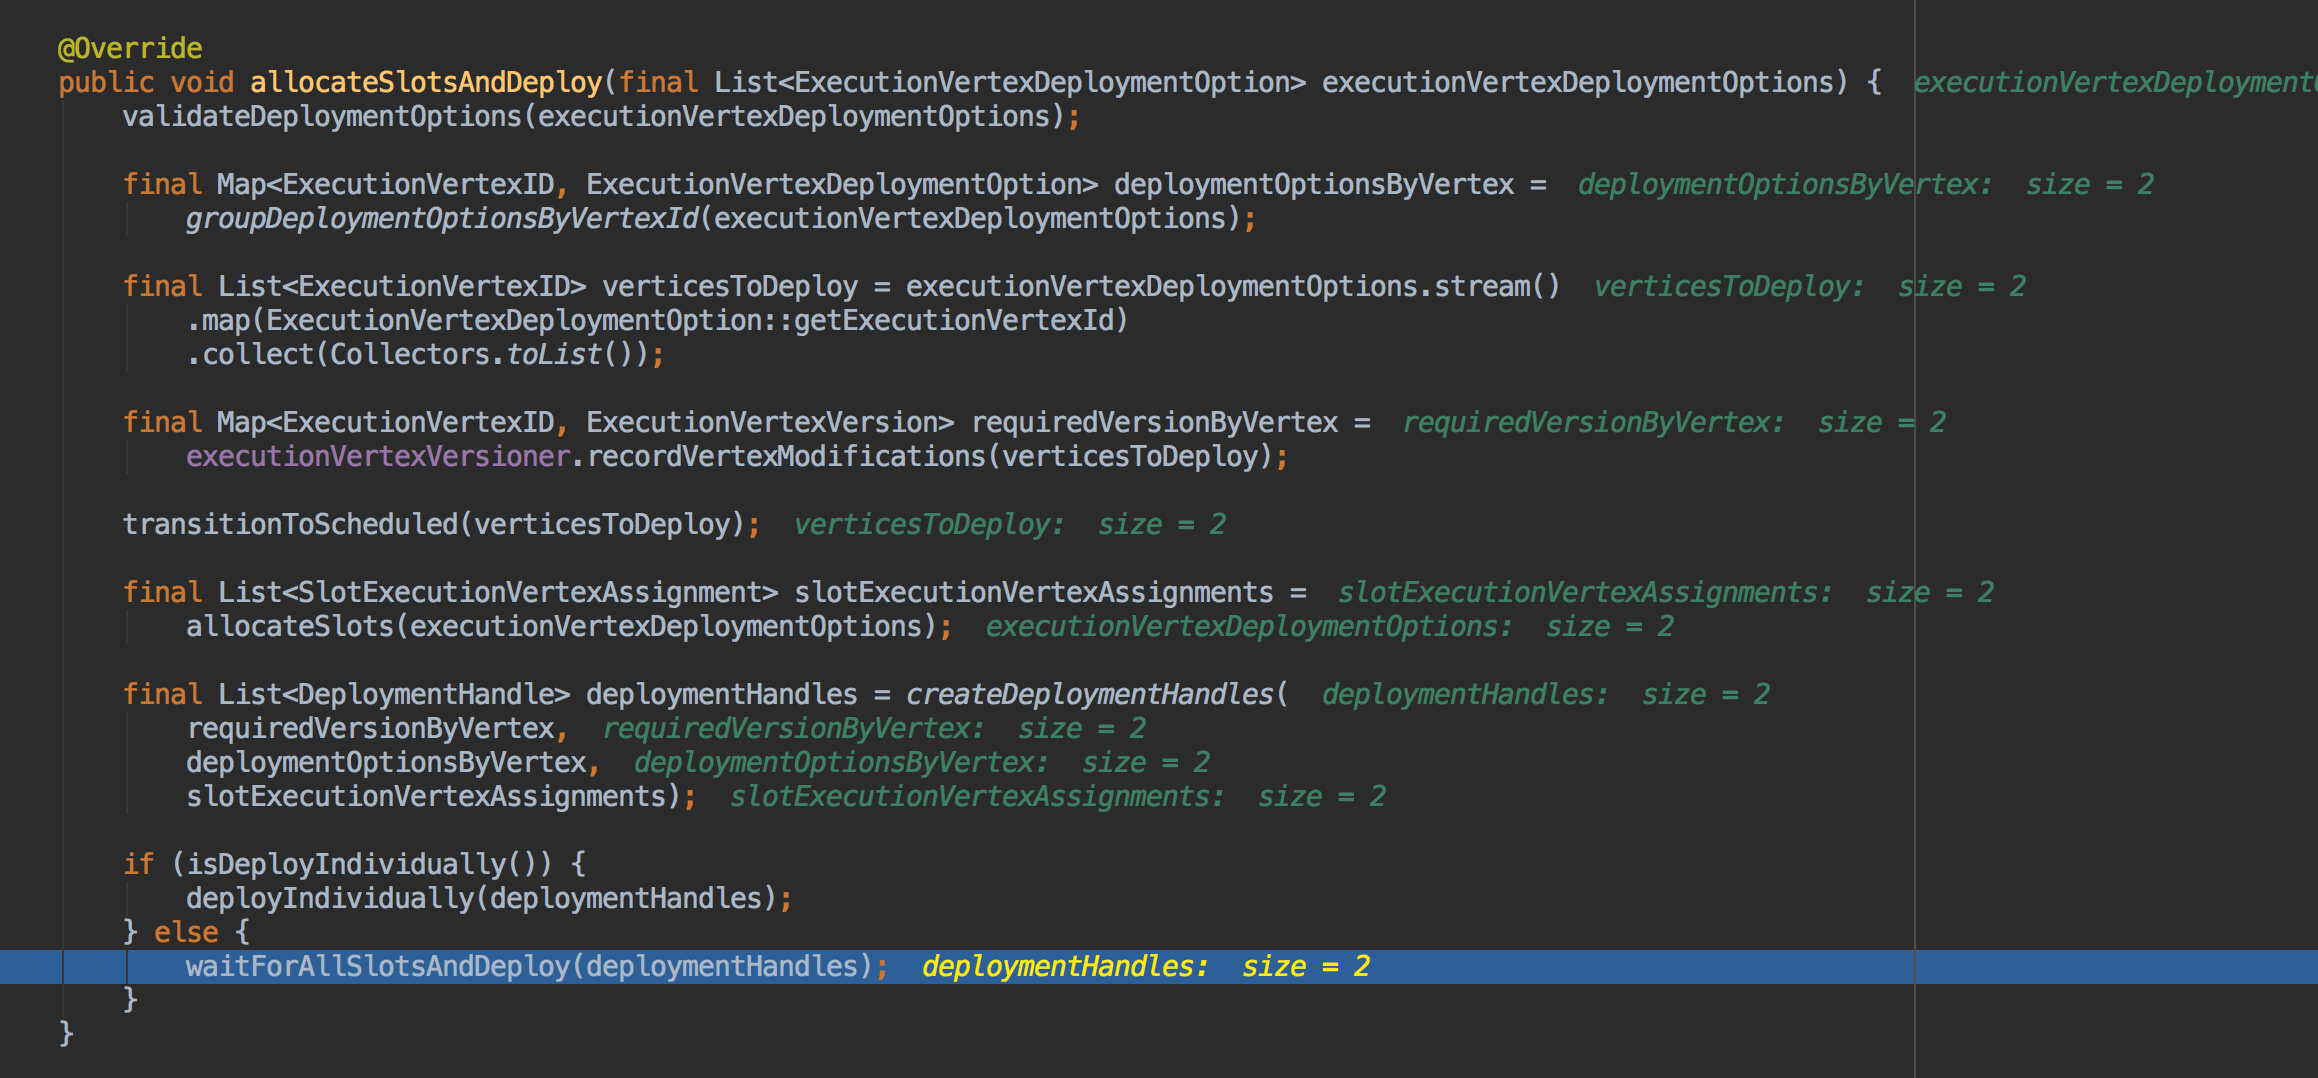
这里有一个比较重要的地方waitForAllSlotsAndDeploy(deploymentHandles)
这个地方有一个值得注意的,这里明显能看到拆成了两个任务,source算子和map算子合在了一起,窗口函数在别一个task里

部署所有的task
这里部署这两个任务
private BiFunction<Void, Throwable, Void> deployAll(final List<DeploymentHandle> deploymentHandles) {
		return (ignored, throwable) -> {
			propagateIfNonNull(throwable);
			for (final DeploymentHandle deploymentHandle : deploymentHandles) {
				final SlotExecutionVertexAssignment slotExecutionVertexAssignment = deploymentHandle.getSlotExecutionVertexAssignment();
				final CompletableFuture<LogicalSlot> slotAssigned = slotExecutionVertexAssignment.getLogicalSlotFuture();
				checkState(slotAssigned.isDone());

				FutureUtils.assertNoException(
					slotAssigned.handle(deployOrHandleError(deploymentHandle)));
			}
			return null;
		};
	}
Execution
走到deploy方法
public void deploy() throws JobException {
            //这里提交任务
			CompletableFuture.supplyAsync(() -> taskManagerGateway.submitTask(deployment, rpcTimeout), executor)
	}
TaskExecutor 执行任务
public CompletableFuture<Acknowledge> submitTask(
			TaskDeploymentDescriptor tdd,
			JobMasterId jobMasterId,
			Time timeout) {
			//生成task
			Task task = new Task(
				jobInformation,
				taskInformation,
				tdd.getExecutionAttemptId(),
				tdd.getAllocationId(),
				tdd.getSubtaskIndex(),
				tdd.getAttemptNumber(),
				tdd.getProducedPartitions(),
				tdd.getInputGates(),
				tdd.getTargetSlotNumber(),
				memoryManager,
				taskExecutorServices.getIOManager(),
				taskExecutorServices.getShuffleEnvironment(),
				taskExecutorServices.getKvStateService(),
				taskExecutorServices.getBroadcastVariableManager(),
				taskExecutorServices.getTaskEventDispatcher(),
				taskStateManager,
				taskManagerActions,
				inputSplitProvider,
				checkpointResponder,
				aggregateManager,
				blobCacheService,
				libraryCache,
				fileCache,
				taskManagerConfiguration,
				taskMetricGroup,
				resultPartitionConsumableNotifier,
				partitionStateChecker,
				getRpcService().getExecutor());
			taskMetricGroup.gauge(MetricNames.IS_BACKPRESSURED, task::isBackPressured);
			log.info("Received task {}.", task.getTaskInfo().getTaskNameWithSubtasks());
			boolean taskAdded;
			try {
				taskAdded = taskSlotTable.addTask(task);
			} catch (SlotNotFoundException | SlotNotActiveException e) {
				throw new TaskSubmissionException("Could not submit task.", e);
			}
			if (taskAdded) {
			    //task启动
				task.startTaskThread();
			}
	}
Task 最终的task
这里task启动
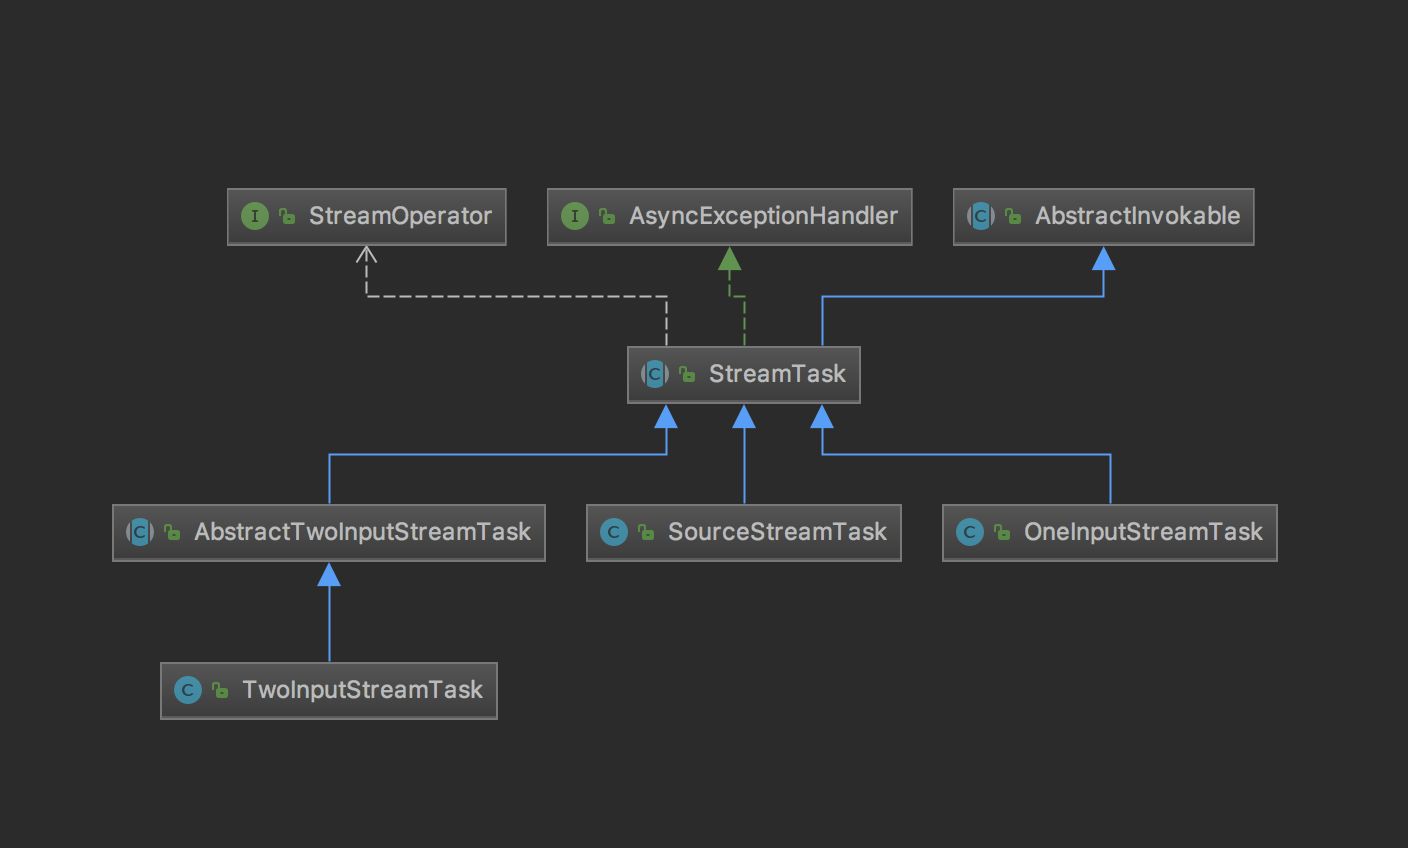
invokable 这里生成的是具体的task类
private void doRun() {
			invokable = loadAndInstantiateInvokable(userCodeClassLoader, nameOfInvokableClass, env);
			invokable.invoke();
	}
类图关系

最后
以上就是粗暴保温杯最近收集整理的关于Flink源码-7-Scheduler的全部内容,更多相关Flink源码-7-Scheduler内容请搜索靠谱客的其他文章。
本图文内容来源于网友提供,作为学习参考使用,或来自网络收集整理,版权属于原作者所有。


发表评论 取消回复