参考:
http://blog.csdn.net/u012706811/article/details/51059419
http://blog.csdn.net/u012660464/article/details/53434331
一、文件上传
1.引入依赖包
在pom.xml文件中添加如下内容,引入 commons-fileupload 和 commons-io 两个包。
<dependency>
    <groupId>commons-fileupload</groupId>
    <artifactId>commons-fileupload</artifactId>
    <version>1.3.1</version>
</dependency>

<dependency>
    <groupId>commons-io</groupId>
    <artifactId>commons-io</artifactId>
    <version>2.3</version>
</dependency>
2.spring-mvc.xml
<!--文件上传-->
<bean id="multipartResolver" class="org.springframework.web.multipart.commons.CommonsMultipartResolver">
<!--最大上传大小(字节)-->
<property name="maxUploadSize" value="1048576" />
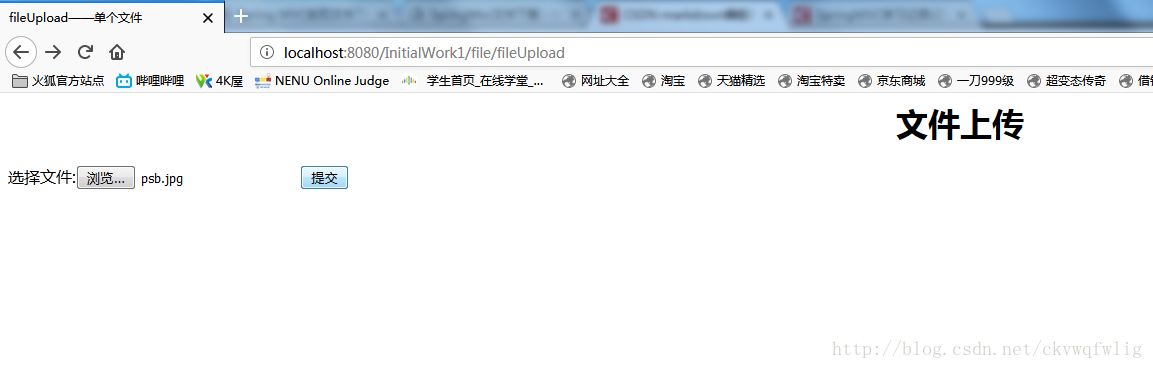
</bean>3.fileUpload.jsp
form中加入 enctype=”multipart/form-data” 属性,表示将文件一二进制流传输,否则报错。
<%@ page contentType="text/html;charset=UTF-8" language="java" %>
<html>
<head>
    <title>fileUpload —— 单个文件</title>
</head>
<body>
<h1 align = "center">文件上传</h1>
<form action = "${website}FileController" enctype="multipart/form-data" method = "post">
    选择文件:<input type="file" name = "file">
    <input type="submit" value = "提交">
</form>
</body>
</html>
4.Success.jsp
<%@ page contentType="text/html;charset=UTF-8" language="java" %>
<html>
<head>
    <title>success</title>
</head>
<body>
<h1 align="center">Success!</h1>
</body>
</html>
5.index.jsp
<%@ page contentType="text/html;charset=UTF-8" language="java" %>
<html>
<body>
<h2 align="center">Hello World!</h2>
<a href="${website}admin/listUser">进入用户管理界面</a>
<a href="${website}file/fileUpload">上传单个文件</a>
<a href="${website}file/multiFileUpload">上传多个文件</a>
<%--<a href="${website}file/fileDownload">下载文件</a>--%>
<a href="${website}file/download">下载指定文件</a>

</body>
</html>

6.FileController
    /**
     * 去文件上传页面
     *
     * @return
     */
    @RequestMapping(value = "fileUpload", method = RequestMethod.GET)
    public String toFileUpload(){
        return "/file/fileUpload";
    }

    /**
     * 单个文件上传
     *
     * @param file
     * @return
     */
    @RequestMapping(value = "upload", method = RequestMethod.POST)
    public String fileUpload(@RequestParam("file")MultipartFile file){
        if (!file.isEmpty()){
            try {
                //存入F:temp目录下
                FileUtils.copyInputStreamToFile(file.getInputStream(), new File("F:\temp",
                        System.currentTimeMillis()+ file.getOriginalFilename()));
            } catch (IOException e){
                e.printStackTrace();
            }
        }
        //上传成功,跳转至success页面
        return "file/success";
    }
7.多个文件上传
    /**
     * 去多个文件上传页面
     *
     * @return
     */
    @RequestMapping(value = "multiFileUpload", method = RequestMethod.GET)
    public String toMultiFileUpload(){
        return "/file/multiFileUpload";
    }

    /**
     * 多个文件上传
     *
     * @param multiRequest
     * @return
     */
    @RequestMapping(value = "multiUpload", method = RequestMethod.POST)
    public String multiFileUpload(MultipartHttpServletRequest multiRequest) throws IOException {
        Iterator<String> filesNames = multiRequest.getFileNames(); //获得所有的文件名
        while(filesNames.hasNext()){    //迭代,对单个文件进行操作
            String fileName =filesNames.next();
            MultipartFile file =  multiRequest.getFile(fileName);
            if(!file.isEmpty()){
                FileUtils.copyInputStreamToFile(file.getInputStream(), new File("F:\temp",
                        System.currentTimeMillis()+ file.getOriginalFilename()));
            }

        }
        //上传成功,跳转至success页面
        return "file/success";
    }
二、文件下载
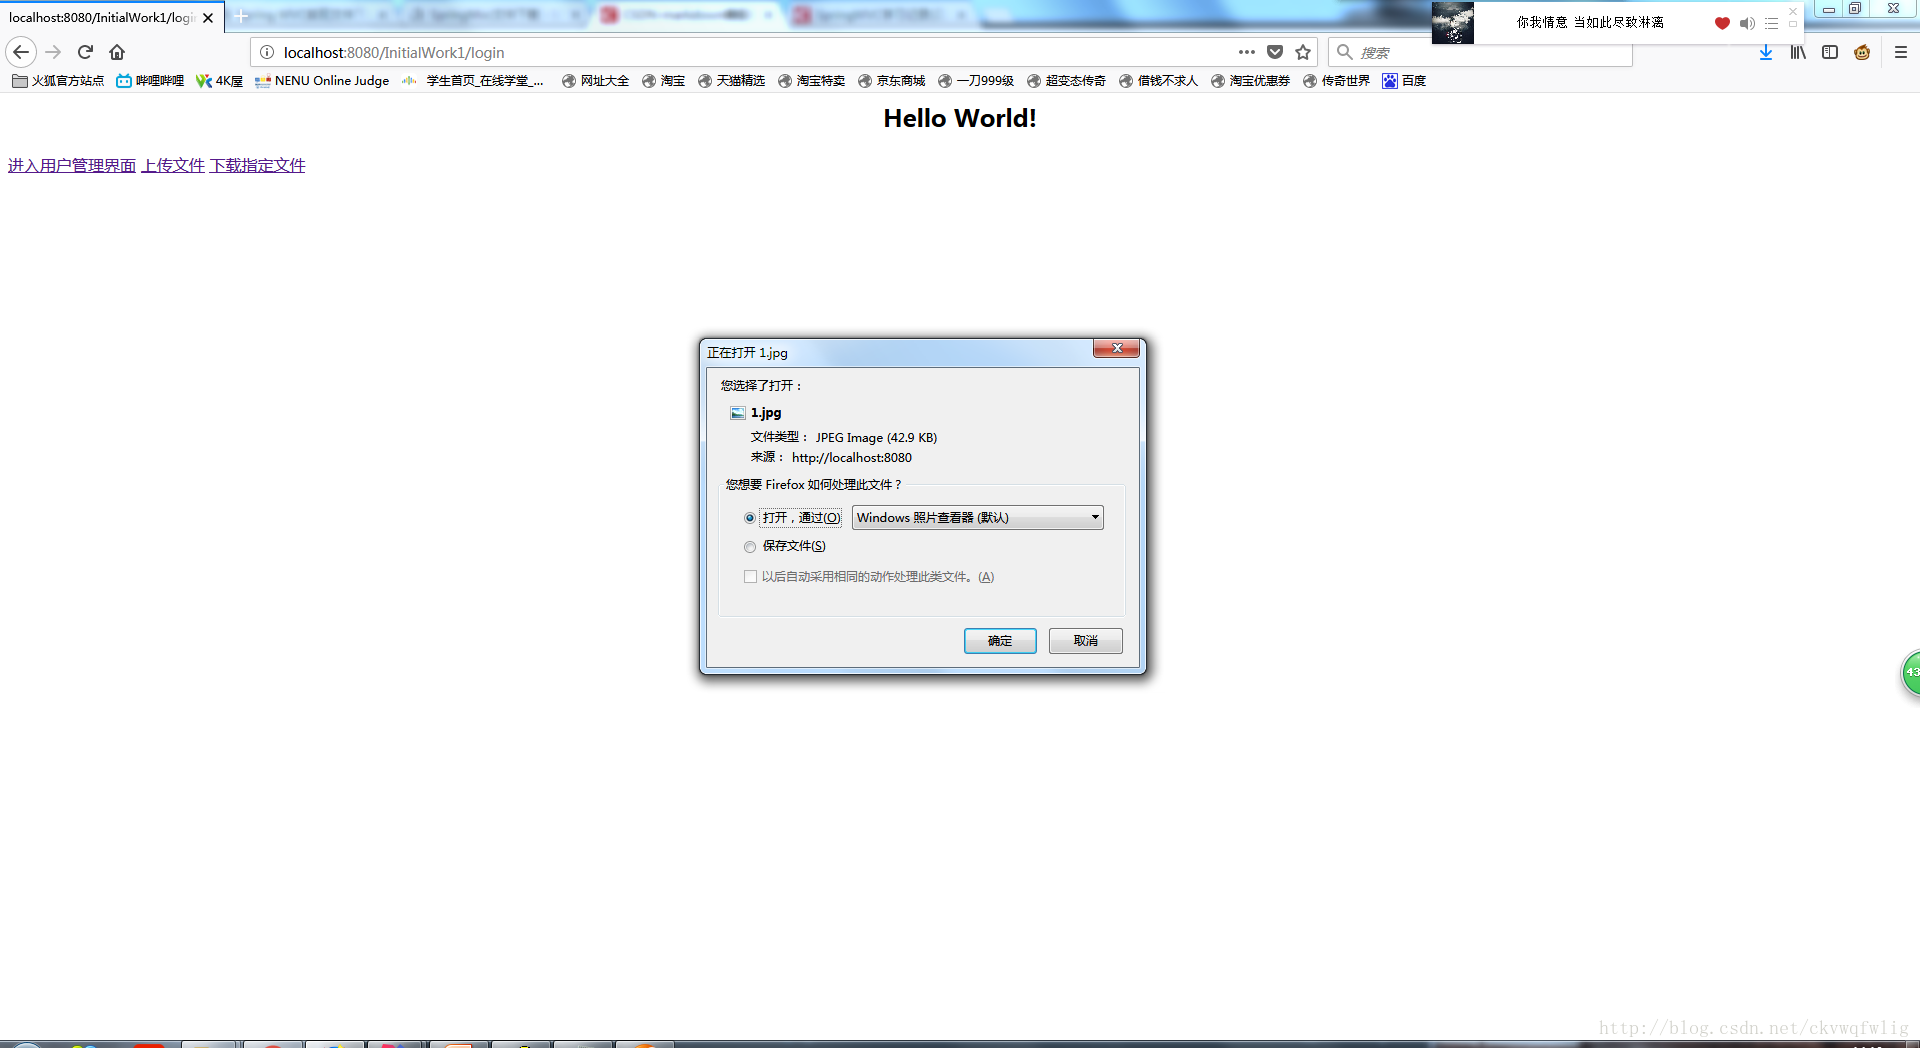
1.index.jsp
<%@ page contentType="text/html;charset=UTF-8" language="java" %>
<html>
<body>
<h2 align="center">Hello World!</h2>
<a href="${website}admin/listUser">进入用户管理界面</a>
<a href="${website}file/fileUpload">上传文件</a>
<%--<a href="${website}file/fileDownload">下载文件</a>--%>
<a href="${website}file/download">下载指定文件</a>

</body>
</html>
2.FileController
现在实现的功能是点击“下载指定文件”则下载在controller中指定好的文件,还没有实现把上传的文件传入数据库,也没实现下载数据库中要存的文件,日后慢慢改进。
    /**
     * 指定文件下载
     *
     * @return
     * @throws IOException
     */
    @RequestMapping(value = "download",produces = "application/octet-stream;charset=UTF-8")
    public ResponseEntity<byte[]> download() throws IOException {
//                指定文件,必须是绝对路径
        File file = new File("F:\temp\1513489657107psb.jpg");
//                下载浏览器响应的那个文件名
        String dfileName = "1.jpg";
//                下面开始设置HttpHeaders,使得浏览器响应下载
        HttpHeaders headers = new HttpHeaders();
//                设置响应方式
        headers.setContentType(MediaType.APPLICATION_OCTET_STREAM);
//                设置响应文件
        headers.setContentDispositionFormData("attachment", dfileName);
//                把文件以二进制形式写回
        return new ResponseEntity<byte[]>(FileUtils.readFileToByteArray(file), headers, HttpStatus.CREATED);
    }
效果
最后
以上就是眯眯眼指甲油最近收集整理的关于SpringMVC——实现文件上传下载的全部内容,更多相关SpringMVC——实现文件上传下载内容请搜索靠谱客的其他文章。
本图文内容来源于网友提供,作为学习参考使用,或来自网络收集整理,版权属于原作者所有。


![SpringMVC实现文件上传报错:rejected value [org.springframework.web.multipart.commons.CommonsMultipartFile@*]](https://www.shuijiaxian.com/files_image/reation/bcimg13.png)


发表评论 取消回复