准备:
关闭selinux
被监控节点安装gmond
监控节点安装gmeta,ganglia-web,nginx
一、安装CentOS 企业扩展YUM源
# yum install epel-release二、安装依赖包
yum -y install gcc glibc glibc-common rrdtool rrdtool-devel apr apr-devel expat expat-devel
pcre pcre-devel dejavu-lgc-sans-mono-fonts dejavu-sans-mono-fonts zlib zlib-devel libconfuse libconfuse-devel
三、下载Ganglia
Ganglia
http://jaist.dl.sourceforge.net/project/ganglia/ganglia%20monitoring%20core/3.7.2/ganglia-3.7.2.tar.gz
Ganglia-web
http://jaist.dl.sourceforge.net/project/ganglia/ganglia-web/3.7.2/ganglia-web-3.7.2.tar.gz
四、监控端安装gmond及gmeta
# cd ganglia-3.7.2
# ./configure --prefix=/usr/local/ganglia --with-gmetad --enable-gexec
# make && make install
五、安装nginx
# yum install nginx -y
# chkconfig nginx on
# systemctl start nginx
六、安装php
# yum --enablerepo=remi,remi-php55 install php-fpm php-common php-devel php-mysqlnd php-mbstring php-mcrypt
# chkconfig php-fpm on
# systemctl start php-fpm
七、配置nginx代理访问php
# vim /etc/nginx/nginx.conf
## server处增加location配置块:
location ~ .php$ {
root
/var/www;
fastcgi_pass
127.0.0.1:9000;
fastcgi_index
index.php;
fastcgi_param
 SCRIPT_FILENAME  $document_root/$fastcgi_script_name;
include
fastcgi_params;
}
##重启nginx
# systemctl restart nginx
7-1 测试PHP+Nginx
# cd /var/www
# vim test.php
<?php
phpinfo();
?>
:wq
访问:http//<php server ip>/test.php,出现如下界面即为调试成功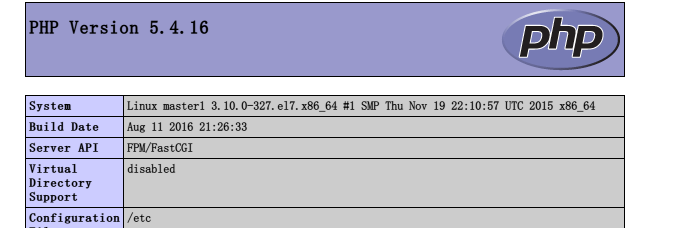
八、配置gmeta
# mkdir -p /var/lib/ganglia/rrds
# chown nobody:nobody /var/lib/ganglia/rrds
# cd ganglia-3.7.2
# cp ./gmetad/gmetad.init
/etc/init.d/gmetad
##修改gmetad
##具体值通过“find / -name 'gmetad' -print”查
# vim /etc/init.d/gmetad
GMETAD=/usr/local/ganglia/sbin/gmetad
##修改gmetad.conf配置文件
##如果文件不存在:cp ./gmetad/gmetad.conf
/usr/local/ganglia/etc
#vim
/usr/local/ganglia/etc/gmetad.conf
data_source "my grid" 192.168.0.136
xml_port
8651
interactive_port
8652
rrd_rootdir
"/var/lib/ganglia/rrds"
case_sensitive_hostnames
0
# chkconfig --add gmetad
# service gmetad restart
# 可以通过日志 tail -f /var/log/messages 查看启动情况
九、配置gmond
# cd ganglia-3.7.0
# cp ./gmond/gmond.init
/etc/init.d/gmond
# ./gmond/gmond -t > /usr/local/ganglia/etc/gmond.conf
##修改gmond配置
# vim
/etc/init.d/gmond
GMOND=/usr/local/ganglia/sbin/gmond
##修改gmond.conf配置
# vim
/usr/local/ganglia/etc/gmond.conf
cluster {
name = "my cluster" #要与gmated.conf中data_source的名称相同
owner = "nobody"
latlong = "unspecified"
url = "unspecified"
}
##配置网络(多播,单播)
udp_send_channel {
#bind_hostname = yes # Highly recommended, soon to be default.
# This option tells gmond to use a source address
# that resolves to the machine's hostname.
Without
# this, the metrics may appear to come from any
# interface and the DNS names associated with
# those IPs will be used to create the RRDs.
mcast_join = master1
port = 8649
ttl = 1
}
udp_recv_channel {
#mcast_join = 239.2.11.71
port = 8649
#bind = 239.2.11.71
retry_bind = true
# Size of the UDP buffer. If you are handling lots of metrics you really
# should bump it up to e.g. 10MB or even higher.
# buffer = 10485760
}
tcp_accept_channel {
port = 8649
# If you want to gzip XML output
gzip_output = no
}
重启gmond
service gmond restart
十、安装Ganglia Web
tar -zxvf ganglia-web-3.7.2.tar.gz
cd ganglia-web-3.7.2
vim Makefile
GDESTDIR = /var/www/ganglia
APACHE_USER = apache
# 与 /etc/php-fpm.d/www.conf 中user保持一致
make install
十一、配置nginx访问ganglia
Nginx新增ganglia文件目录访问配置
# vim /etc/nginx/nginx.conf
location /ganglia {
root
/var/www;
index
index.html index.htm index.php;
}
:wq
cd /var/www
chown -R apache:apache ganglia/
十二、配置Ganglia Web
# cd /var/www/ganglia
# cp conf_default.php conf.php
# vim conf.php
##conf.php中有些默认配置和以上设置不一样的需要进行修改:
============================================================================================
$conf['gweb_root'] = "/var/www/ganglia";
$conf['gweb_confdir'] = "/var/www/ganglia";
include_once $conf['gweb_root'] . "/version.php";
#
# 'readonly': No authentication is required.
All users may view all resources.
No edits are allowed.
#
'enabled': Guest users may view public clusters.
Login is required to make changes.

#
An administrator must configure an authentication scheme and ACL rules.
# 'disabled': Guest users may perform any actions, including edits.
No authentication is required.
$conf['auth_system'] = 'readonly';
#
# The name of the directory in "./templates" which contains the
# templates that you want to use. Templates are like a skin for the
# site that can alter its look and feel.
#
$conf['template_name'] = "default";
#
# If you installed gmetad in a directory other than the default
# make sure you change it here.
#
# Where gmetad stores the rrd archives.
$conf['gmetad_root'] = "/var/lib/ganglia";
$conf['rrds'] = "${conf['gmetad_root']}/rrds";
# Where Dwoo (PHP templating engine) store compiled templates
$conf['dwoo_compiled_dir'] = "${conf['gweb_confdir']}/dwoo/compiled";
##如果不存在可以手动创建并注意权限
$conf['dwoo_cache_dir'] = "${conf['gweb_confdir']}/dwoo/cache";
# Where to store web-based configuration
$conf['views_dir'] = $conf['gweb_confdir'] . '/conf';
$conf['conf_dir'] = $conf['gweb_confdir'] . '/conf';
# Where to find filter configuration files, if not set filtering
# will be disabled
#$conf['filter_dir'] = "${conf['gweb_confdir']}/filters";
# Leave this alone if rrdtool is installed in $conf['gmetad_root'],
# otherwise, change it if it is installed elsewhere (like /usr/bin)
$conf['rrdtool'] = "/bin/rrdtool";
##通过命令 which rrdtool 查看
十三、重启服务并查看结果
service gmond start
service gmetad start
service php-fpm start
service nginx start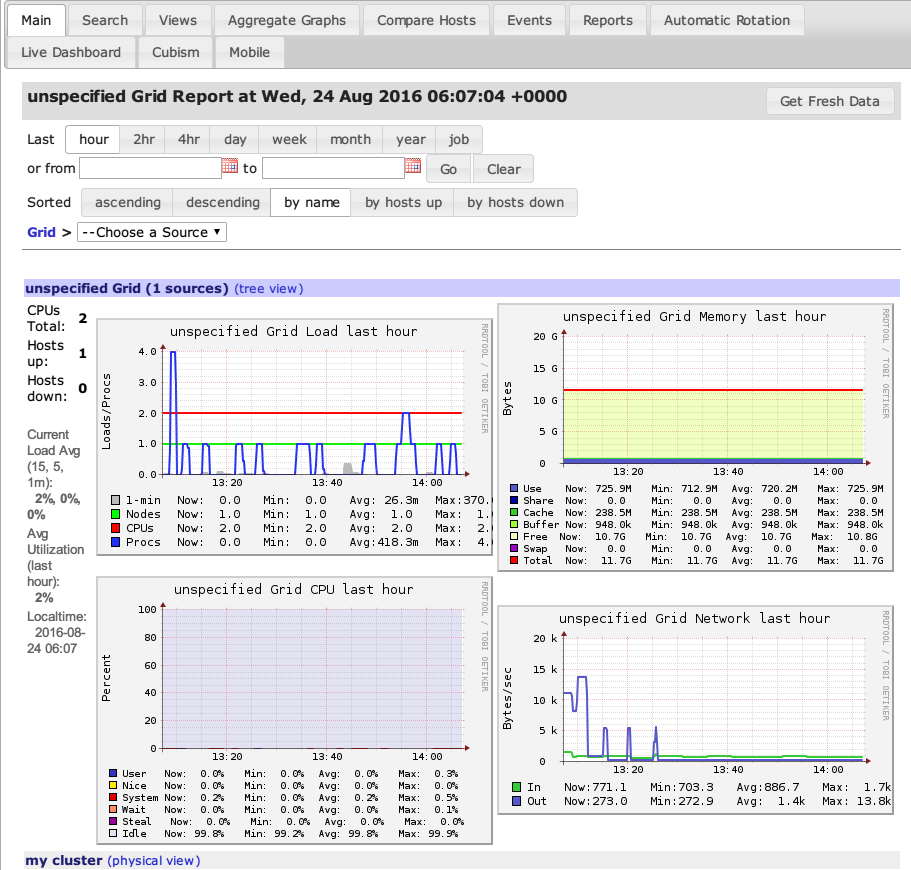
十四、写在后面
日志位置 :/var/log/message
查看服务状态:systemctl status “service name”
gmeta的pid位置:/usr/local/ganglia/var/run/gmetad.pid 目录不存在可以手工建立
十五、参考
http://blog.csdn.net/xxd851116/article/details/25346553
http://my.oschina.net/u/1459307/blog/208933
http://blog.csdn.net/wuwenxiang91322/article/details/45696661
https://www.ibm.com/developerworks/cn/linux/l-ganglia-nagios-1/
http://www.cnblogs.com/wukenaihe/archive/2013/03/21/2972837.html
最后
以上就是靓丽蜜蜂最近收集整理的关于Centos7+Nginx 安装 Ganglia3.7.2的全部内容,更多相关Centos7+Nginx内容请搜索靠谱客的其他文章。
本图文内容来源于网友提供,作为学习参考使用,或来自网络收集整理,版权属于原作者所有。


发表评论 取消回复