CentOS7 部署Cobbler(PXE)实现自动化安装Centos、Windows
1 环境:
| 系统 | CentOS7.5 |
| IP | 192.168.100.2 |
Cobbler是基于PXE的升级版,简化了配置步骤,能同时管理DHCP、TFTP等,还提供了web界面,但是没有记录下来,我大概看了下,web界面还是挺方便的,感兴趣的童鞋可以安装看看
这里用的是CentOS7.5,我用CentOS7.2也是成功了,所以理论上,CentOS7各版本都是可以的
2 cobbler部署
2.1 关闭防火墙
# systemctl stop firewalld
# systemctl disable firewalld
2.2 关闭selinux
# setenforce 0
# sed -i "s/^SELINUX=.*/SELINUX=permissive/g" /etc/sysconfig/selinux
2.3 安装epel源
# yum install -y epel-release
2.4 安装cobbler及其相关软件
# yum -y install cobbler dhcp tftp-server pykickstart httpd
2.5 修改cobbler配置文件
2.5.1 修改server和next_server参数
# vi /etc/cobbler/settings
将server: 127.0.0.1修改为server: 192.168.100.2
将next_server: 127.0.0.1修改为next_server: 192.168.100.2
这里的192.168.100.2为当前节点IP
2.5.2 修改default_password_crypted参数
# openssl passwd -1 -salt 'passwd' '123456'
$1$passwd$h/du.ylwCiLuPa1Br.Ho2.
这里的123456设置的是默认密码
将得到的结果替换default_password_crypted的参数
例如:
# vi /etc/cobbler/settings
default_password_crypred: "$1$passwd$h/du.ylwCiLuPa1Br.Ho2."
2.5.3 开启管理DHCP
# vi /etc/cobbler/settings
将manage_dhcp参数改为1
将pxe_just_once参数改为1
修改DHCP模板
# vi /etc/cobbler/dhcp.template
subnet 192.168.100.0 netmask 255.255.255.0 {
     option routers             192.168.100.1;
     option domain-name-servers 114.114.114.114;
     option subnet-mask         255.255.255.0;
     range dynamic-bootp        192.168.100.10 192.168.100.200;
     default-lease-time         21600;
     max-lease-time             43200;
     next-server                $next_server;
2.6 启用tftp
将/etc/xinetd.d/tftp的disable选项改为no
# /etc/xinetd.d/tftp
disable = no
2.7 启动相关服务
# systemctl start httpd rsyncd tftp cobblerd
# systemctl enable httpd rsyncd tftp cobblerd
2.8 检查cobbler
# cobbler check
The following are potential configuration items that you may want to fix:


1 : Some network boot-loaders are missing from /var/lib/cobbler/loaders, you may run 'cobbler get-loaders' to download them, or, if you only want to handle x86/x86_64 netbooting, you may ensure that you have installed a *recent* version of the syslinux package installed and can ignore this message entirely.  Files in this directory, should you want to support all architectures, should include pxelinux.0, menu.c32, elilo.efi, and yaboot. The 'cobbler get-loaders' command is the easiest way to resolve these requirements.

2 : debmirror package is not installed, it will be required to manage debian deployments and repositories

3 : fencing tools were not found, and are required to use the (optional) power management features. install cman or fence-agents to use them


Restart cobblerd and then run 'cobbler sync' to apply changes.
2.9 修复上述检查出的问题1,其中问题2、3可以忽略
# cobbler get-loaders
task started: 2018-12-12_110817_get_loaders
task started (id=Download Bootloader Content, time=Wed Dec 12 11:08:17 2018)
downloading https://cobbler.github.io/loaders/README to /var/lib/cobbler/loaders/README
downloading https://cobbler.github.io/loaders/COPYING.elilo to /var/lib/cobbler/loaders/COPYING.elilo
downloading https://cobbler.github.io/loaders/COPYING.yaboot to /var/lib/cobbler/loaders/COPYING.yaboot
downloading https://cobbler.github.io/loaders/COPYING.syslinux to /var/lib/cobbler/loaders/COPYING.syslinux
downloading https://cobbler.github.io/loaders/elilo-3.8-ia64.efi to /var/lib/cobbler/loaders/elilo-ia64.efi
downloading https://cobbler.github.io/loaders/yaboot-1.3.17 to /var/lib/cobbler/loaders/yaboot
downloading https://cobbler.github.io/loaders/pxelinux.0-3.86 to /var/lib/cobbler/loaders/pxelinux.0
downloading https://cobbler.github.io/loaders/menu.c32-3.86 to /var/lib/cobbler/loaders/menu.c32
downloading https://cobbler.github.io/loaders/grub-0.97-x86.efi to /var/lib/cobbler/loaders/grub-x86.efi
downloading https://cobbler.github.io/loaders/grub-0.97-x86_64.efi to /var/lib/cobbler/loaders/grub-x86_64.efi
*** TASK COMPLETE ***
2.10 重启cobblerd服务,并进行同步
# systemctl restart cobblerd
# cobbler sync
task started: 2018-12-12_110924_sync
task started (id=Sync, time=Wed Dec 12 11:09:24 2018)
running pre-sync triggers
cleaning trees
removing: /var/lib/tftpboot/grub/images
copying bootloaders
trying hardlink /var/lib/cobbler/loaders/pxelinux.0 -> /var/lib/tftpboot/pxelinux.0
trying hardlink /var/lib/cobbler/loaders/menu.c32 -> /var/lib/tftpboot/menu.c32
trying hardlink /var/lib/cobbler/loaders/yaboot -> /var/lib/tftpboot/yaboot
trying hardlink /usr/share/syslinux/memdisk -> /var/lib/tftpboot/memdisk
trying hardlink /var/lib/cobbler/loaders/grub-x86.efi -> /var/lib/tftpboot/grub/grub-x86.efi
trying hardlink /var/lib/cobbler/loaders/grub-x86_64.efi -> /var/lib/tftpboot/grub/grub-x86_64.efi
copying distros to tftpboot
copying images
generating PXE configuration files
generating PXE menu structure
rendering DHCP files
generating /etc/dhcp/dhcpd.conf
rendering TFTPD files
generating /etc/xinetd.d/tftp
cleaning link caches
running post-sync triggers
running python triggers from /var/lib/cobbler/triggers/sync/post/*
running python trigger cobbler.modules.sync_post_restart_services
running: dhcpd -t -q
received on stdout:
received on stderr:
running: service dhcpd restart
received on stdout:
received on stderr: Redirecting to /bin/systemctl restart dhcpd.service

running shell triggers from /var/lib/cobbler/triggers/sync/post/*
running python triggers from /var/lib/cobbler/triggers/change/*
running python trigger cobbler.modules.scm_track
running shell triggers from /var/lib/cobbler/triggers/change/*
*** TASK COMPLETE ***
2.11 再次检查cobbler
# cobbler check
The following are potential configuration items that you may want to fix:

1 : debmirror package is not installed, it will be required to manage debian deployments and repositories
2 : fencing tools were not found, and are required to use the (optional) power management features. install cman or fence-agents to use them

Restart cobblerd and then run 'cobbler sync' to apply changes.
刚刚的问题1已经解决了
3 安装CentOS7.5系统
3.1 挂载CentOS7.5镜像文件
# mkdir /mnt/CentOS7.5
# mount CentOS-7-x86_64-DVD-1804.iso /mnt/CentOS7.5/
3.2 导入镜像
#  cobbler import --path=/mnt/CentOS7.5 --name=CentOS7.5 --arch=x86_64
task started: 2018-12-12_111742_import
task started (id=Media import, time=Wed Dec 12 11:17:42 2018)
Found a candidate signature: breed=redhat, version=rhel6
Found a candidate signature: breed=redhat, version=rhel7
Found a matching signature: breed=redhat, version=rhel7
Adding distros from path /var/www/cobbler/ks_mirror/CentOS7.5-x86_64:
creating new distro: CentOS7.5-x86_64
trying symlink: /var/www/cobbler/ks_mirror/CentOS7.5-x86_64 -> /var/www/cobbler/links/CentOS7.5-x86_64
creating new profile: CentOS7.5-x86_64
associating repos
checking for rsync repo(s)
checking for rhn repo(s)
checking for yum repo(s)
starting descent into /var/www/cobbler/ks_mirror/CentOS7.5-x86_64 for CentOS7.5-x86_64
processing repo at : /var/www/cobbler/ks_mirror/CentOS7.5-x86_64
need to process repo/comps: /var/www/cobbler/ks_mirror/CentOS7.5-x86_64
looking for /var/www/cobbler/ks_mirror/CentOS7.5-x86_64/repodata/*comps*.xml
Keeping repodata as-is :/var/www/cobbler/ks_mirror/CentOS7.5-x86_64/repodata
*** TASK COMPLETE ***
3.3 查看镜像列表
# cobbler distro list
   CentOS7.5-x86_64
# cobbler profile list
   CentOS7.5-x86_64
3.4 创建一台空的虚拟机,不挂载CD/DVD光盘镜像,并启动
虚拟机内存必须大于等于2G,启动后,会自动获取IP地址。
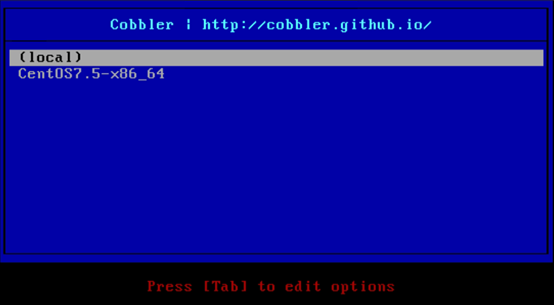
3.5 选择CentOS7.5-x86_64,开始自动化安装CentOS7.5系统
选择CentOS7.5-x86_64后,虚拟机会自动安装CentOS7.5系统,自动分区磁盘,并设置好root密码,密码为前面设置的123456
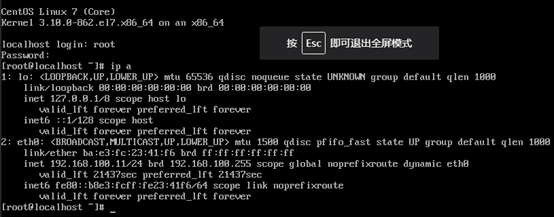
3.6 登录CentOS7.5系统
安装完后的用户名密码为 root:123456
3.7 自己手写ks文件
# vi ks-centos7.5.cfs
install
keyboard 'us'
rootpw --iscrypted $default_password_crypted
timezone Asia/Shanghai
url --url=$tree
lang en_US
firewall --disabled
auth  --useshadow  --passalgo=sha512
text
selinux --disabled
skipx
network  --bootproto=dhcp --device=eth0
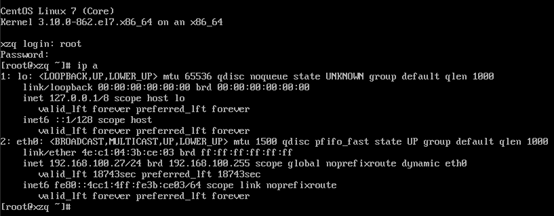
network  --hostname=xzq
reboot
bootloader --location=mbr
zerombr
clearpart --all --initlabel
part /boot --asprimary --fstype="xfs" --size=1024
part swap --fstype="swap" --recommended
part / --fstype="xfs" --grow --size=1

%packages
@^minimal
@core
@compat-libraries
@debugging
@development
tree
nmap
sysstat
lrzsz
dos2unix
telnet
wget
vim
net-tools
bash-completion
%end

%post
systemctl disable postfix.service
%end
3.8 复制ks文件到cobbler目录下
# cp ks-centos7.5.cfg /var/lib/cobbler/kickstarts/.
3.9 指定CentOS7.5的ks文件
# cobbler profile edit --name=Centos-7.5-x86_64 --kickstart=/var/lib/cobbler/kickstarts/ks-centos7.5.cfg
# cobbler profile report
3.10 创建CentOS7.5虚拟机
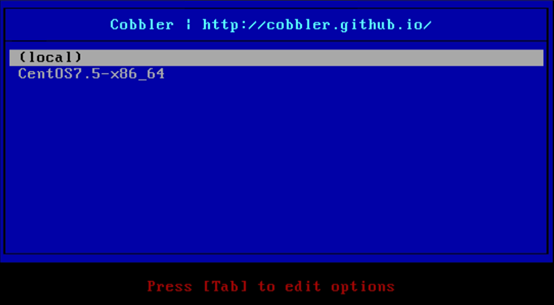
重复3.4-3.6的操作即可
4 安装Windows7系统
4.1 定制Win PE
使用Windows AIK(适用于win7的)工具来定制Win PE
去Microsoft官网下载ISO包
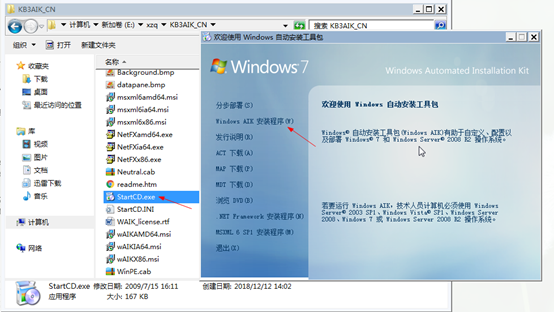
4.1.1 需要在个人电脑上下载安装AIK,具体如下
解压AIK包

4.1.2 进入解压后的目录,双击StartCD.exe,点击Windows AIK安装程序 开始安装
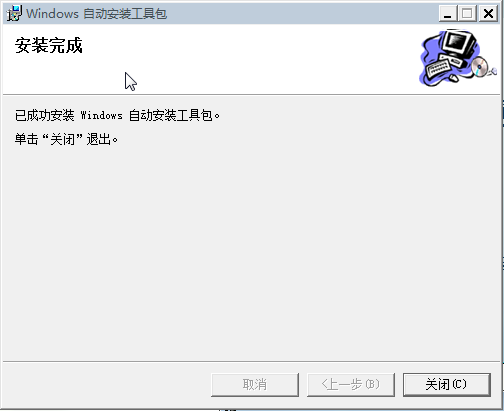
4.1.3 安装完毕后,启动这个工具来定制Win PE镜像
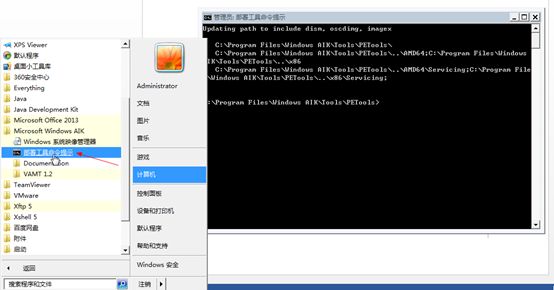
4.1.4 通过命令行制作Win PE镜像
进入一个盘,例如这里进入E盘
C:Program FilesWindows AIKToolsPETools> E:
生成Win PE预安装文件
E:> copype amd64 E:winpe
挂载成可读写形式
E:> imagex /mountrw E:winpewinpe.wim 1 E:winpemount
制作start脚本
E:> echo ping -n 7 -l 69 192.168.100.2 >> E:winpemountWindowsSystem32startnet.cmd
E:> echo net use Z: \192.168.100.2share >> E:winpemountWindowsSystem32startnet.cmd
E:> echo Z: >> E:winpemountWindowsSystem32startnet.cmd
E:> echo cd win >> E:winpemountWindowsSystem32startnet.cmd
E:> echo setup.exe /unattend:Autounattend.xml >> E:winpemountWindowsSystem32startnet.cmd
卸载
E:> imagex /unmount c:winpemount /commit
复制启动文件
E:> copy E:winpewinpe.wim E:winpeISOsourcesboot.wim
生成Win PE ISO镜像
E:> oscdimg -n -bE:\winpeetfsboot.com E:winpeISO E:\winpewinpe_cobbler_amd64.iso
4.2 导入ISO镜像
# cobbler distro add --name=windows7 --kernel=/var/lib/tftpboot/memdisk --initrd=/root/winpe_cobbler_amd64.iso --kopts="raw iso"4.3 配置ISO镜像的无人值守安装文件
# touch /var/lib/cobbler/kickstarts/win7pe.xml
#cobbler profile add --name=windows7 --distro=windows7 --kickstart=/var/lib/cobbler/kickstarts/win7pe.xml
4.4 安装Samba服务
4.4.1 安装Samba软件包
# yum install samba -y
4.4.2 配置Samba文件
# vi /etc/samba/smb.conf
[global]
        map to guest = Bad User
[share]
        comment = share directory
        path = /smb/
        directory mask = 0755
        create mask = 0755
        guest ok = yes
        writable = yes
4.4.3 配置win7共享文件夹
# mkdir -p /smb/win
# mkdir /mnt/win7
# mount /root/cn_windows_7_ultimate_with_sp1_x64_dvd_u_677408.iso /mnt/win7
# cp -rf /mnt/win7/* /smb/win/.
4.4.4 启动Samba服务
# systemctl start smb
# systemctl enable smb
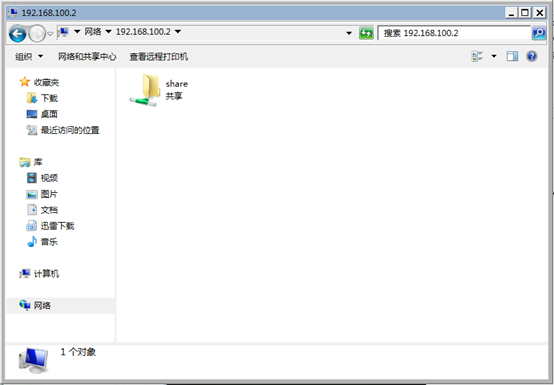
4.4.5 验证smb能否访问
打开\192.168.100.2,看看能否访问
4.5 添加Autounattend.xml文件到/smb/win/下
将Autounattend.xml自动值守安装文件添加到Samba共享目录下
这个文件可以自己制作,我这边已经写好了一个,需要的可以参考https://pan.baidu.com/s/1WaDHshXauSJx9NiSqvbfLw
4.6 创建一台空的虚拟机,不挂载CD/DVD光盘镜像,并启动
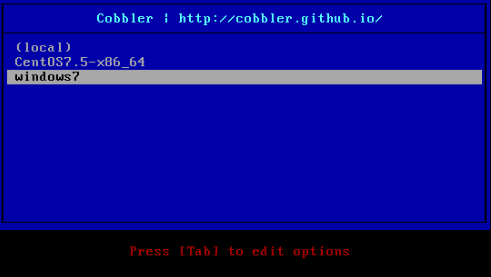
4.7 选择Windows7进行安装
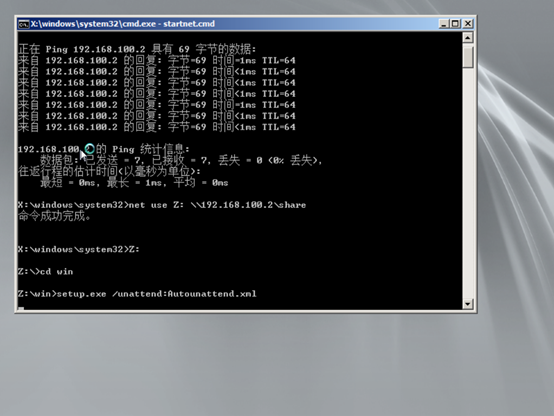
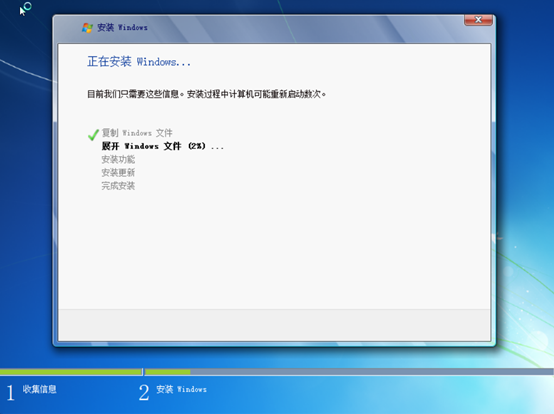
4.8 等待安装完毕即可进入系统

5 遇到的问题
1 环境中已有DHCP服务
在大部分网络环境中都会已经有一个dhcp服务了,如果要在这样的网络环境中构筑pxe就需要dhcp proxy(就近选择原理)
在CentOS上可以安装dnsmasq服务
首先关闭cobbler的dhcp设置
# vi /etc/cobbler/settings
将manage_dhcp参数改为0
接着配置dnsmasq
[root@localhost ~]# yum install dnsmasq -y
[root@localhost ~]# vi /etc/dnsmasq.d/dhcp
port=0   #禁用DNS端口
dhcp-range=192.168.100.0,proxy  #当前所在网段
dhcp-boot=pxelinux.0
pxe-service=x86PC,'Cobbler-Install',pxelinux
[root@localhost ~]# systemctl start dnsmasq
[root@localhost ~]# systemctl enable dnsmasq
1 Ubuntu系统试了能成,自动化模板cobbler也有提供,其他的没试,理论上也是可以的
2 Windows部署参考链接:https://www.cnblogs.com/pluse/p/8508538.html,这篇文章真的给力,提供了很好的思路
最后
以上就是复杂大碗最近收集整理的关于CentOS7 部署Cobbler(PXE)实现自动化安装Centos、Windows的全部内容,更多相关CentOS7内容请搜索靠谱客的其他文章。


发表评论 取消回复