ubuntu16.04配置kinect v1驱动并保存图像
参考连接https://www.cnblogs.com/sincere-diligence/p/9322313.html
https://blog.csdn.net/weixin_40799815/article/details/79861612
文章目录
- ubuntu16.04配置kinect v1驱动并保存图像
- 一、安装驱动
- 1. 安装必要工具
- 2. 安装libfreenect
- 3. 安装Udev规则
- 4. 安装openNI
- 5. 安装NITE
- 6. 安装Sensor
- 7. 运行示例
- 8. 注意如果出现:
- 二、保存图像
一、安装驱动
1. 安装必要工具
1 sudo apt-get install g++ python libusb-1.0-0-dev freeglut3-dev openjdk-8-jdk doxygen graphviz mono-complete
**openNI,NITE,Sensor安装包:**链接:https://pan.baidu.com/s/1QKTCrQvox6Ke-pDvkKHW4Q 提取码:f176
2. 安装libfreenect
1 git clone https://github.com/OpenKinect/libfreenect.git
2 cd libfreenect
3 mkdir build
4 cd build
5 cmake -L ..
6 make
7 sudo make install
3. 安装Udev规则
将~/libfreenect/platform/linux/udev/下的51-kinect.rules复制到/etc/udev/rules.d/下
1 sudo cp ~/libfreenect/platform/linux/udev/51-kinect.rules /etc/udev/rules.d/
4. 安装openNI
cd ~/software/OpenNI-Bin-Dev-Linux-x64-v1.5.7.10
sudo ./install.sh
如果显示如下
Installing OpenNI
copying shared libraries...OK
copying executables...OK
copying include files...OK
creating database directory...OK
registering module 'libnimMockNodes.so'...OK
registering module 'libnimCodecs.so'...OK
registering module 'libnimRecorder.so'...OK
creating java bindings directory...OK
Installing java bindings...OK
*** DONE ***
则安装成功
5. 安装NITE
cd /home/siat/software/NITE-Bin-Linux-x64-v1.5.2.23
sudo ./install.sh
如果显示如下:
Installing NITE
***************
Copying shared libraries... OK
Copying includes... OK
Installing java bindings... OK
Installing module 'Features_1_3_0'...
Registering module 'libXnVFeatures_1_3_0.so'... OK
Installing module 'Features_1_3_1'...
Registering module 'libXnVFeatures_1_3_1.so'... OK
Installing module 'Features_1_4_1'...
Registering module 'libXnVFeatures_1_4_1.so'... OK
Installing module 'Features_1_4_2'...
Registering module 'libXnVFeatures_1_4_2.so'... OK
Installing module 'Features_1_5_2'...
Registering module 'libXnVFeatures_1_5_2.so'... OK
Copying XnVSceneServer... OK
Installing module 'Features_1_5_2'
registering module 'libXnVHandGenerator_1_3_0.so'...OK
Installing module 'Features_1_5_2'
registering module 'libXnVHandGenerator_1_3_1.so'...OK
Installing module 'Features_1_5_2'
registering module 'libXnVHandGenerator_1_4_1.so'...OK
Installing module 'Features_1_5_2'
registering module 'libXnVHandGenerator_1_4_2.so'...OK
Installing module 'Features_1_5_2'
registering module 'libXnVHandGenerator_1_5_2.so'...OK
Adding license.. OK
*** DONE ***
则安装成功
6. 安装Sensor
cd /home/siat/software/Sensor-Bin-Linux-x64-v5.1.2.1
sudo ./install.sh
如果显示如下
Installing PrimeSense Sensor
****************************
creating config dir /usr/etc/primesense...OK
copying shared libraries...OK
copying executables...OK
registering module 'libXnDeviceSensorV2KM.so' with OpenNI...OK
registering module 'libXnDeviceFile.so' with OpenNI...OK
copying server config file...OK
setting uid of server...OK
creating server logs dir...OK
installing usb rules...OK
installing modprobe blacklist...OK
*** DONE ***
则安装成功
7. 运行示例
连上kinect的数据线
cd ~/software/OpenNI-Bin-Dev-Linux-x64-v1.5.7.10/Samples/Bin/x64-Release
./NiViewer
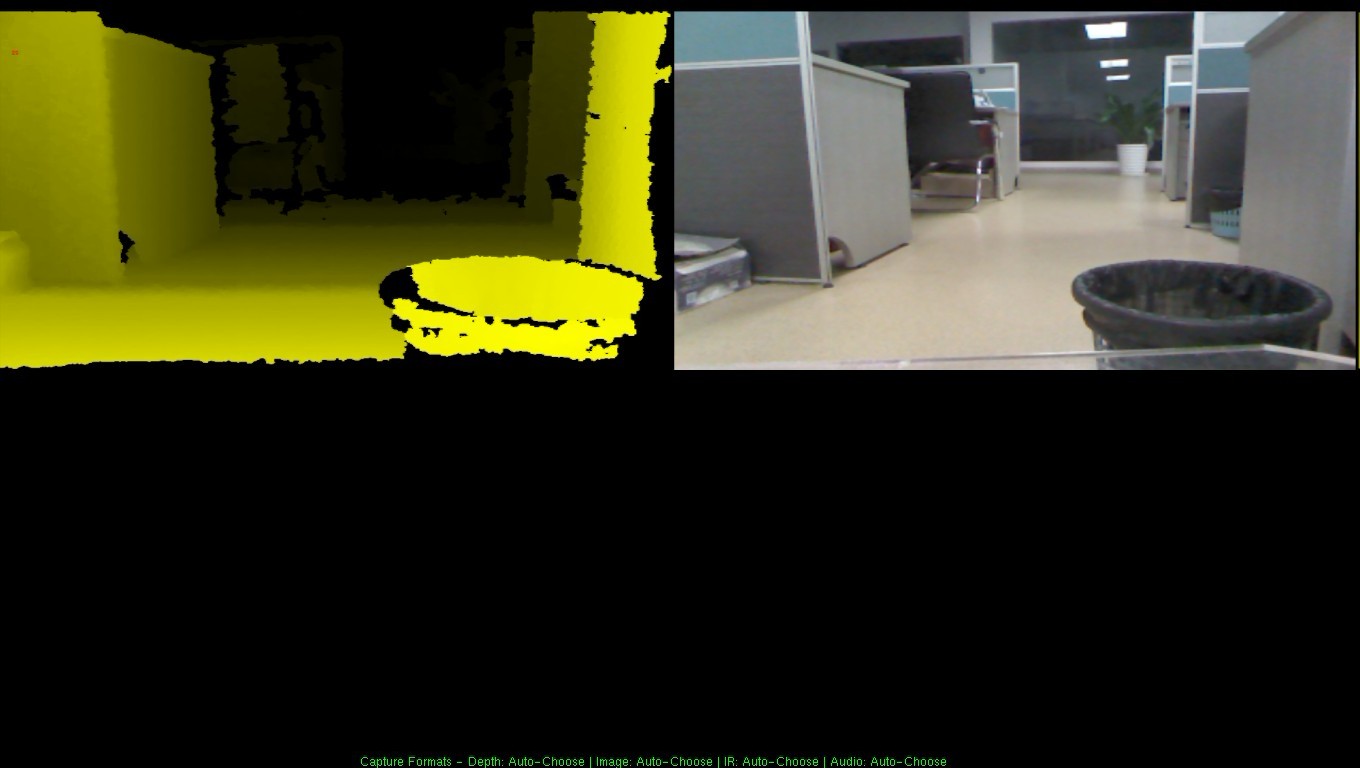
如果出现kinect画面则配置成功
8. 注意如果出现:
One or more of the following nodes could not be enumerated:
Device: PrimeSense/SensorV2/5.1.6.6: The device is not connected!
Device: PrimeSense/SensorV2/5.1.0.41: The device is not connected!
Device: PrimeSense/SensorV2/5.1.6.6: The device is not connected!
Device: PrimeSense/SensorV2/5.1.0.41: The device is not connected!
Press any key to continue . . .
这样的问题有可能是这三个包版本不匹配,我这里的三个包亲测是可用的。但是Sensor如果是5.1.6.6版本则出现上面报错。
二、保存图像
CMakeList:
cmake_minimum_required(VERSION 2.8)
set(CMAKE_CXX_STANDARD 11)
project(Kinect_test)
# 寻找OpenCV库
find_package( OpenCV REQUIRED )
# 添加头文件
include_directories( ${OpenCV_INCLUDE_DIRS} )
# 包含OpenNI库
include_directories ("/usr/include/ni/"
)
set(SOURCE_FILES main.cpp )
add_executable(Kinect_test main.cpp)
target_link_libraries( Kinect_test OpenNI ${OpenCV_LIBS})
main.cpp:
#include <stdlib.h>
#include <iostream>
#include <cstdlib>
#include <string>
//【1】
#include <XnCppWrapper.h>
#include "opencv/cv.h"
#include "opencv/highgui.h"
#include <opencv2/imgproc.hpp>
#include <time.h>
#include<algorithm>
using namespace std;
using namespace cv;
int counters = 0;
string save_path = "/home/wya/Project/DF/dynamicfusion-ceres/data/Input/";
//根据自己需要修改
string command;
void CheckOpenNIError( XnStatus result, string status )
{
if( result != XN_STATUS_OK )
cerr << status << " Error: " << xnGetStatusString( result ) << endl;
}
int main( int argc, char** argv )
{
XnStatus result = XN_STATUS_OK;
xn::DepthMetaData depthMD;
xn::ImageMetaData imageMD;
//OpenCV
IplImage*
imgDepth16u=cvCreateImage(cvSize(640,480),IPL_DEPTH_16U,1);
IplImage* imgRGB8u=cvCreateImage(cvSize(640,480),IPL_DEPTH_8U,3);
IplImage*
depthShow=cvCreateImage(cvSize(640,480),IPL_DEPTH_8U,1);
IplImage* imageShow=cvCreateImage(cvSize(640,480),IPL_DEPTH_8U,3);
cvNamedWindow("depth",1);
cvNamedWindow("image",1);
char key=0;
//【2】
// context
xn::Context context;
result = context.Init();
CheckOpenNIError( result, "initialize context" );
// creategenerator
xn::DepthGenerator depthGenerator;
result = depthGenerator.Create( context );
CheckOpenNIError( result, "Create depth generator" );
xn::ImageGenerator imageGenerator;
result = imageGenerator.Create( context );
CheckOpenNIError( result, "Create image generator" );
// Kinect_test
//【3】
//map mode
XnMapOutputMode mapMode;
mapMode.nXRes = 640;
mapMode.nYRes = 480;
mapMode.nFPS = 30;
result = depthGenerator.SetMapOutputMode( mapMode );
result = imageGenerator.SetMapOutputMode( mapMode );
//【4】
// correct view port
depthGenerator.GetAlternativeViewPointCap().SetViewPoint( imageGenerator );
//【5】
//read data
result = context.StartGeneratingAll();
//【6】
result = context.WaitNoneUpdateAll();
//
const time_t t = time(NULL);
//
struct tm* current_time = localtime(&t);
//
std::string Time_path;
//
Time_path=src_path+std::to_string(current_time->tm_mon + 1)+"-"+ std::to_string(current_time->tm_mday)
//
+"_"+std::to_string(current_time->tm_hour)+":"+std::to_string(current_time->tm_min)+"/";
//
// save_path=save_path+"/"+Time_path+"/";
//
//
command = "mv "+save_path+" "+Time_path;
//
system(command.c_str());
command = "rm -rf " + save_path+"depth";
system(command.c_str());
command = "rm -rf " + save_path+"color";
system(command.c_str());
command = "mkdir -p " + save_path+"depth";
system(command.c_str());
command = "mkdir -p " + save_path+"color";
system(command.c_str());
while( (key!=27) && !(result = context.WaitNoneUpdateAll( ))
)
{
//get meta data
depthGenerator.GetMetaData(depthMD);
imageGenerator.GetMetaData(imageMD);
//【7】
//OpenCV output
memcpy(imgDepth16u->imageData,depthMD.Data(),640*480*2);
cvConvertScale(imgDepth16u,depthShow,255/4096.0,0);
memcpy(imgRGB8u->imageData,imageMD.Data(),640*480*3);
cvCvtColor(imgRGB8u,imageShow,CV_RGB2BGR);
cvShowImage("depth", depthShow);
cvShowImage("image",imageShow);
string picname_rgb =to_string(counters);
string picname_depth =to_string(counters);
if(counters<10){
picname_rgb = save_path+"color/" +"frame-00000"+picname_rgb + ".color.png";
picname_depth = save_path +"depth/" +"frame-00000"+picname_depth + ".depth.png";
}
else if(counters>=10 && counters<100){
picname_rgb = save_path+"color/" +"frame-0000"+picname_rgb + ".color.png";
picname_depth = save_path +"depth/" +"frame-0000"+picname_depth + ".depth.png";
}
else if(counters>=100 && counters<1000){
picname_rgb = save_path+"color/"+"frame-000"+picname_rgb + ".color.png";
picname_depth = save_path+"depth/" +"frame-000"+picname_depth + ".depth.png";
}
else if(counters>=1000 && counters<10000){
picname_rgb = save_path+"color/"
+"frame-00"+picname_rgb + ".color.png";
picname_depth = save_path +"depth/" +"frame-00"+picname_depth + ".depth.png";
}
else if(counters>=10000 && counters<100000){
picname_rgb = save_path+"color/" +"frame-0"+picname_rgb + ".color.png";
picname_depth = save_path +"depth/"+"frame-0"+picname_depth + ".depth.png";
}
else{
picname_rgb = save_path+"color/" +"frame-"+picname_rgb + ".color.png";
picname_depth = save_path+"depth/" +"frame-"+picname_depth + ".depth.png";
}
Mat RGB=cvarrToMat(imageShow);
Mat depth=cvarrToMat(imgDepth16u);
//
imwrite(picname_rgb, RGB);//保存rgb图片
depth2rgb rgbmat
//
imwrite(picname_depth, depth);//保存depth图片
std::cout << "输出第
" << counters << "
幅图像" << std::endl;
counters++;
key=cvWaitKey(1);
}
//destroy
cvDestroyWindow("depth");
cvDestroyWindow("image");
cvReleaseImage(&imgDepth16u);
cvReleaseImage(&imgRGB8u);
cvReleaseImage(&depthShow);
cvReleaseImage(&imageShow);
context.StopGeneratingAll();
context.Shutdown();
return 0;
}
最后
以上就是曾经冬瓜最近收集整理的关于ubuntu16.04配置kinect v1驱动并保存图像ubuntu16.04配置kinect v1驱动并保存图像的全部内容,更多相关ubuntu16.04配置kinect内容请搜索靠谱客的其他文章。
本图文内容来源于网友提供,作为学习参考使用,或来自网络收集整理,版权属于原作者所有。


发表评论 取消回复