本篇文章主要讲述的是在Mac系统下用Apache和PHP安装Xdebug详细流程,感兴趣的朋友可以学习一下。
MAC homebrew自2018/3/31之后弃用homebrew/phpBy 31st March 2018 we will deprecate and archive the Homebrew/php tap. Unfortunately we have been unable to maintain an acceptable, consistent user or contributor experience and CI workload through non-core formula taps in the Homebrew organisation so we are continuing to migrate widely used formulae into Homebrew/core and encourage more niche formulae and options to be supported outside the Homebrew organisation.
详细:https://brew.sh/2018/01/19/homebrew-1.5.0/
所以不能再用下面的方法安装xdebug了,下面的方法不行!下面的方法不行!下面的方法不行!brew install php-xdebug
所以,安装xdebug我们可以手动编译一下,具体步骤如下:
1.首先进入 Xdebug 官方下载页面:https://xdebug.org/download.php,下载安装php版本支持的xdebug的版本
eg.我本地的PHP版本是5.6.38,所以下载了2.5.4的source,一个tgz压缩包
2.在下载xdebug的文件夹里打开终端-xzf xdebug-.
也可以在本地直接解压,再进入解压的xdebug的文件夹里,打开终端phpize #如果不可以,写phpize的完整路径 ./configure
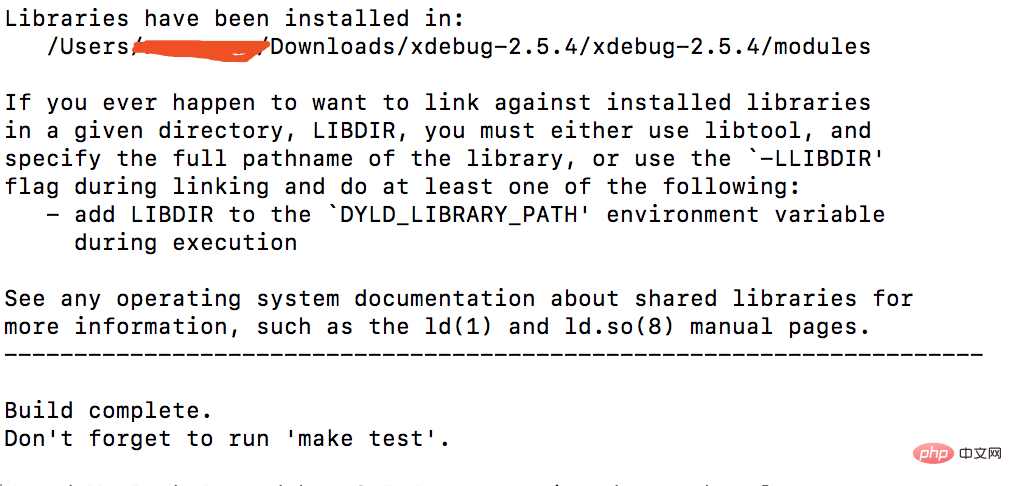
上面命令执行之后,开始编译make -j2
编译完成之后,会提示,在modules可找到xdebug.so文件

3.将编译之后得到的xdebug.so文件可以拷贝到extension_dir规定的文件夹中
注:php.ini 中搜索extension_dir
4.在php.ini中配置一下参数[Xdebug] zend_extension="/usr/local/lib/php/pecl/20131226/xdebug.so";自动跟踪,可关闭(关闭后提升性能) xdebug.auto_trace=On ;性能分析,可关闭(关闭后提升性能) xdebug.profiler_enable=On xdebug.var_display_max_children=512xdebug.var_display_max_data=2048xdebug.var_display_max_depth=8
修改完之后,重启apache,phpinfo()检测一下安装上了没,应该是没问题了
相关视频:PHP视频教程
最后
以上就是单纯钢铁侠最近收集整理的关于mac php xdebug,Mac系统下用Apache和PHP安装Xdebug详细流程的全部内容,更多相关mac内容请搜索靠谱客的其他文章。
![buuctf [PHP]XDebug RCE](https://www.shuijiaxian.com/files_image/reation/bcimg10.png)


发表评论 取消回复