1.Running rancher UI
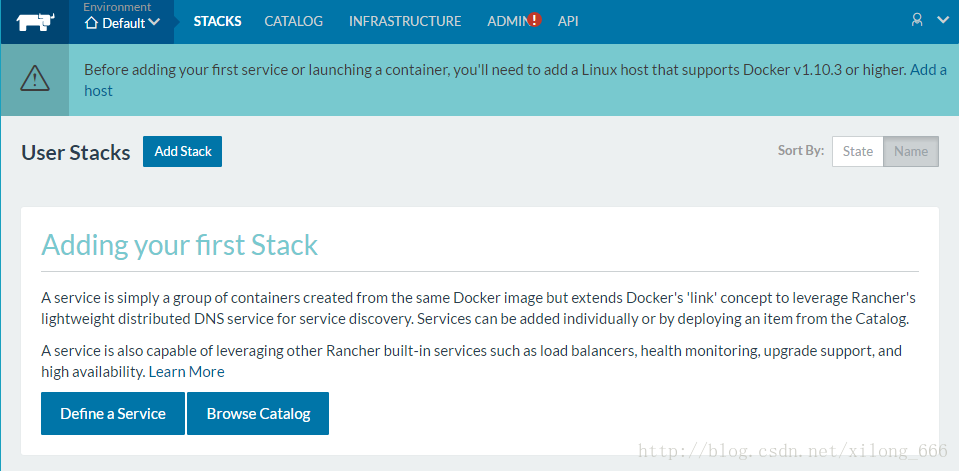
The UI and API will be available on the exposed port 8080. After the docker image is downloaded, it will take a minute or two before Rancher has successfully started and is available to view.
Navigate to the following URL: http://192.168.5.156 :8080. The 192.168.5.156 is the public IP address of the host that is running Rancher server.
Once the UI is up and running, you can start by adding hosts or select a container orchestration from the Infrastructure catalog. By default, if a different container orchestration type is not selected, the environment will be using cattle. After the hosts are added into Rancher, you can start adding services or launch templates from the Rancher catalog.

2.Add a host
Please pay attention to the words that are shown on the screen:Before adding your first service or launching a container, you’ll need to add a Linux host that supports Docker v1.10.3 or higher. Add a host
Click “Add a host”,which will immediately bring you to the Hosts page.

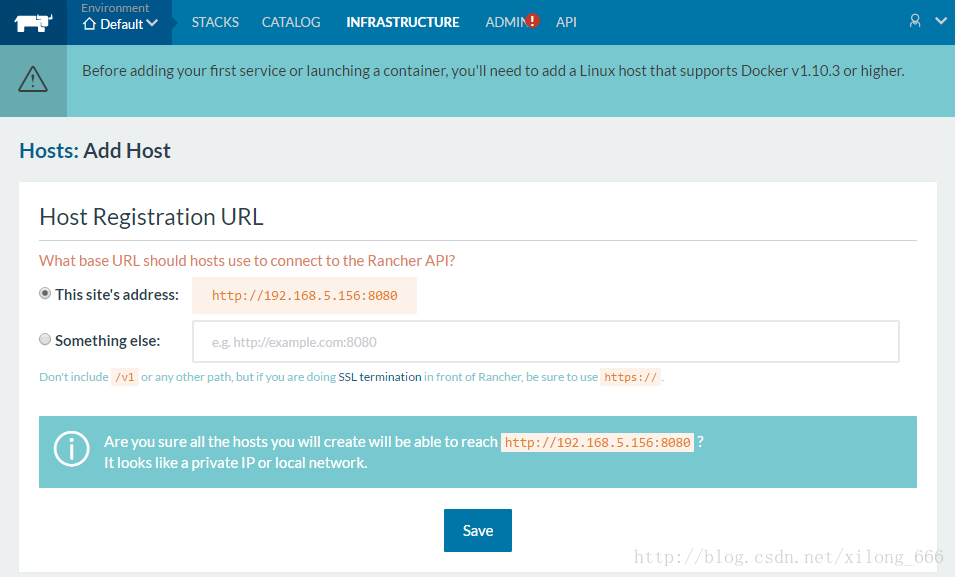
Rancher will prompt you to select a host registration URL. This URL is where Rancher server is running and must be reachable from all the hosts that you will be adding. This is useful in installations where Rancher server will be exposed to the Internet through a NAT firewall or a load balancer. If your host has a private or local IP address like 192.168.., Rancher will print a warning asking you to make sure that the hosts can indeed reach the URL.
For now you can ignore these warnings, we will only be adding the Rancher server host itself. Click Save. By default, the Custom option will be selected, which provides the Docker command to launch the Rancher agent container. There will also be options for cloud providers, which Rancher uses Docker Machine to launch hosts.
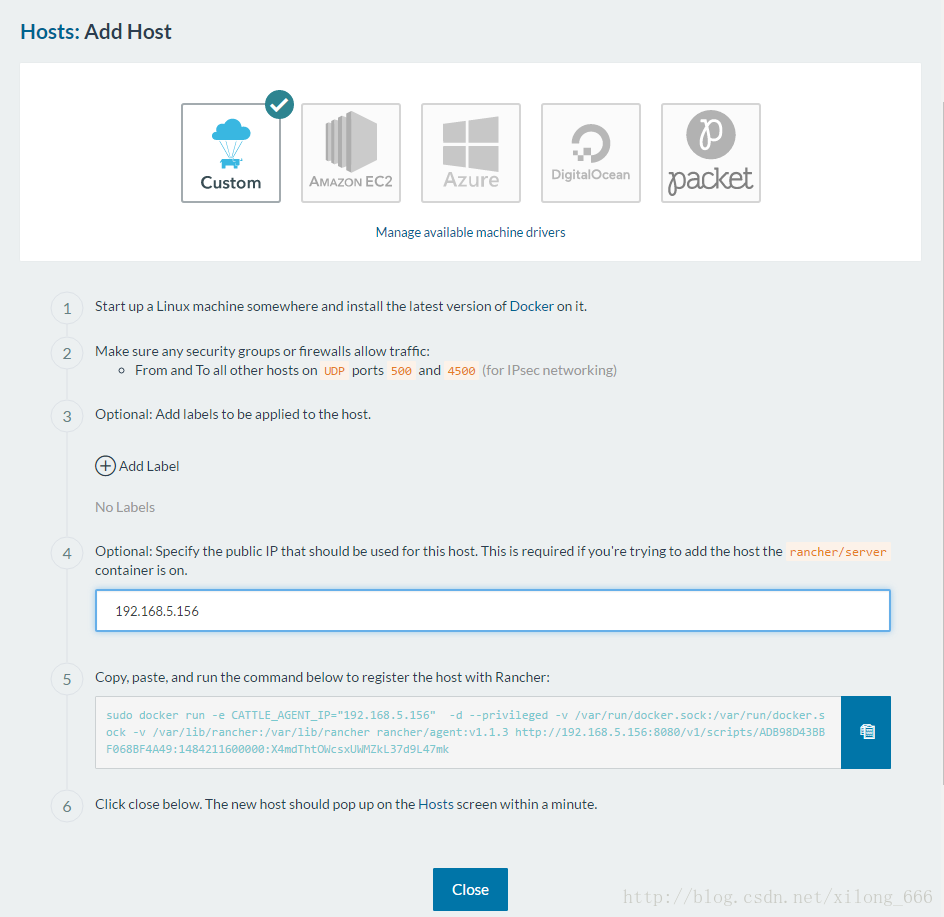
After clicking “Save”, it brings you to the page blew like this:

In the UI, it provides instructions of the ports that need to be open on your host as well as some optional information. Since we are adding a host that is also running Rancher server, we need to add the public IP that should be used for the host. One of the options provides the ability to input this IP, which automatically updates the custom command with an environment variable.
Run this command in the host that is running Rancher server.
When you click Close on the Rancher UI, you will be directed back to the Infrastructure -> Hosts view. In a couple of minutes, the host will automatically appear.
最后
以上就是忧心热狗最近收集整理的关于rancher UI 使用的全部内容,更多相关rancher内容请搜索靠谱客的其他文章。


发表评论 取消回复