1.理解ROS Topic
这个教程介绍ROS topic和rostopic和rqt_plot命令行工具.
1.1建立
1.1.1roscore
先在一个新的终端中运行roscore;
$ roscore
注意:只能运行一个roscore.
1.1.2tuetlesim
在新的终端中运行turtlesim;
$ rosrun turtlesim turtlesim_node
1.1.3turtle 键盘遥控
我们需要用一些东西去控制turtle,在新的终端运行:
$ rosrun turtlesim turtle_teleop_key
[ INFO] 1254264546.878445000: Started node [/teleop_turtle], pid [5528], bound on [aqy], xmlrpc port [43918], tcpros port [55936], logging to [~/ros/ros/log/teleop_turtle_5528.log], using [real] time
Reading from keyboard
---------------------------
Use arrow keys to move the turtle.
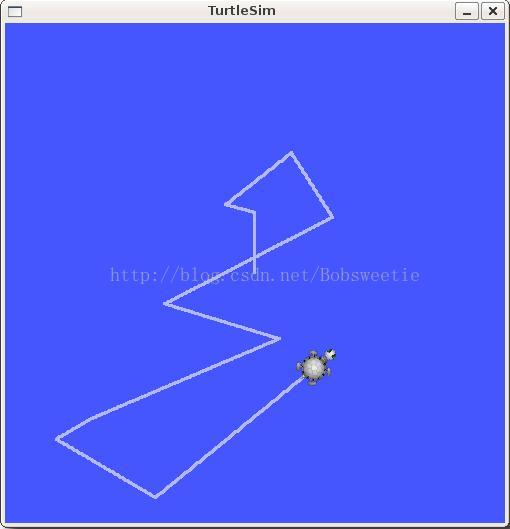
现在你可以用键盘上的方向键控制小乌龟了(保持键盘输入窗口在焦点).再看看窗口后面发生了什么.
1.2ROS Topic
turtlesim_node和turtle_teleop_key node之间用topic交流通信.
turtle_teleop_key 在这个topic上发布按键敲击,而turtlesim订阅同样的topic接受按键敲击.让我们用rqt_graph显示现在正在运行的topic和nodes.
如果你是用electric或更早的版本,建议用rxygrah替代。
1.2.1用rqt_grah
rqt_grah创建了一个动态的图形显示系统上正在进行什么,rqt_grah是qpt package的一部分.运行:
$ sudo apt-get install ros-<distro>-rqt
$ sudo apt-get install ros-<distro>-rqt-common-plugins
<distro>用你的ros版本名替代
再在新终端输入:
$ rosrun rqt_graph rqt_graph
你将会看到:

如果把鼠标放上去将会高亮,node是蓝色或者绿色,topic是红色.正如你所见到的一样,turtlesim_node and the turtle_teleop_key nodes 是通过叫做
/turtle1/command_velocity. 的在通信.


1.2.3介绍rostopic
rostopic工具允许你从rostopic中获得信息.
通过:
$ rostopic -h
可以获得等多命令选项
rostopic bw display bandwidth used by topic
rostopic echo print messages to screen
rostopic hz display publishing rate of topic
rostopic list print information about active topics
rostopic pub publish data to topic
rostopic type print topic type
让我们用这些命令去检验一下turtlesim.
1.2.3使用rostopic echo
用法:
rostopic echo [topic]
允许我们看看turtle_teleop_key node. 发布的命令速度数据;
对于ROS Hydro和之后的版本,这个数据在发布在/turtle1/cmd_vel topic,在新终端,运行:
$ rostopic echo /turtle1/cmd_vel
选择turtle_teleop_key终端,用方向键控制小乌龟,你将会看到
linear:
x: 2.0
y: 0.0
z: 0.0
angular:
x: 0.0
y: 0.0
z: 0.0
---
linear:
x: 2.0
y: 0.0
z: 0.0
angular:
x: 0.0
y: 0.0
z: 0.0
让我们再来看看rqt_graph.点击左上角的刷新按钮显示新的node.你将会看到rostopic echo也订阅了turtle1/command_velocity topic.

1.2.4使用rostopic list
rostopic list会列出现在所有被订阅和发布的topic.
看看这个命令需要什么参数,运行:
$ rostopic list -h
Usage: rostopic list [/topic]
Options:
-h, --help show this help message and exit
-b BAGFILE, --bag=BAGFILE
list topics in .bag file
-v, --verbose list full details about each topic
-p list only publishers
-s list only subscribers
对于verbose选项:
$ rostopic list -v
显示详细的一列topic信息包括发布的,订阅的和它们的类型.
Published topics:
* /turtle1/color_sensor [turtlesim/Color] 1 publisher
* /turtle1/command_velocity [turtlesim/Velocity] 1 publisher
* /rosout [roslib/Log] 2 publishers
* /rosout_agg [roslib/Log] 1 publisher
* /turtle1/pose [turtlesim/Pose] 1 publisher
Subscribed topics:
* /turtle1/command_velocity [turtlesim/Velocity] 1 subscriber
* /rosout [roslib/Log] 1 subscriber
1.3 ROS Messages
Topic上的通信通过在nodes之间发送messages来实现.对于发布者(turtle_teleop_key)和订阅者(turtlesim_node)之间的通信必须使用相同的
message类型.这就意味着,topic的类型由发布的message类型决定.发布在topic上的message的类型可以由rostopic type来决定.
1.3.1使用rostopic type
rostopic type返回任何topic发布的message类型.
用法:
rostopic type [topic]
对于ROS Hydro 和之后的版本:
$ rostopic type /turtle1/cmd_vel
你会得到:
geometry_msgs/Twist
想得到详细信息运行:
$ rosmsg show geometry_msgs/Twist
geometry_msgs/Vector3 linear
float64 x
float64 y
float64 z
geometry_msgs/Vector3 angular
float64 x
float64 y
float64 z
既然我们已经知道turtlesim期待什么类型的message了,我们可以发布命令给小乌龟.
1.4继续rostopic
既然我们已经知道ros message 了,让我们一起用ros messages吧。
1.4.1使用rostopic pub
rostopic pub把数据发布到正被广播的topic上。
用法:
rostopic pub [topic] [msg_type] [args]
对于ROS Hydro和之后的版本:
$ rostopic pub -1 /turtle1/cmd_vel geometry_msgs/Twist -- '[2.0, 0.0, 0.0]' '[0.0, 0.0, 1.8]'
这会给turtle发布一个message告诉它线速度2.0,角速度1.8.
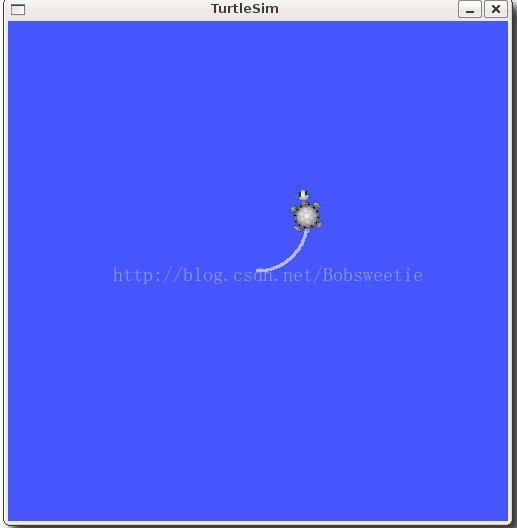
这个命令十分复杂,所以我们仔细看看它的每个参数
对于ROS Hydro和之后的版本:
这个命令会发送messages给给定的topic:
rostopic pub
这个选项使得rostopic只发布一条message然后退出:
-1
这是要发布给它信息的那个topic:
/turtle1/cmd_vel
这是发布topic时的message类型:
geometry_msgs/Twist
双虚线告诉选项剖析器接下来的参数都不是选择,以免把负号后面的参数当成参数选项。
--
一个geometry_msgs/Twist 有两组由三个浮点元素组成得的向量:线性的和角度的.这样的话,'[2.0, 0.0, 0.0]'就是线性值x=2.0,y=0.0,z=0.0,而'[0.0, 0.0, 1.8]'就是角度的值x=0.0,y=0.0,z=1.8.这些参数遵从YAML 语法规则。更多信息查看YAML command line documentation.
'[2.0, 0.0, 0.0]' '[0.0, 0.0, 1.8]'
你也许注意到小乌龟已经停止了;这是因为小乌龟需要稳定的1HZ的命令流去保持运动。我们可以用rostopic pub -r命令发布一个稳定的命令流。
对于ROS Hydro和之后的版本:
$ rostopic pub /turtle1/cmd_vel geometry_msgs/Twist -r 1 -- '[2.0, 0.0, 0.0]' '[0.0, 0.0, 1.8]'
这将以1HZ的速度去发布速度命令给速度topic.
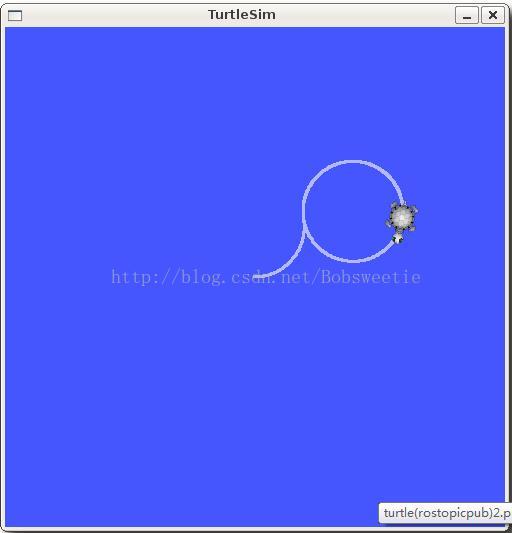
再刷新一下rqt_graph,看到rostopic pub node 在和rostopic echo node 通信

当你看到小乌龟在绕圈圈的时候可以在一个新的终端输入rostopic echo 命令看看turtlesim发布的数据。
1.4.2使用rostopic hz
rostopic hz 报告数据发布的速度
用法:
rostopic hz [topic]
来看看turtkesim node 以多快的速度发布/turtle1/pose。
$ rostopic hz /turtle1/pose
你会看到:
subscribed to [/turtle1/pose]
average rate: 59.354
min: 0.005s max: 0.027s std dev: 0.00284s window: 58
average rate: 59.459
min: 0.005s max: 0.027s std dev: 0.00271s window: 118
average rate: 59.539
min: 0.004s max: 0.030s std dev: 0.00339s window: 177
average rate: 59.492
min: 0.004s max: 0.030s std dev: 0.00380s window: 237
average rate: 59.463
min: 0.004s max: 0.030s std dev: 0.00380s window: 290
现在我们知道turtlesim大概以60HZ的速度发布数据。也可以用rostopic type和rosmsg获取关于topic进一步的信息。
对于ROS Hydro和之后的版本:
$ rostopic type /turtle1/cmd_vel | rosmsg show
现在我们已经用rostopic检验了topic,让我们用其他工具看看turtlesim发布的数据把。
1.5使用rqt_plot
electric之前的版本用rxplot代替。
rqt_plot以时间轴的形式显示发布在topic上的数据。这里我们用它去显示发布在/turtle1/pose topic上的数据。首先:
$ rosrun rqt_plot rqt_plot
这时会弹出一个新的窗口,一个文本框出现再左上角,文本框是输入topicd的,这里我们输入/turtle1/pose/x会高亮原来不亮的按钮。按下它并且用/turtle1/pose/y重复同样的操作,就会看到x-y位置的图像出现。
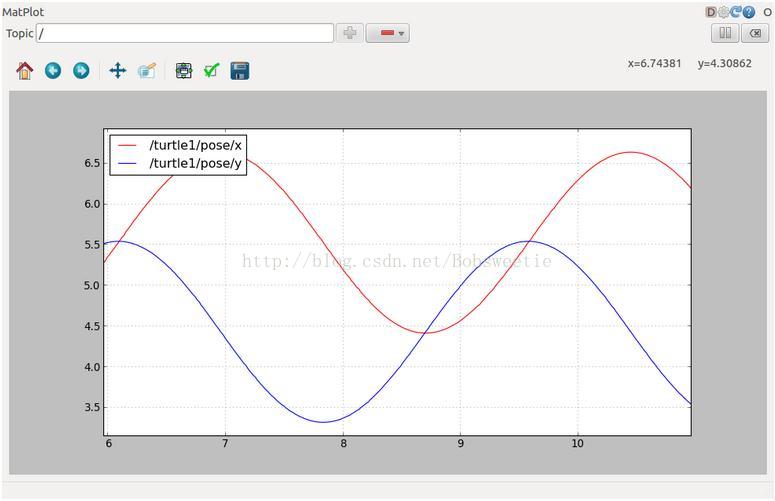
点击负号按钮可以隐藏指定的topic。全部影藏,增加/turtle1/pose/theta,你会看到下面的图像;
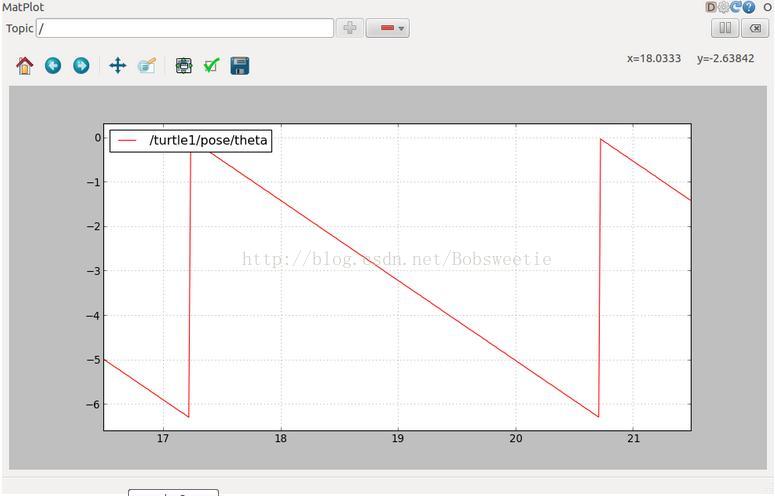
这章节就是这些了,Ctrl + c杀死rostopic 终端但是让turtlesim继续运行。
既然你明白ros topic是怎样工作的了,让我们来看看service和 parameter是怎样工作的.
最后
以上就是寂寞雪糕最近收集整理的关于机器人操作系统ROS Indigo 入门学习(7)——理解ROS Topic的全部内容,更多相关机器人操作系统ROS内容请搜索靠谱客的其他文章。


发表评论 取消回复