教程目录
- 0x00 教程内容
- 0x01 准备环境
- 1. 新建HTML文件
- 2. 用浏览器打开
- 0x02 Bootstrap全局样式的使用
- 1. 引入Bootstrap样式资源
- 2. 修改css样式
- 3. 校验结果
- 0x03 彩蛋
- 1. 是彩蛋啊
- 0xFF 总结
0x00 教程内容
- 准备环境
- Bootstrap全局样式的使用
0x01 准备环境
1. 新建HTML文件
<html>
<head>
	<meta charset="utf-8"/>
    <script src="https://cdn.bootcss.com/jquery/3.1.1/jquery.min.js"></script>
    <script src="https://cdn.bootcss.com/vue/2.5.22/vue.min.js"></script>
    <style type="text/css">
        td{
            border:1px solid #000;
        }
    </style>
</head>

<body>
	<div id="app">
		<table id="productListTable">
			<thead>
				<tr>
					<th>商品名称</th>
					<th>数量</th>
					<th>操作</th>
				</tr>
			</thead>
			<tbody>
				<tr v-for="product in products">
					<td>{{product.productName}}</td>
					<td>{{product.nums}}</td>
					<td>
						<a href="#nowhere" @click="edit(product)">编辑</a>
						<a href="#nowhere" @click="deleteProduct(product.id)">删除</a>
					</td>
				</tr>
				<tr>
					<td colspan="3">
						商品名称:
						<input type="text" v-model="product4Add.productName" />
						<br>
						数量:
						<input type="number" v-model="product4Add.nums" />
						<br>
						<button type="button" v-on:click="add">增加</button>
					</td>
				</tr>
			</tbody>
		</table>

<script type="text/javascript">
    $("#div4Update").hide();
    //Model
    var data = {
        products: [
	        { id: 1, productName: '袜子', nums: 15},
	        { id: 2, productName: '羊毛衫', nums: 20},
	        { id: 3, productName: '雪纺衫', nums: 24},
	        { id: 4, productName: '高跟鞋', nums: 30}
        ],
        product4Add: { id: 0, productName: '', nums: '0'},
    };

    var maxId = 5;
    for (var i=0;i<data.products.length;i++){
        if (data.products[i].id > maxId)
            maxId=  this.products[i].id;
    }

    //ViewModel
    var vue = new Vue({
        el: '#app',
        data: data,
        methods: {
            add: function (event) {
                maxId++;
                this.product4Add.id = maxId;
                if(this.product4Add.productName.length==0)
                    this.product4Add.productName = "product#"+this.product4Add.id;
                //将对象加入到数组
                this.products.push(this.product4Add);
                this.product4Add = { id: 0, productName: '', nums: '0'}
            },
        }
    });
    </script>
</body>
</html>
2. 用浏览器打开

同样,这也是教程:Vue2.x案例之商品增删改查的实现的前端界面,此处只留了增加功能,如需要其他功能请自行看教程。
0x02 Bootstrap全局样式的使用
1. 引入Bootstrap样式资源
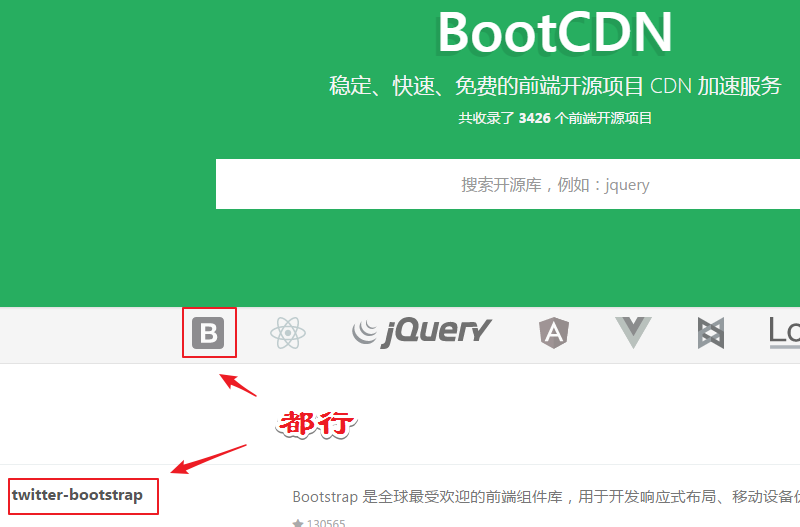
a. 打开cdn搜索网站(https://www.bootcdn.cn),搜索Bootstrap(其实第一个就是)

b. 点击,找一个版本(此处使用3.3.7版本),复制这一行:
<link href="https://cdn.bootcss.com/twitter-bootstrap/3.3.7/css/bootstrap.min.css" rel="stylesheet">
c. 粘贴到在head标签里,引入bootstrap:

2. 修改css样式
a. 删除之前的样式:
<style type="text/css">
    td{
        border:1px solid #000;
    }
</style>
b. 在Bootstrap中文官网(https://v3.bootcss.com/css) 查找Bootstrap样式

c. 找一个自己喜欢的表格样式,在table标签添加类即可:

3. 校验结果
a. 修改后为:
<table id="productListTable" class="table table-striped">
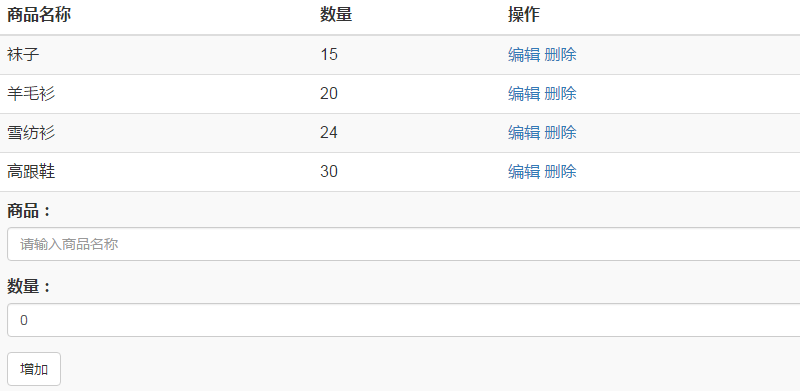
b. 用浏览器打开发现样式已经改变:

0x03 彩蛋
1. 是彩蛋啊
a. 在Bootstrap官网点击表单,找到内联表达,修改列表下面的样式(td colsapn='3'下面):
<div class="form-group">
	<label for="product">商品:</label>
	<input type="text" class="form-control" id="product" v-model="product4Add.productName" placeholder="请输入商品名称">
</div>
<div class="form-group">
	<label for="number">数量:</label>
	<input type="text" class="form-control" id="number" v-model="product4Add.nums" placeholder="请输入商品数量">
</div>
<button type="submit" @click="add" class="btn btn-default">增加</button>
b. 修改后用浏览器打开,可以看到结果:

0xFF 总结
- 本教程非常入门,学完应该学会举一反三,官网不单只有css,还有各种美观的组件、JavaScript插件,自行多看看,实操实操。
- 在生活中你会看到很多网站的字体、颜色等等跟我们刚刚弄的表格非常相似,其实就是用Bootstrap来开发的。
- 源码以及更多学习资料请查看我的代码学习库,并Star:邵奈一的学习库
作者简介:邵奈一
大学大数据讲师、大学市场洞察者、专栏编辑
公众号、微博、CSDN:邵奈一
本系列课均为本人:邵奈一原创,如转载请标明出处
最后
以上就是精明大门最近收集整理的关于Bootstrap全局css样式的使用0x00 教程内容0x01 准备环境0x02 Bootstrap全局样式的使用0x03 彩蛋0xFF 总结的全部内容,更多相关Bootstrap全局css样式的使用0x00内容请搜索靠谱客的其他文章。


发表评论 取消回复