作为一个伪学者,偶尔写写文章是少不了的,稍微有点技术含量的文章又少不了图形。
今天以PSTricks 为例,讲解图片的生成方式。
PSTricks 指令(command) 通常是放在 pspicture 环境里面的
begin{pspicture}(x0,y0)(x1,y1)
% ...
end{pspicuture}
放在圆括号里面的(x0,y0)(x1,y1) 描述了一个长方形,这个长方形左下角的坐标在(x0,y0) , 右上角的坐标在(x1,y1), 下面的生成的图形不能越过这个长方形的范围。
如果(x0,y0), 不显式的指明,那么这个参数指原点,即(0,0)。
直线
如果要画一条直线,指令是这样的
psline(x0,y0)(x1,y1)
如果要画一个向量(vector),我们只需加一个箭头
psline{->}(x0,y0)(x1,y1)
下面给出一个完整的例子:
documentclass{report}
usepackage{pstricks}
begin{document}
begin{pspicture}(25,25)
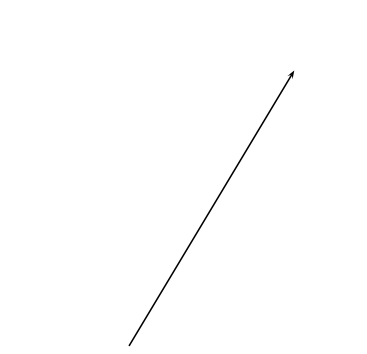
psline{->}(0,0)(3,5)
end{pspicture}
end{document}
将上面这些代码放在叫***.tex的文件里面,然后运行:
# xelatex trick.tex
最后生成的结果是这样的:

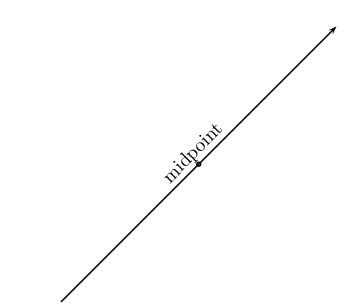
很多情况下,我们还需要对图形做一些解释,比如,标出上面图形的中点

上图的代码是这样的:
documentclass{report}
usepackage{pstricks}
begin{document}
begin{pspicture}(25,25)
psline{->}(0,0)(2.5,2.5)(5,5)
pscircle[linewidth=2pt](2.5,2.5){0.05}  % 这里画出一个小圆,所要放的位置为(2.5,2.5), 半径为0.05
rput{45}(2.4,2.7){midpoint}   % rput 就是打印出文本,45 表示角度, (2.4,2.7)表示文本所要放的位置,{midpoint} 即为要显示的内容
end{pspicture}
end{document}
矩形
psframe(x0,y0)(x1,y1)
psfreame*(x0,y0)(x1,y1)
后一种搞法,是生成一个填充后的矩形,使用下面参数可以得到一个角比较圆的矩形
psframe[framearc=0.2](x0,y0)(x1,y1)
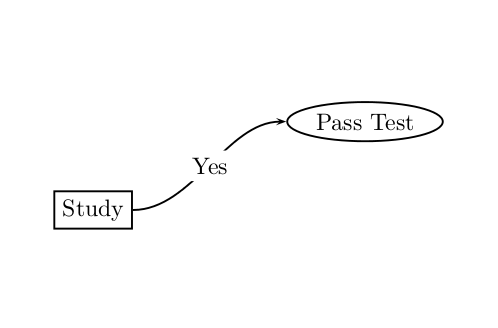
流程图

documentclass{article}
usepackage{pstricks}
usepackage{pst-node}
begin{document}
begin{pspicture}
rput(3cm,-8cm){rnode{X}{psframebox{Study}}} % Specifies that "Study"
                                               % is to be surrounded by a box
                                               % and placed at (3cm,-8cm) along
                                               % from the pencil to the
                                               % centre of "Study".
rput(7,-6.7){ovalnode{Y}{Pass Test}}         % Specifies that "Pass Test"
                                               % is to be surrounded by a
                                               % circular node and placed
                                               % at (7,-6.7) along from
                                               % pencil to the centre of
                                               % Pass Test.
nccurve[angleB=180]{->}{X}{Y}                 % Specifies that there is to
                                               % be a curve between X and Y
                                               % such that the curve touches
                                               % node Y at 180 degrees. The
                                               %{->} signifies that you
                                               % which to include an arrow.
lput*{0}{Yes}                                 % Specifies to put "Yes"
                                               % within the line
end{pspicture}
end{document}
https://www.latexstudio.net/archives/category/tex-graphics/pstricks-example
最后
以上就是任性钢笔最近收集整理的关于科技文图片的生成之PSTricks的全部内容,更多相关科技文图片内容请搜索靠谱客的其他文章。
本图文内容来源于网友提供,作为学习参考使用,或来自网络收集整理,版权属于原作者所有。


发表评论 取消回复